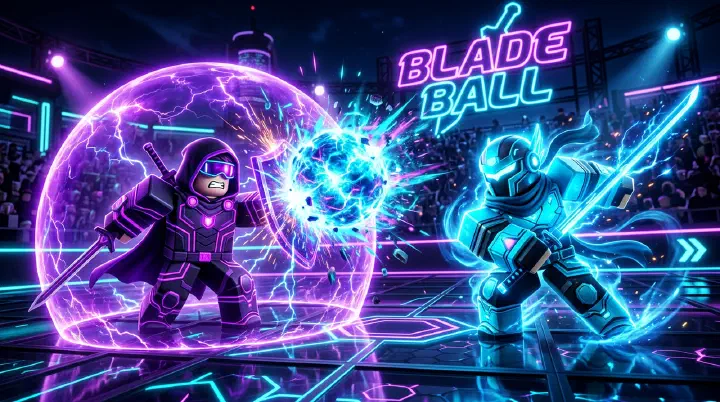
Scene-Driven Opening: The Panic-Dash Death
You’re in a Diamond 1v1. The score is 4-4. The ball’s been deflected nine times and the lobby’s thinning out. Your opponent activates Wind Cloak. You see the blue trail streak toward you and your brain screams danger. You panic-Dash sideways. Now you’re in the corner with no mobility left. They close the gap, activate Raging Deflect, and the ball rockets back at a speed you can’t see. You die. Match over.
You had Infinity equipped. You had the better defensive toolkit. You just used your Dash reactively instead of saving Infinity for the lethal return.
Here’s the painful truth about Blade Ball at high rank: knowing what each ability does isn’t enough. Every Diamond player knows Raging Deflect boosts ball speed. Every Diamond player knows Wind Cloak gives movement speed. What separates climbers from stallers is knowing what beats what, and when.
Blade Ball ability matchups aren’t about reaction time. They’re about reading intent, tracking cooldowns, and understanding that the strongest ability in your loadout is often the one you don’t use. This guide gives you the counter framework. Not a tier list — you already have that. Not a combo guide — you’ve got that too. This is the rock-paper-scissors layer that sits on top of both. If you’ve ever wondered why you lose ability duels despite having “better” skills, this is the answer.
Failure Analysis: 3 Repeatable Death Patterns
Most ability duels are lost before either player presses a key. They’re lost in the five seconds of positioning and cooldown tracking that precede the clash. Here are the three death patterns that keep players stuck in Platinum, with concrete examples of how to fix each one.
1. You React to the Animation, Not the Setup
Reactive ability usage means you press the button after you see the threat. Predictive usage means you press it before the threat materializes. Here’s what that looks like in practice.
You’re at deflection 7. The ball’s already fast. Your opponent steps inside melee range and angles their blade forward. You wait for the Raging Deflect flash. The flash happens. The ball is already traveling at 1.4x speed. Your brain processes the visual 200 milliseconds later. You’re dead before your finger reaches the Infinity key.
Top players don’t watch for the flash. They watch for the setup. Close range plus forward blade angle plus available defensive ability on the opponent’s side equals an imminent Raging Deflect. They pre-pop Infinity at deflection 6, before the swing happens. The counter isn’t faster reactions. It’s reading the tells.
The fix: Watch their feet and their range, not their ability animation. If an opponent with Raging Deflect steps inside three body lengths at deflection 6 or higher, assume the boost is coming. Counter before the swing.
2. You Trade Your Ace for Their Jack
This is the most expensive mistake in Blade Ball. You see an opponent activate Wind Cloak, so you pop Infinity to survive the rush. Fine — you survived. But now your best defensive ability is on cooldown for the next 18 seconds, and they still have Raging Deflect ready.
You countered their mobility ability. You didn’t win the exchange. You traded your ace for their jack, and now you’re defenseless when the real threat arrives.
Here’s a concrete scenario. You’re at deflection 5. They pop Wind Cloak and rush. You panic and use Infinity. They circle for four seconds, the buff expires, and they back off. At deflection 8, they use Raging Deflect. Infinity is still on cooldown. You try to block manually at 1.4x speed. You die.
The fix: The best counter to an ability is often a positional adjustment, not an ability of your own. Against Wind Cloak, step back and block manually for four seconds. Save Infinity for the Raging Deflect that comes after the speed buff expires. Abilities are resources. Spending them when you don’t need to is how you lose late-game duels.
3. You Ignore Phase and Geometry
A defensive ability used at deflection 3 is a waste. A defensive ability used at deflection 7 is a lifesaver. Many players pop Forcefield the moment they feel threatened, regardless of how fast the ball is or where they’re standing.
Picture this: You’re nervous at deflection 3. The ball is slow enough to block with your eyes closed. You pop Forcefield anyway, “just to be safe.” At deflection 7, the ball is actually lethal. Forcefield is on cooldown. You die to a normal fast ball that you could have blocked manually at deflection 3.
Geometry matters just as much as phase. Raging Deflect is stronger than a normal deflect, but if your opponent is standing at a 70-degree angle to the wall, the boosted ball hits the wall and dies. Speed doesn’t matter if the geometry is wrong. Angle and positioning beat raw power more often than players admit.
The fix: Before deflection 5, use positioning and manual blocks. After deflection 5, use abilities. Before you pop any defensive cooldown, ask: “Is the ball actually too fast to block manually, and am I in a position where blocking even matters?”
Decision Framework: The Counter-Pick Priority Checklist
This checklist isn’t a replacement for game sense. It’s a starting point. Memorize the logic, then adapt based on opponent habits and match phase.
Raging Deflect — Counter: Infinity, Forcefield, or sharp angle pre-positioning
- Why it works: Boosted ball speed exceeds human reaction time after deflection 6. Defensive abilities absorb the hit automatically.
- No defensive ability available? Pre-position at an 80-degree angle to the nearest wall. The boosted ball will hit the wall and die before it reaches you.
Wind Cloak — Counter: Freeze, patience, or lateral space
- Why it works: Speed means nothing if the ball is frozen in place. Freeze locks the ball for 2.5 seconds, burning the entire duration of their buff.
- No Freeze equipped? Hold your ground for 4 seconds. Most Wind Cloak users burn their speed to close distance, then have no escape when the buff expires.
Infinity — Counter: Bait, Wait, or Pull
- Why it works: Auto-block has a 3-second duration and an 18-second cooldown. Fake aggression at deflection 4 to force the pop, then strike 4 seconds later when they’re exposed.
- A well-timed Pull can drag the ball out of Infinity’s auto-block radius, though this requires precise timing.
Freeze — Counter: Thunder Dash or pre-emptive reposition
- Why it works: Freeze locks the ball for 2.5 seconds, but Thunder Dash teleports you out of the freeze vector. When Freeze expires, the ball resumes at its original path — and you’re no longer in front of it.
- No Thunder Dash? Move early before they lock. Force the Freeze user to guess a new angle. Guessing wrong wastes their ability entirely.
Thunder Dash — Counter: Raging Deflect prediction or center control
- Why it works: Most players dash toward the center of the arena, not away from it. Pre-time Raging Deflect at the center zone so they teleport directly into a lethal return.
- Without Raging Deflect? Control the center yourself and force them to dash into predictable angles.
Forcefield — Counter: Double-tap or wait-out
- Why it works: Forcefield blocks exactly one hit. Send a fast ball immediately after expiry. If you can’t double-tap quickly, wait 5 seconds. A Forcefield user without their shield is just a normal player with no escape.
Pull — Counter: Dash sideways or Super Jump
- Why it works: Pull drags the ball toward the user’s position. Lateral movement breaks the vector. Super Jump clears the drag line entirely, leaving them pulling at empty air.
Super Jump — Counter: Pre-position below or angle disruption
- Why it works: They must land. The ball often resumes toward their landing zone. Stand directly under their apex and force an awkward landing deflect that sends the ball wide.
Invisibility — Counter: Audio cue or wide swing
- Why it works: Invisibility has a loud activation sound. Swing 30 degrees wider than normal to catch invisible deflects. Don’t trust your eyes — trust the audio tell.
How to Read the Checklist in Real Time
Step one: Identify the opponent’s primary ability in the first two deflections. Most players reveal their hand early. A Wind Cloak user will sprint aggressively. A Freeze user will pause at deflection 4 to set up the lock. A Thunder Dash player will teleport at the first sign of pressure.
Step two: Map their primary to your counter. If they’re Raging Deflect primary, your Infinity isn’t a backup — it’s your dedicated answer. Don’t use Infinity for anything else. If they’re Pull primary, save your Dash for lateral escapes, not forward aggression.
Step three: Track their secondary. After they use their primary, they’ll fall back on their secondary within two deflections. If their secondary is offensive, keep your defensive ability ready. If their secondary is mobility, expect an angle change and pre-position accordingly.
Step four: Adjust for phase. In Phase 1 (deflections 1-4), most abilities are unnecessary. Save your counters. In Phase 2 (deflections 5-8), abilities define the matchup. In Phase 3 (deflections 9+), abilities become binary — you have a defensive ability available or you don’t.
Counter-Intuitive Advice: 5 Truths That Break the Meta
The best players in Blade Ball don’t win because they have better reflexes. They win because they break the assumptions that average players hold about ability matchups. Here are five counter-intuitive truths that’ll change how you duel.
1. The Best Counter to an Ability Is Sometimes No Ability at All
If your opponent activates Wind Cloak and you have Infinity equipped, your instinct is to pop Infinity and survive the rush. But Wind Cloak only lasts four seconds. If you simply hold your ground and manually block, you save Infinity for the Raging Deflect that comes after the Wind Cloak expires.
The best counter to a speed buff is often a well-timed step backward and a normal block. Abilities are resources. Spending them when you don’t need to is how you lose late-game duels.
2. Don’t Use Your Best Ability to Counter — Save It to Win
Average players treat their strongest ability as an emergency button. Top players treat it as a win condition. If you have Raging Deflect equipped and your opponent uses Thunder Dash, your first thought might be to use Raging Deflect to send back their teleport attack.
But what if you simply block their Thunder Dash manually, take the small risk, and save Raging Deflect for a guaranteed scoring angle two deflections later? The player who uses their best ability to counter survives. The player who saves it to score wins.
3. Losing the Ability Trade on Purpose Can Set Up a Winning Position
Here’s a high-level scenario. You’re at deflection 6. Your opponent has Forcefield. You have Pull and Infinity. You use Pull. They pop Forcefield and block it. You’ve now “lost” the ability trade — you spent Pull, they spent Forcefield, and neither scored.
But Forcefield has a 16-second cooldown, and Pull has an 11-second cooldown. Your Pull comes back first. On the next exchange, they have no Forcefield, and you have Pull again. You forced a trade where your ability returned faster. That’s a win disguised as a loss.
4. Letting the Ball Hit You on Purpose Can Win the Duel
If you have Forcefield and the ball is at deflection 4, you can let it hit you. Forcefield absorbs the hit, your opponent sees the block, and they assume you’re vulnerable. They rush in with Raging Deflect.
But you still have your second ability — say, Freeze. You freeze the ball, they whiff their Raging Deflect into empty air, and now both their abilities are on cooldown while yours are cycling. Intentional absorption is a legitimate strategy when it forces an overcommitment.
5. Slower Is Often Stronger Than Faster
Players assume that if their ability is faster or stronger, they win. But abilities have contexts. Raging Deflect at deflection 4 is technically stronger than a normal deflect, but the ball is still slow enough to block manually. You’re wasting a cooldown on a threat that doesn’t exist yet.
Meanwhile, a well-aimed normal deflect at deflection 7 — with proper angle geometry — is more lethal than a Raging Deflect at deflection 4 because the opponent’s defensive abilities are more likely to be on cooldown. Speed doesn’t matter if the geometry is wrong, and raw power doesn’t matter if the phase is wrong.
The 2026 Meta Snapshot: What Actually Wins Ranked
The current meta is defined by one principle: pressure beats survival in 1v1, but survival beats pressure in FFA.
In 1v1 ranked, the dominant loadout is Raging Deflect plus Wind Cloak. The combination creates an aggressive tempo where the opponent is always reacting to your speed and power. The counter-meta that’s emerging in high Diamond is Freeze plus Thunder Dash — a defensive-teleport hybrid that breaks the aggression cycle by removing the ball from play, then repositioning for a counter-attack.
In FFA, the meta is slower. Forcefield plus Infinity is the safest top-four combination because you aren’t trying to score — you’re trying to outlast five other players. The counter to this turtle strategy is Pull plus Raging Deflect, which drags the ball into your zone and sends it back before the turtle can react.
In 2v2, coordination matters more than individual ability choice. The strongest pair composition is one control player (Freeze + Pull) and one finisher (Raging Deflect + Wind Cloak). The control player sets the ball state; the finisher exploits it. If both players run aggressive loadouts, the team lacks the defensive coverage to survive focused fire.
Matchup Deep Dives: Specific Scenarios
Raging Deflect vs. Infinity
This is the most common high-level duel. Raging Deflect wants to send a lethal return. Infinity wants to auto-block it. The Raging Deflect player wins this matchup if they can force Infinity to activate early — for example, by faking a rush at deflection 4 when the ball is still blockable by hand.
Once Infinity is down, the Raging Deflect player has a free window at deflection 6 or 7 to land the lethal return. Infinity wins if the player holds until the actual boosted swing.
Wind Cloak vs. Freeze
Wind Cloak is about tempo. Freeze is about removing tempo. When a Wind Cloak player rushes, most opponents panic and burn an ability. The Freeze player doesn’t panic. They freeze the ball, step sideways, and wait.
The Wind Cloak user burns four seconds of speed doing nothing. Then the freeze expires with the ball traveling toward the empty space where the Wind Cloak user used to be. Freeze doesn’t counter Wind Cloak by blocking it. Freeze counters Wind Cloak by making speed irrelevant.
Thunder Dash vs. Raging Deflect
Thunder Dash is a teleport that puts the user directly in the ball path. Raging Deflect is a deflect that sends the ball back at boosted speed. If the Raging Deflect player predicts the Thunder Dash angle, they can pre-time the deflect so the teleporting opponent lands directly into a lethal return.
This is one of the most satisfying counters in the game, but it requires reading the opponent’s preferred teleport angle. Most players dash toward center, not away from it.
Frequently Asked Questions
What is the hardest ability to counter in Blade Ball?
Raging Deflect is the hardest ability to counter consistently because it changes the ball speed mid-exchange. Most players are calibrated to block at standard speeds. A 1.4x multiplier breaks that calibration. The only reliable counters are defensive abilities or pre-positioning at extreme angles.
Should I change my abilities based on my opponent’s loadout?
In ranked 1v1, you can’t see your opponent’s loadout before the match starts. In custom lobbies or tournament play, yes — you should adapt. Against known Raging Deflect players, prioritize Infinity. Against known Wind Cloak players, bring Freeze. In blind ranked, run a balanced loadout that can handle both aggression and control.
How do I practice ability counters without losing rank?
Use casual 1v1 lobbies or private matches with friends. Focus on one matchup per session. For example, spend an entire session only dueling Raging Deflect users with Infinity. Learn the timing windows, the fake-out patterns, and the angle adjustments. Once the counter feels automatic, take it to ranked.
Why does the same counter work sometimes but not others?
Because phase and cooldown state change the math. Countering Raging Deflect with Infinity at deflection 4 is overkill and wastes your safety net. Countering it at deflection 7 is perfect. The same counter in a different phase has a completely different value. Always ask: what phase am I in, and what abilities are still available?
Is there an ability that has no hard counter?
No. Every ability in Blade Ball has at least one hard counter and one soft counter. The closest to uncounterable is Infinity in Phase 3, but even Infinity has a duration and a cooldown. The trick isn’t finding an uncounterable ability — it’s forcing your opponent to use their counter at the wrong time.
Related Guides
- Blade Ball Abilities Tier List — Every Skill Ranked S to D
- Blade Ball Ability Combos & Synergy Guide
- Blade Ball Ability Phase Guide — When to Use Each Ability
- Blade Ball How to Win Guide — Advanced Strategies
- Blade Ball Ranked Climbing Decision Guide
- Blade Ball Deflect & Parry Timing Guide
- Blade Ball Opponent Reading Guide
Disclaimer: Meta rankings and counter strategies reflect community consensus and testing as of July 2026. Game updates may change ability stats, cooldowns, or interactions. Check the official Blade Ball Wiki for the most current ability information.
Sources: