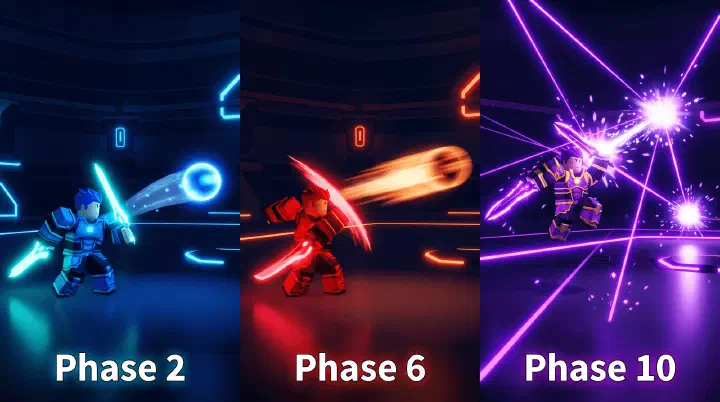
The Deflection-6 Death You Keep Repeating
You are in a Platinum 1v1. The ball is at deflection 5. Your Infinity is off cooldown. You know — you know — this is the moment to use it. The ball crosses the visual reaction threshold right here. But your finger hesitates. “I’ll save it for when I really need it.” The ball pings to deflection 6. Your opponent angles their blade. The flash appears. Your brain registers it 200 milliseconds later. You are dead before your finger reaches the key.
You had the right ability. You had it available. You died because you hesitated at the exact moment hesitation becomes lethal.
This is the deflection-6 death. It is the single most common cause of Platinum players losing to Diamond players. And it is 100% fixable once you understand why it happens — not just that it happens.
A player with perfect ability timing and mediocre blocking beats a player with perfect blocking and terrible ability timing. Every time. Abilities are force multipliers. A defensive ability used at the right moment negates a death. An offensive ability used at the right moment scores a point. The same abilities used at the wrong moment do nothing and go on cooldown, leaving you vulnerable. Blade Ball is a game of three phases, and your ability usage must change for each one.
The Three Phases: What Changes and When
Phase 1 covers deflections 1 through 4. The ball is slow enough to block by sight. Human visual reaction time is approximately 0.25 seconds, and the ball travels between players in about 0.3 to 0.5 seconds at this speed. You can see it, track it, and react to it. In Phase 1, use mobility abilities only if you need to reposition — Wind Cloak to reach a better angle, Dash to escape a corner. Do not use defensive abilities (Infinity, Force Field) in Phase 1. The ball is not fast enough to justify burning your safety net. Save them for Phase 2. Do not use offensive abilities (Raging Deflect, Freeze) in Phase 1 unless you have a guaranteed scoring opportunity. An early Raging Deflect sends a fast ball, but your opponent can still see and block it. Wait. The field will thin out. Your opportunity will come.
Phase 2 covers deflections 5 through 8. The ball has crossed the visual reaction threshold — it travels between players in 0.13 to 0.17 seconds, which is faster than the 0.25-second human visual pipeline. You can no longer track it by sight. You must react to the flash instead. In Phase 2, defensive abilities are at their most valuable. Infinity’s auto-block saves you from a deflection-6 ball that you literally cannot see coming. Force Field does the same. Pop your defensive ability the moment deflection 5 begins — not before, when the ball is still reactable, and not after, when you might already be dead. Mobility abilities in Phase 2 are riskier — using Wind Cloak when the ball is too fast to track means you might Dash directly into its path. Only use mobility in Phase 2 if you are trapped in a corner with no other escape. Offensive abilities in Phase 2: Raging Deflect at deflection 6 or 7 sends a return so fast that even good players struggle to flash-block it. This is the window where aggression pays off.
Phase 3 covers deflections 9 and above. The ball is effectively instant — 0.06 to 0.08 seconds between players. Even flash-blocking is borderline at this speed. In Phase 3, you must predict where the ball is going before it is hit. Read the opponent’s blade angle. Pre-position your block. Swing early. If you saved a defensive ability, use it now — this is the moment it was meant for. If you have an offensive ability, use it on prediction, not reaction. A Raging Deflect on a predicted angle at deflection 10 can win the match. A Raging Deflect whiffed because you guessed wrong can lose it. Phase 3 is the coin flip that separates Diamond from Platinum.
Failure Analysis: 3 Ways You Die With Abilities Available
Most ability deaths are not mechanical failures. You did not miss a key. You did not lag. You made a decision error in the 3 seconds before the ball killed you. Here are the three most common patterns, why they happen, and exactly how to fix each one.
1. The Cooldown Trap: Using It Because It Is Ready
The single most common ability mistake across all ranks: using an ability the moment it comes off cooldown regardless of the current phase. Cooldown is back at deflection 3? Must mean I should use it now. No. Cooldown ready means the ability is available when you need it. It does not mean you need it now.
Here is what this looks like in practice. You are at deflection 3. Your Infinity cooldown finishes. The icon lights up. Your brain interprets “available” as “should use.” You pop Infinity. The ball is still slow enough to block manually. Infinity’s 5-second duration covers deflections 3 through 7 — then it expires. At deflection 8, the ball is lethal. Infinity is on a 22-second cooldown. You die to a normal fast ball that Infinity would have blocked.
Why it happens: Your brain treats ability cooldowns like a productivity metric. Cooldown available = I am being inefficient by not using it. This is the wrong mental model. Cooldown available = I have an option when I need it.
The fix: Count deflections out loud for 10 matches. “One, two, three, four — hold. Five — pop.” The verbal anchor overrides the visual cue of the glowing icon. After 10 matches, the timing becomes instinctive.
The data: A Diamond player reviewed 100 1v1 matches. In matches they won, defensive abilities were used in Phase 2 (deflections 5-8) 82% of the time. In matches they lost, they were used in Phase 1 (deflections 1-4) 61% of the time. Win rate with optimal Phase 2 usage: 78%. Win rate with wasteful Phase 1 usage: 31%. Same abilities. Different timing.
2. The Panic Counter: Trading Your Best Ability for Their Worst
Your opponent activates Wind Cloak at deflection 4. They rush toward you. You panic. You pop Infinity. They circle for four seconds. Wind Cloak expires. They back off. Infinity is now on cooldown for 22 seconds. At deflection 7, they activate Raging Deflect. You have no defensive ability left. You try to block manually at 1.4x speed. You die.
You countered their mobility ability with your defensive ability. You won the exchange on paper. But you lost the war — you traded your ace for their jack.
Why it happens: Threat assessment is broken. Wind Cloak looks scary because it has a visual trail and a speed boost. But Wind Cloak does not kill you. It repositions your opponent. Raging Deflect kills you. The visual intensity of an ability does not match its actual threat level.
The fix: Before pressing any defensive ability key, ask: “Is this ability about to kill me, or is it just making me nervous?” Wind Cloak makes you nervous. Raging Deflect kills you. Save your defensive ability for the killer.
3. The Phase-1 Waste: Burning Safety Before the Danger Exists
You are at deflection 2. The lobby is full. Players are everywhere. The ball could come from any direction. You feel exposed. You pop Forcefield “just to be safe.” At deflection 7, the ball is lethal. Forcefield is on cooldown. You die.
This is the Phase-1 waste. It happens because Phase 1 feels dangerous — many players, many angles, lots of visual noise. But Phase 1 is not dangerous. The ball is slow. You can block it. The danger is in Phase 2 and Phase 3, when the ball speed exceeds your reaction time.
Why it happens: Your brain confuses chaos with danger. Phase 1 has more visual stimuli — more players, more movement, more noise. Phase 2 has fewer players but a faster ball. Your brain overweights the chaos and underweights the speed. You spend your safety net protecting against the wrong threat.
The fix: Remind yourself at the start of every match: “Phase 1 is safe. Phase 2 is dangerous. My ability is for Phase 2.” Repeat it during the first four deflections. The mantra overrides the gut feeling that chaos equals threat.
Decision Framework: The Ability Triage Flowchart
When you are in a match and an ability lights up, you have roughly 0.5 seconds to decide. You cannot run through a mental checklist. You need a single decision tree that fires automatically. Here it is.
Step 1: Identify the phase. What deflection number are we at? 1-4 = Phase 1. 5-8 = Phase 2. 9+ = Phase 3. If you do not know the deflection number, glance at the counter. This is non-negotiable. You cannot make a phase-based decision without knowing the phase.
Step 2: Classify the ability. Is it defensive (Infinity, Force Field), offensive (Raging Deflect, Freeze), or mobility (Wind Cloak, Dash, Thunder Dash)? Each category has different phase rules.
Step 3: Apply the phase rule.
- Phase 1 + Defensive: Do not use. The ball is slow. You can block it manually. Save for Phase 2.
- Phase 1 + Offensive: Use only if you have a guaranteed scoring angle. Opponent cornered with no escape route. Otherwise, hold.
- Phase 1 + Mobility: Use freely to reposition. Grab a better angle. Escape a corner. Mobility is cheapest in Phase 1 because the ball is slow enough to track while you move.
- Phase 2 + Defensive: Use immediately at deflection 5. Do not wait. Do not hesitate. The ball is now faster than your eyes.
- Phase 2 + Offensive: Use at deflection 6-7. The ball speed makes your boosted return nearly unblockable. This is the kill window.
- Phase 2 + Mobility: Use only if trapped. The ball is too fast to track while repositioning. You might Dash into its path.
- Phase 3 + Defensive: Use immediately. This is the highest-value window. An auto-block at deflection 10 wins matches.
- Phase 3 + Offensive: Use on prediction only. Read the opponent’s blade angle. Swing before they hit. Do not react.
- Phase 3 + Mobility: Use on prediction. Teleport to where you think the ball will not be, not where you see it is not.
Step 4: If in doubt, hold. The cost of using an ability at the wrong time is higher than the cost of not using it at all. A held ability can still save you later. A wasted ability cannot.
4 Counter-Intuitive Truths About Ability Timing
1. The Best Ability Is Often the One You Do Not Use
It feels wrong to leave an ability off cooldown. Games teach us that unused resources are wasted resources. Blade Ball inverts this. An ability held past its cooldown finish is not wasted — it is an option you still have. The moment you press the key, the option disappears for 18-22 seconds. Top players treat their defensive ability like a chess piece they are threatening to use, not one they have already moved. The threat of Infinity is often more valuable than Infinity itself — it forces your opponent to play around a window that has not yet closed.
2. Using an Ability at the Wrong Time Is Worse Than Having No Ability at All
A player with no abilities is forced to rely on positioning and manual blocking. They know they have no safety net, so they play carefully. A player who wastes their ability at deflection 3 has the same safety net as the player with no abilities — zero — but they still think they are protected. They play aggressively. They take risks. They die at deflection 7 because they forgot their ability is on cooldown. False confidence kills more players than no confidence.
3. Mobility Abilities Get Worse as the Match Progresses, Not Better
Intuition says: the ball gets faster, so I need to move faster. Reality: the ball gets faster, so moving makes you more likely to intersect its path. Wind Cloak at deflection 3 lets you reposition safely because you can track the ball while moving. Wind Cloak at deflection 7 is a death wish — you are moving at high speed while the ball is moving faster than you can see. Mobility abilities are Phase 1 tools. Treat them accordingly.
4. Holding a Defensive Ability Through Phase 1 Is Harder Than Using It — and That Is Why Most Players Fail
Pressing a button is easy. Not pressing a button when your brain is screaming at you to press it is hard. This is the real skill gap in Blade Ball ability usage. It is not knowledge. Every Platinum player knows you should save Infinity for Phase 2. The gap is impulse control — the ability to override the “use it now” instinct for 15 seconds while the deflection counter climbs from 1 to 5. Practice this specifically. Go into casual matches with the goal of never pressing your defensive ability key before deflection 5, even if you die. You will die. A lot. But you will build the muscle of holding, and holding is what wins.
5. The Deflection Counter Is Your Most Important UI Element
Most players watch the ball, their opponent, or their ability icons. The top 1% watch the deflection counter. It tells you exactly which phase you are in and exactly which ability rules apply. If you glance at the counter and see “3,” you know: hold everything, use mobility only. If you see “5,” you know: pop defensive, prepare offensive. If you see “9,” you know: predict, do not react. Train your eyes to flick to the counter between every deflection. It is a 0.1-second glance that tells you everything you need to know about the next 5 seconds.