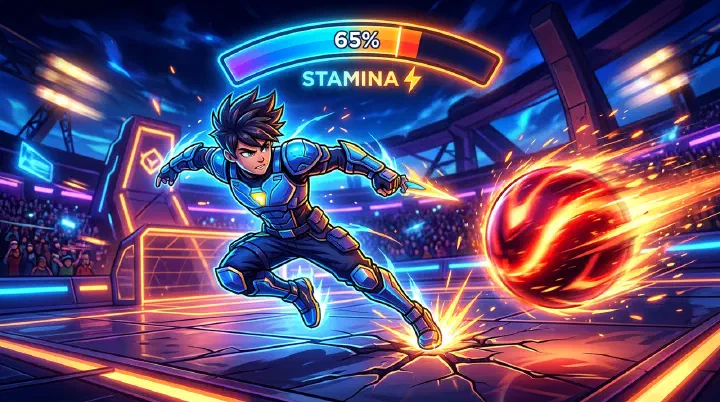
Scene-Driven Opening: The Empty Tank Death
You’re in a Platinum 1v1. Deflection 7. The ball’s screaming across the arena at a speed that makes your eyes water. You’ve been sprinting for the last eight seconds trying to cut off the angle. Your opponent activates Wind Cloak and rushes. You see the play developing — they’re going to deflect at a sharp angle toward the corner. You know exactly where you need to be.
You press Dash. Nothing happens. You press it again. Still nothing. You look at your energy bar. It’s a sliver of red — 8%. You can’t dash. You can’t use your defensive ability. You can’t sprint. You’re standing in the open with no options, and the ball is already on its way.
You die. Not because you misread the play. Not because you picked the wrong ability. Not because your reaction time was slow. You die because you spent the last eight seconds sprinting when you should have been walking, and now your energy economy is bankrupt.
Here’s the thing nobody tells you about Blade Ball: energy is your most important resource. More important than your ability cooldowns. More important than your positioning. More important than your blade angle. If your energy bar is empty, you have no abilities, no mobility, and no options. You’re a target standing still in a game about movement.
Most players treat energy like it’s infinite — sprint everywhere, dash on cooldown, pop abilities the moment they’re available. Then they wonder why they’re always empty in the moments that matter. This guide breaks down exactly how energy works, where you’re wasting it, and how to build an energy economy that keeps you alive through deflection 9 and beyond.
How Energy Actually Works in Blade Ball
Blade Ball gives you one energy bar. That bar fuels everything you do beyond basic movement and blocking. Run out, and you’re reduced to walking and manual deflecting — viable at deflection 2, suicide at deflection 7.
Here’s the energy economy in numbers:
- Total energy pool: 100% (one bar)
- Passive regeneration (standing still): ~5% per second
- Passive regeneration (walking): ~3% per second
- Regeneration during sprint: 0% (completely paused)
- Regeneration during ability use: 0% (paused for the ability’s duration + a short lockout)
- Full recharge from empty: ~20 seconds standing still
The single most important number in that list is the zero. Sprinting pauses your energy regeneration. Every second you spend sprinting is a second you’re not recovering energy. If you sprint for 10 seconds straight, you’ve burned roughly 80% of your energy and recovered exactly zero. That’s the core of the starvation problem.
What Each Action Costs
- Dash: 25% flat cost per use. Two-second internal cooldown between dashes.
- Sprint: ~8% per second continuous drain. No cooldown, no burst cost — just a steady bleed.
- Raging Deflect: 35% energy cost. Highest in the game.
- Thunder Dash: 35% energy cost. Tied with Raging Deflect.
- Wind Cloak: 30% energy cost.
- Freeze: 30% energy cost.
- Infinity: 25% energy cost.
- Forcefield: 25% energy cost.
- Pull: 20% energy cost.
- Super Jump: 20% energy cost.
- Invisibility: 15% energy cost. Cheapest ability in the game.
Notice the pattern. The abilities that win duels — Raging Deflect, Thunder Dash, Wind Cloak — cost the most energy. The abilities that keep you alive — Infinity, Forcefield — cost a moderate amount. The utility tools — Pull, Super Jump, Invisibility — cost the least. Blade Ball’s energy economy is designed so that the most powerful plays are also the most expensive. You can’t spam them. You have to choose your moments.
The Energy Starvation Trap
Energy starvation happens when you spend energy faster than you regenerate it, eventually hitting zero in a moment where you need to act. It’s not bad luck. It’s a predictable outcome of a specific spending pattern. Here’s what the trap looks like:
- You sprint to reposition after a deflect. Energy drops to 70%.
- You dash to cut off an angle. Energy drops to 45%.
- You sprint again to close distance. Energy drops to 20%.
- Your opponent activates an ability. You need to dash or use your defensive ability. You have 20% energy. Neither option is available.
- You die.
The trap isn’t step 4. The trap is steps 1 through 3 — the small, seemingly harmless energy spends that add up to bankruptcy. Each individual decision made sense. Sprinting to reposition is natural. Dashing to cut an angle feels proactive. But together, they drained your bar before the real fight even started.
The fix is simple in theory and hard in practice: treat every energy spend as a loan against your future self. Before you sprint, ask: “Can I walk instead?” Before you dash, ask: “Will this dash change the outcome, or am I just moving faster for the sake of moving faster?” Most of the energy you spend in a match doesn’t change the result. It just makes you feel busier.
Failure Analysis: 3 Repeatable Energy Death Patterns
These three patterns are responsible for the vast majority of energy-related deaths in Blade Ball. If you recognize yourself in any of them, the fix is mechanical — not a matter of “getting better,” but of changing a specific behavior.
1. The Sprint-to-Death Spiral
You sprint everywhere. Between deflections, you’re holding the sprint key. Chasing the ball, you sprint. Running from an aggressive opponent, you sprint. You’ve been sprinting for fifteen seconds straight, and your energy bar is at 12%.
Then the moment comes — deflection 7, the ball is fast, and you need to dash. You can’t. Your energy is gone. You die.
This is the most common energy death in Blade Ball, and it’s entirely self-inflicted. Sprinting is not free movement. It’s an energy trade. Every second of sprinting costs you 8% of your bar and pauses your regeneration. Fifteen seconds of sprinting costs 120% of your energy bar — more than you even have, which means you’ve been running on empty for the last few seconds without realizing it.
The fix: Set a sprint budget. Sprint for a maximum of three seconds at a time, then walk for at least two seconds to let regeneration kick in. If you need to cross the arena, sprint in bursts — three seconds on, two seconds off. Your total travel time is only slightly longer, but your energy bar stays above 50% the entire time. In a game where one dash is the difference between life and death, that’s worth the extra second.
2. The Double-Dash Bankrupt
You dash once. It’s a good dash — you cut off the angle perfectly. But the ball takes an unexpected deflection, and now you’re out of position. You dash again immediately. Two dashes in under three seconds. You’ve spent 50% of your energy bar in the blink of an eye.
Now you’re at 50% energy. If you have an ability available, it probably costs 25-35%. Using it drops you to 15-25%. You’re one sprint away from zero. Your opponent still has their dash and both abilities. The duel is effectively over — not because they outplayed you, but because you spent your mobility budget before the critical exchange.
Two dashes is the energy equivalent of using Raging Deflect and Thunder Dash back to back. It’s a massive spend that leaves you with nothing. Yet players double-dash constantly because the cooldown is short and the action feels urgent.
The fix: Never dash twice in the same exchange unless the second dash scores a point or saves your life. One dash is a reposition. Two dashes is a commitment. If you dash once and the ball changes direction, accept the bad position and walk to a better angle. You’ll take a worse deflect, but you’ll do it with energy in the tank for the next exchange. A bad deflect with energy is better than a perfect angle with none.
3. The Ability-First Empty
You enter an engagement with 70% energy — not full, but enough. Your opponent is closing in at deflection 5. You pop Raging Deflect (35% cost). Now you’re at 35%. The return is fast, but your opponent blocks it. They dash to a new angle. You need to chase. You sprint for two seconds (16% drain). Energy: 19%.
The ball is at deflection 7 now. Your opponent has Wind Cloak active. They’re rushing. You need to dash. You have 19% energy. You can’t dash. You can’t use your second ability. You’re dead.
You opened with your most expensive ability at 70% energy. That’s the mistake. Raging Deflect at 70% energy leaves you with 35% — not enough to dash, not enough for another ability, not enough to sprint for more than two seconds. You spent your entire energy budget on one offensive action, and when it didn’t end the duel, you had nothing left.
The fix: Bank energy before using high-cost abilities. Enter every engagement with at least 80% energy if you plan to use Raging Deflect or Thunder Dash. If your energy is below 80%, use low-cost abilities (Pull, Super Jump, Invisibility) or rely on manual blocks and positioning until your energy recovers. The math is unforgiving: 80% minus 35% equals 45%, which is enough for one dash or one sprint burst. 70% minus 35% equals 35%, which is enough for nothing.
Decision Framework: The Energy Priority Ladder
When your energy bar is full, every option is on the table. As it drains, your options close one by one. Here’s the ladder — what you can do at each energy level, and what you should be doing instead.
100-80%: Full Arsenal
- You can dash, sprint, and use any ability.
- This is your engagement window. If you’re going to play aggressive, do it now.
- Rule: never start an engagement below 80% unless you’re the defender.
80-55%: Cautious Active
- You can dash once and still have energy for a low-cost ability.
- You can sprint for a few seconds safely.
- Rule: avoid high-cost abilities. Save Raging Deflect and Thunder Dash for when you’re above 80%.
55-30%: Conserve Mode
- You can dash OR use a low-cost ability, but not both.
- Sprinting is dangerous — every second burns energy you might need for an escape.
- Rule: walk whenever possible. Only spend energy on defensive actions. If you’re the aggressor, back off and let energy regen.
30-15%: Emergency Only
- You can dash, but it’ll leave you at near-zero.
- Most abilities are unavailable.
- Rule: your only job is to survive until energy regenerates. Walk, manually block, and avoid engagements. If you’re targeted, use your one remaining dash to escape, not to engage.
Below 15%: Dead Zone
- You can’t dash. You can’t use any ability.
- You can sprint for maybe one second before you’re completely empty.
- Rule: you are a target. Stand still and let energy regenerate. If the ball comes at you, you’re blocking manually or dying. There is no third option.
How to Apply the Ladder in Real Time
Glance at your energy bar after every deflect. Not every five deflections. Not when you feel like you’re running low. Every single deflect. It takes a quarter of a second. If your energy is in the wrong zone for what you’re about to do — stop. Adjust. Walk for three seconds. Let the bar climb one tier. The five seconds you spend recovering energy between deflections 4 and 5 is the difference between having a dash at deflection 7 and dying with an empty bar.
Energy Management by Playstyle
Aggressive Playstyle
Aggressive players burn energy the fastest. Raging Deflect plus Wind Cloak is the most energy-intensive combo in the game — 35% for the deflect, 30% for the cloak, plus sprinting to close distance between exchanges. An aggressive player can drain their entire energy bar in under ten seconds of active play.
The aggressive energy rule: bank before you swing. Sprint to your position, then stop. Stand still for three seconds. Let your energy bar hit full. Only then do you engage. If you engage at 70% energy, you’ll be empty before the duel ends. If you engage at 100%, you’ll have enough for one ability, one dash, and a sprint to chase the return.
Aggressive players also need to track their opponent’s energy. If you force them to dash twice, they’re at 50% or below. That’s your window. Press hard while they can’t escape. The best aggressive players don’t just manage their own energy — they drain their opponent’s.
Defensive Playstyle
Defensive players face a different problem. You’re not burning energy on offensive abilities, but you’re constantly repositioning. Every time the ball changes direction, you dash or sprint to a new angle. Over the course of a long match, that steady drain adds up.
The defensive energy rule: never dip below 25%. A defensive player without a dash is a dead player. If you can’t escape a fast ball, your Forcefield or Infinity buys you one hit — then you’re vulnerable on the next exchange. The dash is your second layer of defense. Keep it available at all times.
Defensive players should also prioritize low-cost abilities. Freeze (30%) is more expensive than Super Jump (20%), but both can reset a bad angle. If you’re playing a long, patient game, the 10% energy difference per use adds up over five or six exchanges. That’s an extra dash you get to keep.
Hybrid Playstyle
Most players run one offensive and one defensive ability. This is the most energy-efficient setup because it staggers your costs. Your offensive ability costs 30-35%, and your defensive ability costs 20-25%. You can use one, let energy recover for a few seconds, and still have the other available.
The hybrid energy rule: alternate, don’t double. After using your offensive ability, don’t immediately use your defensive one. Wait. Let energy regenerate. The two abilities should be separated by at least five seconds of walking or standing still. If you fire both back to back, you’re at 35-45% energy with both abilities on cooldown — the worst possible position.
Counter-Intuitive Truths: 4 Energy Rules That Feel Wrong but Win Games
1. Walking Is Often Better Than Sprinting
Sprinting feels proactive. You’re moving fast, cutting angles, pressing the opponent. But sprinting costs 8% energy per second and pauses regeneration. Walking costs nothing and lets you regenerate 3% per second.
Over a ten-second reposition, sprinting costs 80% energy. Walking costs zero and regenerates 30%. The net difference is 110% of your energy bar. That’s a dash, a defensive ability, and a sprint burst — all lost because you wanted to move faster.
The only time sprinting is worth the cost is when you’re racing the ball to a position. If the ball is mid-flight and you need to be somewhere before it arrives, sprint. If you’re just rotating between exchanges, walk. Your energy bar will thank you, and your positioning will be just as good.
2. The Best Dash Is the One You Don’t Use
Dashing feels essential. The ball is coming, you need to move, and dashing is the fastest way to do it. But here’s the thing: most dashes don’t change the outcome. You dash to a new position, the ball deflects somewhere else, and you’re no better off than if you’d walked — except now you’re 25% energy poorer.
The test: before you dash, ask whether walking to the same position would change the result. If the ball is three seconds away, walking gets you there in time. If the ball is half a second away, dash. Most players dash when the ball is two seconds away — close enough that walking is fine, far enough that dashing feels urgent. That’s the gray zone where energy is wasted.
Save your dash for two situations: escaping a lethal ball that you can’t block, and securing a position that walking can’t reach in time. Everything else is a luxury spend.
3. Low Energy Is a Signal, Not a Crisis
When your energy bar drops below 40%, most players panic. They dash to safety, sprint to cover, and burn their remaining energy in a frenzy of self-preservation. The panic spending is what kills them — not the low energy itself.
Low energy is information. It tells you: “You can’t afford to dash and use an ability. Pick one.” If you pick one and play around it, you survive. If you panic and try to do both, you hit zero and die.
The calm response to low energy: stop moving. Stand still. Let regeneration kick in. Three seconds of standing still recovers 15% energy — enough for a dash. Four seconds recovers 20% — enough for Pull or Super Jump. The bar climbs faster than you think, but only if you let it.
4. Aggressive Players Run Out of Energy Faster Than Defensive Players — But That’s the Point
An aggressive playstyle burns energy at roughly twice the rate of a defensive playstyle. Raging Deflect (35%) plus Wind Cloak (30%) plus sprinting (8% per second) drains a full bar in under eight seconds. A defensive player using Freeze (30%) and walking between exchanges can sustain for 20+ seconds.
But here’s the counter-intuitive part: the aggressive player isn’t mismanaging energy. They’re spending it intentionally. The aggressive strategy is to burn energy faster than the opponent can respond, ending the duel before the energy deficit matters. If the aggressive player scores within eight seconds, the empty bar doesn’t matter. The duel is over.
The problem is when aggressive players don’t score within their window. They burn all their energy, the opponent survives, and now the aggressive player is defenseless. That’s not an energy management failure. That’s a failure to close. If you’re going to play aggressive, commit to the timing. Know your window. If you haven’t scored by the time your energy hits 30%, disengage and recover. Don’t keep pressing with an empty tank.
Ability Energy Costs: The Full Breakdown
Every ability has a fixed energy cost. Understanding these costs lets you plan your spending before the match starts.
High-Cost Abilities (35%):
- Raging Deflect — the most powerful offensive ability, and the most expensive. One use consumes over a third of your bar.
- Thunder Dash — teleport plus reposition. Same cost as Raging Deflect. Using both in the same loadout means you can only afford one ability per engagement without a full recharge.
Mid-Cost Abilities (30%):
- Wind Cloak — speed boost that also burns sprint energy while active. Total cost is higher than it looks.
- Freeze — ball control at a premium. Worth it in Phase 2 and 3. Wasted in Phase 1.
Moderate-Cost Abilities (25%):
- Infinity — auto-block at a reasonable cost. The best energy-value defensive ability in the game.
- Forcefield — one-hit shield. Same cost as Infinity but shorter coverage. Use it when you’re already low on energy and need exactly one save.
Low-Cost Abilities (20%):
- Pull — ball manipulation at a bargain. The best ability for energy-conscious players.
- Super Jump — vertical escape. Cheap, reliable, and the only ability you can safely use below 40% energy.
Budget Ability (15%):
- Invisibility — the cheapest ability in the game. Use it when you’re energy-starved and need to create confusion without spending resources. It won’t win the duel, but it’ll buy you time to regenerate.
The takeaway: your loadout determines your energy profile. Raging Deflect + Thunder Dash is a high-cost, high-risk build that demands perfect energy management. Pull + Invisibility is a low-cost build that gives you more room for error. Choose your loadout based on how confident you are in your energy discipline.
Frequently Asked Questions
Why do I run out of energy faster in ranked than in casual?
Because ranked matches last longer. In casual, duels end quickly — someone makes a mistake, the ball speeds up, and the round is over. You never hit the point where energy management matters. In ranked, both players are disciplined. Duels stretch to deflection 8, 9, 10. Your energy spending over the first six deflections determines whether you have resources at deflection 9. The longer the match, the more energy economy matters.
Can I use abilities when my energy is below their cost?
No. Blade Ball checks your current energy against the ability cost at the moment you press the button. If you have 28% energy and try to use Wind Cloak (30%), nothing happens. The ability doesn’t activate at reduced effectiveness. It simply doesn’t activate. This is why hovering near the cost threshold is dangerous — a single sprint tick can drop you below the threshold and lock you out of your ability.
Does energy regenerate faster with certain abilities equipped?
No. Energy regeneration is a fixed rate regardless of your equipped abilities or blade. Some players believe Infinity or Forcefield improves regeneration speed. They don’t. The only thing that changes regeneration is your movement state: standing still (5%/s), walking (3%/s), or sprinting/ability use (0%/s).
Should I ever intentionally sit at low energy to bait an opponent?
Yes, but only if you have a plan. If you’re at 25% energy and your opponent knows it, they’ll press hard — they think you can’t escape. If you’ve been saving your dash and they don’t know it, you can bait the aggression, dash out at the last moment, and counter while they’re overextended. This is an advanced tactic that requires precise energy tracking and confidence in your timing. Don’t try it until you can reliably track your energy without looking at the bar.
How do I practice energy management?
The mirror drill. Play five casual matches where your only goal is to never drop below 40% energy. Ignore winning. Ignore scoring. Your only job is energy discipline. Sprint in bursts of three seconds. Walk between exchanges. Don’t use abilities below 80%. You’ll lose some of these matches because you’re not playing to win. But after five matches, the spending patterns will feel natural. Then add winning back in. Your energy management will be automatic.
Related Guides
- Blade Ball Beginner Guide — From First Match to First Win
- Blade Ball Ability Combos & Synergy Guide
- Blade Ball Ability Counter & Meta Guide 2026
- Blade Ball Ability Phase Guide — When to Use Each Ability
- Blade Ball Deflect & Parry Timing Guide
- Blade Ball Speed Curve Guide — Why Everything Changes After Deflection 5
- Blade Ball Ranked Climbing Decision Guide
- Blade Ball Settings & Controls Optimization Guide
Disclaimer: Energy costs and regeneration rates reflect community testing and consensus as of August 2026. Game updates may adjust energy values, ability costs, or regeneration mechanics. Check the official Blade Ball Wiki for the most current information.
Sources: