Dana finally did it. Wave 90, Normal mode, victory screen, the whole loadout on the field. She’d spent two weeks grinding her way there — forty-plus games of the same two early Titans, the same purchase order, the same savings discipline. The results screen was still loading when she queued Hard mode. It seemed like the obvious next step. She had beaten the game. Hard was just Normal with a higher ceiling. What else was there to do?
She died at wave 12. She’d never seen a shielded enemy before wave 30, and on Hard they arrive at wave 15. Her lineup — Titan Cameraman, Titan Speakerman, Upgraded Cameraman, and a dream — had no answer for an early shield wall. The enemies carried 40 percent more HP, so her kills were slower, so her Cen arrived slower, so every savings milestone slid backward. She queued again. Wave 14. Again. Wave 11. She told herself she just needed to play better. She was wrong. Dana’s problem wasn’t aim, wasn’t reaction time, wasn’t luck. It was sequence — she had promoted on a single clear instead of on milestones.
Progression in BBF is not a ladder you climb whenever you feel ready. It is a gate system, and the gates are skill milestones plus Cen discipline. This guide is the full path from your first match to Nightmare mode — what unlocks, in what order, and the three decisions that decide how fast you get there.
Why Progression Stalls: Three Ways Players Get Stuck
Everyone dies in BBF. Dying is not the failure. The failure is dying at the same wave, for the same reason, for fifty games in a row. Three patterns cover almost every stalled player.
Pattern one — premature promotion. You clear Normal 90 once, queue Hard the same evening, die at wave 12, and repeat it five times. The error is treating a difficulty as something you conquer by beating it one time. The consequence is worse than just losing: each failed Hard run ends before the high-value waves, so it earns almost no Cen, so your economy is 40 minutes of nothing per attempt. The correct move is consolidation — three consecutive Normal clears first, because the third clear is where your late-game order moves from conscious effort into automatic habit. Promoting on clear number one means practicing your worst skill (the 60-90 stretch) least.
Pattern two — permanent Normal plateau. You’ve cleared Normal twice, but Hard scares you, so you keep farming Normal forever. The error is confusing comfort with progress. The consequence is a quiet 33 percent pay cut: Hard’s 1.5x Cen multiplier means a wave-50 Hard clear out-earns your wave-90 Normal clear, and you’re donating that difference to the leaderboard. The correct move is to promote when the exit conditions are met — failure on Hard is tuition, not punishment, as long as you review the run afterward instead of just re-queuing.
Pattern three — budget-blind buying. You arrive on a new difficulty, panic at the new enemy density, and start buying mid-tier Titans because “the game is harder now, I need more units.” The error is responding to pressure with dead-end purchases — Large Cameraman (650) does not upgrade into anything. The consequence is compounding: every Cen spent off the ladder delays the next real upgrade by waves, and during those waves your underpowered lineup loses kills, which loses Cen, which delays the next upgrade further. The correct move is to accept that the loadout list is fixed and nothing outside it helps.
Here is the recovery protocol that fixes all three: after every failed run, answer two questions in writing — what wave did I die at, and what did I spend Cen on in the ten waves before it? One analyzed run teaches more than five rushed ones. That’s the protocol Dana missed; her 64-game plateau dissolved once she started reviewing.
The Progression Ladder: Milestones That Open Each Stage
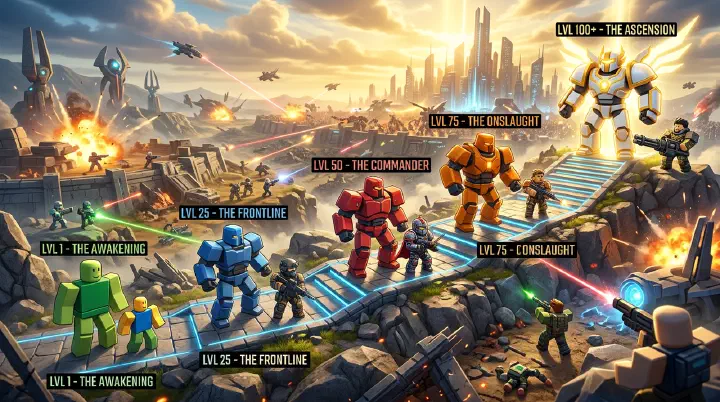
Think of BBF’s difficulty as a series of gates, and each gate has a skill you must own before it opens. The game never tells you these milestones — it just lets you walk into the wall. This is the ladder, with the exit condition that actually opens each stage.
| Stage | Skill milestone | Exit condition (promote when met) |
|---|---|---|
| Normal waves 1-25 | Two-Titan discipline — Cameraman 350, Speakerman 900, nothing else | 5 consecutive runs reaching wave 25 |
| Normal waves 26-50 | Upgrade timing + mini-map scan every 10-15 seconds | Wave 50 in 6 of your last 10 runs |
| Normal waves 51-90 | The four late walls — wave 66 double shield, 72 double spawn, 80 AoE boss, 85 HP spike | 3 consecutive wave-90 clears |
| Hard waves 1-90 | Compressed order (Drill Man by wave 12-14) + between-wave rotation | 3 consecutive Hard wave-90 clears |
| Nightmare | 2x-speed positioning, 0.5x-Cen discipline, manual heal rotation | Any wave-50+ clear |
Read that ladder as a sequence of habits, not a sequence of numbers. The wave-25 exit condition is not “reach wave 25 five times” — it is “buy exactly two Titans, every run, without being tempted.” The wave-90 exit condition is not “survive ninety waves” — it is “execute the order so many times that wave 72’s double spawn doesn’t surprise you.”
A scene for how this works in practice: you just hit your first wave-90 victory screen. The lobby timer is counting down and your cursor is already hovering over Hard mode. Stop. The habit you actually need to build — the compressed purchase order — is not in that screen. Queue Normal twice more, and on the second of those runs, simulate the Hard schedule: Drill Man at wave 14, everything else pushed earlier. Now the Hard attempt costs you nothing you haven’t already practiced.
The full pacing estimate — how many games each stage takes with focused play, and why skipping stages costs more games than it saves — lives in our BBF Complete Beginner to Pro Player Roadmap, where the 150-to-300-game math to Nightmare is broken down stage by stage. This guide is the what-and-when; that one is the how-many.
The Unlock Order and the Cen Math Behind It
The loadout ladder is the backbone of the entire progression. Every difficulty shift moves this ladder earlier or later, but never changes the sequence. Here it is with the reason each step exists — the buy wave is for Normal mode:
| Titan | Cost | Normal buy wave | Why this step exists |
|---|---|---|---|
| Titan Cameraman | 350 | 4-5 | Best damage-per-Cen in the game; center position beams both lanes |
| Titan Speakerman | 900 | 8-10 | Rapid fire tags swarms the single-target beam misses |
| Upgraded Cameraman | 2,500 | 20-25 | First power spike; the wave-25 boss is a single-target DPS check |
| Upgraded Speakerman | 3,200 | 30-35 | Second spike; base HP climbs past what the beam alone can kill |
| Titan TV Man | 3,800 | 40-45 | AoE + heal ability; enables chokepoint stacking farms |
| Titan Cineman | 4,200 | 45-55 | 15% vulnerability debuff — boss waves 50-80 need it |
| Titan Drill Man | 5,000 | 55-60 | Shield removal; the wave-66 double-shield wall is a Drill Man check |
| Upgraded TV Man | 6,500 | 60-65 | Final power spike; carries waves 72-90 |
Now the Cen math that makes the order self-enforcing. A full Normal 90-wave clear spends roughly 26,000-30,000 Cen in total. Each purchase in that ladder produces the income for the next: the 350-Cen beam earns the 900 Cen, the pair earns the 2,500, and so on. That is why skipping a step fails — the skipped unit was the income engine for everything after it.
Here’s the scene where players learn this the hard way: wave 40, you have 3,800 Cen, and the shop is showing two options side by side — Titan Cineman at 4,200, which you want for the boss waves coming, and Upgraded Speakerman at 3,200, which you’ve skipped. You buy Cineman first “because bosses matter more.” At wave 50 the boss has 30 percent more effective HP than your debuff-less lineup can chew through, and your un-upgraded Speakerman can’t hold the swarm lane. The order exists precisely because each purchase sets up the next; buying out of sequence turns every future wave into a check you can’t pass.
The detailed Cen sources — which waves pay the best, how stacking changes per-wave income, and the spend-vs-save decision tree — are in our BBF Cen Farming Guide. For the progression question, the only number that matters is that each ladder step must arrive on schedule or the next step arrives late, and “late” is always the wave where you die.
The Three-Question Test: Spend or Save
Here’s the decision framework that resolves every shopping dilemma in the game, from your second match to Nightmare.
The situation, concretely: it’s wave 19 on Normal. You have 1,450 Cen. Titan Cameraman is holding the center but wave 22 is a swarm wave and you’re nervous about it. The shop offers Large Cameraman at 650 — tankier, looks like a safety net — and your next real purchase, Upgraded Cameraman at 2,500, is still 1,050 away. Do you buy the safety net or save through the swarm?
Ask three questions, and buy only if you can answer yes to at least one:
- Does it earn Cen? Upgrades and AoE units increase kills per wave; anything else doesn’t.
- Does it stop an imminent leak right now? An actual leak costs 40-80 Cen per enemy plus lane HP. If the current wave will end your run without it, buy.
- Is it on the ladder? Is this unit in the table above, in sequence?
Large Cameraman fails all three: it doesn’t earn, the wave-22 swarm is a positioning problem not a tank problem, and it’s not on the ladder. The real math on the safety net: 650 Cen spent delays Upgraded Cameraman by roughly a wave and a half of farming, and every kill your un-upgraded lineup misses during those waves is more Cen lost. If your Cameraman is dying, the free fix is moving it forward one grid step for a longer beam window — repositioning costs zero and beats every 650-Cen answer in the shop.
The rule that falls out of the test: between waves 15 and 40, “should I buy a safety net?” almost always gets a no, because the only purchase that genuinely saves a run at that stage is the next ladder step, bought on time.
The second decision the framework resolves is the promote-or-farm call. You have limited session time: one more Normal 90 clear (guaranteed ~26,000 Cen at 1x), or your first Hard attempt (likely a wave-15 failure worth almost nothing, possible wave-50 success worth ~1.5x a Normal 60). The test doesn’t have a third question for this one — the answer is the exit conditions in the ladder table. Milestones met, attempt Hard. Milestones not met, farm Normal. The game is remarkably fair about this: it pays you exactly what you’ve proven you can survive.
What Feels Wrong but Is Right
Four rules of BBF progression that violate the instinct of every new player. Trust the mechanics, not the feeling.
1. Slowing down gets you to Nightmare faster. The fastest-feeling path is promoting at first clear and “learning by failing.” It is also the slowest: every failed Hard attempt before your milestones are met practices your weakest skills least, and earns almost no Cen. The three-consecutive-clears rule feels like procrastination — you’ve already proven you can clear! — but it’s consolidation. The third clear is where the order becomes automatic, and automatic beats impressive.
2. On Nightmare, your best lineup is the one the schedule allows — not the one you want. At 0.5x income, you cannot afford the full ladder plus comfort picks, and the game does not let you borrow. Players who arrive with Normal habits — buy everything, then upgrade — hit wave 40 with four un-upgraded Titans and no Cineman. The counter-intuitive part: on Nightmare, an un-upgraded ladder unit is a liability, not a placeholder. Skip the “nice to have” purchases entirely and your upgrades arrive on time.
3. Let enemies reach your chokepoint on farm waves. Everything in the game’s presentation says clear fast — kill at the spawn line, don’t let anything through. But on waves 25-45 with TV Man or Cineman on the field, letting swarms stack at a chokepoint means every ability cast and every beam sweep connects with more targets, and Cen per wave rises by roughly a third. Fast clearing is the instinct; stacked clearing is the income. The only caveat: don’t stack if your lineup is pure single-target — stacking then just becomes leaking.
4. The most expensive purchases in BBF are the cheap ones. Large Cameraman costs 650 Cen, and every new player buys it as a “starter.” It’s a dead-end — it upgrades into nothing — so its true cost is the 2,500 upgrade delayed by a wave and a half, plus everything the delayed upgrade fails to kill in between. Cheap units are expensive because they spend the same income as ladder units and produce zero progress. When you see a small price tag, read it as a warning.
Crossing the Gates: Normal to Hard to Nightmare
Each difficulty transition changes the game structurally, not just numerically. Here’s what to actually do at each gate.
Normal to Hard. Hard moves shielded enemies from wave 30 to wave 15, adds 40 percent enemy HP, and multiplies Cen by 1.5. The entire strategy shift is the Drill Man timing: 5,000 Cen that you previously had until wave 55 must now exist by wave 14. That single shift compresses every other purchase — Upgraded Cameraman lands at 18-20, Upgraded Speakerman at 28-30, TV Man at 35-38. The scene where you can feel the difference: wave 13 on Hard, you’re 1,200 Cen short of Drill Man, and the shop is showing Upgraded Cameraman at 2,500, tempting you to grab the upgrade first. Don’t. Shields are a hard stop; HP is not. The shield wall at 15 ends runs; the slightly weaker beam only slows them.
Hard to Nightmare. Nightmare doubles enemy speed, halves Cen income, brings armored shields at wave 8, and — the one nobody mentions before they lose — disables auto-heal. Three adjustments: position everything 30 percent closer to spawn points, because 2x speed halves your DPS window; buy Drill Man upgraded at wave 8-10 before any other expensive unit; and learn the manual heal rotation with TV Man’s heal on a 45-second cooldown. A full breakdown of every mechanical change, the adjusted order, and whether the Nightmare skins are worth the grind is in our BBF Nightmare Mode Guide.
The gate habit to build on Nightmare: set wave goals, not clear goals. Your first attempts will fail — the milestone is wave 30, then 40, then 50. That’s the whole game’s progression in miniature: not one big leap from Normal to Nightmare, but a ladder of small, named, practiced milestones, each one opening the next. Dana’s mistake wasn’t lack of skill. It was trying to climb the whole ladder in one jump. Don’t jump. Climb.