Last updated: June 19, 2026. This guide covers major bosses and raids in Blox Fruits as of Update 24, with locations, key drops, spawn mechanics, raid roles, awakening costs, and the phase-based survival habits that stop late-fight wipes.
Dough King is at 10% HP. Your Buddha player is still alive. Your Magma friend has been carrying damage all fight. Nobody is underleveled. Nobody forgot Instinct. On paper, this is the kind of team that should clear.
Then the arena fills with dough waves.
The first wave catches the Magma player because they used a movement skill for damage two seconds earlier. The Buddha tank panic-walks backward, dragging the boss across the arena instead of anchoring him. The support player tries to revive pressure by flying straight through the slow zone. Dough King turns, clips two players with the follow-up hitbox, and the last person dies while still typing “how?” in chat.
That wipe was not a fruit problem. It was a mechanics problem.
At 10% HP, many Blox Fruits bosses become more dangerous not because their stats suddenly become impossible, but because your team stops respecting the fight. Everyone sees the health bar low and dumps cooldowns. The boss enters its most punishing pattern. The tank loses aggro for three seconds. Damage players stand where they were safe in phase one. The whole run collapses faster than a bad trade.
This bosses and raids guide is written for that moment. You still get the locations, drops, raid basics, awakening costs, and farming routes, but the focus is no longer “bring Buddha and win.” The real question is: can your team survive the last 20% of the fight without turning a clean clear into a wipe?
Why Your “Meta” Team Keeps Wiping
A meta team is only a shortcut if everyone knows what the meta is supposed to do.
Buddha is strong because it can hold enemy attention, reduce incoming damage, and keep pressure on targets without needing perfect aim. Magma is strong because awakened Magma deletes bosses that stand still and punishes clustered enemies. Phoenix is strong because healing can reset mistakes between waves. Dough, Dragon, Kitsune, and other high-damage fruits are strong because they compress the fight timer.
None of that matters if the team plays like four solo farmers standing near each other.
Most wipes come from four mistakes:
- Phase ignorance. Players know the boss’s name and drop, but not the HP thresholds where the fight changes. They save no movement skill for the 50%, 25%, or final burn window.
- Aggro drift. The Buddha tank starts the fight in front, then circles too wide. The boss turns toward DPS players, and suddenly the safest role becomes the one eating the biggest hitbox.
- Cooldown greed. Damage players use mobility skills as part of their combo, then have nothing left when the one-shot or slow field appears.
- Stacking without a reason. Standing together feels safer, but many boss attacks punish stacked players. If one person gets clipped, everyone gets clipped.
The counter-intuitive advice: do less damage during the final 15% if your movement skills are not ready. That sounds wrong because everyone wants to finish quickly, but many Blox Fruits wipes happen when a team forces a boss into a dangerous phase while half the party has no dash, no Instinct charges, no transformation uptime, or no safe angle. Waiting three seconds for cooldowns can save a ten-minute spawn attempt.
A clean boss kill is not just maximum DPS. It is controlled DPS, predictable boss facing, and movement saved for the attacks that actually kill you.
Boss Mechanics Overview
Bosses in Blox Fruits generally fall into four practical categories:
- Field bosses roam a specific area and respawn after a timer. Examples include Gorilla King, Magma Admiral, Ice Admiral, and many island bosses. They are best for XP, materials, and repeated drop farming.
- Quest or trigger bosses appear when a player completes a requirement or starts a chain. Blackbeard, Don Swan-style encounters, and several progression bosses fit this pattern.
- Raid bosses appear at the end of raid instances. They are less about spawn camping and more about wave control, role discipline, and finishing the final island without a wipe.
- Sea event bosses spawn dynamically while sailing. Sea Beasts and other ocean encounters test boat positioning, ranged damage, and awareness more than classic island boss kiting.
Boss Drop Mechanics
Most bosses drop loot with specific probabilities. Drop rates are not affected by luck myths, server age, or doing a “last hit ritual.” Each kill is an independent roll. Farming a rare drop usually means repeating the fight until the math finally turns your way.
Key drop rules to remember:
- The player who deals the most damage is usually the safest candidate for loot credit.
- Other players who contribute damage may still get rewards, but the common farming etiquette is to rotate primary damage if multiple people need the same item.
- If you are helping a friend farm, avoid accidentally stealing top damage with a huge late combo.
- For low-rate drops, plan around expected kills, not hopes. A 5% drop can happen first try, but it can also take 30+ kills.
The Survival Framework: Position, Phase, Cooldown
Before any boss, ask three questions:
- Where should the boss face? If the boss has cones, pulls, waves, or frontal slams, the tank should point those away from the group.
- When does the fight change? If the dangerous phase starts at low HP, slow down before pushing into it.
- Which cooldown is reserved for survival? Every player should keep at least one dash, mobility move, transformation reset, or escape option for the boss’s biggest attack.
This framework matters more than memorizing every number in the game. A slightly under-optimized team that respects phases clears more often than a stacked team that burns everything on cooldown.
Essential Boss Location and Drop Reference
Keep this table as a quick reference, then use the sections below for survival notes.
| Boss | Sea / Location | Key Drops or Purpose | Main Danger |
|---|---|---|---|
| Gorilla King | First Sea / Jungle | Early XP, Beli | Basic melee pressure |
| Yeti | First Sea / Frozen Village | Yeti Fur material | Charge attack |
| Wysper | First Sea / Upper Skylands | Shisui, Wysper Mask | Airborne wind attacks |
| Magma Admiral | First Sea / Magma Village | Magma Core, coat | Ground magma pools |
| Fishman Lord | First Sea / Underwater City | Trident, crown | Wide arcs, movement penalty |
| Blackbeard | First Sea / Fountain City | Second Sea unlock | Dark pull into Quake phase |
| Don Swan | Second Sea / Prison | Swan Glasses, ship rewards | Heavy melee hits |
| Diamond | Second Sea / Flower Hill | Wando chance, cosmetics | Damage reduction, charges |
| Jeremy | Second Sea / Kingdom of Rose | Observation-related progression, coat | Wind slash combos |
| Ice Admiral | Second Sea / Ice Castle | Rengoku, coat, progression | Freeze into burst |
| Awakened Ice Admiral | Second Sea / quest spawn | Third Sea gate, materials | Stronger freeze chains |
| Cursed Captain | Third Sea / Cursed Ship | Cursed materials, cosmetics | Minions and dark pressure |
| Dough King | Third Sea / trigger spawn | Dough Core, Mirror Fractal | Dough waves, slow zones |
| Rip Indra | Third Sea / quest chain | Valkyrie Helmet, Dark Dagger | Speed, burst, arena pressure |
| Sea Beast | Ocean event | Sea Beast Drops, fragments | Frontal cone and boat pressure |
First Sea Bosses
Gorilla King
Gorilla King is the first boss most players fight, and his job is simple: teach you that bosses have more health and wider attacks than normal enemies.
- Location: Jungle, near the treehouse.
- Level: Around 20.
- Key drops: No important rare drop; mainly early XP and Beli.
- Danger: Basic melee pressure if you stand still too long.
- Survival note: Circle him instead of face-tanking if your Defense is low. This is where new players should learn not to spend the whole fight locked in place.
The fight is easy, but the habit matters. If you learn early to attack, reposition, and attack again, later bosses feel much less chaotic.
Yeti
Yeti is an optional Frozen Village boss with a simple but useful lesson: a boss that looks slow can still punish players who attack in a straight line.
- Location: Frozen Village, in the cave behind the village.
- Level: Around 150.
- Key drops: Yeti Fur material at a low-to-moderate rate.
- Danger: Charge attack and moderate burst if you are underleveled.
- Best approach: Use AOE from outside his swing range, then move sideways after each skill.
Do not run directly away from Yeti during a charge. Side movement is safer than backing up because many boss attacks cover forward distance better than lateral space.
Wysper
Wysper matters because of Shisui, one of the legendary swords tied to True Triple Katana progression. He also teaches a different skill: fighting enemies that do not stay neatly on the ground.
- Location: Upper Skylands, top level.
- Level: Around 325.
- Key drops: Shisui at a low rate and Wysper Mask at a higher cosmetic rate.
- Danger: Airborne wind attacks and awkward camera angles.
- Recommended tools: Ranged abilities, a Logia fruit for safer farming, and enough healing to survive chip damage.
Wysper strategy:
- Keep the camera unlocked enough that you can track his height.
- Do not stand under him if your fruit has slow vertical aim.
- Use ranged skills after he commits to a wind attack, not before.
- If you are farming Shisui, expect a real grind. Plan around 15–25 kills, not one lucky spawn.
Magma Admiral
Magma Admiral is the First Sea boss that punishes bad ground awareness. His damage is not just the hit; it is the space he denies afterward.
- Location: Magma Village.
- Level: Around 525.
- Key drops: Magma Core material and Magma Admiral coat.
- Danger: Persistent magma pools and high close-range damage.
- Best approach: Fight at range, then rotate around the edge of the arena instead of crossing through magma zones.
Magma Admiral strategy:
- Treat every pool as a wall, not as minor damage.
- Ranged users should kite in a wide circle instead of backing into corners.
- Buddha users can tank more than most players, but should still avoid standing in overlapping pools.
- Magma Cores are important for later fighting style upgrades, so farming him cleanly saves time.
Counter-intuitive note: Magma users should not always stand still just because the fruit has strong ground damage. If the boss’s own magma zones force your path, move first and cast second.
Fishman Lord
Fishman Lord is less about raw difficulty and more about awkward movement. Underwater positioning makes normal dodge instincts feel worse.
- Location: Underwater City, central chamber.
- Level: Around 650.
- Key drops: Trident and Fishman Crown.
- Danger: Wide melee arcs and reduced underwater movement.
- Preparation: Equip the Diving Mask or use movement tools that reduce the underwater penalty.
Fishman Lord strategy:
- Do not enter with a nearly empty health bar from the trip down.
- Use Buddha transformation if available; damage reduction compensates for reduced mobility.
- Magma players can use water-walking advantages from above and rain attacks down where possible.
- Watch oxygen if your setup requires it. A boss fight plus environmental pressure is how players make basic mistakes.
Blackbeard (First Sea)
Blackbeard is the gatekeeper to Second Sea. He is not the hardest boss mechanically, but he is the first fight where phases matter to progression.
- Location: Fountain City, central fountain area.
- Level: Around 750.
- Key purpose: Required to unlock Second Sea.
- Phase 1 danger: Dark fruit pull and slow pressure.
- Phase 2 danger: Quake shockwaves with delayed burst.
Blackbeard strategy:
- In the Dark phase, stay at mid-range. Too close and the pull ruins your spacing; too far and you lose damage windows.
- When Quake attacks start, stop tunnel-visioning the health bar. Watch for the delayed detonation, then dodge after the tell appears.
- Buddha transformation makes the fight easier, but it does not excuse standing inside every shockwave.
- Bring healing and do not push the final phase while your escape skill is down.
Second Sea Bosses
Don Swan
Don Swan is a Second Sea prison boss with heavy melee pressure. His drops are useful but not mandatory for every build.
- Location: Prison, lower level.
- Level: Around 820.
- Key drops: Swan Glasses, Swan Ship-related rewards.
- Danger: Big melee hits if you let him stay glued to you.
- Best approach: Kite around obstacles, punish after his committed swings, and avoid letting him corner you.
If you are helping someone farm Don Swan, rotate damage control clearly. Players often lose credit because a higher-level helper casually melts the boss near the end.
Diamond
Diamond is a patience check. His damage reduction makes him feel slower to kill, so players get greedy and eat charges.
- Location: Flower Hill.
- Level: Around 910.
- Key drops: Longsword-style rewards, Diamond Helmet, and a low Wando chance depending on progression context.
- Danger: Charging attacks and extended time-to-kill.
- Best approach: Use consistent damage, not risky burst windows.
The safest Diamond pattern is boring: bait, sidestep, punish, reset. If you try to rush through his reduction, you usually take more damage than you save in time.
Jeremy
Jeremy is important because he sits near Observation Haki progression for many players, and his wind slashes punish straight-line movement.
- Location: Kingdom of Rose.
- Level: Around 970.
- Key drops: Black Spikey Coat and Observation-related progression items depending on your quest state.
- Danger: Wind slash combos that chain if you keep moving predictably.
- Best approach: Move diagonally, not straight back.
Jeremy strategy:
- Keep moving, but vary direction after each attack.
- Save Instinct dodges for the combo starter, not the final hit.
- Do not leave Second Sea without sorting your Observation Haki progression; it affects nearly every later boss and raid.
Fajita
Fajita is mostly a progression boss. He does not define a build, but he does punish players who treat every mid-game boss like a training dummy.
- Location: Green Zone.
- Level: Around 1,050.
- Key drops: Fajita Mask and progression rewards.
- Danger: Straightforward but punishing attacks if you are careless.
- Best approach: Maintain spacing, use your best AOE, and reset when low instead of forcing a risky finish.
Ice Admiral
Ice Admiral is a major milestone because of Rengoku and Third Sea progression. His freeze effects are dangerous because they turn one mistake into several hits.
- Location: Ice Castle, throne room.
- Level: Around 1,300.
- Key drops: Rengoku and Ice Admiral Coat.
- Danger: Freeze into burst damage.
- Progression note: You also deal with Ice Admiral-related requirements while moving toward Third Sea access.
Ice Admiral strategy:
- Fight at a range where you can see freeze tells clearly.
- Keep a mobility tool ready; do not spend every dash to gain tiny damage windows.
- If frozen once, assume the follow-up is coming and prepare to escape as soon as control returns.
- Rengoku farming often takes 7–15 kills, so prioritize a repeatable safe pattern over a flashy fast one.
Smoke Admiral (Hot and Cold)
Smoke Admiral is tied to Bisento V2-style progression and uses smoke pressure that can make the battlefield feel unclear.
- Location: Hot and Cold, cold side.
- Level: Around 1,400.
- Key purpose: Bisento V2-related upgrade progress.
- Danger: Smoke abilities that obscure spacing and punish close-range greed.
- Best approach: Keep him in open space and avoid fighting against walls where smoke pressure limits your escape path.
Awakened Ice Admiral
Awakened Ice Admiral is the stronger progression gate version of Ice Admiral. If normal Ice Admiral teaches freeze awareness, this fight checks whether you actually learned it.
- Location: Ice Castle, spawned through progression requirements.
- Level: Around 1,500.
- Key purpose: Third Sea gate and rare materials.
- Danger: Stronger freeze chains, higher damage, and less room for lazy recovery.
- Best approach: Treat every freeze as a possible death setup. Reset spacing after each major attack instead of continuing your combo immediately.
The most common mistake here is entering with good gear but no patience. If your goal is Third Sea, a slow clear still counts. A fast wipe does not.
Third Sea Bosses
Cursed Captain
Cursed Captain is a Third Sea boss with pressure from both the boss and the environment. The Cursed Ship is also linked to several advanced weapon journeys, including Tushita and CDK-related progression.
- Location: Cursed Ship interior.
- Level: Around 1,650.
- Key drops: Cursed materials and cosmetics.
- Danger: Dark attacks plus ghost/minion pressure.
- Best approach: Clear extra pressure before committing to long boss combos.
Cursed Captain strategy:
- Do not let summons or nearby enemies chip you down while you tunnel the boss.
- Keep your back away from corners.
- If farming materials, use a route that lets you reset safely between spawns.
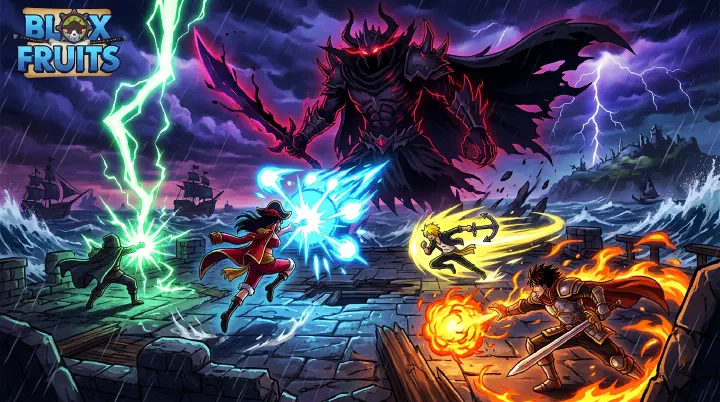
Dough King
Dough King is where many “perfect” teams discover they are not actually coordinated. The fight is punishing because Dough attacks control space, slow movement, and create panic during the last stretch.
- Location: Third Sea, spawned through a specific trigger chain.
- Level: Around 2,000.
- Key drops: Dough Core for Dough awakening progress and Mirror Fractal for top-tier upgrades.
- Danger: Dough waves, slow zones, large awakened hitboxes, and late-fight panic.
- Recommended team: 2–4 players with one clear tank and at least one reliable ranged damage source.
Dough King survival plan:
- Assign a Buddha tank before the fight starts. The tank’s job is not just to survive; it is to keep the boss facing away from the team.
- DPS players should stand off-angle, not directly behind the tank. If the boss turns, they need a lateral escape path.
- At roughly the final 20%, stop dumping every cooldown. Confirm everyone has movement or Instinct available before the final push.
- When dough zones appear, move sideways out of the danger first. Do not cast a long animation while standing inside a slow.
- If the tank loses aggro, DPS should stop attacking for a moment instead of competing for attention.
This is the fight where “more damage” often makes the group worse. If you push Dough King into the final pattern while the arena is already badly placed, you are choosing a wipe. Reposition, breathe, then burn.
Rip Indra
Rip Indra is one of the most prestigious endgame fights because the margin for error is small. He is fast, hits hard, and punishes players who rely only on stats.
- Location: Third Sea, spawned through a quest chain.
- Level: Around 2,500.
- Key drops: Valkyrie Helmet and Dark Dagger at low rates.
- Danger: Speed, burst damage, and constant pressure.
- Recommended group: Four coordinated players with strong Haki, one durable frontliner, and ranged DPS that can attack without stealing bad aggro.
Rip Indra strategy:
- Decide who leads the fight before the spawn. Random public groups often fail because everyone assumes someone else is controlling tempo.
- Save defensive options for his burst windows, not for minor chip damage.
- If one player dies, the rest should widen spacing instead of stacking on the corpse area.
- Expect multiple attempts while learning. Wiping once is normal; wiping the same way five times means the team has not identified the mechanic.
Raids: The Part People Over-Simplify
Raids are instanced combat challenges that reward Fragments, the currency used for fruit awakening. Each raid is themed after a specific Devil Fruit type, and each one pushes the same fundamentals: clear waves, preserve health, control final island chaos, then defeat the awakened boss.
Raid basics:
- Players: 2–4 is the normal range. Solo is possible for some raids but not realistic for every build.
- Duration: Usually 10–20 minutes depending on party strength and coordination.
- Structure: Five islands. Early islands are wave clears; the final island includes the dangerous boss encounter.
- Failure condition: A full party wipe.
- Rewards: Fragments, fruit awakening progress, and occasional extra drops depending on the raid.
How to Start a Raid
- Go to a raid portal in Second Sea or the relevant raid area for your progression.
- Talk to the Mysterious Scientist NPC.
- Insert a Raid Chip, usually bought with Beli or traded for a fruit.
- Wait for other players to join if you are grouping.
- Ready up and begin.
Raid Difficulty Reference
This compact table is worth keeping because raid choice affects fragment planning.
| Raid | Difficulty | Recommended Level | Fragment Reward | Best For |
|---|---|---|---|---|
| Flame | Easy | 700+ | 200–400 | Beginners, Flame awakening |
| Ice | Easy | 700+ | 200–400 | Ice awakening, fast practice |
| Dark | Medium | 900+ | 300–500 | Dark awakening |
| Quake | Medium | 900+ | 300–500 | Quake awakening |
| String | Medium | 1000+ | 400–600 | String awakening |
| Rumble | Medium-Hard | 1100+ | 400–600 | Rumble awakening |
| Paw | Medium-Hard | 1100+ | 500–700 | Paw awakening |
| Spider | Hard | 1200+ | 500–700 | Spider awakening |
| Phoenix | Hard | 1300+ | 600–800 | Phoenix awakening |
| Buddha | Hard | 1300+ | 600–800 | Buddha awakening |
| Dough | Very Hard | 1500+ | 800–1,500 | Dough awakening, high fragment rate |
Raid Roles That Actually Work
Buddha Tank
Buddha is the most important raid role because it turns chaotic enemy waves into something predictable.
- Fruit: Buddha, transformed whenever serious damage starts.
- Stats: Heavy Melee and Defense, with fruit points only if your build requires them.
- Fighting style: God Human, Sharkman Karate, or another reliable close-range style.
- Job: Hold the center, keep enemies grouped, absorb pressure, and avoid dragging mobs through your DPS players.
The tank should not chase every scattered enemy. If the Buddha runs in circles, the whole raid becomes harder for everyone else.
DPS
DPS players are there to shorten the fight without making it unstable.
- Fruits: Dragon, Dough awakened, Kitsune, Magma awakened, or other strong AOE options.
- Stats: High Blox Fruit, enough Defense to survive mistakes, enough Melee for energy.
- Job: Attack from behind or off-angle, clear grouped mobs, and save movement for boss mechanics.
Good DPS is not just bigger numbers. Good DPS knows when to stop attacking so the tank can regain control.
Hybrid or Support
Support is not mandatory in easy raids, but it becomes valuable when the group is learning harder content.
- Fruit: Phoenix is the obvious healing option, but any build that can rescue bad situations counts.
- Stats: Enough Defense to survive while helping, not just maximum fruit damage.
- Job: Heal between waves, clean up stragglers, help low players reset, and avoid becoming the first death.
Raid Wave Survival
Instead of memorizing a table, think of raids as five escalating checks:
- Island 1: Warm-up. Clear quickly, but do not waste transformation uptime if you can avoid it.
- Island 2: Mixed enemies. Start grouping mobs around the tank.
- Island 3: Stronger enemies. DPS should stop standing inside the pack just to land one extra ability.
- Island 4: Mini-boss pressure. Treat this as a rehearsal for the final island: tank faces the threat, DPS stays off-angle.
- Island 5: Main boss. Slow down, reset cooldowns, and enter the boss phase with health and movement available.
Final Island Boss Counters
- Flame raid boss: Meteor-style pressure rewards constant movement. Do not stack tightly.
- Ice raid boss: Freeze chains punish players who hold still. Buddha can absorb some pressure, but others should keep distance.
- Dark raid boss: Black hole pulls punish players who drift too close to the center. Back out early, not after you are already trapped.
- Dough raid boss: Dough prison and wave pressure punish panic casting. Move first, attack second.
Fruit Awakening
Awakening upgrades a fruit’s abilities into stronger versions with higher damage, better utility, or new effects. The usual loop is simple: own the fruit, complete its raid, spend Fragments, then unlock abilities in sequence.
Awakening requirements:
- You must own or use the relevant fruit for the awakening path.
- You must complete the appropriate raid type.
- Each awakened ability costs Fragments.
- Abilities usually unlock in order, such as Z into X into C and beyond, depending on the fruit.
Awakening Cost Reference
| Fruit | Total Fragments for Full Awakening | Typical Raid Completions |
|---|---|---|
| Flame | 10,000 | 20–30 |
| Ice | 12,000 | 25–35 |
| Dark | 14,000 | 30–40 |
| Quake | 14,000 | 30–40 |
| String | 16,000 | 35–45 |
| Rumble | 16,000 | 35–45 |
| Dough | 20,000 | 45–55 |
| Buddha | 18,000 | 40–50 |
Example Dough awakening sequence:
- Awaken Z ability for the first major damage upgrade.
- Awaken X for stronger control.
- Awaken C for better range and threat.
- Awaken V for the huge AOE payoff.
The exact feel of each awakening depends on your build, but the planning lesson is the same: do not spend all your Fragments randomly if you are targeting one specific fruit.
How to Farm Fragments Efficiently
Fragment farming works best when you choose the hardest raid your team can clear consistently, not the hardest raid your team can theoretically enter.
- Solo Flame or Ice raids: Slow, but useful if you want independence and basic raid practice.
- Grouped Flame or Ice raids: Good early farming because clears are reliable and failures are rare.
- Grouped Dough raids: Best fragment rate when the group is competent, but a bad group can waste more time than it saves.
- Daily quests: Low effort. Do them while you are waiting for groups or boss spawns.
- Sea events: Good incidental fragments while sailing, especially if you are already farming materials.
Consistency beats difficulty. Three clean medium raids are better than one failed hard raid and 20 minutes of blaming teammates.
Sea Events
Sea Events are dynamic encounters that happen while sailing. They provide XP, Fragments, and rare materials, and they reward a different kind of positioning than island bosses.
Sea Beast
Sea Beast is the most common and valuable ocean event for many players.
- Spawn location: Random ocean location in Second or Third Sea.
- HP: Roughly 300,000–500,000 depending on scaling and context.
- Drops: Sea Beast Drops, XP, and Fragments.
- Recommended level: 700+ for Second Sea attempts, 1500+ for Third Sea comfort.
- Danger: Frontal cone pressure, boat damage, and players falling into bad positions.
Sea Beast hunting strategy:
- Equip Magma for water control or use a fast boat with cannons.
- When the spawn message appears, travel to the marked location without splitting the group too far.
- Approach from the side because frontal attacks are the most punishing.
- Stay close enough to deal damage, but do not park the whole team in the same cone.
- Collect drops, repair or reset as needed, then move to the next event.
Sea Beast Drops are essential materials for several upgrades including God Human, Dark Blade V3, and various V2 fighting styles.
For open-world sea content, our Blox Fruits Sea Events & Raids Guide covers Sea Beast farming, Rumbling Waters, Factory Raid rewards, and all world boss drop tables.
Optimal Boss Farming Routes
For Materials
Use these routes when you are leveling fighting styles or collecting upgrade materials:
- Magma Core: Farm Magma Admiral in First Sea. Expect a repeated route of roughly 10–15 kills depending on drop luck.
- Fish Tail / underwater materials: Farm Fishman Lord and nearby content in First Sea as needed.
- Electric Core-style farming: Check Thunder God and Skylands-related routes if your upgrade path requires it.
- Sea Beast Drop: Farm Sea Beasts in any eligible sea. Plan around 10–15 events for larger material goals.
- Third Sea materials: Use Hydra Island NPCs and boss routes depending on the item. Not every material is boss-specific.
Material farming tip: rotate bosses by respawn timer instead of standing still. If you only camp one spawn, you waste time between kills.
For Sword Drops
- Shisui: Farm Wysper in First Sea. Expect a low drop rate and many attempts.
- Rengoku: Farm Ice Admiral in Second Sea. This is one of the most valuable mid-to-late progression grinds.
- Wando: Farm the appropriate Second Sea bosses tied to your route, such as Diamond or Jeremy depending on availability and progression.
- Tushita: Follow the Third Sea sword quest chain and related skeleton/boss requirements.
Sword farming tip: if a friend is helping, decide who should top-damage before the fight starts. Otherwise the helper may accidentally steal the roll you are farming for.
For Rare Cosmetics
- Swan Glasses: Don Swan.
- Black Spikey Coat: Jeremy.
- Valkyrie Helmet: Rip Indra.
- Ice Admiral Coat: Ice Admiral.
Cosmetic farming is where patience matters most. These drops feel worse because they do not always improve your power while you wait, so combine cosmetic attempts with XP, money, or material goals when possible.
Raid Build Recommendations
A good raid build has a job. Do not copy a fruit tier list without knowing what job you are filling.
- Tank build: Buddha, God Human or Sharkman Karate, high Defense, strong Haki, and a sword like CDK or Rengoku if it fits your progression. Your purpose is control.
- DPS build: Dragon, awakened Dough, awakened Magma, Kitsune, or another strong damage fruit. Your purpose is safe damage from a controlled angle.
- Support build: Phoenix or another stabilizing setup. Your purpose is preventing one mistake from becoming a wipe.
- Hybrid build: Awakened Magma or Buddha variants that can tank some damage while still contributing clear speed. Your purpose is flexibility.
If your group already has two greedy DPS players, the best third player is often not another top-tier fruit. It is someone willing to stabilize the run.
Frequently Asked Questions
Q: Can I solo raids? Yes, but only easier raids such as Flame and Ice are realistic for most players. Harder raids, especially Dough, are much more consistent with a group.
Q: What is the fastest way to farm Fragments? Grouped Dough raids with a competent Buddha tank and strong DPS can reach the best fragment rates. If your group wipes often, drop to easier raids until clears are consistent.
Q: Do boss drops scale with level? No. A lower-level player and a max-level player have the same listed drop chance from the same boss. Higher level only makes the kill easier.
Q: Can I trade boss drops? Some items are tradeable, while quest items and unlock items often are not. Check the item description in-game before planning a trade route.
Q: How many raid chips do I need for a full awakening? Each raid activation requires one chip. A fruit like Dough can require around 45–55 successful raid completions for full awakening, so plan a large chip budget.
Q: What happens if I fail a raid? The raid resets and you can try again. The real cost is time, momentum, and sometimes group patience.
Q: Do I need to be max level to beat Rip Indra? Max level helps, but coordinated level 2,200+ players with strong gear and good Haki can contribute. Coordination matters more than one player’s level number.
Q: Should every raid group have Buddha? For hard raids, yes, Buddha makes life dramatically easier. But Buddha is not magic. A bad Buddha tank who drags enemies across the map can make the raid harder than a disciplined non-Buddha group in easier content.
Final Thoughts
Boss hunting and raiding are the core endgame loop in Blox Fruits. You farm bosses for swords, materials, cosmetics, and progression gates. You run raids for Fragments and awakenings. You sail for Sea Beasts and event materials. The rewards matter, but the pattern behind the fights matters more.
For most players, the progression path is:
- Farm First Sea bosses for early materials, XP, and basic mechanics practice.
- Clear Blackbeard and move into Second Sea.
- Farm Ice Admiral for Rengoku and learn freeze discipline.
- Run Flame and Ice raids for fragment practice.
- Move into harder raids only when your team can clear consistently.
- Farm Third Sea bosses for advanced materials and weapon progression.
- Treat Dough King and Rip Indra as mechanics fights, not just damage races.
If you keep wiping with a “perfect” team, stop asking which fruit is missing. Ask who is holding aggro, who is saving movement, and which phase keeps killing you. That is usually where the real answer is.
Check our Fruits Tier List for which fruits are worth awakening, and our Leveling Guide for the fastest way to reach raid-ready levels.