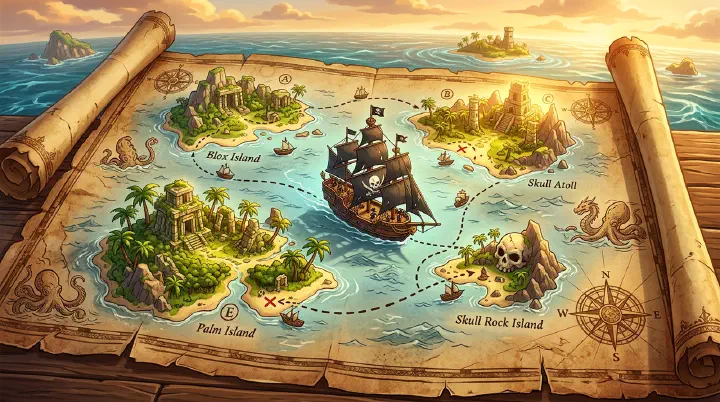
You just hit level 432. The Colosseum fighters were giving decent XP, but the quest felt slow. You looked at the map, picked an island to the east that looked green and inviting, and sailed. The dock was peaceful. A few NPCs wandered around. You ran up to the first quest giver, mashed the interact key, and accepted the quest. Then a skeleton with a scythe turned around. Level 950. Your health bar emptied before your abilities came off cooldown. You died on the loading dock.
You sailed to the wrong sea. Not the wrong island — the wrong sea entirely. The Graveyard sits in Second Sea territory, and you were still wearing First Sea gear. Blox Fruits does not flash a red warning. No quest giver says “come back at level 700.” The map shows islands as pretty dots, not level ranges. The game expects you to know that sailing east from the Colosseum at level 432 is a death sentence.
This guide is the map the game forgot to include. Every island in all three seas. Every level range. Every quest NPC, boss spawn, hidden utility vendor, and the exact sailing order that keeps you alive.
Why Players Get Lost and Die in Blox Fruits
Blox Fruits looks like a casual exploration game until it is not. The open ocean invites curiosity, and curiosity kills more players than any boss. Here are the five mistakes that trap players on the wrong island.
Sailing by sight instead of level range. The in-game map shows island shapes and names, but never the recommended level. A level 300 player sees Magma Village on the horizon and thinks “volcano island, cool.” They dock, step onto lava rock, and meet level 525 NPCs who treat them like kindling. The rule is simple: if you do not know the level range, do not dock.
Skipping small islands with progression-locked NPCs. The Frozen Village looks like a pit stop between Desert and Marine Fortress. Players sail past it, miss the Ability Teacher, and arrive at Skylands with no Busoshoku Haki. Suddenly every angel ignores their Logia intangibility, and they have no idea why. That one skipped village costs hours of confusion.
Chasing bosses before checking the neighborhood. You heard Wysper drops Shisui, so you ride the geyser to Skylands at level 250. Wysper is level 325. The angels around him are level 275. You cannot even clear the trash mobs to reach his spawn point. Boss hunting without level-appropriate gear is just a fast way to test the respawn timer.
Ignoring one-way sea gates. You hit level 700, defeat Blackbeard, and teleport to Second Sea. Then you remember you never bought the Diving Mask, never finished the Jeremy quest chain, and left 200,000 Beli unspent in First Sea. Too late. You cannot casually sail back. The sea transition is a commitment, not a day trip.
Assuming bigger islands mean better quests. Magma Village is visually massive. The Underwater City is compact and hard to navigate. Players flock to Magma Village because it looks important, while ignoring the Underwater City until they realize its quests bridge the 550–700 gap more efficiently. Size is not value in Blox Fruits.
First Sea Island Progression: Levels 1–700
The First Sea is your training ground. It spans twelve major islands and teaches you the core loop: quest, grind, sail, repeat. Follow this order. Do not skip ahead.
| Island | Level Range | Quest NPC Location | Key Boss | Critical Notes |
|---|---|---|---|---|
| Starter Island | 1–10 | Near spawn point | None | Bandits are your first targets. Grab every quest before killing. |
| Jungle | 10–35 | Near the bridge entrance | Gorilla King | Monkeys cluster together — great for early AOE. Dark Step teacher is here (150k Beli). |
| Pirate Village | 35–50 | Center of village | None | Pirates have moderate damage. Logia users are effectively immune. |
| Desert | 50–100 | Near the oasis | None | Enemies spread wide — gather aggro by running through the camp first. |
| Frozen Village | 100–150 | Village center | Yeti | Ability Teacher sells Busoshoku Haki for 25k Beli at level 100. Mandatory. |
| Marine Fortress | 150–200 | Behind the main fortress | None | Marines are tightly packed behind the building — excellent AOE farming. |
| Skylands | 200–325 | Upper Skylands | Wysper (Upper Skylands, ~325) | Ride the Frozen Village geyser to access. Best enemy density in First Sea. |
| Prison | 300–375 | Inside the prison complex | None | Guards and prisoners roam close together. Watch for high-level roamers. |
| Colosseum | 375–450 | Arena entrance | None | Fighters are tightly packed. Excellent Buddha M1 territory if you have it early. |
| Magma Village | 450–550 | Village center | Magma Admiral (~525) | Persistent magma pools punish standing still. Kite in wide circles. |
| Underwater City | 550–700 | Central chamber | Fishman Lord (~650) | Buy Diving Mask (2,500 Beli) near Frozen Village first. |
| Fountain City | 700 | Central fountain | Blackbeard (~750) | Required to unlock Second Sea. Bring food and Haki. |
Key NPCs you cannot miss in First Sea:
- Ability Teacher (Frozen Village): Sells Busoshoku Haki at level 100. This is not optional. Without it, Second Sea mobs and many bosses ignore your Logia intangibility.
- Dark Step Teacher (Jungle): 150,000 Beli. Your first fighting style upgrade.
- Sword Dealer (Pirate Village): Sells basic blades. Upgrade here if you are still using the starter sword.
- Diving Mask Seller (Near Frozen Village): 2,500 Beli. Required for Underwater City. Buy it the moment you see it.
First Sea boss priorities:
Kill Gorilla King once for early XP. Ignore him after that. Yeti drops Yeti Fur, which matters for some crafting but is not urgent. Wysper drops Shisui, a legendary sword component, but only farm him when you are level 325+ with decent gear. Magma Admiral drops Magma Cores for later upgrades — come back at level 550+ to farm him comfortably. Fishman Lord drops the Trident and crown; clear Underwater City quests first, then fight him with a group if possible. Blackbeard is your gatekeeper exam. He has two phases: Dark fruit pulls, then Quake shockwaves. Stay at mid-range, save movement for Phase 2, and bring healing.
Second Sea Island Progression: Levels 700–1500
Second Sea is where Blox Fruits opens up. The level range is more than double the entire First Sea, and the islands are less linear. Land at Kingdom of Rose and do not rush.
| Island | Level Range | Quest NPC Location | Key Boss | Critical Notes |
|---|---|---|---|---|
| Kingdom of Rose | 700–850 | Town center | Diamond (~910), Jeremy (~970) | Main hub. Stay here until 825+ to adjust to Second Sea pacing. |
| Green Zone | 850–950 | Hidden hut area | Fajita (~1050) | Master of Auras NPC lives here. Buy aura upgrades immediately. |
| Graveyard | 950–1050 | Central crypt | Cursed Captain (night) | Small island. Required quest chain for later Underwater City access. |
| Snow Mountain | 1050–1150 | Mountain base | None | Snow troopers have wide AOE. Pull smaller groups until comfortable. |
| Hot and Cold | 1150–1250 | Lab building (cold side) | Smoke Admiral (~1400) | Science weapon vendor here. Buy one even if you do not use it — counts toward Superhuman unlock. |
| Cursed Ship | 1250–1400 | Ship deck (night) | Cursed Captain (night) | Elite Pirates drop Fragments. Farm here nightly even if you do not need Fragments yet. |
| Ice Castle | 1300–1425 | Throne room entrance | Ice Admiral (~1300) | Compact grind zone. Many players park here for several levels. |
| Forgotten Island | 1350–1425 | Tribal camp | Tide Keeper | Long Arm Tribe quest chain finishes here. Fast melee mob combos. |
| Haunted Castle | 1425–1500 | Castle courtyard | None | Final Second Sea bridge. Quests here lead into Third Sea transition. |
Second Sea utility NPCs:
- Observation Haki Teacher (Kingdom of Rose area): Unlocks Observation Haki. Kill Jeremy or buy directly.
- Master of Auras (Green Zone): Sells aura upgrades that increase damage against aura-using enemies. Most Second Sea mobs use aura — this upgrade is invisible power.
- Sabo / Dragon Breath Teacher (Near Kingdom of Rose): Starts the Dragon Breath fighting style quest if you are pursuing fighting styles.
- Mysterious Scientist (Raid portals): Sells Raid Chips for 100k Beli or 1 fruit. Your gateway to Fragment farming.
Sea transition note: At level 1500, defeat the Awakened Ice Admiral at Ice Castle. An NPC spawns that transports you to Third Sea. Before you go, ensure you have at least 8,000 Fragments stockpiled and your fruit mastery is near max. Third Sea mobs are tankier, and slower mastery gains there feel painful.
Third Sea Island Progression: Levels 1500–2600
Third Sea is endgame territory. Enemies have high HP, hit hard, and the islands demand efficient grinding. Buddha transformation or strong AOE fruit is nearly mandatory here.
| Island | Level Range | Quest NPC Location | Key Boss | Critical Notes |
|---|---|---|---|---|
| Port Town | 1500–1700 | Town docks | None | Gentle introduction to Third Sea. Standard Buddha M1 farming works. |
| Hydra Island | 1700–1900 | Island camp | None | High HP but slow enemies. Home to the Yama puzzle and CDK progression. |
| Great Tree | 1900–2100 | Base of the tree | None | Vertical area with multiple platform levels. Watch your footing. |
| Floating Turtle | 2100–2300 | Turtle shell interior | None | Best grinding spot in the game. Tight quarters, excellent density. |
| Haunted Castle | 2300–2450 | Castle halls | None | Hard-hitting ghosts. Keep food in hotbar. Major bone farming spot. |
| Sea of Treats | 2450–2550 | Candy fields | None | Open area with moderate density. Good for the final stretch. |
| Tiki Outpost | 2550–2600 | Outpost center | None | Highest-level non-boss enemies. Slow kills even with Buddha. Home stretch. |
Third Sea priorities:
Upon arrival, head to Hydra Island and begin the Temple of Time puzzle for Observation Haki V2. Find the Ancient Monk NPC to start the God Human fighting style quest if that is your goal. Floating Turtle is where you will spend the most time — do not rush past it. Many players leave at 2300 for Haunted Castle, but Floating Turtle’s density is superior until 2300. Sea of Treats and Tiki Outpost are patience checks. Kills are slower, but the XP per quest completion is the highest in the game.
Counter-Intuitive Island Tips That Save Hours
The smallest island in Second Sea unlocks your biggest shortcut. Graveyard Island looks like a decorative pit stop. It is not. The Cursed Captain quest chain here is required to unlock Underwater City access later. Skip Graveyard and you will be backtracking through Second Sea content you outleveled, wasting hours for a quest you could have finished naturally.
Stay in First Sea to max your fruit before crossing. If your fruit is within 50 mastery of its cap, finish it in First Sea. Second Sea mobs are tankier, which means slower kills, which means slower mastery gains. A fully mastered fruit entering Second Sea makes the 700–850 transition dramatically smoother.
Hot and Cold’s cold side is the better grind spot. Everyone rushes to the lava half because it looks cooler. The cold side enemies are slightly easier to kill, spawn closer together, and are less crowded with other players. The temperature effect is purely visual.
Floating Turtle beats Haunted Castle even after you outlevel it. Many players leave Floating Turtle at 2300 because Haunted Castle has higher-level mobs. But Floating Turtle’s enemy density is so superior that XP per hour remains higher until roughly 2350. Do not leave the turtle until kills there actually slow down.
The Diving Mask is the cheapest power spike in the game. At 2,500 Beli, it unlocks the entire Underwater City quest line and Fishman Lord access. Players skip it because it is not a weapon or a fruit. That is a 500,000+ Beli mistake in missed quest rewards and boss drops.
Frequently Asked Questions
Q: Is there an in-game map that shows island levels? No. The in-game map displays island positions and names, but never level ranges, quest NPC locations, or boss spawns. That is why external guides like this one exist.
Q: What is the fastest way to travel between islands? Light fruit flight is the fastest unrestricted travel method. If you do not have Light, the Swan Ship (dropped by Don Swan) is the best early-game boat. In Third Sea, the Frozen Dragon or Turtle Boat offers the best durability for long routes.
Q: Should I fight every boss on an island before moving on? No. Kill mandatory progression bosses (Blackbeard, Ice Admiral) once. Optional bosses like Gorilla King or Yeti can be skipped unless you need their specific drops. Do not waste time farming Magma Admiral for his coat at level 450 when you could be questing.
Q: Why do I keep dying to normal NPCs even though I have a Logia fruit? Starting in Second Sea, many NPCs use Busoshoku Haki or aura attacks that bypass Logia intangibility. If you skipped the Ability Teacher in Frozen Village, or skipped aura upgrades in Green Zone, your “immunity” no longer works.
Q: Can I solo the Blackbeard and Ice Admiral sea-transition bosses? Yes, but bring healing and respect their phases. Blackbeard’s Quake phase and Ice Admiral’s freeze chains can stunlock unprepared players. Buddha users have an easier time thanks to damage reduction, but standing in every AOE will still kill you.
Related Guides
- Blox Fruits Leveling Guide: Fastest XP Routes for All 3 Seas
- Blox Fruits Second Sea Complete Guide: Islands, Bosses & Progression
- Blox Fruits Bosses & Raids Guide: All Boss Locations & Strategies
- Blox Fruits Beginner Guide: Complete Walkthrough for New Players
- Blox Fruits Fruits Tier List: Best Devil Fruits Ranked
- Blox Fruits Swords Guide: Best Weapons & Locations