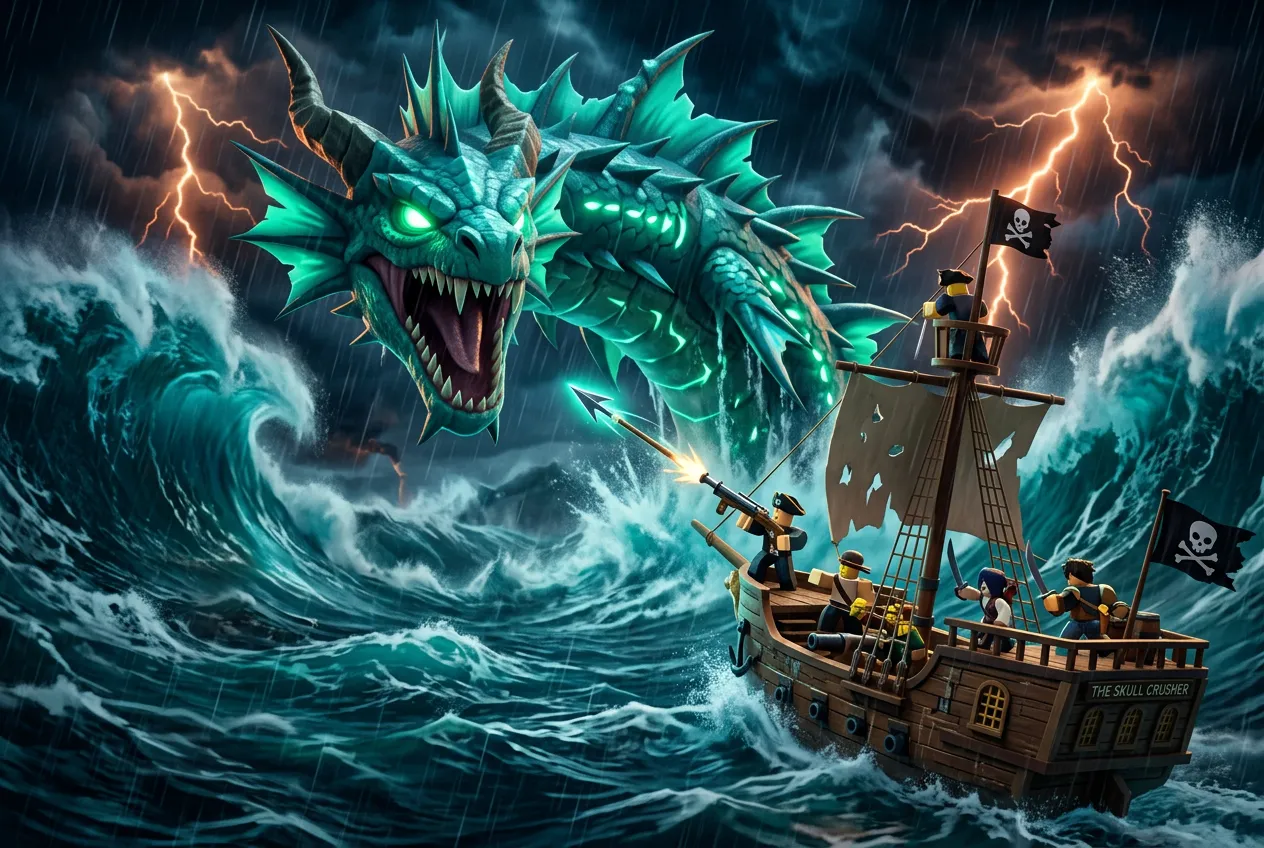
You sail out of Tiki Outpost for the first time. The water is calm. Your compass ticks up: Danger 1. Thirty seconds later, the screen shakes and a Sea Beast erupts from the water in front of you. You land a few hits, it drops 180 Fragments and 75,000 Beli, and you think: this is easy money.
Then you get cocky.
You sail farther. Danger 4. The sky darkens. A Terror Shark rams your boat from underneath — one hit deletes half your HP before you even see it. You try to jump onto a nearby island, but an Electric Storm chain-stuns you mid-air. You die. Your boat sinks. You respawn at Tiki with zero Fragments and a bruised ego.
The Third Sea does not care about your confidence.
Sea Events in Blox Fruits are the most layered PvE system in the game. Most players stop at “kill Sea Beast, collect Fragments.” That’s like buying a Ferrari and never leaving first gear. The full system spans Danger Levels, the Leviathan raid, Terror Shark mini-bosses, Ghost Ships, and environmental hazards that punish you for not knowing what you’re sailing into.
This guide covers every piece of it.
How Danger Level Actually Works
The Danger Level system is not flavor text. It directly controls what spawns, how often it spawns, and how hard it hits.
When you leave Tiki Outpost, a compass appears at the bottom of your HUD. It shows a number between 1 and 6. The number rises as you sail away from the main islands — distance from shore is the only factor. There is no RNG involved in the level itself. You control it by where you point your boat.
Here is what each tier unlocks:
| Danger Level | Zone | Events | Notable Drops |
|---|---|---|---|
| 1-2 | Coastal waters near Tiki | Sea Beast, low-rate Terror Shark, basic Ship Raids | Fragments (100-250), Beli, Sea Beast drops |
| 3-4 | Mid-ocean | Terror Shark, multiple Ship Raids, Ghost Ship, Piranhas, Electric Storms | Mutant Teeth, Terror Eyes, Ghost Ship loot |
| 5-6 | Void / Frozen Zone edges | Leviathan portal, lightning strikes, persistent environmental damage, all top-tier events | Leviathan Scales, Leviathan Heart, Shark Anchor |
One thing the game never tells you: Danger Level also multiplies Sea Beast HP and damage. A Danger 1 Sea Beast folds in under 10 seconds with a mid-tier fruit. A Danger 5 Sea Beast tanks noticeably harder — not because it’s a different enemy, but because the scaling modifier kicks in.
The “Distance Is Everything” Rule
Scenario: you want Terror Shark drops but do not want to deal with Leviathan spawns.
The play is Danger 3-4. Sail out until the compass reads 3, then stop advancing. Circle a mid-ocean area. Terror Sharks share the spawn pool with Sea Beasts at this range, and you will never trigger a Leviathan portal because those only open at Danger 5+.
I learned this the hard way. First time hunting a Terror Shark, I sailed straight to Danger 6 thinking “higher danger = more Terror Sharks.” What actually happens: at Danger 5-6, the spawn pool gets diluted with Leviathan-related events, lightning storms, and environmental damage ticks. You spend more time healing and repairing your boat than actually fighting. I sank three times in 20 minutes and fought exactly zero Terror Sharks.
Safe Farming Strategies Per Danger Level
Danger 1-2: The Fragment Printer
If you just want Fragments and Beli, stay here. Sea Beasts spawn fast, die fast, and drop up to 250 Fragments plus 100,000+ Beli each in Third Sea.
Bring any fruit with decent ranged damage — Magma, Light, or Buddha works. Do not overthink it. Park your boat, kill whatever surfaces, repeat. A focused 30-minute grind nets 3,000-5,000 Fragments solo with zero risk.
The only thing that can kill you here is your own greed. Stay alert for the rare Terror Shark spawn — it hits hard even at Danger 1, and if you are half-HP from lazily face-tanking Sea Beasts, it will finish you.
Danger 3-4: The Sweet Spot for Terror Shark
This is where you farm Mutant Teeth and Terror Eyes. The key is awareness. Terror Sharks attack from below — your screen shakes, your boat takes damage, and then the shark breaches. You have maybe 1.5 seconds from the first shake to jump off your boat and start attacking in the water.
Do not fight a Terror Shark from your boat. The boat’s hitbox is massive and the shark targets it. You will lose the boat. Jump into the water, use a fruit or fighting style with AoE, and circle-strafe. Terror Sharks have a forward-lunging attack — sidestepping it is trivial once you see the tell.
One more thing about Danger 3-4: Ghost Ships appear here. They are not hard, but they drop solid loot and count toward Sea Event milestones. If you see one, kill it. Free value.
Danger 5-6: High Risk, Specific Purpose
Do not sail to Danger 5-6 unless you have a specific goal: Leviathan raid, high-end material farming, or you are in a group. The environmental damage alone — lightning strikes, freezing water in Frozen Zone, Void ticks — will drain your healing resources before combat even starts.
If you are solo at Danger 5-6, you are not a daring adventurer. You are loot waiting to be collected.
Leviathan Raid: The Full Walkthrough
The Leviathan is not a boss you stumble into. It is a staged raid with prerequisites, a resource cost, and a multi-phase fight that punishes bad coordination.
Prerequisites
You need five things before the Leviathan even spawns:
A Sea Exploration Group of 5+ players. This is not a suggestion. The fight mechanics require multiple people on harpoons, multiple people defending the boat, and at least one person on Heart escort duty. Four people cannot cover all roles.
6,000 Fragments. You bribe the Spy NPC at Tiki Outpost. The Spy reveals the Leviathan’s current spawn location. No bribe, no portal, no Leviathan.
A Beast Hunter Boat. Not a regular boat. Not the fastest boat you own. The Beast Hunter Boat specifically. It is the only boat with harpoon mounts, and the harpoons are the only way to stop the Leviathan from escaping.
At least one player who knows harpoon timing. The Leviathan periodically dives and tries to flee. If no harpoon connects during the flee window, the encounter ends. All 6,000 Fragments are gone. The Spy keeps them.
A plan for the Heart escort. The Leviathan Heart is a carried object. The carrier moves slow, cannot use abilities, and every sea enemy in the zone aggros onto the carrier. You escort this thing back to Tiki Outpost on foot — or rather, on boat — while under constant attack.
Step by Step
Step 1: Assemble at Tiki Outpost. Everyone in the Sea Exploration Group gathers at Tiki. Designate roles: two harpoon shooters, one boat driver, one Heart carrier, one flex defender.
Step 2: Bribe the Spy. One player spends 6,000 Fragments at the Spy NPC. The Spy marks a location on the map. This location changes — sometimes it is near the Frozen Zone, sometimes deep in Void waters. Wherever it is, it is always Danger 6.
Step 3: Sail to the marked location in the Beast Hunter Boat. Everyone boards the same Beast Hunter Boat. Do not split into multiple boats — the harpoon mounts are on this one, and if other boats aggro adds, you create chaos.
Step 4: Trigger the portal. At the marked location, a portal opens. The Leviathan surfaces. The fight begins.
Step 5: Damage phase + harpoon windows. The Leviathan has a massive HP pool and cycles through three behaviors:
- Surface attack: swipes, tail slams, water projectiles. Everyone deals damage. Boat driver keeps the Beast Hunter Boat angled so harpoon shooters have a clear line of sight.
- Dive / flee: the Leviathan submerges and the screen tints. This is the harpoon window. Both harpoon shooters must fire. If one misses, the second can still connect. If both miss, the Leviathan escapes and the raid is over.
- Enrage: at roughly 30% HP, the Leviathan summons adds — Sea Beasts, Piranhas, and sometimes a Terror Shark. The flex defender’s job is to keep these off the harpoon shooters and the boat.
Step 6: Collect the Leviathan Heart. When the Leviathan dies, it drops Leviathan Scales (used for crafting the Leviathan Shield and S-tier fighting styles) and a Leviathan Heart. One player picks up the Heart. That player is now priority target number one for every hostile entity in the Third Sea.
Step 7: Escort the Heart to Tiki Outpost. This is where most groups wipe. The Heart carrier sits on the boat, defenseless. Sea Beasts spawn aggressively. If a Terror Shark rams the boat and the carrier dies, the Heart drops into the ocean. Anyone can pick it up, but every second it sits on the ocean floor is a second closer to despawning.
Assign your strongest AoE player to stand next to the carrier and clear anything that gets close. The boat driver takes the shortest route back — no detours, no “let’s kill that Sea Beast for extra loot.” Straight line to Tiki.
Step 8: Turn in the Heart. At Tiki Outpost, the Heart carrier interacts with a specific NPC (not the Spy — a different NPC near the dock) to claim the reward. The group receives Leviathan Scales, and the Heart is consumed.
Where Most Groups Fail
I have watched three Leviathan attempts fail, and two of them failed at the same moment: the first harpoon window.
Here is what happens. The Leviathan surfaces. Everyone unloads damage. It looks easy. Then the screen tints, the Leviathan dives, and your harpoon shooters are still spamming their fighting style moves instead of switching to the harpoon mount. By the time they realize what is happening, the Leviathan is gone.
The fix is painfully simple: call it out loud. Designate someone to yell “HARPOON” in voice chat the second the screen tints. No one shoots harpoons until the callout. No exceptions.
The third failure was the Heart escort. The group killed the Leviathan cleanly, the carrier grabbed the Heart, and everyone relaxed. A Terror Shark spawned 15 seconds into the return trip, rammed the boat, and the carrier got knocked into the water. The Heart sank. By the time they cleared the shark and found the Heart on the ocean floor, it despawned. Total time from victory to heartbreak: 45 seconds.
Do not relax until the Heart is turned in.
The Beast Hunter Boat: What It Does and How to Get It
The Beast Hunter Boat is not optional for Leviathan content. It has two functions no other boat has:
Harpoon mounts. These are the only way to interrupt the Leviathan’s flee phase. Regular attacks do not work. Fruits do not work. Only a harpoon fired from a Beast Hunter Boat.
Durability against sea enemies. The Beast Hunter Boat takes reduced damage from Sea Beasts, Terror Sharks, and environmental hazards. A regular boat at Danger 6 lasts maybe 90 seconds under sustained attack. The Beast Hunter Boat lasts long enough to finish the fight.
To craft it, you need materials from Sea Events themselves — a clever gate from the developers. You must farm lower-tier sea content to build the tool you need for top-tier sea content.
Terror Shark and the Shark Anchor
The Terror Shark is the gatekeeper between casual Sea Event farming and the Leviathan endgame. It spawns at Danger 2-6 and drops three key items:
- Mutant Teeth — crafting material, stackable, used in multiple recipes
- Terror Eyes — rarer drop, used for specific accessories
- Shark Anchor — legendary sword, requires you to have a crafted Monster Magnet equipped for it to appear in the drop table
Read that last one again. Without a Monster Magnet equipped, the Shark Anchor will never drop. Period. No amount of farming will change it.
I farmed Terror Sharks for three hours before learning this. Three hours. Do not be me. Craft the Monster Magnet first.
Monster Magnet Crafting
The Monster Magnet requires materials from Ship Raids and Sea Beasts. It is not expensive, but you need to craft it before your Terror Shark sessions. Equip it in your accessory slot. The game checks for it when the Terror Shark’s loot table rolls.
Once you have the Magnet equipped, the Shark Anchor drop rate is still low — estimate around 5-10%. It is a legendary-tier weapon for a reason. Expect to kill 10-20 Terror Sharks before seeing one.
The Shark Anchor itself is a heavy sword with high knockback and solid damage. It is not the absolute best sword in Blox Fruits, but it is a status item — having it signals that you understand the Sea Event system deeply enough to have navigated the Monster Magnet gate.
Sea Beast Farming: Fragments and Beli Per Hour
Sea Beasts are the bread and butter of Sea Event income. In the Third Sea, each Sea Beast drops:
- 150-250 Fragments (scales with Danger Level — higher danger, higher average)
- 75,000-150,000 Beli
- Occasional Sea Beast materials (used in boat upgrades and accessories)
Optimal Solo Route
Start at Tiki Outpost. Sail to Danger 2, not Danger 1. The spawn rate is noticeably faster at Danger 2, and the HP increase is negligible with any decent build. Circle between Tiki and the nearest mid-ocean island. Kill every Sea Beast that spawns, do not skip any, and do not chase Terror Sharks unless you need their specific drops — Terror Sharks take longer to kill and interrupt your Sea Beast rhythm.
Expected yield: 4,000-6,000 Fragments per hour solo, plus 2-3 million Beli. In a group of two, you push closer to 8,000 Fragments per hour because spawns are shared and kill speed doubles.
Why Danger 2 Is Better Than Danger 1
The math is simple. At Danger 1, Sea Beasts spawn roughly every 45-60 seconds. At Danger 2, they spawn every 30-40 seconds. The HP difference is maybe 15%. With a Max-level character and a decent fruit, neither Sea Beast lives longer than 8 seconds. So the limiting factor is spawn rate, not kill time. Danger 2 wins every time.
At Danger 3-4, Terror Sharks start replacing some Sea Beast spawns, which slows your Fragment rate. At Danger 5-6, the spawn pool adds Leviathan events and environmental damage forces you to heal and repair. More danger does not mean more Fragments per hour — it means more variety at the cost of efficiency.
Decision Framework: Where to Spend Your Fragments
Fragments are the currency that gates every Sea Event upgrade. The question is: what order do you buy things in?
Here is the framework:
If you are solo and under Level 2000: Spend Fragments on fighting style upgrades and fruit awakening first. Sea Beasts at Danger 1-2 are your income source. Do not save for the Leviathan bribe — you will not have the group or gear to use it. Build character power, then revisit sea content later.
If you are Level 2000+ and have a group of 3+: The Monster Magnet comes first (for Terror Shark farming and Shark Anchor access), then Beast Hunter Boat materials, then save 6,000 Fragments for the Spy bribe. The Leviathan is a group activity. Spending 6,000 Fragments without a committed group is throwing resources away.
If you have a stable 5+ player group: Save 6,000 for the Spy bribe immediately, farm the Beast Hunter Boat materials together, and run Leviathan as soon as the boat is crafted. Leviathan Scales open up the Leviathan Shield and S-tier fighting style — both of which outclass almost everything you farmed to get there. The Leviathan pays for itself in power progression.
Leviathan Shield vs. S-Tier Fighting Style: Which First?
This is the single most debated Sea Event spending decision.
Leviathan Shield first if: you are the group’s tank or flex defender, you run content where survivability matters more than damage (Raids, Leviathan re-runs, boss fights), or you die frequently in third sea PvE.
S-Tier fighting style first if: you are the group’s primary DPS, you solo-farm Sea Beasts regularly and want faster kill times, or you play PvP.
There is no wrong answer, but there is a wrong assumption: that you will have enough Scales for both quickly. You will not. One Leviathan kill drops enough Scales for roughly one major craft. Choose based on your role in the group.
Counter-Intuitive Advice That Actually Works
“Danger 5-6 Is a Gold Mine If You Know What You Are Doing”
Every new player sees Danger 5-6 and thinks “stay away.” The environmental damage, the lightning, the Leviathan — it looks like a death zone.
It is a death zone for the unprepared. For a coordinated group with a Beast Hunter Boat, it is the only place in the game where Leviathan Scales, Terror Shark drops, and max-tier Sea Beast Fragments all overlap. You can chain Leviathan kills if your group is efficient — one run funds the next Spy bribe in Fragments.
The catch: you need everyone on the same page. One under-leveled player who does not understand harpoon timing or Heart escort can wipe the whole run. The “gold mine” only works if your group has done its homework.
“The Monster Magnet Is More Important Than Your Fighting Style”
Players love to grind fighting styles. New moves, flashy animations, bigger numbers. The Monster Magnet is a boring accessory with no combat stats that sits in your inventory and does nothing visible.
It also unlocks the Shark Anchor — a legendary sword. And you need it equipped to even roll for the drop.
If you are farming Terror Sharks without a Monster Magnet, you are not farming Terror Sharks. You are donating your time to the Roblox server.
Common Mistakes That Will Get You Killed
Sailing to Danger 6 solo. You are not him. Go back to Danger 2 and farm Sea Beasts until you have a group.
Bringing a regular boat to Leviathan content. The Beast Hunter Boat exists for a reason. Without harpoon mounts, the Leviathan flees. Without the durability buff, your boat sinks before phase two.
Letting the Heart carrier fight. The carrier cannot use abilities. If they try to “help” by attacking adds, they die to the first thing that aggros them. The carrier’s one job is: stay on the boat, stay alive, do not drop the Heart.
Bribing the Spy without a group ready. The bribe is non-refundable. The Fragments are gone whether you kill the Leviathan or wipe at the first flee window. Only bribe when all five players are standing at the Spy NPC, ready to sail.
Ignoring the harpoon callout system. If you do not have someone dedicated to calling harpoon windows, your harpoon shooters will miss the window. Every time.
For more on boss mechanics and group coordination, check our Blox Fruits Bosses and Raids Guide. If you are still working through Third Sea content, the Third Sea Complete Guide covers everything from leveling routes to island unlocks.
FAQ
How do I find and increase Danger Level in the Third Sea?
Sail out from Tiki Outpost and watch the compass at the bottom of your screen. It shows a Danger Level number from 1 to 6. Keep sailing in one direction, and it rises naturally as you move farther from shore. To hit Danger 5-6, head toward the Void or Frozen Zone edges of the map.
Can I solo the Leviathan, or do I need a full crew?
You cannot solo it. You need at least 5 players in a Sea Exploration Group, one player with a Beast Hunter Boat, and 6,000 Fragments to bribe the Spy NPC at Tiki Outpost. Even with a full crew, the fight takes coordination — harpoon timing, boat positioning, and escorting the Leviathan Heart back all require multiple people.
What is the fastest way to farm Fragments from Sea Events?
Park at Danger Level 1-2 and farm Sea Beasts. Each Third Sea Sea Beast drops up to 250 Fragments and 100,000+ Beli. They spawn fast at low danger, you can kill them with any decent fruit or fighting style, and there is no risk of getting jumped by a Terror Shark or Leviathan adds. A 30-minute session nets 3,000-5,000 Fragments solo.
Related Guides:
- Blox Fruits Sea Events & Raids Guide — full coverage of Ship Raids, Ghost Ships, and sea-based PvE mechanics
- Blox Fruits Bosses and Raids Guide — boss patterns, raid strategies, and group coordination
- Blox Fruits Third Sea Complete Guide — leveling routes, island unlocks, and everything new in Third Sea
- Blox Fruits Raid Boss Strategies Guide — advanced boss tactics and loot tables