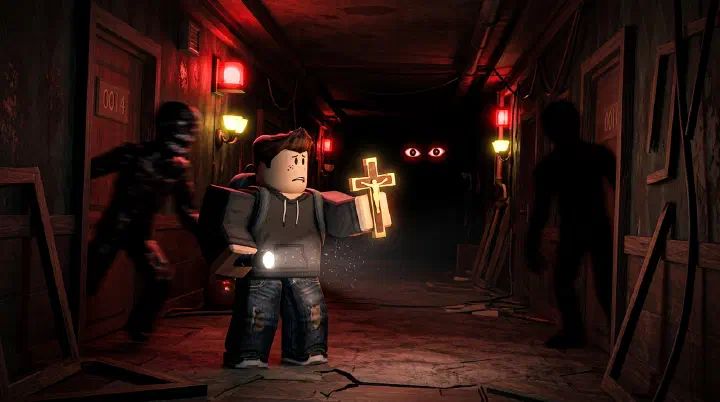
Last updated: July 15, 2026. Covers The Hotel (Doors 1-100), The Mines (Doors 101-200), The Outdoors, Rush Mode, Endless Mode, and modifier combinations. Accurate for the current live build.
You are at Door 87. The hallway is long, narrow, and poorly lit. You hear the distant rumble that means Rush is coming. Your muscle memory kicks in. You dive into the nearest closet, heart pounding, and wait.
The whoosh tears past. The screen shakes. Then silence.
You count to two — the way you always have — and step out. The hallway is empty. You take one step toward Door 88 and the lights stutter again. Green this time. Not Rush. Ambush. You spin back toward the closet, but the prompt is slow. Ambush blasts through on its second pass before you are fully inside. You survive the hit, barely, bleeding health and panicking.
You stumble into the next room, dark as a cave, and immediately hear the whisper. Screech. You forgot to turn your flashlight back on after the closet. You whip the camera left, right, behind you, searching for the pale face. You find it, but in your panic you back into a red glow. Eyes. You were so focused on Screech that you looked directly into an entity that punishes looking.
Three entities. Thirty seconds. One death.
That sequence is not bad luck. It is what happens when you treat every entity as an isolated problem instead of a priority queue. Doors does not wait for you to finish one counter before it loads the next. The game tests whether you know which threat kills you fastest, which item counters which entity, and why hiding from everything is a strategy that quits working past Door 50.
This guide is the response script. Not a bestiary of names, but a defense manual: exact counters, exact priorities, and the exact moments when the “safe” play is actually the lethal one.
For the full floor layouts and beginner routing, see our Doors Beginner Guide. For entity lore and audio profiles, check the Doors Entities Bestiary.
Why Entity Combinations Kill You
Most players do not die to a single entity. They die to the gap between entities — the moment when one threat ends and another begins, or when two threats overlap and the player picks the wrong one to counter first.
Here are the five mistakes that turn survivable rooms into run-enders.
You treat all sweepers like Rush. Rush passes once. Ambush passes multiple times. Hide passes repeatedly until you leave the closet at the right moment. If your default sweeper script is “hide, wait two seconds, leave,” Ambush and Hide will farm you for deaths. Each sweeper has its own exit timing, and assuming they are identical is one of the most common causes of mid-game deaths.
You counter the wrong entity first in stacked rooms. In a dark room with multiple doors, you might be managing Dupe numbers, Screech whispers, and a Rush audio cue at the same time. Players often try to finish reading door numbers while Rush is audible, or rotate for Screech while standing in the middle of the hallway. The correct order is always: instant death threat first, then position threat, then damage threat. Rush kills you faster than Dupe. Hide before you sort doors.
You waste items on the wrong threats. Using a Crucifix on Timothy is a tragedy. Using Vitamins to outrun Figure is usually louder and more dangerous than crouch-walking. Using a flashlight in a Gloombat corridor turns a minor annoyance into a swarm. Items have specific matchups, and burning them on autopilot leaves you defenseless when the real threat shows up.
You hide from entities that require movement. Seek, Halt, and certain World Lotus phases punish hiding. Players who have trained themselves to dive into closets at every audio cue will try to closet their way through a Seek chase or a Halt hallway. The result is instant death. Not every entity is solved by a closet. Some are solved by sprinting, turning around, or walking backward.
You ignore the second decision. Getting into the closet is the easy part. Getting out at the right time is where the run lives or dies. Players celebrate the first correct action — hiding from Rush, looking at Screech, crouching for Figure — and then immediately make a second incorrect action. Entity combinations exploit this exact gap. The death comes not from the first mistake, but from the premature celebration after the first success.
The Entity Priority System
When multiple threats are active or chaining, you need a clear hierarchy. This is not a damage chart. It is a decision chart: what kills you instantly, what traps you, and what only chips your health.
Priority 1 — Instant sweepers: Rush, Ambush, Hide, A-60, A-120. These delete your run in under a second if you are exposed. Your first reaction to any sweeper cue is to find cover. Ambush takes priority over Rush because its multi-pass pattern punishes early exits.
Priority 2 — Chase entities: Seek, Halt. These require movement, not cover. If Seek begins, hiding is a death sentence. If Halt appears in a hallway, you must turn and walk the opposite direction. Never confuse a chase cue with a sweeper cue.
Priority 3 — Camera and position threats: Screech, Eyes, Dupe. These punish how you are looking or where you are standing. They are dangerous, but they give you a reaction window. Handle them only after Priority 1 and 2 threats are resolved.
Priority 4 — Environmental traps: Snare, Giggle, Timothy, Jack, Surge. These punish inattention while you are doing something else. They rarely kill full-health players outright, but they can knock you into a vulnerable position for a higher-priority threat.
Priority 5 — Boss and hunter entities: Figure, Grumble, Groundskeeper. These are room-state threats, not momentary cues. You do not “react” to Figure the way you react to Rush. You maintain a continuous defensive posture: crouch, listen, time interactions.
The golden rule: when in doubt, assume the worst threat in the room. If you hear a sound and are unsure whether it is Rush or Ambush, treat it as Ambush. If you see a dark room and are unsure whether Screech is active, assume it is. The cost of over-defending is a few seconds. The cost of under-defending is the run.
Entity-by-Entity Counter Guide
Rush
The discipline check.
Rush is the baseline sweeper. Lights flicker, audio builds, and a fast-moving shadow passes through the room. It kills on contact.
Counter:
- Stop all interactions the instant lights flicker.
- Locate the nearest valid hiding spot: closet, bed, or locker.
- Enter immediately. Do not sprint past the hiding spot to reach a “better” one.
- Wait for the audio to pass completely.
- Exit only after the room returns to normal lighting and sound.
Item matchups:
- Crucifix: Works. Single-use save if you fail to hide.
- Flashlight / Lighter: No effect. Turn them off while hiding so the beam does not obscure your vision.
- Vitamins: No direct counter, but can help you reach a distant closet if caught in a bad room.
Never exit the closet because you think the sound is “fading.” Wait for silence.
Ambush
The patience tax.
Ambush uses similar flickers to Rush, but the warning is longer and the sound is more distorted. It passes through the room multiple times before disappearing.
Counter:
- Hide as soon as the extended flicker begins.
- Stay hidden through the first pass.
- Stay hidden through the second pass.
- Stay hidden through any subsequent passes.
- Only exit after the room has been completely silent for at least three seconds.
The most common death is re-entering the closet too late after stepping out early. If you leave and hear the return, you usually do not have time to get back inside.
Item matchups:
- Crucifix: Works. One of the best uses for it because Ambush is mechanically simple but mentally cruel.
- Vitamins: Dangerous. Do not use them to try to “outrun” Ambush. There is no outrunning the multi-pass pattern.
For dedicated Ambush training, see our Ambush Protocol Guide.
Screech
The camera check.
Screech appears in dark rooms and whispers close to your ear. If you do not look at it quickly, it bites for moderate damage.
Counter:
- In any dark room, expect Screech before it spawns.
- When you hear the whisper, stop moving forward.
- Sweep your camera in all directions until you spot it or the cue ends.
- Resume movement only after you know where the exits and other hazards are.
Item matchups:
- Flashlight / Lighter: Prevents or heavily reduces Screech spawns. Always have a light source in dark rooms.
- Crucifix: Works, but wasteful. A flashlight is cheaper and reusable.
Warning: Do not spin so wildly that you walk into Eyes or a Dupe door while hunting Screech.
Eyes
The anti-camper.
Eyes emits a red aura and deals rapid damage if you look directly at it. It punishes players who stare at walls, doors, or teammates while standing still.
Counter:
- Learn the audio hum that signals Eyes is nearby.
- If you see red light, look away immediately.
- Walk around it while keeping your camera pointed at the floor or walls.
- Never try to hide in a closet directly facing Eyes.
Item matchups:
- Flashlight: No effect. The red aura is visible without light.
- Crucifix: Does not work on Eyes.
Eyes is a Priority 3 threat. It will not kill you instantly, but it can drop your health low enough that the next entity finishes you.
Halt
The hallway trap.
Halt appears as a blue ghost in long hallways. It forces you to turn around and walk the opposite direction. Walking toward Halt deals rapid damage.
Counter:
- When the hallway turns blue and Halt appears, stop sprinting forward.
- Turn around and walk in the opposite direction.
- Halt will flash periodically. Each flash means you must turn around again.
- Continue this back-and-forth until you reach the end of the hallway.
Item matchups:
- Crucifix: Works.
- Vitamins: Can help you cover the back-and-forth distance faster, but are unnecessary if you stay calm.
Halt is a chase entity disguised as a hallway. Treat it like Seek: movement, not hiding.
Dupe
The autopilot killer.
Dupe creates fake doors with wrong numbers. Running through the wrong door deals damage and disorients you.
Counter:
- Memorize your current door number at all times.
- In multi-door rooms, stop and read every number before committing.
- Choose the next sequential number, not the most centered or convenient door.
- If teammates run through a door first, verify the number yourself.
Item matchups:
- No item counters Dupe. Only attention counters Dupe.
In modifier runs or Endless Mode, Dupe becomes significantly more dangerous because door numbers can be harder to track.
Seek
The chase sequence.
Seek triggers a scripted cinematic chase. Once it begins, hiding is useless. You must run.
Counter:
- When the cutscene ends, move immediately.
- Follow glowing arrows and hand indicators.
- Jump over fallen furniture instead of routing around it.
- At hallway splits, trust the marked path, not your intuition.
- At the final door, open the exit and keep moving until the sequence fully ends.
Item matchups:
- Vitamins: Useful for maintaining sprint speed through long chase sections.
- Crucifix: Does not work on Seek.
- Flashlight: Usually unnecessary; the chase is lit by design.
For full route breakdowns, read our Seek Chase Complete Guide.
Figure
The sound hunter.
Figure is blind and navigates by hearing. It appears at Door 50 (The Library) and Door 100 (The Electrical Room).
Counter:
- Crouch-walk at all times when Figure is active.
- Time interactions — book pickups, switch flips, code entries — for when Figure is far away.
- If Figure passes close to your closet, use the breath-hold prompt and do not release early.
- Never sprint, jump, or spam interactions near Figure.
Item matchups:
- No item directly counters Figure. Silence is the only defense.
- Vitamins: Can help reposition if spotted, but sprinting creates more sound and often makes things worse.
For detailed Library and Electrical Room routing, see Room 50 Library Walkthrough and Figure Survival Protocol.
Snare
The floor trap.
Snare appears as tangled vines or wires on the floor, primarily in The Mines and The Outdoors. Stepping on it traps you in place and deals damage.
Counter:
- Watch the floor in Mines sections and outdoor areas.
- If snared, mash the interact prompt to break free immediately.
- Do not stand in Snare if a sweeper cue begins while trapped.
Item matchups:
- No item prevents Snare. Awareness does.
Giggle
The ceiling ambush.
Giggle hangs from ceilings in The Mines and drops on players who walk underneath.
Counter:
- Look up in Mines rooms before walking through the center.
- If Giggle drops, move out from under it quickly.
- The damage is minor, but the stun can trap you during a sweeper event.
Grumble
The blind hunter of The Mines.
Grumble behaves similarly to Figure but patrols wider areas in The Mines.
Counter:
- Crouch-walk when Grumble is nearby.
- Use verticality and cover to break line of sight.
- Time your movement to its patrol pattern.
A-60 and A-120
The Backdoor / Rooms sweepers.
These entities appear in Rooms, The Backdoor, and certain modifier configurations. A-60 rushes forward. A-120 can attack from behind.
Counter:
- Hide immediately when the visual or audio cue triggers.
- For A-120, never assume the room behind you is safe. Face forward in the closet if possible.
- Wait longer than you think. These sweepers have irregular timing.
Hide
The closet entity.
Hide pushes you out of closets if you stay in them too long.
Counter:
- Do not camp in closets between entity events.
- Enter, survive the sweeper, then leave promptly.
- In multiplayer, coordinate closet usage so one player is not forced out by Hide while another is still hiding from Ambush.
Jack
The closet jumpscare.
Jack rarely appears inside closets instead of letting you hide. It deals minor damage and ejects you.
Counter:
- There is no warning.
- If ejected, immediately locate another hiding spot or exit the room.
- Do not let Jack’s surprise cause you to sprint blindly into a worse threat.
Timothy
The drawer spider.
Timothy jumps from drawers and deals tiny damage.
Counter:
- Do not overreact. The damage is negligible.
- Do not burn items or sprint into hazards because a spider surprised you.
Item-to-Entity Counter Matrix
| Item | Best Used Against | Does NOT Work On | Strategy Notes |
|---|---|---|---|
| Crucifix | Rush, Ambush, Screech, Halt | Figure, Seek, Eyes, Dupe, Snare, Grumble | Single-use. Save for your weakest matchup or guaranteed death rooms. |
| Flashlight | Screech, dark rooms | Rush, Ambush, Seek, Figure | Prevents Screech spawns. Turn off while hiding from sweepers. |
| Lighter | Screech, dark rooms | Same as flashlight | Shorter range than flashlight but infinite duration. |
| Vitamins | Seek chase, repositioning | Ambush, Figure (indirect) | Sprint speed helps chases. Sprinting near Figure or Ambush makes things worse. |
| Lockpick | Dupe rooms, general utility | No entity counter | Saves time in multi-door rooms, reducing exposure time. |
| Skeleton Key | Locked rooms | No entity counter | Removes the need to search for keys, reducing backtracking. |
| Candle | Screech prevention | Sweepers | Small radius light source. Situational. |
Items are force multipliers, not replacement skills. A Crucifix does not teach you Ambush timing. It only forgives one mistake. The best players treat items as insurance, not primary defense.
Counter-Intuitive Defense Rules
The Crucifix is not the best item for most entities. It is rare, single-use, and does not work on the hardest threats like Figure, Seek, or Eyes. A flashlight prevents more deaths across a full run than a Crucifix because it nullifies Screech and reveals Dupe doors. A Crucifix is a safety net, not a strategy.
Sometimes the best defense is to keep moving. Hiding is the correct response to Rush and Ambush, but it is fatal against Seek, Halt, and certain World Lotus phases. Players who develop a “closet reflex” for every audio cue will die repeatedly in chase sequences. The correct response to a threat depends on the threat type, not on your panic level.
Hiding is not always the right answer. In a dark room with Eyes active, a closet facing the wrong direction can kill you faster than staying in the open. In a room with multiple Dupe doors, diving into a closet delays your decision and gives you less time to read numbers when you exit. Hiding solves sweepers. It does not solve position puzzles.
Sprinting away from Figure is louder than walking toward it. Figure is blind. It does not see you; it hears you. Many players panic-sprint when Figure gets close, which is the exact sound profile that draws it to your location. Crouch-walking calmly past Figure at close range is often safer than sprinting away from it at medium range.
Turning your light off saves lives. Players leave flashlights on inside closets, which does nothing against the sweeper and can blind you to audio cues or screen-color changes. In Mines sections, light attracts Gloombats. In dark rooms, a flashlight helps, but in closets and sweepers, darkness is your friend.
Building Your Defense Reflex
The difference between a player who survives Door 100 and a player who dies at Door 40 is not knowledge. It is reflex architecture.
Here is how to build it:
Run the priority out loud. When a cue happens, say the priority: “Sweeper first, camera second, traps third.” Verbalizing forces your brain to sort threats instead of panicking.
Practice the second decision. In custom lobbies or safer rooms, deliberately hide from Rush, then force yourself to count to five before exiting. Train the wait, not just the hide.
Item discipline. Pick one item per run and decide in advance what it counters. “This Crucifix is for Ambush.” “These Vitamins are for the Seek chase.” If you do not pre-assign the item, you will burn it on Timothy or a false alarm.
Review your deaths. Every death in Doors teaches something. If Ambush killed you, you left early. If Eyes killed you, you were looking at it while distracted. If Figure killed you, you made noise at the wrong moment. The game is fair in its patterns. Your job is to match the pattern with the right script.
For more on pre-run loadouts and item management, visit our Doors Items and Inventory Guide. For floor-specific routing, see The Hotel Walkthrough and The Mines Survival Protocol.