Last updated: May 12, 2026. All room numbers, entity behaviors, and secret locations reflect the current 2026 version of DOORS.
The Hotel: Floor 1 Overview
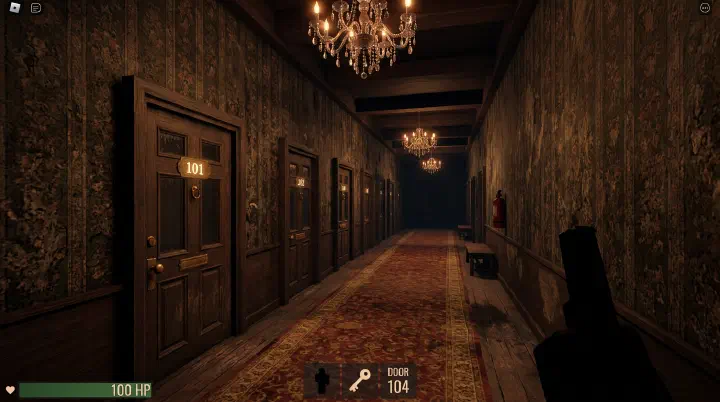
The Hotel is the first floor of DOORS and the experience most players encounter first. It consists of 100 numbered rooms (Door 1 through Door 100), each presenting unique challenges, entities, puzzles, and opportunities. Behind Door 100 awaits the Figure – the floor’s final boss entity.
This walkthrough covers every room, every entity encounter, every secret hiding spot, and the Jeff Shop layout. Whether you are running for your first completion badge or speedrunning, this guide has you covered. If you are looking for a quicker overview, our Beginner Guide covers the absolute essentials.
Room-by-Room Walkthrough
Doors 1-9: The Introduction
The first set of rooms serves as a tutorial. You will learn the basic mechanics of DOORS: opening doors, finding keys, hiding from entities, and collecting items.
| Room | What Happens | Tips |
|---|---|---|
| Door 1 | Opens to a simple hallway. No entities. | Grab any items you see. Take your time. |
| Door 2-3 | Basic hallways with items scattered around. | Collect Lighter, Vitamins, and any coins. |
| Door 4 | First entity encounter: Rush. Lights flicker, then Rush charges through. | Listen for the flickering lights. Hide in the nearest closet or under a bed immediately. |
| Door 5 | Key room. The door is locked. Find the key on a table, shelf, or in a drawer. | Keys glow faintly. Check every surface before panicking. |
| Door 6-8 | Mixed hallways with items and possible Ambush encounters. | Ambush can bounce back multiple times. Wait a few seconds after it passes before leaving hiding. |
| Door 9 | First curved hallway variant. May contain a hiding spot requirement. | Stay alert. Curved hallways limit your view of approaching entities. |
Total entities encountered so far: Rush (multiple times), Ambush (possibly)
Doors 10-19: Increasing Complexity
| Room | What Happens | Tips |
|---|---|---|
| Door 10 | Figure mini-encounter – no, just kidding. This is usually a standard hallway with items. However, it marks the point where entity frequency increases. | Start managing your inventory. Keep a Lighter and at least one lockpick. |
| Door 11-13 | Standard hallways. Possible Seek chase sequence can start here. | Seek chases are the most intense encounters. Keep running and follow the glowing door outlines. |
| Door 14 | Seek Chase – one of the most iconic encounters in DOORS. The lights go out, Seek appears behind you, and you must run through a procedurally generated obstacle course. | Do not stop running. Look for glowing outlines of the correct door. Avoid obstacles (fallen furniture, books on the floor, crawling spaces). |
| Door 15 | Post-Seek recovery room. Items are plentiful here. | Restock. Grab Vitamins, a Lighter, and any Keys you need. |
| Door 16-18 | Mixed rooms. Possible Halt encounter in long hallways. | Halt forces you to walk backward. Do not turn around. Walk backward toward the next door until the effect ends. |
| Door 19 | Standard room, possibly with a Guiding Light hint (the glowing outline showing where the key is). | Guiding Light is your friend. Follow the glow to find hidden items. |
Doors 20-39: The Mid-Hotel Grind
This section introduces more complex room layouts and more frequent entity encounters.
| Room Range | Key Encounters | Strategy |
|---|---|---|
| 20-25 | Jack (jumpscare from dark closets), more Rush/Ambush | Only hide in closets with light seeping through. Dark closets may contain Jack. |
| 26-30 | Possible Dupe encounter (fake doors with numbers) | Check the door number carefully. Dupe creates a door with the wrong number. Entering it damages you significantly. |
| 31-35 | Screech encounters (attacks when you are in dark rooms without a light source) | Always carry a Lighter or have a light-giving item equipped. Screech deals damage quickly if ignored. |
| 36-39 | Jeff Shop preparation rooms. Start saving coins (at least 500). | Do not spend all your coins on consumables. Save for the Jeff Shop. |
Dupe Door Mechanics
Dupe is one of the trickiest entities because it creates visual deception:
| Sign | Real Door | Fake Door (Dupe) |
|---|---|---|
| Door Number | Matches the current room | Different number (usually off by 1-3) |
| Sound | Normal door creak | Slightly distorted sound |
| Visual | Normal door appearance | Slightly darker or more faded |
| Consequence of entering | Proceeds to next room | Deals 40 damage |
Pro tip: Always verify the door number before entering. This habit alone saves you from Dupe every time.
Doors 40-49: The Jeff Shop
Door 50 is the Jeff Shop – one of the most important rooms in the Hotel. It appears at Door 50 (and sometimes at other intervals in special runs).
Jeff Shop Inventory
| Item | Cost | What It Does | Worth Buying? |
|---|---|---|---|
| Lockpick | 20 coins | Picks locked doors without finding a key | Yes, always buy 2-3 |
| Skeleton Key | 50 coins | Opens any locked door, guaranteed | Situational. Only if you are low on keys |
| Lighter | 30 coins | Provides a light source for dark rooms | Yes, if you do not have one |
| Bandage Pack | 30 coins | Restores 20 HP over time | Yes, essential for Figure fight |
| Vitamins | 20 coins | Instant 15 HP boost + speed boost for 10 seconds | Yes, the speed boost is clutch |
| Crucifix | 100 coins | Kills one hostile entity that enters your room | Expensive but game-changing. Buy if you can afford it. |
| Revive | 200 coins | Auto-revives you if you die | Only for hardcore runs. Skip if you need other items. |
| Shakelight | 50 coins | Brighter, longer-lasting than a Lighter | Yes, if available. Superior to Lighter. |
| Spotlight | 150 coins | Very bright light source, lasts the entire run | Premium option. Buy if you have excess coins. |
| Hint | 100 coins | Reveals the location of a hidden item | Useful for finding secret rooms |
Jeff Shop Strategy
| Budget Level | Priority Purchases |
|---|---|
| 50-100 coins | Lockpick (20) + Lighter (30) + Bandage (30) |
| 100-200 coins | Lockpick x2 (40) + Bandage x2 (60) + Vitamins (20) |
| 200-300 coins | Crucifix (100) + Lockpick x2 (40) + Bandage x2 (60) |
| 300+ coins | Crucifix (100) + Spotlight (150) + Bandage x2 (60) + Lockpick (20) |
Doors 51-79: The Danger Zone
Entity frequency peaks in this section. Expect multiple Rush, Ambush, Screech, Dupe, and Halt encounters.
| Room Range | Key Encounters | Strategy |
|---|---|---|
| 51-55 | Rush, Ambush (possibly multiple bounce-backs) | Ambush can return 2-4 times. Count the passes before leaving hiding. |
| 56-60 | Seek chase possible. Dark hallways requiring light. | Keep your Lighter or Shakelight ready at all times. |
| 61-65 | Dupe doors become more frequent. Jack from closets. | Always verify door numbers. Check closets for light before entering. |
| 66-70 | Eyes entity (appears in specific rooms, deals damage if you look at it) | When you see floating eyes, look away immediately (turn your camera away). |
| 71-75 | Multiple entity combinations (Rush + Screech, Ambush + Dupe) | Manage multiple threats simultaneously. Prioritize the most immediate danger. |
| 76-79 | Halt long hallways, preparation rooms for Figure | Stock up on bandages and vitamins. You will need them for Door 50’s boss. |
Eyes Entity Details
| Property | Details |
|---|---|
| Appearance | Floating pair of eyes in the darkness |
| Behavior | Deals damage over time if you look directly at it |
| Counter | Turn your camera away from the eyes until they disappear |
| Damage | Approximately 5-10 HP per second of exposure |
| Duration | 10-15 seconds if you keep looking away |
Doors 80-99: Pre-Figure Preparation
| Room Range | What Happens | Tips |
|---|---|---|
| 80-85 | Heavy entity spam. Rush, Ambush, Screech, and Dupe all appear frequently. | This is the endurance test. Stay calm, hide when needed, keep moving. |
| 86-90 | Timed puzzle rooms. Some rooms have levers or buttons that must be activated within a time limit. | Work quickly. Failed puzzles usually result in entity spawns or damage. |
| 91-95 | Final restock rooms. Limited items available. | Grab anything you can. You need maximum HP for the Figure fight. |
| 96-99 | Build-up rooms. Music intensifies, lighting changes. | The Figure is approaching. Make sure you have bandages, vitamins, and a lockpick. |
Door 100: The Figure Boss Fight
Door 100 contains The Figure, the final boss of the Hotel floor. This is a stealth encounter that tests everything you have learned.
Figure Fight Mechanics
| Phase | Description | What to Do |
|---|---|---|
| Phase 1: The Library | A large library room. The Figure patrols the area. You must find the library key while avoiding the Figure. | Crouch-walk. The Figure detects sound. Move slowly and pick up the key when you see it. The key spawns in a random location on the bookshelves. |
| Phase 2: The Escape | After getting the key, run to the next door. The Figure chases you through a hallway with obstacles. | Run. Do not stop. Follow the path and open the door at the end. |
| Phase 3: The Final Door | Use the key to open Door 100. The Figure makes one final attempt to catch you. | Open the door quickly and enter. You have completed Floor 1. |
Figure Detection Mechanics
| Behavior | Detection Level | Consequence |
|---|---|---|
| Standing/walking normally | High detection from far away | Figure moves toward your location immediately |
| Crouching/walking slowly | Low detection, short range | Figure may not notice you if you stay far enough |
| Running/sprinting | Maximum detection, entire map | Figure will find you very quickly |
| Hiding under tables/desks | No detection | Figure cannot see you while hidden |
| Heartbeat loud | Figure is nearby | Listen for your heartbeat. If it is loud, the Figure is close – stay still. |
Figure Fight Tips
- Crouch the entire time in Phase 1. Do not sprint unless you have the key and are in Phase 2.
- Listen for the Figure’s heartbeat. The louder it gets, the closer the Figure is. If it is very loud, freeze in place.
- Use your items wisely. Vitamins give you a speed boost for Phase 2. Save bandages for after the fight if you take damage.
- The key location is randomized. Search the library systematically. Check bookshelves, tables, and the floor.
- In Phase 2, do not look back. Just run toward the next door. Looking back slows you down and the Figure catches up.
For players who want to know more about the Figure and other entities, our Entities Bestiary has detailed information on every creature in the game.
Secret Rooms and Hidden Areas
Library Secret Room
Between Doors 60-80, there is a chance of encountering a hidden room variant:
| Secret | Location | Reward |
|---|---|---|
| Hidden Closet | Behind a bookshelf in certain library rooms | Rare item spawn (Crucifix, Spotlight) |
| Secret Passage | Appears as a slightly transparent wall in hallway rooms | Shortcut to next room, skips entity encounter |
| Jeff’s Back Room | Accessible from the Jeff Shop (rare) | Extra items at discounted prices |
How to Find Secret Rooms
- Look for visual inconsistencies. Slightly misaligned walls, different textures, or unusual shadows often mark secret areas.
- Listen for audio cues. Secret rooms often have subtle ambient sounds that differ from regular rooms.
- Use the Hint item from Jeff Shop. If you buy a Hint, Guiding Light will point toward nearby secrets.
- Check behind large furniture. Bookshelves, cabinets, and paintings sometimes hide passages.
Badge Farming in the Hotel
Several badges can be earned during the Hotel floor:
| Badge | How to Earn | Difficulty |
|---|---|---|
| The Hotel | Complete Floor 1 (reach Door 100 and escape) | Medium |
| Speedrunner | Complete the Hotel in under 15 minutes | Hard |
| Pacifist | Complete the Hotel without killing any entities (using Crucifix) | Medium |
| Full Clear | Find all secret rooms and items in a single run | Very Hard |
| No Damage | Complete the Hotel without taking any damage | Extreme |
Speedrun Route
For the Speedrunner badge, follow this optimized route:
| Door Range | Strategy | Time Target |
|---|---|---|
| 1-10 | Sprint through everything. Grab only essential items. | 2 minutes |
| 11-30 | Run Seek chases efficiently. Skip non-essential rooms. | 4 minutes |
| 31-50 | Quick Jeff Shop purchases (lockpick + vitamins only). | 3 minutes |
| 51-80 | Avoid unnecessary hiding. Only hide for guaranteed Rush/Ambush. | 4 minutes |
| 81-100 | Figure fight – optimize key search pattern. | 2 minutes |
| Total | ~15 minutes |
Items and Inventory Management
Essential Items to Always Carry
| Item | Priority | Reason |
|---|---|---|
| Lighter/Shakelight | Critical | Required for dark rooms and Screech encounters |
| Lockpick | Critical | Opens locked doors without searching for keys |
| Bandage Pack | High | Essential for surviving the Figure fight |
| Vitamins | High | Speed boost for chase sequences + HP recovery |
| Crucifix | Medium | Emergency entity defense. Expensive but powerful |
Inventory Slots
You have a limited number of inventory slots. Prioritize:
- Light source (always slot 1)
- Lockpick (always carry at least 1)
- Healing items (bandages and vitamins)
- Crucifix (if you can afford it)
- Extra items (keys, special quest items)
For a complete list of all items and their detailed stats, see our Items & Inventory Guide.
Common Death Causes and How to Avoid Them
| Cause of Death | Room Range | Prevention |
|---|---|---|
| Rush (failed to hide in time) | All rooms | Listen for flickering lights. Always know where the nearest closet is. |
| Ambush (left hiding too early) | 6+, especially 50+ | Count the passes. Ambush can bounce back 2-4 times. Wait 3 seconds after the last pass. |
| Dupe (entered wrong door) | 26+ | Always verify the door number. This is the most preventable death. |
| Screech (no light source) | 31+ | Always carry a lighter or shakelight. Equip it in dark rooms. |
| Figure (detected in library) | Door 100 | Crouch-walk. Listen for heartbeat. Do not sprint in Phase 1. |
| Seek (failed obstacle during chase) | 14, and occasionally 50+ | Follow the glowing door outlines. Practice the obstacle patterns. |
| Halt (turned around) | Long hallways | Walk backward. Do not turn your camera around. |
| Eyes (looked at the entity) | 66-70 | If you see floating eyes, look away immediately. |
Frequently Asked Questions
Q: How many rooms are in the Hotel floor? A: 100 rooms, numbered Door 1 through Door 100. Door 100 contains the Figure boss fight.
Q: Can I skip the Jeff Shop? A: Yes, but it is not recommended. The items sold there (especially lockpicks and bandages) are essential for later sections and the Figure fight.
Q: What happens after I complete the Hotel? A: You unlock access to The Mines (Floor 2). See our The Mines Walkthrough for the next floor.
Q: Does the Figure always appear at Door 100? A: Yes, in the standard Hotel floor. However, modifiers or special game modes can change this behavior.
Q: How much damage does each entity deal? A: Rush and Ambush are instant-kill if they catch you outside of hiding. Screech deals approximately 5-10 HP per second. Dupe deals 40 damage. The Figure is instant-kill if caught.
Q: Can I use the Crucifix on the Figure? A: No. The Crucifix works on Rush, Ambush, and several other entities, but not on the Figure. You must complete the stealth encounter.
Related Guides
- The Mines Walkthrough – Complete guide to Floor 2 with all new rooms and entities
- Entities Bestiary – Detailed information on every entity in DOORS
- Items & Inventory Guide – Every item, where to find it, and how to use it effectively
- Achievements & Secrets – All badges, hidden rooms, and secret content in DOORS
Related Guides: