Last updated: June 23, 2026.
The Two-Hour Trap Nobody Talks About
Picture this. You’re perched at the edge of Forsaken Shores with a line in the water, same spot you’ve camped for the last two hours. You’ve burned through forty pieces of bait. Your thumb’s sore from the minigame. And your inventory? A sad pile of Commons and Uncommons that won’t even cover the bait cost.
Ten feet to your left, another angler reels in the exact Mythic you’ve been hunting. Third cast. They weren’t using better gear. They weren’t luckier. They just glanced at the bottom-right corner of their screen, saw the rain clouds rolling in, and knew exactly what that meant.
You were fishing in Clear weather during daytime for a nocturnal, rain-preferring fish. That’s not RNG being cruel — that’s a 90% spawn rate penalty doing exactly what the game told it to do. You weren’t unlucky. You were uninformed.
Weather, seasons, and the day-night cycle in Fisch aren’t cosmetic fluff. They’re the single biggest lever on your catch rates, and most players treat them like background noise. This guide fixes that.
How Weather and Time Work in Fisch
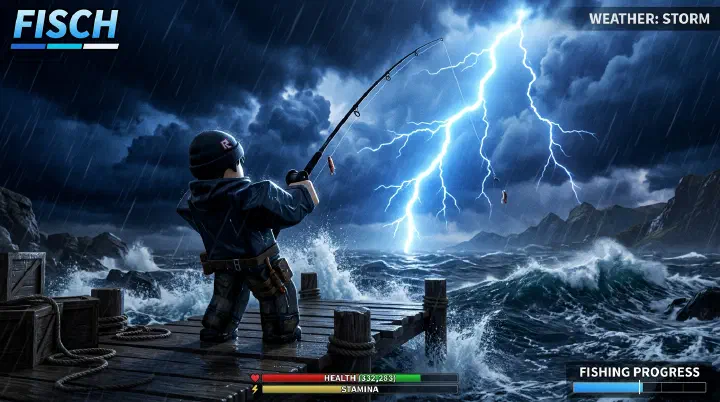
Fisch has a dynamic environmental system where weather, seasons, and the day/night cycle all affect which fish spawn and how frequently they appear. Mastering this system is essential for targeting rare fish efficiently.
The current weather, season, and time are displayed in the bottom-right corner of your screen. Learning to read these indicators and time your fishing sessions accordingly separates casual anglers from serious collectors.
What Most Players Get Wrong (And Why)
After watching hundreds of players fish — and making these mistakes myself — I’ve spotted three patterns that kill catch rates over and over.
Mistake #1: Treating weather as decoration.
Most players see “Rain” or “Foggy” and think it’s just atmosphere. It isn’t. Each weather type gives a +35% catch rate boost to fish that prefer that weather. That’s not a tiny edge — that’s the difference between one rare fish per hour and one per ten minutes. Yet players will sit through the wrong weather for an entire cycle without ever checking what the fish they’re targeting actually wants.
Why it happens: Fisch doesn’t slap you with a warning. There’s no popup saying “Hey, this fish hates Clear weather.” The penalty is invisible unless you know to look for it. So players blame RNG and keep casting.
Mistake #2: Ignoring the day/night cycle entirely.
Diurnal fish lose 90% of their spawn rate at night. Nocturnal fish lose the same during the day. That’s not a mild preference — that’s near-extinction. I’ve seen players camp a spot for thirty minutes during the wrong time of day and wonder why the fish “isn’t biting.” It’s not biting because the game literally removed it from the spawn pool.
Why it happens: The day/night cycle is subtle. The lighting changes, sure, but there’s no countdown timer, no big announcement when night falls. If you’re hyper-focused on the minigame, you can miss the transition entirely. A 2,000 C$ Sundial Totem flips day to night instantly — yet most players don’t even know it exists.
Mistake #3: Chasing premium totems before understanding basics.
Aurora Totems cost 500,000 C$. Blizzard Totems cost 275,000 C$. Newer players see those price tags and assume they’re mandatory for rare fish. They’re not. If you don’t have the right season, the right basic weather, and the correct time of day, that 500K Aurora Totem is burning money. A 2,000 C$ Tempest Totem used at the right moment will outperform a premium totem used blindly.
Why it happens: Expensive stuff feels better. It’s a psychological trap. But Fisch’s environmental system is layered — the basics matter more than the flashy stuff. Nail the fundamentals first. Then worry about the 6× luck events.
Day/Night Cycle
| Detail | Value |
|---|---|
| Full cycle duration | ~25 minutes |
| Day length | ~12.5 minutes |
| Night length | ~12.5 minutes |
| Day fish spawn penalty at night | -90% spawn rate |
| Night fish spawn penalty during day | -90% spawn rate |
Night-Exclusive Events
These events only trigger during nighttime:
| Event | Effect |
|---|---|
| Night of the Fireflies | 2× catch rate for all nocturnal fish |
| Night of the Luminous | +10% Sparkling mutation chance |
| Starfall | +5% Nova mutation, +10% fishing progress speed |
| Aurora Borealis | +700% luck (6x boost), rare spawn |
All Weather Types & Effects
Weather is randomly chosen at the start of each new day or night period (~12.5 minutes). Each weather type boosts the spawn rate of fish that prefer that weather by +35%.
Standard Weather
| Weather | Effect | Totem | Totem Cost |
|---|---|---|---|
| Clear | Neutral — no boosts, no penalties | (Default weather) | – |
| Foggy | Boosts fog-preferring fish, reduced visibility | Smokescreen Totem | 2,000 C$ |
| Windy | Boosts wind-preferring fish, reduced visibility | Windset Totem | 2,000 C$ |
| Rain | Boosts rain-preferring fish | Tempest Totem | 2,000 C$ |
Special Weather Events
| Event | Trigger | Key Effects |
|---|---|---|
| Rainbow | Random (Sundial use increases chance) | Massive luck boost, rare mutations, Lobster King spawn |
| Eclipse | Day only, or Eclipse Totem | Solarblaze mutation (2.5× sell value), Phantom Megalodon |
| Aurora Borealis | Rare, night only, or Aurora Totem | +700% luck (6×) server-wide |
| Starfall | Night only, or Starfall Totem | +5% Nova mutation, +10% progress speed |
| Mutation Surge | Random, or Mutation Totem | 10× Luck, +15% Mythical mutation |
| Shiny Surge | Random, or Shiny Totem | +3% Shiny mutation |
| Moonlit Mirage | Random | Stackable bonus to lunar mutated fish value/weight |
Localised Events (Location-Specific)
| Event | Location | Effect |
|---|---|---|
| Blizzard | Northern Summit | 15% Blighted mutation chance. Trigger with Blizzard Totem (275,000 C$) |
| Avalanche | Northern Summit | 10% Sleet mutation, Yellow Energy Crystal obtainable. Avalanche Totem (150,000 C$) |
| Meteor | Ancient Isle | Rare spawns triggered. Meteor Totem (75,000 C$) |
Seasons System
Seasons rotate automatically and are universal across all servers — you cannot change them with any Totem.
| Season | Duration | Fish Spawn Bonus | Penalty (Off-Season) |
|---|---|---|---|
| Spring | ~9.6 hours | +25% for spring-preferring fish | -15% for all others |
| Summer | ~9.6 hours | +25% for summer-preferring fish | -15% for all others |
| Autumn | ~9.6 hours | +25% for autumn-preferring fish | -15% for all others |
| Winter | ~9.6 hours | +25% for winter-preferring fish | -15% for all others |
A full rotation through all four seasons takes approximately 38.4 real-life hours. Each season has its own distinct visual effects — snow in Winter, falling leaves in Autumn, flowering plants in Spring, and brighter lighting in Summer.
Seasons Rod
Crafted at the Crafting Station (Level 145+): 2 Opals + 3 Frozen Driftwood + Magic Thread + 35,000 C$.
| Feature | Detail |
|---|---|
| Passive | +20% multiplicative luck during a fish’s preferred season (stacks to +50% total) |
| Mutation chance | 20% chance to apply a season-specific mutation |
| Winter mutation | 2.5× sell price |
| Spring mutation | 3× sell price |
| Summer mutation | +25% size |
The “If X, Then Y” Decision Framework
Stop guessing. Here’s a concrete decision tree you can use every time you load into a server.
Step 1: Check the season.
Look at the bottom-right corner. What’s the season? Now ask: does the fish I want prefer this season?
- Yes → You get a +25% spawn rate boost. Keep going.
- No → Spawn rate drops by 15%. It’s not impossible, but it’s slower. Decide if you want to wait 9.6 hours for the next rotation, or fish anyway and accept the penalty.
Step 2: Check the time of day.
Is it day or night? Match it to the fish.
- Fish is diurnal + it’s daytime → Perfect. No penalty.
- Fish is nocturnal + it’s nighttime → Perfect. No penalty.
- Mismatch → 90% spawn rate penalty. Do not fish here. Use a Sundial Totem (2,000 C$) to flip the cycle, or switch to a different fish that matches the current time.
Step 3: Check the weather.
What’s the weather icon showing?
- Clear → Neutral. No boost, no penalty. Fine for general farming, bad for targeting specific fish.
- Rain / Foggy / Windy → If your target fish prefers this weather, you get +35% catch rate. If not, consider using the matching totem (2,000 C$ each) to force the weather you need.
Step 4: Stack or switch.
If season + time + weather all align, you’re in the golden window. Use your best bait and rod. If two out of three align, it’s still worth fishing. If only one aligns — or none — you’re better off switching targets or waiting.
Quick example: You want a nocturnal, rain-preferring, Winter fish. It’s currently Winter, nighttime, and raining. That’s triple alignment. Your spawn rate is getting compounded bonuses from all three systems. This is when you pop your best bait and commit.
Reverse example: Same fish, but it’s Summer, daytime, and Clear. You’re fighting a -15% season penalty, a -90% time penalty, and zero weather bonus. Your effective spawn rate is basically zero. Don’t be the player who camps this for two hours. Just don’t.
Complete Totem Guide
Totems are consumable items that let you control weather and trigger events. Each use consumes one totem.
Weather Control Totems (Basic)
| Totem | Effect | Cost | Location |
|---|---|---|---|
| Sundial Totem | Flips day ↔ night | 2,000 C$ | Sunstone Island cave |
| Smokescreen Totem | Sets weather to Foggy | 2,000 C$ | Mushgrove Swamp |
| Windset Totem | Sets weather to Windy | 2,000 C$ | Snowcap Island cave |
| Tempest Totem | Sets weather to Rain | 2,000 C$ | Terrapin Island underwater cave |
Event Trigger Totems (Premium)
| Totem | Effect | Cost | Location |
|---|---|---|---|
| Eclipse Totem | Triggers Eclipse event | 250,000 C$ | Ancient Isle cave |
| Meteor Totem | Summons a Meteor | 75,000 C$ | Roslit Volcano |
| Aurora Totem | Triggers Aurora Borealis | 500,000 C$ | Desolate Pocket / Desolate Deep |
| Blizzard Totem | Triggers Blizzard | 275,000 C$ | Northern Summit (Frigid Cavern) |
| Avalanche Totem | Triggers Avalanche | 150,000 C$ | Northern Summit mountain |
The Counter-Intuitive Truth About Premium Totems
Here’s something that goes against almost every “Fisch pro tip” you’ll see in Discord: Aurora Totems are often a waste of money.
Yes, they give +700% luck. Yes, 6× server-wide sounds incredible. But here’s what nobody mentions: Aurora Borealis doesn’t change which fish can spawn. It only makes the fish already in the spawn pool appear more often. If you’re fishing in the wrong season, at the wrong time, in the wrong weather, that 6× luck is multiplying near-zero.
I’ve watched players burn 500,000 C$ on an Aurora Totem, then fish for a diurnal fish at night. They’re getting 6× luck on a pool that’s been reduced by 90%. The math is brutal. You’d have been better off spending 2,000 C$ on a Sundial Totem to fix the time penalty.
The real counter-intuitive play? Save your premium totems for when the basics are already aligned. Aurora Totems shine when you’ve got matching season, matching weather, and correct time of day. That’s when 6× luck turns a good spawn rate into an insane one. Used blindly, they’re the most expensive placebo in the game.
Same logic applies to Eclipse Totems. The Solarblaze mutation is fantastic — 2.5× sell value — but Eclipse only triggers during the day. If you pop it at night, you’ve just lit 250,000 C$ on fire. Check the time first. Always.
Optimal Fishing Strategy
Stacking Boosts for Maximum Luck
The key to rare fish is overlapping favorable conditions:
- Target during the fish’s preferred season (+25% spawn rate)
- Use the matching weather totem (+35% spawn rate)
- Fish at the correct time of day (avoid the -90% penalty)
- Stack with event bonuses (Aurora Borealis = 6× luck)
Example: A nocturnal, rain-preferring, winter fish should be targeted at night during Winter with Rain weather active. The combined bonuses (25% + 35% + no time penalty) give the highest possible spawn rate.
Best Times to Use Premium Totems
| Totem | Best Use Case |
|---|---|
| Aurora Totem (500K) | Save for when you have a stockpile of high-quality bait and a strong rod. The 6× luck window is too valuable to waste on basic gear. |
| Eclipse Totem (250K) | Use when farming for high-value Solarblaze mutation fish (2.5× sell price on all catches during Eclipse). |
| Blizzard Totem (275K) | Northern Summit exclusive farming for Blighted mutation (15% chance). |
Related Guides
- Fisch Beginner Guide — Getting started with fishing
- Fisch Best Rods Tier List — Best rods for each weather condition
- Fisch Mutations & Bait Guide — Pairing bait with weather for maximum value
- Fisch Fish Location Map — Where to find weather-specific fish
- Fisch Boss Fishing & Hunting Guide — Rare boss spawns and how weather affects them
- Fisch Money Farming Guide — Turn your weather-perfect catches into maximum profit
- Fisch Rod Progression Timeline — Which rod to use at each stage of the game