You’ve Mastered the Basics. Now the Game Changes.
You can clear your first 3-5 quotas consistently. You know the moons, the entities, the items. You think you’ve figured out Lethal Company.
Then quota 6 hits. You need 750 credits. Your usual route — Assurance, March, Offense — barely scrapes together 600. You fail the quota. You lose. You don’t understand what changed.
What changed is the quota scaling curve. The early game teaches you to collect 200-400 scrap per run. The mid-game demands 600-800. The late game asks for 1,200+. Your strategy needs to evolve with each quota tier. Here’s how.
Quota Tiers: How Your Moon Choices Must Evolve
| Quota Tier | Required Scrap/Day | Viable Moons | New Risk |
|---|---|---|---|
| 1-3 (Beginner) | 50-100 | Assurance, March | Almost none — these moons are free and safe |
| 4-6 (Intermediate) | 150-250 | Offense, March, Rend (cautiously) | Rend introduces Coil-Head risk |
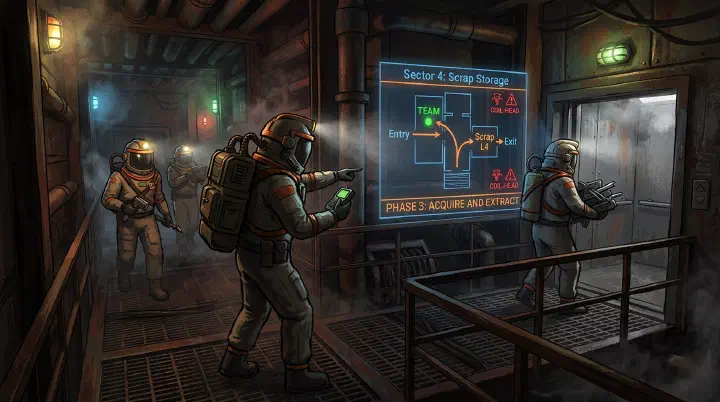
| 7-9 (Advanced) | 300-450 | Rend, Dine, Titan (if crew is experienced) | Titan has S+ hazard — Jesters, Coil-Heads, Ghost Girl |
| 10+ (Expert) | 500+ | Titan, Artifice | Artifice costs 1,200 to land — a wipe costs you a full quota |
The transition that kills most crews: moving from Tier 1-3 to Tier 4-6. The free moons can no longer provide enough scrap to meet quota. You MUST start landing on paid moons. But crews that have spent 15 hours only on free moons haven’t learned paid-moon survival — they’ve been playing in the kiddie pool and now the game throws them in the deep end.
The fix: Start landing on Offense (40 credits, C hazard) by quota 3, not quota 5. Use the early quotas — when the scrap requirement is low — to practice paid-moon survival. A wipe on quota 3 costs you almost nothing. A wipe on quota 7 costs you the run.
Entity Manipulation: Turning Threats Into Tools
Experienced crews don’t just avoid entities. They use them.
Bracken as a Room Scanner
Bracken’s presence in a room means something: Bracken rooms have high-value scrap more often than empty rooms. The Bracken IS the indicator. If you enter a room and see Bracken, glance briefly (under 0.5 seconds!) then look away and BACK OUT slowly. Note the room number. Come back 2 minutes later — Bracken patrols and leaves rooms temporarily. The room it guarded usually has above-average loot.
Eyeless Dogs as Perimeter Alarms
Dogs howl when they detect sound. A howl from the direction of your ship entrance means something — or someone — is outside near your extraction path. Experienced crews use Dog howls as free radar: “Dog howled from the left side of the ship. Someone’s on the left approach. Take the right path.”
Hoarding Bugs as Scrap Aggregators
Hoarding Bugs collect scrap and pile it in their nest. If you find a Bug nest (pile of random scrap in a corner), you’ve found 5-10 items in one location. Clear the Bug (Shovel, 3 hits), collect the pile. One Bug nest often contains more scrap than 3 rooms of regular looting.
The Day-by-Day Moon Rotation (Quotas 4-8)
Here’s a proven three-day rotation for mid-to-late-game quotas:
Day 1: Rend (550 credits to land, B-tier hazard). Average scrap: 800-1,100. Goal: collect 700+ scrap. Leave by 4 PM. Rend’s scrap density is the best in the game for its hazard level. One good Rend run funds half your quota.
Day 2: March or Offense (free or 40 credits). Lower risk, lower reward. Goal: collect 300-500 scrap. You’re filling the gap, not carrying the quota. If Day 1 went exceptionally well (1,000+ scrap), you can skip Day 2 entirely or use it as a Titan practice run.
Day 3: Assess the gap. If you need under 200 to meet quota: Offense. If you need 200-400: Rend again. If you need 400+: Titan (if crew is experienced) or double-run Rend (do two quick runs — enter at 8 AM, clear 3-4 rooms near entrance, leave, sell, re-enter for the afternoon).
The mistake: Running Titan on Day 1 because “we always run Titan.” Titan on Day 1 is a gamble. If you wipe, you’re behind on Day 2 AND Day 3. Rend on Day 1 is the safe play. Titan is for when you’re already ahead and can afford the risk.
When to Abandon a Run
Experienced crews know when to cut losses. Not every facility entry needs to end with scrap delivered. If two crew members die within the first 5 minutes, the remaining two should return to the ship immediately. The scrap those two dead players were carrying is gone. The hazard level hasn’t changed. You’re now running a 2-player operation on a moon balanced for 4. Leave. Sell what you have. Try again on a different moon.
The crews that survive 10+ quotas aren’t the ones that play perfectly. They’re the ones that recognize a losing run and extract before it becomes a wipe. The difference between quota 8 and quota 12 isn’t skill — it’s knowing when a moon entry has gone bad and having the discipline to call it. The best call in Lethal Company is often “everyone back to the ship, we’re leaving.” Not because you’re scared. Because you’re smart enough to live to collect scrap another day. The difference between a crew that survives 10 quotas and one that dies at 6 isn’t mechanical skill. It’s the willingness to abort a bad run on Day 1 instead of forcing it and losing two crew members, their scrap, and their equipment.
Item Juggling: The 5th Inventory Slot
When your hands are full (4 items in inventory) and you find a 5th valuable item, you can “juggle” it — pick it up, throw it forward, walk to it, pick it up, throw it forward, repeat. This lets you transport a 5th item without an inventory slot, at the cost of moving at throwing speed instead of walking speed.
When to juggle: The item is worth 60+ credits AND you’re within 3 rooms of the exit AND no entities are currently active. Juggling a 120-credit Laser Pointer 2 rooms from the exit is worth the extra 45 seconds. Juggling a 30-credit Tattered Metal Sheet 5 rooms deep is not — the time cost exceeds the scrap value.
When not to juggle: During entity activity. A juggled item on the floor when Rush screeches is a lost item. During fog or storm weather — outdoor visibility is too low to track where you threw the item. In multiplayer with a full crew — have someone else carry it instead of juggling. Item juggling is a solo-player desperation technique, not a standard strategy. If you have teammates, use them as inventory slots before you start throwing scrap down hallways.