The Rend Wipe That Should Have Taught You Everything
Your ship hits Rend at 9 AM. The fog is so thick you can’t see the main entrance from the landing pad. Everyone has the standard kit: Pro-Flashlight, Walkie-Talkie, and one shovel between two of you. You’ve cleared Experimentation, Assurance, and Offense with this exact loadout, so why change?
Three minutes in, your scout pings on the walkie: “There’s something big out here, I can hear stomping.” Then silence. Not a scream — silence. A Forest Keeper just picked him up and ate him whole. Your second teammate sprints toward the entrance, and the Keeper grabs her too. Two players gone, no body to recover, no scrap returned to the ship. The shovel does 1 HP per hit and the Keeper has 8 HP. You’d need to swing eight times while it’s chewing on your face. You don’t.
The remaining two of you panic-loot the entrance, lose another to a Bracken in the corridor because nobody had a flashlight pointed at it, and reach the ship with 47 credits of scrap. Quota is 350. You fail. The crew gets fired into space.
The wipe wasn’t bad luck. It was a loadout problem. You brought Experimentation gear to a Rend moon. Forest Keepers don’t care about your shovel. The fix wasn’t more flashlights — it was a single 30-credit Stun Grenade in the scout’s pocket. The flash-bang stuns the Keeper for 5 seconds, long enough for everyone to break line-of-sight and reach cover. One item. The whole run lives.
This is what the store actually is: a threat-counter system. The reason your team keeps dying with “the optimal loadout” is that there is no optimal loadout. There are loadouts that match the moon’s threat profile and loadouts that don’t.
Why the Standard Loadout Fails
The default Lethal Company loadout — flashlight, walkie, shovel — is built around a fantasy where the only threats are Snare Fleas, Hoarding Bugs, and Thumpers. On Experimentation and Assurance, that fantasy is mostly true. On every other moon, it falls apart.
Here’s why the “buy 4 flashlights, 4 walkies, 1 shovel” approach gets you killed:
- It assumes melee is a viable answer. It isn’t, against half the bestiary. Brackens kill you in one neck-snap. Forest Keepers swallow you whole. Coil-Heads are invincible. Jesters can’t be stopped by a shovel. A team with five shovels and zero stun tools has zero answers to roughly 60% of the monsters past Tier 2.
- It assumes vision is the bottleneck. It isn’t. Information is. A walkie tells you a Bracken is in the corner; a Pro-Flashlight only helps if you already know where to point it. Teams that buy three flashlights and zero Radar Boosters are over-investing in light and under-investing in coordination.
- It assumes every player needs the same kit. They don’t. The ship operator doesn’t need a shovel. The scout doesn’t need a heavy haul tool. Identical loadouts waste credits and slot space.
- It ignores the moon. Titan needs an Inverse Teleporter. Rend needs Stun Grenades. Dine needs Lockpickers. The “standard loadout” pretends all moons are interchangeable. They aren’t — and the store rotates daily specifically so you have to plan ahead.
The framework that works: read the moon’s dominant threat type, pick 1–2 hard counters for that threat, and only then fill out generic gear with whatever credits remain. Below is what that looks like in practice.
Threat-Profile Loadouts
Experimentation, Assurance, Offense (free moons, low threat)
These moons are dominated by Snare Fleas, Hoarding Bugs, Thumpers, and the occasional Bracken. Shovels actually work here. Don’t overthink it.
- One Pro-Flashlight per two players (sharing is fine on small maps)
- Walkie for every single player, no exceptions
- One shovel for the team — the lead corridor-clearer holds it
- Skip Stun Grenades, skip Zap Guns, skip the Inverse Teleporter
- Total team cost: roughly 80–110 credits
If you’re spending more than 110 credits on Experimentation gear, you’re throwing money away. Save it for the day the shop has a Stun Grenade in stock and you’re heading to Rend.
Vow and March (mid-tier, mixed threats)
Vow and March introduce Eyeless Dogs outdoors and bigger monster variety indoors. The threat profile shifts from “melee everything” to “avoid the dogs, then melee the small stuff.”
- Two Pro-Flashlights for the indoor team
- Walkie for everyone (still non-negotiable)
- One shovel for the indoor lead
- One Boombox or Radar Booster for the outdoor traversal — to lure or distract dogs
- Optional: one Stun Grenade if a Forest Keeper spawns
- Total team cost: roughly 130–180 credits
The Boombox is a controversial pick because it attracts everything, but on Vow and March it’s the cheapest dog-distraction tool you’ll find. Drop it 40 meters from the ship door and Eyeless Dogs will path toward it instead of toward you.
Rend, Dine, Titan (high tier, must-counter threats)
This is where the standard loadout gets your whole team killed. Rend has Forest Keepers and Eyeless Dogs. Dine has both plus heavy mansion interiors. Titan is a meat grinder of dogs, Coil-Heads, Jesters, and Nutcrackers.
- Pro-Flashlight per player — visibility is now critical
- Walkie per player
- Two shovels minimum (Nutcrackers alone soak 4 hits)
- One Stun Grenade per player — the cheapest insurance in the game at 30 credits
- One or two Lockpickers for mansion doors (Dine, Rend)
- One Inverse Teleporter on Titan (essential, not optional)
- One Zap Gun for the support player on Titan
- Two Radar Boosters for navigation and bait
- Total team cost: 800–1,200 credits
The cost looks scary until you realize a single failed Titan run costs you the entire ship — which is far more than 1,200 credits in lost scrap and a crew dismissal.
The Counter-Intuitive Truth Nobody Tells You About Shovels
Every Lethal Company guide tells you to buy two shovels for your team. Most of them are wrong. The shovel is the most over-bought item in the game.
Here’s the math nobody runs:
- The shovel does 1 HP per hit
- It takes 5–8 hits to kill anything bigger than a Hoarding Bug
- Each hit takes about 1 second
- During those 5–8 seconds, the monster is hitting you back
- Most monsters that take 5+ hits to kill will kill you first
The shovel only “works” against Snare Fleas (1 hit), Hoarding Bugs (2 hits), and Thumpers if you have wall-cover (3 hits). Against everything else, swinging a shovel is a slower form of dying. Brackens snap your neck before hit four. Forest Keepers eat you whole, ignoring damage entirely. Coil-Heads cannot be killed.
The counter-intuitive truth: on harder moons, replace your second shovel with a Stun Grenade. A 30-credit grenade trades zero damage for 5 seconds of total monster lockdown — including invincible monsters. That’s enough time for the whole team to reach the ship. A 30-credit shovel only kills monsters you could already outrun.
Most experienced teams run one shovel total, two on Titan, and pour the saved credits into Stun Grenades and Radar Boosters. Try this for one quota cycle. Your survival rate will jump.
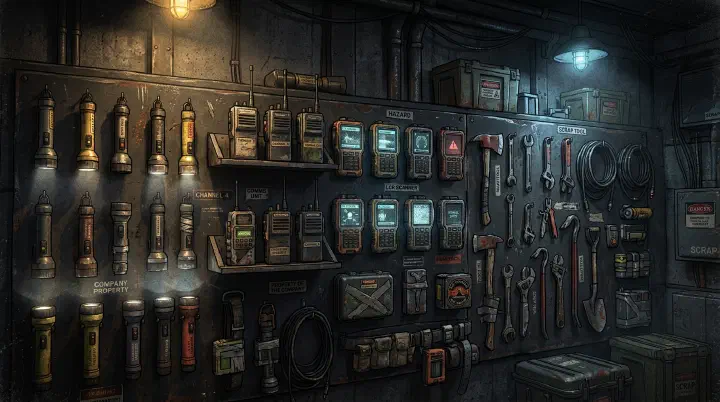
Items Worth Buying (Quick Reference)
Cost and weight reference for the items that actually carry their weight in your inventory:
| Item | Cost | Hands | Best Used For |
|---|---|---|---|
| Walkie-Talkie | 12 | 1 | Every player, every run |
| Pro-Flashlight | 25 | 1 | Indoor navigation, all moons |
| Shovel | 30 | 1 | Snare Fleas, Hoarding Bugs only |
| Stun Grenade | 30 | 1 | Forest Keepers, Brackens, Jesters |
| Radar Booster | 60 | 1 | Dog bait, dead-player guidance |
| Lockpicker | 20 | 1 | Mansion runs (Rend, Dine, Titan) |
| Inverse Teleporter | 375 | N/A | Titan, situational on Rend/Dine |
| Zap Gun | 400 | 2 | Late-game stun-lock support |
Everything else in the store is either redundant (Stop Sign vs. Shovel), niche (Extension Ladder), or genuinely a trap (covered below).
How to Read Each Item’s Real Value
Below is the loadout-builder’s decision logic for the items most teams misuse.
Walkie-Talkie (12 credits). Buy one for every player on every run, period. Dead players can still hear and speak through walkies, which means a dead scout can still warn the living about a Coil-Head around the corner. At 12 credits, this is the single most efficient credit-to-survival ratio in the game.
Pro-Flashlight (25 credits) over basic Flashlight (15 credits). The basic flashlight is a trap purchase disguised as a budget option. The Pro doubles the battery life and widens the beam for only 10 more credits. If you’re already spending 15 on a flashlight, the extra 10 is the highest-value upgrade in the store.
Stun Grenade (30 credits). The most under-bought item in the game. Affects every monster including invincible ones. One per player on Rend, Dine, and Titan. Half your team will never use them, which means they come home and you didn’t spend the 30 credits to die.
Radar Booster (60 credits). Reusable. Place at facility entrance, ping from terminal to lure Eyeless Dogs away, hand to dead players who can ping it to guide the living, mark high-value scrap caches you couldn’t carry. Most teams buy one and forget about it. Buy two.
Inverse Teleporter (375 credits). Bypasses the outdoor section entirely on Titan. The outdoor area on Titan is where 80% of Titan deaths happen. Worth every credit on Titan, situational elsewhere.
Zap Gun (400 credits). Stun-locks any single monster indefinitely. The support player holds it and locks down the Bracken or Coil-Head while the rest of the team loots. Late-game only.
Items That Are Traps
These items look good in the store. They aren’t.
- Jetpack (700 credits) — Roughly 30% chance to explode on hard landings, 50% if a monster hits you mid-flight, near-100% in stormy weather. You will lose a Jetpack and a player on the same trip. Fun, but not a credit investment.
- TZP-Inhalant (120 credits) — 15 seconds of +50% speed. By the time you’ve decided you need it, you’re already dead. The credits buy four Stun Grenades, which actually save runs.
- Extension Ladder (60 credits) — Two-handed, heavy, blocks scrap-carrying slots. Niche cheese strategy on Vow only. Skip it.
- Boombox (60 credits) — Useful as dog-bait on Vow/March, but attracts every monster on harder moons. The “lure” turns into a “summon.”
- Spray Paint (50 credits) — Only helps if your team gets lost. Learn the mansion and facility layouts instead. Twenty hours of practice replaces every spray-paint can you’ll ever buy.
- Stop Sign (30 credits) — Identical damage to the shovel, slower swing. The shovel is strictly better. Only buy if shovels are out of stock.
Day-to-Day Spending Rules
These rules keep your credit pool healthy across a quota cycle:
- Never spend more than 30% of your current quota on equipment in any single day. The rest funds emergencies and shop refreshes.
- Buy walkies first, every time, before anything else.
- One shovel per two players for easy moons; two total for hard moons. Resist the urge to over-buy.
- Recharge flashlights and walkies between trips at the ship’s charging station.
- Always pick up Radar Boosters before lift-off. They are reusable, and leaving one behind is a 60-credit loss.
- Save Stun Grenade purchases for the day before a Rend, Dine, or Titan run — not the day before Experimentation.
Equipment Combos That Actually Win Runs
These are the synergies that turn equipment from solo-survival tools into team-survival systems:
- Stun Grenade + Shovel. Throw the grenade, swing the shovel during the 5-second window. Bracken dies in 5 hits with zero damage taken.
- Zap Gun + Team Melee. One player holds the Zap Gun on a Bracken or Forest Keeper, two others hit it with shovels. The fastest safe kill in the game.
- Boombox + Radar Booster (outdoor). Drop both 50 meters from the ship in opposite directions. Eyeless Dogs split between the two sound sources, neither reaches the door.
- Inverse Teleporter + Pro-Flashlight + Stun Grenade. Standard Titan opener. Teleport in, light up the dropzone, grenade anything that’s already chasing.
Conclusion
The reason your team keeps wiping isn’t that you’re under-equipped — it’s that you’re equipped wrong for the moon you’re on. A 200-credit loadout matched to the threat profile beats a 1,000-credit loadout that ignores it. Walkies for everyone, Pro-Flashlights over basics, one shovel until you really need two, and Stun Grenades on every harder moon. Skip the trap items. Read the moon before you read the shop.
Next time you land on Rend in heavy fog, you’ll have the grenade in your pocket. The Forest Keeper will still come — but this time, the run lives.
Related Guides
- Lethal Company Advanced Strategies Guide
- Lethal Company Beginner Guide: Survive Your First Quota
- Lethal Company Co-op Team Roles Guide
- Lethal Company Monster Bestiary: Every Entity Explained
- Lethal Company Moons Guide: Complete Moon Rankings
- Lethal Company Scrap and Loot Guide: Complete Item Database
- Lethal Company Terminal Commands Guide