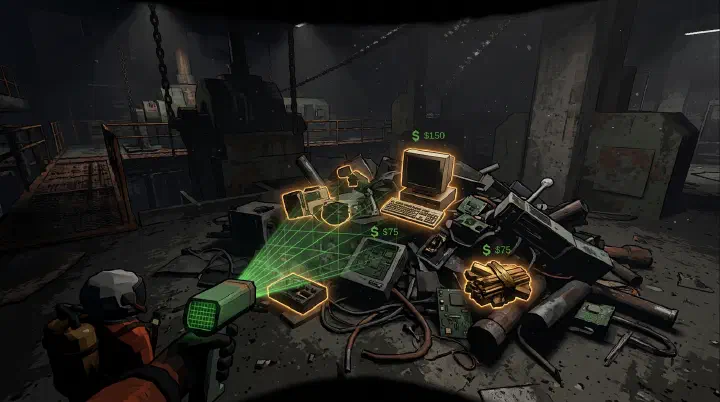
Last updated: July 3, 2026. This comprehensive scrap guide covers every lootable item in Lethal Company with accurate value ranges, weight classifications, and strategic priority rankings to maximize your quota earnings.
The Scene: Rend, Night 2, Quota Short by 50
You round a corner in the Rend facility and spot a Large Axle glowing on a shelf. Sixty credits. Your quota is sitting at 430 out of 480, and this one item clears the gap. You hoist it onto your shoulder — both hands occupied — and start the long walk back. Your flashlight is in your pocket. Your walkie-talkie is silent because you cannot reach it. You hear a Bracken rustle behind you. You try to sprint, but the axle slows you down. Two seconds later, your crew watches your body cam go black.
That axle is still sitting in the facility. The quota fails. And the lesson is simple: scrap value means nothing if you do not extract it.
Every decision in Lethal Company — what to grab, what to skip, when to leave — is a trade-off between credits and survival. This guide breaks down the full scrap database, but more importantly, it teaches you how to think about loot so you stop leaving your best items on the floor next to your corpse.
Scrap System Overview
Scrap items are the primary source of income in Lethal Company. Each item rolls a randomized value within a fixed range when the facility generates. Two copies of the same item can differ by hundreds of credits depending on the roll.
Items also have weight classifications. One-handed items occupy a single slot and let you carry a second item or a flashlight. Two-handed items occupy both slots, reduce your movement speed, and prevent you from using doors, ladders, or equipment while carrying them. Special items like the Apparatus and Bee Hive have unique mechanics that add risk on top of weight.
- Class: One-Handed | Slots Used: 1 slot | Mobility: Full mobility | Examples: Candy, Ring, Robot Toy
- Class: Two-Handed | Slots Used: 2 slots | Mobility: Reduced mobility | Examples: Cash Register, V-Type Engine
- Class: Special | Slots Used: Variable | Mobility: Special interaction | Examples: Apparatus, Bee Hive
Failure Analysis: What Players Get Wrong About Scrap
Most crews lose runs not because they are bad at shooting monsters, but because they are bad at evaluating loot. Here are the three most common mistakes.
Mistake 1: Overvaluing two-handers. New players see a V-Type Engine with an 80-140 credit range and think they hit the jackpot. They do not realize that carrying it turns them into a slow, blind target. If that same player had grabbed a Gold Bar in one hand and a Perfume Bottle in the other, they would be carrying roughly the same value while still having a free hand for a flashlight and full sprint speed.
Mistake 2: Ignoring weight-to-value ratio. A Metal Sheet averages 15 credits and takes both hands. A Candy averages 11 credits and takes one hand. On paper, the Metal Sheet is worth more. In practice, the Candy leaves you mobile and lets you stack a second item. The Metal Sheet should almost always stay on the floor unless you are on a trivial moon and have nothing else to do.
Mistake 3: Not prioritizing scrap types by moon. On Experimentation, the total loot pool is so small that every credit matters. Grab whatever you can. On Titan, the average item value is nearly triple, and the monster density is lethal. You do not have time for ten trips. You need to identify the three or four best items in the facility, extract them in one or two runs, and leave the rest behind. The same looting strategy does not work on every moon.
Decision Framework: Grab vs Leave Behind
When you find an item, run through this checklist in under three seconds.
Step 1: How much is it worth? Check the approximate value. If it is under 20 credits average and two-handed, skip it unless the moon is free and quiet.
Step 2: How many hands does it need? One-handed items are almost always better than they look on paper because you can pair them. Two-handed items need to justify the opportunity cost of everything else you cannot carry.
Step 3: What is the extraction route? A Cash Register is a fine item in a room near the entrance. The same Cash Register at the bottom of a fire escape on Rend is a death trap. Distance and danger scale down the real value of heavy items.
Step 4: What time is it? After 5 PM, monsters get more aggressive. A risky Bee Hive grab that made sense at 1 PM is a bad call at 7 PM.
Step 5: What does your team already have? If the ship already holds enough scrap to clear quota, stop looting. Greed kills more crews than monsters do.
Here is a quick reference for common items:
- Priority: Always | Item: Gold Bar | Avg Value: ~140 | Hands: 1H | Verdict: Pick up every time
- Priority: Always | Item: Bee Hive | Avg Value: ~200 | Hands: 1H | Verdict: Grab only if route to ship is clear
- Priority: High | Item: Hairdryer | Avg Value: ~80 | Hands: 1H | Verdict: Excellent value, no downside
- Priority: High | Item: V-Type Engine | Avg Value: ~110 | Hands: 2H | Verdict: Good, but only if path is safe
- Priority: Medium | Item: Painting | Avg Value: ~75 | Hands: 2H | Verdict: Bulky; skip if far from exit
- Priority: Low | Item: Metal Sheet | Avg Value: ~15 | Hands: 2H | Verdict: Leave it
- Priority: Low | Item: Yield Sign | Avg Value: ~21 | Hands: 2H | Verdict: Leave it unless desperate
Counter-Intuitive Advice
A pile of low-value one-handers often beats one big two-hander. Imagine you find a Cash Register worth 100 credits. It takes both hands. Now imagine you find a Ring (~38), a Tea Kettle (~32), and a Pickle Jar (~25) scattered across three nearby rooms. Individually they look weak. Combined they are 95 credits, you carry them across multiple trips without slowing down, and you never lose flashlight access. On hard moons, that flexibility keeps you alive.
The Apparatus is a trap for greedy teams. It averages 170 credits, the highest of any item. But pulling it raises monster spawns, and you are stuck carrying a bulky two-handed object through a now-angry facility. The right way to take it: send one player ahead to pull it while the rest of the team is already at the main doors. If the puller dies, the team can still leave. If everyone is deep inside when the alarm goes off, you are probably all dying together.
Sometimes the best play is to sell early. If you have cleared quota by day two, do not keep looting for “extra padding.” Extra credits beyond quota do not roll over in a meaningful way. Every extra trip is another chance to lose equipment or lives. Sell what you have, meet the quota, and live to see the next cycle.
Complete Scrap Item Database
Apparatus is listed here but treated as a special case due to its alarm mechanic.
Tier 1: High Value (50+ credits average)
- Item: Gold Bar | Value Range: 72 - 210 | Avg: ~140 | Weight: 1H | Notes: Best value-per-slot in the game
- Item: Bee Hive | Value Range: 80 - 420 | Avg: ~200 | Weight: 1H | Notes: Outdoor only; grabbing it spawns bee swarm
- Item: V-Type Engine | Value Range: 80 - 140 | Avg: ~110 | Weight: 2H | Notes: Heavy, needs clear path
- Item: Apparatus | Value Range: 60 - 280 | Avg: ~170 | Weight: Special | Notes: Triggers facility alarm on removal
- Item: Cash Register | Value Range: 40 - 160 | Avg: ~100 | Weight: 2H | Notes: Common but bulky
- Item: Fancy Lamp | Value Range: 60 - 280 | Avg: ~140 | Weight: 2H | Notes: Bulky; prioritize only near exits
- Item: Shotgun | Value Range: 90 - 150 | Avg: ~120 | Weight: 2H | Notes: Nutcracker drop; usable as weapon Bee Hive detail: Found hanging from outdoor trees. Grabbing one aggroes bees that chase at slightly faster than sprint speed, dealing roughly 5 HP per sting. The swarm stops only when you enter the ship or drop the hive. Because it is one-handed, you can still open doors normally. Grab it, sprint in a straight line to the ship, and do not zig-zag — the bees will catch you if you slow down.
Apparatus detail: There is exactly one per facility, wall-mounted in the Apparatus room. Removing it sounds a facility-wide alarm and increases monster spawn rate. Only remove it when your team is positioned at the exit and ready to leave immediately. Lingering after removal is the leading cause of late-run party wipes.
Tier 2: Medium Value (30-50 credits average)
- Item: Painting | Value Range: 30 - 120 | Avg: ~75 | Weight: 2H | Notes: Common but bulky
- Item: Perfume Bottle | Value Range: 40 - 84 | Avg: ~62 | Weight: 1H | Notes: Great value-per-slot
- Item: Large Axle | Value Range: 36 - 64 | Avg: ~50 | Weight: 2H | Notes: Heavy
- Item: Air Horn | Value Range: 40 - 80 | Avg: ~60 | Weight: 1H | Notes: Solid filler item
- Item: Clown Horn | Value Range: 50 - 100 | Avg: ~75 | Weight: 1H | Notes: Uncommon, worth grabbing
- Item: Robot Toy | Value Range: 50 - 100 | Avg: ~75 | Weight: 1H | Notes: Uncommon, worth grabbing
- Item: Hairdryer | Value Range: 60 - 100 | Avg: ~80 | Weight: 1H | Notes: Excellent one-handed value
Tier 3: Low-Medium Value (15-30 credits average)
- Item: Ring | Value Range: 20 - 56 | Avg: ~38 | Weight: 1H | Notes: Good filler
- Item: Tea Kettle | Value Range: 20 - 44 | Avg: ~32 | Weight: 1H | Notes: Good filler
- Item: Wedding Ring | Value Range: 12 - 56 | Avg: ~34 | Weight: 1H | Notes: Good filler
- Item: Magnifying Glass | Value Range: 12 - 40 | Avg: ~26 | Weight: 1H | Notes: Grab if hand is free
- Item: Easter Egg | Value Range: 22 - 48 | Avg: ~35 | Weight: 1H | Notes: Good filler
- Item: Laser Pointer | Value Range: 18 - 32 | Avg: ~25 | Weight: 1H | Notes: Grab if hand is free
- Item: Pickle Jar | Value Range: 20 - 30 | Avg: ~25 | Weight: 1H | Notes: Grab if hand is free
- Item: Pill Bottle | Value Range: 10 - 30 | Avg: ~20 | Weight: 1H | Notes: Low priority
- Item: Comedy Mask | Value Range: 10 - 32 | Avg: ~21 | Weight: 1H | Notes: Low priority
Tier 4: Low Value (Under 20 credits average)
- Item: Candy | Value Range: 6 - 16 | Avg: ~11 | Weight: 1H | Notes: Grab only if nothing else nearby
- Item: Red Soda | Value Range: 10 - 24 | Avg: ~17 | Weight: 1H | Notes: Low priority
- Item: Plastic Fish | Value Range: 8 - 20 | Avg: ~14 | Weight: 1H | Notes: Low priority
- Item: Rubber Ducky | Value Range: 10 - 20 | Avg: ~15 | Weight: 1H | Notes: Low priority
- Item: Gift Box | Value Range: 10 - 28 | Avg: ~19 | Weight: 1H | Notes: Low priority
- Item: Hair Brush | Value Range: 6 - 20 | Avg: ~13 | Weight: 1H | Notes: Low priority
- Item: Metal Sheet | Value Range: 8 - 22 | Avg: ~15 | Weight: 2H | Notes: Avoid — two-handed, low value
- Item: Tattered Metal Sheet | Value Range: 8 - 16 | Avg: ~12 | Weight: 1H | Notes: Very low priority
- Item: Cog | Value Range: 12 - 20 | Avg: ~16 | Weight: 1H | Notes: Very low priority
- Item: Whoopie Cushion | Value Range: 10 - 18 | Avg: ~14 | Weight: 1H | Notes: Very low priority
- Item: Yield Sign | Value Range: 14 - 28 | Avg: ~21 | Weight: 2H | Notes: Avoid — two-handed, low value
Item Rarity by Moon
Different moons have different scrap spawn pools. Below is each moon’s typical loot profile.
- Moon: Experimentation | Typical Loot Pool: Low-tier items, few high-value | Avg Item Value: ~30 credits | Total Loot Value: 200-400 per run
- Moon: Assurance | Typical Loot Pool: Mixed, some medium-value | Avg Item Value: ~35 credits | Total Loot Value: 250-500 per run
- Moon: Vow | Typical Loot Pool: Medium-tier, occasional high-value | Avg Item Value: ~40 credits | Total Loot Value: 300-600 per run
- Moon: Offense | Typical Loot Pool: Medium-high mix | Avg Item Value: ~45 credits | Total Loot Value: 400-800 per run
- Moon: March | Typical Loot Pool: High-value pool | Avg Item Value: ~55 credits | Total Loot Value: 600-1,200 per run
- Moon: Rend | Typical Loot Pool: Very high-value pool | Avg Item Value: ~65 credits | Total Loot Value: 800-1,800 per run
- Moon: Dine | Typical Loot Pool: Very high-value pool | Avg Item Value: ~65 credits | Total Loot Value: 900-2,000 per run
- Moon: Titan | Typical Loot Pool: Maximum value pool | Avg Item Value: ~80 credits | Total Loot Value: 1,500-3,500 per run Titan’s generation is weighted heavily toward high-value items like Gold Bars, Fancy Lamps, V-Type Engines, and Cash Registers. It also spawns fewer low-tier items like Candy, Metal Sheets, and Whoopie Cushions. The catch is that Titan’s monster density makes full looting nearly impossible. Most successful Titan runs extract 30-50% of the total scrap and still clear quota.
Scrap Farming Strategy
When looting a facility, pick items in this order:
- Gold Bars and Bee Hives — highest value-per-slot, but only grab hives with a clear path to the ship.
- High-value one-handers — Hairdryer, Clown Horn, Robot Toy, Perfume Bottle. Easy to carry, no downside.
- High-value two-handers near exits — V-Type Engine, Cash Register. Only if the walk out is short and quiet.
- Medium one-handers — Ring, Tea Kettle, Easter Egg. Fill empty hands on the way out.
- Everything else — Skip unless you are on a free moon with time to kill.
The One-Trip Rule: On easier moons like Experimentation and Assurance, make three to five trips. The danger is low and the total scrap pool is small enough that every item helps. On harder moons like Rend and Titan, minimize trips. Identify the best items quickly, extract them in one or two runs, and leave. Every extra minute inside is another chance for a Coil-Head or Bracken to find you.
Value-per-slot matters more than total value. A Gold Bar (~140) in one hand and a Perfume Bottle (~62) in the other gives you 202 credits with full mobility. A Fancy Lamp (~140) takes both hands and slows you down. The dual-wield combination is safer and often more profitable because you can grab both on the same trip without penalty.
Selling Scrap
All scrap must be physically inside the ship before it can be sold. Use the terminal and type sell followed by item names, or sell all to dump everything scanned. You must scan items first — either by pointing at them and pressing Q or by using the ship’s onboard scanner — before the terminal recognizes them.
- Command:
sell [item]| Function: Sell a specific item - Command:
sell all| Function: Sell all scanned scrap - Command:
sell [item] [item]| Function: Sell multiple specific items Do not sell the Apparatus mid-run unless you are certain you will not need the credits for ship upgrades before the next quota. Most crews sell everything at once right before the deadline to avoid accidentally spending money they need for essentials.
Conclusion
Knowing scrap values changes how you move through a facility. Instead of grabbing everything you see, you start making trades. You leave the Metal Sheet behind because it is not worth both hands. You grab the Gold Bar first because it pays for itself. You skip the far-away Cash Register on Titan because the Bracken corridor between you and the exit is not worth 100 credits.
The golden rule has not changed: a Gold Bar in the ship is worth more than a V-Type Engine in the facility. Secure your high-value items early, extract before greed gets you killed, and remember that the best loot run is the one where everyone makes it back to orbit.