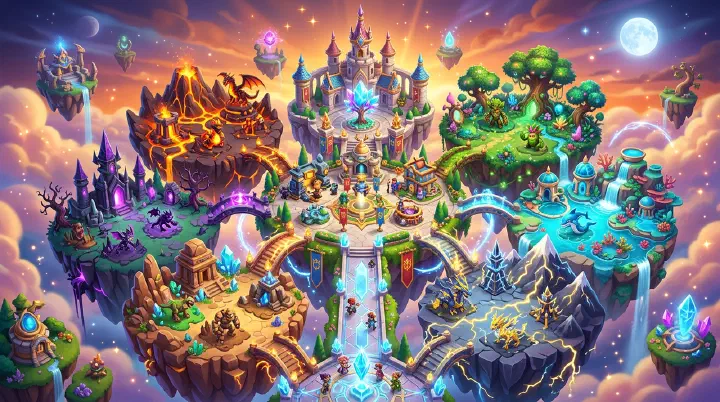
You hit level 48. You have ten islands unlocked. You have spent roughly 35 million gold on expansions, decorations, and habitat upgrades. You open your base every morning, swipe through ten islands, collect gold, and feel like you are managing a small empire. Then you visit a friend’s base. They are level 35. They own six islands. Their gold income is 180,000 per hour. Yours is 120,000. You have more islands, more habitats, more monsters. You earn 33% less. Something is wrong with your base design, and you have no idea what it is.
You compare tiles. Their Main Island is cramped — six Legendary habitats in a tight grid, a single Gold Farm in the center touching four habitats at once. Your Main Island has the Breeding Mountain dead center and two temples taking up prime real estate. Every difference is small. Added together, they explain the gap.
This is the island design trap. Monster Legends does not teach base layout in its tutorial. The game gives you islands, habitats, and decorations, then leaves you to figure out the math yourself. Most players figure it out wrong. They unlock islands as soon as they can afford them. They place habitats wherever space exists. They put temples in the center because temples feel important. They keep Common habitats because deleting them feels like throwing away progress. The result is a base that looks busy but performs like a starter island. This guide is the design system that fixes it.
The Three Base Design Disasters (And How to Spot Yours)
Every failed base falls into one of three patterns. Spotting your pattern is the first step to fixing it.
The Sprawl. You bought Dark Island at level 30, Light Island at level 35, and Legendary Island at level 50. Each island has 3-4 habitats and huge empty patches. You felt progressive unlocking new land. But empty land generates zero gold. A level-3 Legendary habitat on a full island produces 6,000 gold per hour. That same habitat on an island with five empty tiles around it produces the same 6,000 gold per hour — but it cost you 5 million gold to unlock the island underneath it. The Sprawl player confuses “owning more islands” with “earning more gold.” They are not the same thing.
The Rainbow Mess. Your Fire Island has two Fire habitats, one Nature habitat, and a Water habitat you placed because Fire Island had space. Your Nature Island holds a Dark habitat. Every island is a mix. This feels flexible. It is actually expensive. Element Temples provide a +15% gold bonus to matching-element habitats within a two-tile radius. A Fire Temple on a pure Fire island can boost 6-8 Fire habitats. A Fire Temple on a mixed island might boost only two Fire habitats and waste its radius on unrelated elements. The Rainbow Mess sacrifices 30-40% of potential Temple bonuses for the illusion of convenience.
The Temple Graveyard. You placed temples in the center of your islands because they look important. Temples are 2×2 buildings with no gold production. A center-placed Temple occupies the most valuable real estate on the island — the spot with maximum adjacency potential for habitats. A Temple belongs on the edge, one tile in, where its radius still reaches the habitat block but its footprint does not steal prime grid positions from habitats that actually earn gold.
If any of these three patterns sound like your base, your income is 30-50% lower than it should be. The fix is not spending more gold. It is redesigning what you already own.
The Fill-First Decision Framework
The most common question in island design is: “Should I upgrade what I have, or buy something new?” Here is the framework that answers it every time.
Step 1: Density check. Count your current habitats. Count your total island tiles available. If your habitat footprint covers less than 70% of available tiles, you do not need a new island. You need to rearrange what you have. Players routinely discover they can fit 4-6 extra habitats just by aligning grids properly and moving decorations to the edges.
Step 2: Tier check. Look at your habitat roster. If more than 20% of your habitats are Common or Rare, you have a quality problem, not a space problem. Deleting a Common habitat costs nothing. Replacing it with an Epic or Legendary habitat (even at level 1) typically doubles or triples the gold per hour from that same 3×3 footprint. Upgrade your monsters and habitats before you expand your land.
Step 3: Upgrade ROI check. Habitat upgrades follow a predictable payback curve. A Legendary habitat upgrade from level 3 to level 4 costs 500,000 gold and adds 50% capacity plus a fourth monster slot. At typical gold production rates, this pays for itself in 10-14 days. A new island costs 3-10 million gold and generates zero income until habitats are placed, leveled, and filled with monsters. The payback period for a new island is 45-90 days. If you have habitats below level 4, upgrading them beats buying land every single time.
Step 4: The 85% rule. Only buy a new island when your current islands are 85% filled with level-3+ habitats and you genuinely cannot fit another habitat without deleting something valuable. Until then, every gold coin spent on land is a gold coin that could have doubled your income in two weeks.
Counter-Intuitive Design Principles That Actually Work
These principles break the “common sense” most players follow. Test them and watch your hourly income jump.
1. Legendary habitats belong on the edges, not the center.
Common sense says your best habitats go in the most prominent spots. Wrong. Your best habitats need adjacency bonuses more than they need prominence. A Legendary habitat on the edge of an island can still receive bonuses from a Temple and two Gold Farms placed just inside the edge. A Legendary habitat in the center blocks the center tile — the only tile that can optimally serve four surrounding habitats with adjacency effects. Place breeding buildings and non-production structures in the center. Place habitats in rows along the edges where decorations can flank them.
2. Deleting habitats is often better than upgrading them.
Players hesitate to delete habitats because it feels like losing progress. But a level-3 Common habitat with two Common monsters produces roughly 800 gold per hour. A level-1 Legendary habitat with one Gold-trait Epic produces 3,500 gold per hour. The Legendary habitat occupies the same 3×3 space. Keeping the Common habitat “because I already upgraded it” costs you 2,700 gold per hour, every hour, forever. The sunk-cost fallacy is real in base design. Tear down low-tier habitats the moment you have a higher-tier replacement ready. The game does not punish deletion. It rewards it.
3. Spread your top earners across multiple islands.
It feels satisfying to build one “super island” stacked with twelve Legendary habitats. But Monster Legends caps the bonus radius of Element Temples at two tiles. One island can host one Temple per element. If you stack twelve Fire Legendaries on Fire Island, you get one Fire Temple boosting them. If you spread four Fire, four Nature, and four Dark Legendaries across three islands, each island provides its own Temple boost. You go from one Temple bonus to three, with zero extra gem cost. The super island looks impressive on screenshots. The distributed base earns more gold.
4. Leave empty tiles between habitat rows.
Players cram habitats together to maximize count. But tight packing causes mis-taps. When you collect gold, you tap each habitat. A tightly packed base forces precise tapping. One mis-tap opens a monster detail screen, breaking your collection rhythm. Over 40 habitats, three mis-taps per collection cycle wastes 15-20 seconds. Multiply by 3-4 collections per day. Over a month, mis-taps cost you hours of collection time — or cause you to skip habitats entirely. Leaving one tile of path between rows slightly reduces total habitat count (maybe 1-2 fewer per island) but dramatically increases collection speed and accuracy. Net result: higher actual income, even if theoretical maximum is slightly lower.
The Complete Island Specialization System
Once you have 5+ islands, specialization becomes mandatory. Here is the proven allocation.
Main Island — Operations Hub. Breeding Mountain, Hatchery, Ultra Breeding Tree, and 2-3 overflow habitats only. No temples. No farms. The Main Island is where you interact. It should load fast and show only the buildings you tap constantly. Place the Breeding Mountain one tile north of center, the Hatchery directly south of it. Leave the exact center tile for a Gold Farm that boosts adjacent overflow habitats.
Element Islands — Pure Element Blocks. One element per island. 6-8 habitats of matching element, aligned in 2×3 or 2×4 grids. One Element Temple placed two tiles from the nearest habitat row so its radius covers the maximum block. Gold Farms fill any remaining adjacency gaps. Do not place breeding buildings here. Do not place decorations that do not boost gold. Every tile on an element island should either hold a habitat, a Temple, or a Gold Farm.
Overflow Island — The Holding Pen. As your monster collection grows, you will have monsters that do not fit their element island. The Overflow Island holds non-optimal habitats and temporary placements. It earns less than your specialized islands, but it prevents the Rainbow Mess from infecting your pure element layouts. Revisit the Overflow Island monthly and move monsters to specialized islands as space opens.
Vanity Island — Optional. One island for decorations, event buildings, and trophies. This island earns nothing. It exists for fun. Only build it after all other islands are optimized. Many late-game players use their Legendary Island for this purpose, since Legendary Island’s 10-million-gold cost makes it a poor early investment anyway.
Why specialization beats flexibility. Some players resist pure-element islands because they worry about overflow. “What if I get a seventh Fire monster and Fire Island is full?” The answer is simple: you move the weakest Fire monster to the Overflow Island and replace it with the new one. The Overflow Island exists precisely so your specialized islands can stay pure. A pure Fire island with a Fire Temple boosting six habitats earns 15% more gold from those six habitats than a mixed island ever could. That 15% bonus applies every hour, forever. The 30 seconds it takes to shuffle a monster to Overflow is a one-time cost. The math is not close.
Habitat Upgrade Order: The Exact Sequence
Not all upgrades are equal. Follow this sequence strictly.
First, all Legendary habitats to level 3. This is cheap (150,000 gold each) and doubles base capacity. Second, Legendary habitats to level 4. This is the biggest power spike — it adds a fourth monster slot, increasing production by roughly 33% instantly. Third, Epic habitats to level 3. They are your income floor. Fourth, Gold Farms and Temples. These are decorations, but their adjacency bonuses apply to already-upgraded habitats, so the multiplicative effect is stronger when the base habitats are high-level. Fifth, Legendary habitats to level 5. This is endgame — 1.5 million gold each, 30-45 day payback. Only do this when everything else is done.
Never upgrade Common habitats beyond level 2. Never upgrade Rare habitats beyond level 3. The gold-per-tile return is worse than simply saving for a higher-tier habitat replacement.
Gold Collection Rhythm and Base Layout
Your base design directly affects how often you can collect gold without going insane.
A poorly designed base with mixed elements, scattered habitats, and decorations blocking paths takes 90-120 seconds to collect fully. A well-designed base with element-clustered islands and clean rows takes 30-45 seconds. If you collect 3 times per day, that is a difference of 3 minutes versus 9 minutes. Over a year, the well-designed base saves you 36 hours of tapping.
More importantly, fast collection means you actually do it. Players with messy bases start skipping collections. “I will get it later” becomes “I only collected once today.” A clean base design increases collection frequency, which increases actual gold earned more than any single upgrade can.
The mental load of a messy base. When your Fire habitats are split across three islands, collecting them requires remembering which islands hold Fire. You swipe past an island, think “did I already get those?”, swipe back, realize you did, and swipe forward again. This cognitive overhead sounds trivial, but over hundreds of collections it creates fatigue. Fatigue leads to skipped collections. A pure-element system eliminates the mental load. You see Fire Island, you collect Fire Island, you move on. Your brain does not waste cycles on search and verification.
The tap-path optimization. The most efficient collection path is a zigzag row: start at the top-left habitat, tap across the row, drop down one, tap back across. This takes 2-3 seconds per habitat on a clean grid. A scattered base forces irregular movement — up, left, down, right, zoom out, swipe to next island, zoom in, repeat. Irregular movement adds 4-5 seconds per habitat. With 40 habitats, that is an extra 2-3 minutes per collection. Again, the math sounds small. But 2-3 minutes is the difference between “I will collect now” and “I will do it later.” Later often becomes never.
Design for the human, not the spreadsheet. A theoretically optimal base that is miserable to interact with earns less gold than a slightly suboptimal base that is fast and satisfying to collect from.