SNIPE Ranked Climbing Guide Cover

How to Climb SNIPE Ranked — Best Loadouts, RP System & Tier Strategy (2026)

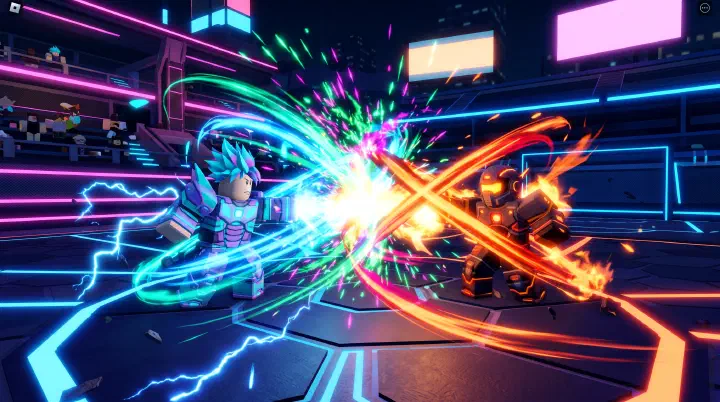
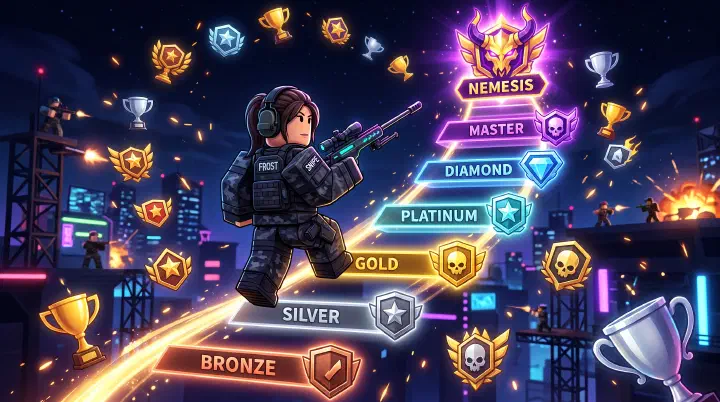
How the SNIPE Ranked System Actually Works SNIPE ranked isn’t a simple “win = gain, lose = drop” system. Your RP changes are calculated from multiple factors: RP Formula 1 RP Change = Kill RP + Win/Placement RP + Streak Bonus - Death Penalty Factor RP Range Details Kill (same rank) +15 to +25 Higher RP for killing higher-ranked players Kill (higher rank) +20 to +35 Killing a Diamond as a Gold gives bonus RP Kill (lower rank) +8 to +15 Killing below your rank gives less Assist +5 to +10 Damage contribution matters Win (1st place) +50 to +100 Depends on mode (FFA = 50, TDM = 75, Objective = 100) Top 3 (no win) +20 to +40 Placement matters Early death (bottom 25%) -10 to -30 Dying in first 2 minutes is heavily penalized Loss streak (3+) -5 per extra loss Compounding penalty to discourage tilt queuing RP Thresholds Rank RP Range % of Players Bronze 0-600 25% Silver 600-1,200 30% Gold 1,200-1,500 20% Platinum 1,500-1,800 10% Diamond 1,800-2,200 8% Champion 2,200-2,600 4% Nemesis 2,600+ 1% Top 500 Varies 0.1% Best Loadouts for Ranked Climbing Bronze → Gold: Consistency Over Flash Slot Choice Why Primary Heavy Sniper One-shot headshot, forgiving, works on all maps Secondary Deagle Finish low-HP targets when sniper is cycling Ability Grapple Hook Escape bad fights, reach elevated positions Playstyle Passive-hold Hold angles, take only 70%+ confidence shots Gold → Diamond: Speed and Versatility Slot Choice Why Primary Semi-Auto Sniper Faster follow-up shots punish Gold players’ missed headshots Secondary Tactical SMG Close-range option for Downtown/Warehouse rotations Ability Wall Run or Grapple Map-dependent — Wall Run for CQB maps, Grapple for open maps Playstyle Aggressive-hold Hold angles but actively jiggle peek to bait shots Diamond+ : Meta Dominance Slot Choice Why Primary Semi-Auto or Heavy Sniper Comfort pick — both are viable at this level Secondary Deagle One-tap headshot potential on damaged enemies Ability Wall Run Diamond lobbies punish predictable Grapple arcs Playstyle Map control Control power positions, rotate after every engagement RP Optimization: Climb Faster With Fewer Kills Most players think more kills = more RP. The actual RP system rewards placement and consistency far more. ...

May 24, 2026 · 4 min · 812 words · DungeonPath Team
Blade Ball Ability Combos & Synergies Guide Cover

Best Ability Combos & Synergies in Blade Ball — Win More With These Pairings (2026)

Why Ability Combos Matter More Than Individual Abilities Blade Ball lets you equip two abilities. Most players pick the two highest-rated abilities from a tier list and call it done. The problem: abilities have hidden interactions, overlapping cooldowns, and anti-synergies that individual tier lists miss. Factor Individual Tier List Actual Combo Impact Cooldown overlap Not measured Two abilities both on 12s cooldown = 6s of vulnerability every cycle Effect stacking Not measured Some buffs multiply, others overwrite Role coverage Not measured Two defensive abilities = no way to pressure opponent S-Tier Combos: Meta-Defining Raging Deflect + Wind Cloak — Aggressive Overwhelm Ability Role Cooldown Effect Raging Deflect Offensive core 10s Deflect at 1.4x speed, +20% ball damage for 3s Wind Cloak Mobility/Utility 8s +40% movement speed for 4s Why it works: Raging Deflect demands aggressive positioning — you need to be close to the ball’s trajectory to deflect at max speed. Wind Cloak gets you there. The speed boost also lets you chase down your own fast deflect for a follow-up hit before the opponent recovers. ...

May 23, 2026 · 5 min · 881 words · DungeonPath Team
Blox Fruits Accessories & Items Tier List Cover

Best Accessories & Items in Blox Fruits — Tier List for PvP, Grinding & Bosses (2026)

How Accessories Work in Blox Fruits Accessories are equippable items that provide stat bonuses. They occupy specific slots and stack with each other and with fruit/race bonuses. Slot Examples Max Equipped Face Masks, Glasses 1 Back Capes, Cloaks 1 Neck Necklaces 1 Waist Belts, Sashes 1 Accessory (misc) Scarves, Rings, Coats 2-3 S-Tier: Meta-Defining Accessory Slot Source Best For Rating Pale Scarf Accessory Soul Reaper (Third Sea) PvP, all builds 10/10 Hunter Cape Back Pirate Raid reward All content 9.5/10 Ghoul Mask Face Ghoul race questline Grinding, PvE 9.5/10 Lei Accessory Elite Pirate drop PvP, gun/sword builds 9/10 Pale Scarf — Best in Slot +15% damage, +500 energy, +2 Instinct dodges. The energy alone lets you chain 2-3 extra fruit moves before needing to recharge. The extra Instinct dodges are the difference between winning and losing a PvP combo trade. This is the accessory every endgame player farms for. ...

May 23, 2026 · 4 min · 674 words · DungeonPath Team
Lethal Company Best Moons for Profit Guide Cover

Best Moons for Profit in Lethal Company — Every Moon Ranked by Scrap Value & Risk (2026)

How Moon Profit Works Every moon in Lethal Company has three variables that determine your actual profit: Variable What It Means Scrap spawn range Minimum and maximum total scrap value that can spawn on the map Map size Larger maps = more walking time = lower profit per minute Hazard level Higher hazard = more and deadlier monsters = higher wipe risk The best moon isn’t the one with the highest scrap — it’s the one with the best combination of scrap value, clear speed, and survival rate. ...

May 23, 2026 · 4 min · 709 words · DungeonPath Team
Fisch Rare & Mythic Fish Guide Cover

How to Catch Every Rare & Mythic Fish in Fisch — Bait, Rod & Location Guide (2026)

How Rarity Works in Fisch Fisch uses a layered rarity system. Each fish has a base catch rate modified by your rod, bait, enchantments, and environmental conditions. Rarity Tier Base Catch Rate (with basic rod) Typical Value Common ~50-60% 5-50 C$ Uncommon ~20-25% 50-150 C$ Rare ~8-12% 150-500 C$ Legendary ~2-4% 500-2,000 C$ Mythic ~0.3-1% 2,000-15,000+ C$ A 0.3% base rate becomes ~2-3% with a fully optimized Mythic hunting loadout — 10x better odds. ...

May 23, 2026 · 4 min · 712 words · DungeonPath Team
Lethal Company Solo Survival Guide Cover

How to Survive Lethal Company Solo — Best Moons, Loadouts & Enemy Counters (2026)

The Solo Mindset: Everything Changes Lethal Company is balanced around 4 players. Playing solo means every system works against you: System 4 Players Solo Scrap requirement (quota) Split across 4 All on you Monster aggro Split across 4 100% on you Item carrying (4 slots) 16 slots total 4 slots total Death penalty 1/4 of team’s scrap lost Everything lost Coil-Head counterplay One stares, one loots Impossible Ship monitor Someone can watch radar You lose radar intel while inside Solo isn’t just “harder” — it requires a completely different strategy. ...

May 23, 2026 · 5 min · 855 words · DungeonPath Team
Sailor Piece Devil Fruits Tier List Cover

Best Devil Fruits for Every Playstyle — Sailor Piece Fruits Tier List (2026)

How We Ranked Every Fruit All 23 obtainable Devil Fruits in Sailor Piece were tested across four use cases. Each fruit receives a weighted composite score. Criteria Weight What We Measured PvP performance 35% 1v1 duel win rate, combo damage, escape tools PvE grinding 30% NPC clear speed, AoE coverage, elemental immunity Boss damage 20% Single-target DPS, armor break, sustain Sea traversal 15% Flight, speed boosts, water immunity S-Tier: Must-Have Fruits Fruit Type Level Req Best For Rating Dragon Mythical Zoan 350 All content 10/10 Phoenix Mythical Zoan 300 PvP + Healing 9.5/10 Soul Mythical Paramecia 400 PvP + Boss 9.5/10 Dragon — The Undisputed King Dragon transformation grants flight (fastest sea travel in the game), massive AoE Bellow attacks that clear entire NPC camps in one cast, and 30% damage resistance in Dragon form. The only fruit that excels at all four criteria simultaneously. ...

May 22, 2026 · 4 min · 725 words · DungeonPath Team
Palworld Food Recipes & Pal Feeding Guide Cover

Best Food Recipes & Pal Feeding Guide — Palworld Cooking Optimization (2026)

Why Food Matters in Palworld Food isn’t just a hunger mechanic in Palworld — it’s a buff system, a work efficiency multiplier, and a breeding enabler. Pals with low hunger lose SAN (Sanity), which causes them to work slower, get sick, and eventually refuse to work entirely. Good food management is the difference between a base that runs itself and one that needs constant babysitting. S-Tier Foods: Must-Craft Food Ingredients Effect Best For Mammorest Curry Mammorest Meat + Spices + Rice +25% Attack (10 min) Boss fights, tower battles Mozzarina Hamburger Mozzarina Meat + Milk + Flour +20% Defense, +15% Attack (10 min) All-around combat Jam-Filled Bun 2 Berries + 1 Flour Large nutrition, cheap Base worker feeding Cake Flour + Red Berries + Milk + Egg + Honey Required for breeding Breeding Farm Jam-Filled Bun — The Base Economy Backbone One Jam-Filled Bun gives ~60 nutrition (vs ~15 from raw Berries). A worker Pal eats one Bun every 10-15 minutes, meaning 4-6 Buns per Pal per hour. For a 10-Pal base, you need roughly 60 Buns per hour. Two Berry Plantations and one Wheat Plantation with a Mill produce enough for 15-20 Pals with surplus. ...

May 22, 2026 · 4 min · 786 words · DungeonPath Team
Pressure Items & Loadout Tier List Cover

Best Items & Loadouts for Every Pressure Floor — Tier List (2026)

How Items Work in Pressure You have 5 inventory slots. Every item you bring is an opportunity cost — carrying one thing means not carrying another. This tier list ranks every item by how many runs it saves vs how many runs its absence costs. S-Tier: Never Leave Without Item Cost (Credits) Use Rating Gummy Flashlight 150 Unlimited light, no battery 10/10 Hand-Cranked Flashlight 300 Unlimited light, manual recharge 10/10 Medkit 50 Heals 40 HP 10/10 Flashlight Comparison Flashlight Brightness Battery Life Recharge Best For Gummy Flashlight Medium Infinite None needed Beginners, learning floors Hand-Cranked Flashlight Medium-High Infinite 1.5s crank animation Experienced players Standard Flashlight High 3 minutes Requires Batteries Speedruns (max brightness) Lantern Low-Medium Infinite None (area light) Co-op support role The Gummy and Hand-Cranked are S-tier because they remove battery management entirely. In Pressure, managing batteries while dodging entities gets players killed. The less you juggle, the more you survive. ...

May 22, 2026 · 4 min · 762 words · DungeonPath Team
Monster Legends Legendary Breeding Recipes Cover

How to Breed Every Legendary Monster — Monster Legends Breeding Recipes (2026)

Legendary Breeding Basics Legendary monsters are the backbone of competitive Monster Legends. Breeding them requires specific parent combinations, patience, and understanding the probability system. Breeding Requirements Requirement Minimum Optimal Breeding Mountain level 5 7+ Parent levels 20+ 30+ Element temples (matching) None required 1-2 placed Breeding Boost Optional 20 Gems for +10% Success Rate Formula 1 Base Rate (5-12%) + Mountain Level Bonus (2% per level past 5) + Parent Level Bonus (up to 5%) + Breeding Boost (10%) + Happy Hour (2x base rate) During Happy Hour with all bonuses active, effective rate reaches 30-45%. ...

May 22, 2026 · 3 min · 536 words · DungeonPath Team