Last updated: June 22, 2026. This guide covers every boss encounter in Palworld including tower bosses, alpha bosses, dungeon bosses, and the four legendary Pals. Each entry includes phase tells, dodge timing, recommended counter-picks, and rewards. See also: Best Pals Tier List, Raid Bosses Guide.
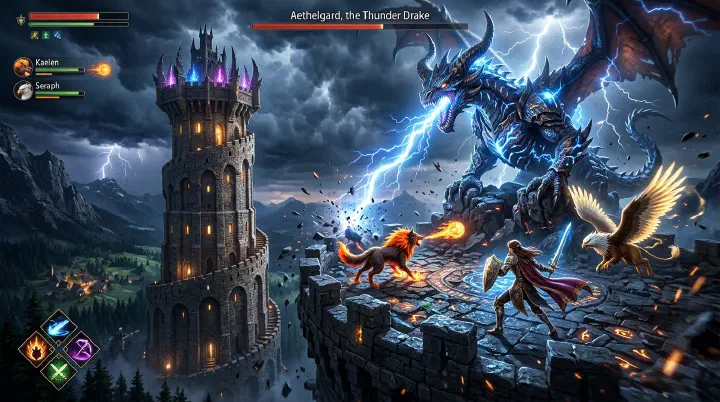
The 30-Second Wipe in Victor’s Tower
You teleport in at level 50. Pal Metal Armor. A bred Jetragon with Dragon Meteor 4. Three backup Pals waiting in spheres. You’ve cleared every previous Tower on the first try. This one should be a formality.
The door slides open. Victor monologues for fourteen seconds. Shadowbeak lifts off, screeches, and the floor under you turns purple.
You sprint sideways out of habit. Wrong direction — the Dark Laser is sweeping clockwise, not coming straight at you, and you’ve just run into the beam. Your character ragdolls. You burn a heal cake. Jetragon takes a Dark Pulse to the face and faints because you forgot Dark isn’t 2x against Dragon, it’s neutral, and Shadowbeak hits like a truck regardless of type. You throw a sphere — Relaxaurus this time — and immediately a second laser starts charging because Shadowbeak is now under 50% HP and you didn’t notice the phase tell.
By second 28, all four Pals are in cooldown. By second 32, you respawn at your base.
This isn’t a level problem. This is what happens when you treat a Tower boss like an overworld Alpha. Tower fights are scripted encounters with attack patterns, phase transitions, and arena hazards. The strategies below are written for the player who already has the gear and is still getting flattened.
Why Your Level Doesn’t Matter
Palworld’s tower bosses are not stat checks. They are pattern checks.
The proof is in the speedrun community: people clear Victor at level 25 with starter Pals because they know exactly when to dodge the Dark Laser, how to interrupt Phase 2 with a stun, and which side of the arena puts a pillar between you and the sweep. Meanwhile, level 55 players with maxed gear die because they’re standing in fire.
Here’s what level does buy you:
- A bigger health pool — survive one extra mistake per phase, maybe two.
- Higher base damage — the fight ends 20% faster.
- Access to better Pals — Jetragon caps at level 50.
Here’s what level cannot buy you:
- Knowledge of the Phase 2 trigger HP threshold.
- The 1.2-second windup tell on the Dark Laser sweep.
- The arena pillar that breaks line-of-sight on Faleris’s swoop.
- The fact that Lyleen’s heal channel can be interrupted with a flinch.
If you are over-leveled and still losing, the problem is not your build. The problem is that you are reacting to the boss instead of predicting it. Every section below leads with the tell — the visual cue that says “the attack you’re about to die to starts NOW” — because that’s the thing that closes the gap between losing and winning.
The Counter-Intuitive Truth: Stop Bringing Dragon Pals to Every Tower
The most common piece of Palworld advice is “bring Jetragon, it works against everything.” This is wrong, and it’s why people stall at Victor.
Jetragon is a Dragon/Fire type. Against Shadowbeak (Dark), Dragon is neutral damage, not super-effective. Dark resists Dragon in the type chart that actually runs under the hood — Shadowbeak takes more damage from raw Neutral attacks from Paladius than from Jetragon’s Dragon Meteor.
The real counter-pick chart for Tower bosses:
- Zoe & Grizzbolt (Electric): Ground beats it. Anubis is the actual best, not Jetragon.
- Lily & Lyleen (Grass): Fire beats it. Jormuntide Ignis or Blazamut, not Jetragon.
- Axel & Orserk (Electric/Dragon): Ground beats Electric, but Dragon Meteor from Jetragon hits Dragon-half for neutral. Bring Anubis here too.
- Marcus & Faleris (Fire): Water beats it. Jormuntide (regular, not Ignis), not Jetragon.
- Victor & Shadowbeak (Dark): Dragon is neutral. Use Paladius (Neutral) with Pal Blast moves, or Necromus with Twin Spears. Jetragon is your mount, not your damage Pal.
The “always Jetragon” advice gets people to level 40 and then breaks at Victor. Bring the actual counter, not the prestige Pal.
Tower Boss Quick Reference
Locations and rewards only — strategy lives in the per-boss sections below.
| Tower Boss | Location | Recommended Level | Reward (First Clear) |
|---|---|---|---|
| Zoe & Grizzbolt | Rayne Syndicate Tower (central Grasslands) | 10-15 | 1 Ancient Tech Point, 1 Technical Manual |
| Lily & Lyleen | Free Pal Alliance Tower (northwest) | 25-30 | 1 Ancient Tech Point, 1 Technical Manual |
| Axel & Orserk | Brothers of the Eternal Pyre (volcano entrance) | 35-40 | 1 Ancient Tech Point, 1 Technical Manual |
| Marcus & Faleris | PIDF Tower (eastern volcano) | 40-44 | 1 Ancient Tech Point, 1 Technical Manual |
| Victor & Shadowbeak | Pal Genetic Research Tower (northeast snow) | 45-50 | 1 Ancient Tech Point, 1 Technical Manual, story complete |
1. Zoe & Grizzbolt — Rayne Syndicate Tower
Your first Tower. Most players walk in at level 13 with a bow, take three minigun bursts to the chest, and respawn confused.
Boss profile:
- Type: Electric (Grizzbolt)
- Estimated HP: ~5,000
- Weakness: Ground (2x)
- Resists: Electric (Grizzbolt heals slightly from electric attacks — never bring Sparkit)
- Arena: Large circular platform with cover pillars at 3, 6, 9, and 12 o’clock
The attack patterns:
- Minigun spray — Grizzbolt plants its feet, both arms light up. ~2.5 seconds of windup. If you’re at close range you eat 60% of your HP. Tell: yellow energy spirals around both wrists.
- Electric AoE slam — Grizzbolt rears up on hind legs and crashes down. ~1.8s windup. Circular AoE, ~6 meters radius. Tell: front paws lift above its head.
- Charge — Grizzbolt sprints in a straight line. Easy to sidestep, but it covers half the arena.
Counter-pick:
- Pal: Anubis (if you bred one early) > Rushoar > Gumoss. Ground-type is immune to Electric.
- Weapon: Bow + Fire Arrows (Fire is neutral here but the burn DoT is free damage during slam recovery).
- Armor: Pelt Armor minimum.
- Food: Mushroom soup for the defense buff.
Fight flow:
- Spawn in, immediately throw your Ground Pal. Don’t wait for Zoe’s intro to end.
- Hug the pillar at 9 o’clock. Strafe in and out for shots.
- When minigun winds up, just step behind the pillar. Don’t try to dodge in the open.
- When slam winds up, sprint toward Grizzbolt then past it — the AoE is centered on the boss, so close range with movement is safer than mid-range.
- Zoe occasionally falls off after a heavy hit. Empty your quiver into her directly during the dismount window.
Reward value: The Ancient Technology Point unlocks the Egg Incubator. This is the boss that gates breeding.
2. Lily & Lyleen — Free Pal Alliance Tower
This is the first Tower where players genuinely fail. Lyleen heals. If you can’t out-DPS the heal, you literally cannot win, regardless of how long you stay.
Boss profile:
- Type: Grass (Lyleen)
- Estimated HP: ~12,000
- Weakness: Fire (2x)
- Resists: Grass, Water
- Arena: Open garden platform with poison pollen patches that linger
The attack patterns:
- Pollen cloud — Lyleen sprays green pollen in a 180° cone in front. Inflicts Poison DoT. Tell: she clasps her hands and dips forward.
- Healing channel — Lyleen kneels, glowing green particles spiral upward. Restores roughly 8% HP over 3 seconds. Can be interrupted by a flinch. Tell: she stops moving completely and the screen tint shifts greener.
- Grass Tornado — pillar of leaves at your last-known location. ~1.5s windup.
Counter-pick:
- Pal: Jormuntide Ignis (best) > Blazamut > Vanwyrm > Arsox. Fire deals 2x.
- Weapon: Crossbow (level 13) with Fire Arrows, or Handgun with regular ammo (level 28+). 200+ rounds.
- Armor: Pelt Armor or better.
Fight flow:
- Open with Fire Pal command — Ignis Breath or equivalent in the first second.
- The healing channel is the make-or-break moment. The instant you see her kneel, dump your highest-burst attack. A rocket launcher hit interrupts. So does a Jormuntide Ignis spit. So does Lily falling off after a critical.
- Stay out of the lingering pollen patches. They tick for ~80/sec and you will not notice you’re dying until you look at your HP bar.
- Lily dismounts twice in a typical fight. Shoot her directly — she has ~2,000 HP separate from Lyleen, and killing her ends the fight regardless of Lyleen’s HP.
Common failure point: Players think the heal is a one-time thing. It isn’t. Lyleen will heal every ~45 seconds. If you can’t kill her inside that window with damage left over, retry with stronger Fire Pals or come back at level 30.
3. Axel & Orserk — Brothers of the Eternal Pyre Tower
The first Tower where the arena itself is hostile. Electric floor panels punish standing still.
Boss profile:
- Type: Electric/Dragon (Orserk)
- Estimated HP: ~25,000
- Weakness: Ground (2x vs Electric half, neutral vs Dragon half — net ~1.5x)
- Resists: Electric, Dragon
- Arena: Square platform with eight floor panels that periodically electrify
The attack patterns:
- Electric slam combo — Orserk slams its halberd twice. Linear AoE. ~1s between hits.
- Dragon breath cone — long ~2.5s windup, wide forward cone. Easy to dodge if you see the windup.
- Floor panel surge — panels under your feet glow yellow, then explode for ~40% HP. ~1.5s warning.
- Ride-by charge — Axel rides Orserk in a circular sweep around the arena perimeter.
Counter-pick:
- Pal: Anubis (best) > Warsect > Digtoise. Ground immunity to Electric is huge.
- Weapon: Makeshift Handgun or Musket. 300+ ammo.
- Armor: Heat-resistant (the approach is volcanic).
- Food: Defense-buff dish.
Fight flow:
- Never stand on a single panel for more than 2 seconds. Always be moving from panel to panel even when no attack is incoming. Build the habit before Orserk forces you.
- The Dragon breath cone has the longest windup of any Tower attack. You get a free 2 seconds to land headshots on Axel during it.
- When the ride-by charge starts, sprint toward the center of the arena. The charge follows the perimeter only.
- Anubis’s Sand Tornado deals broken damage here — bring it as your active Pal, not as a swap.
4. Marcus & Faleris — PIDF Tower
The flying boss. Melee is useless. If you didn’t bring ranged, restart now.
Boss profile:
- Type: Fire (Faleris)
- Estimated HP: ~35,000
- Weakness: Water (2x)
- Resists: Fire, Grass
- Arena: Wide circular platform, no cover
The attack patterns:
- Fire AoE bombing run — Faleris flies high, drops three fire bombs in a triangle pattern. Tell: it gains altitude rapidly.
- Swoop — Faleris dives low across the arena, melee range for ~1 second. This is your damage window.
- Flame breath sweep — only when Faleris briefly lands. ~3-second cone.
- Marcus pistol shots — chip damage, mostly ignorable.
Counter-pick:
- Pal: Jormuntide (best) > Penking > Azurobe > Surfent. Water 2x.
- Weapon: Crossbow or Musket. 400+ ammo. Rocket Launcher works if you have it.
- Armor: Heat-resistant level 2 (Refined Metal Armor).
- Party: 3-4 Water Pals rotated as the front Pal faints.
Fight flow:
- Track Faleris’s altitude. High = bombing run incoming, sprint perpendicular to the wind direction (yes, there’s wind — leaves blow toward the bomb drop zone). Low = swoop, prepare burst damage.
- The swoop is the only time Faleris is reliably hittable with non-explosive weapons. Time your magazine dumps to swoops.
- Marcus falls off about every 90 seconds. He has ~2,500 HP solo. Shoot him directly during dismount — same trick as Lily.
- Jormuntide’s Hydro Laser tracks Faleris in the air. Spam the command.
5. Victor & Shadowbeak — Pal Genetic Research Tower
The final Tower. Two phases. This is the fight from the opening scene.
Boss profile:
- Type: Dark (Shadowbeak)
- Estimated HP: ~50,000
- Weakness: Dragon (neutral, not 2x — common misconception)
- True weakness: Neutral Pals with Pal Blast (Paladius), Pure Dragon damage from Jetragon hits ~1.0x but Necromus’s Twin Spears (Dark) hits Shadowbeak for less. The real high-DPS counter is a Neutral Pal with Power Bombardment.
- Resists: Dark (fully)
- Arena: Circular platform, ~30m diameter, no cover
Phase 1 (100% — 50% HP):
- Dark Laser sweep — wide beam, sweeps in a clockwise or counter-clockwise arc. Tell: Shadowbeak hovers, beak charges purple, ~1.2s windup. Dodge perpendicular and toward the sweep origin, not away — the beam moves faster at the edge of the arc than at the center.
- Dark Pulse — six dark orbs spawn around Shadowbeak and travel outward. Dodge between them.
- Wing slash combo — close-range. Stay at mid-range and this never triggers.
Phase 2 (50% — 0% HP):
- Trigger: Shadowbeak screeches and a black shockwave pulses outward. This shockwave does damage if you’re inside 8m. Tell: HP bar reaches 50%, screen tint darkens.
- Twin Dark Lasers — two beams now, originating from opposite sides of Shadowbeak. Almost impossible to dodge in the open. Solution: stand at the dead center of the arena — the beams pivot around Shadowbeak and the center is the slowest-moving point.
- Dark Meteor — vertical attack, ground markers appear. ~2s windup.
Counter-pick:
- Pal: Paladius (Neutral, hits Shadowbeak for full damage) > Necromus (Dark, less effective but tanky) > Jetragon (decent damage, best for repositioning as a mount).
- Weapon: Assault Rifle (sustained) or Rocket Launcher (burst). 500+ ammo for AR, 30+ rockets.
- Armor: Pal Metal Armor (level 47) minimum.
- Food: Pizza. Carrot Cake as backup. Heal cakes in slot 1.
Fight flow:
- Phase 1: Stay at 15-20m. This forces Shadowbeak into laser/pulse only and disables the wing combo.
- Dump damage during pulse recovery — Shadowbeak hovers stationary for ~1.5s after dark orbs finish.
- At 55% HP, sprint to the arena center before the phase trigger. The shockwave is unavoidable but the center positioning sets up Phase 2 immediately.
- In Phase 2, the dead center is the safest spot. Counter-intuitive — it feels like you should run away. You shouldn’t.
- Victor falls off twice per fight. He has ~3,500 HP solo. Both dismounts together usually kill him outright and end the fight.
Post-boss: Story complete. Final Ancient Tech Point. The endgame tech tree opens.
Legendary Pal Boss Fights
These are roaming world bosses, not Tower bosses. They respawn after defeat or capture. All are level 50.
Frostallion (Ice)
- Location: Frostbound Mountains peak (far north)
- HP: ~70,000
- Weakness: Fire 2x
- Drops: Ancient Civilization Parts, Ice Organ, Ruby, Legendary Schematic (Frostallion saddle or Legendary Ice Crossbow)
- Mount speed: 2800
- Saddle unlock: Level 46
Key tactics:
- Fire Pals only — Jormuntide Ignis, Blazamut, Suzaku.
- Ice storm AoE is the killer attack — sprint out of the circle, don’t try to tank.
- Frostallion is faster than you. Don’t kite — out-DPS.
- Bring 4 backup Pals. Frostallion one-shots lower-level Pals.
- After capture, Frostallion becomes S-tier combat / mount / base cooler. See the Breeding Guide for breeding chains.
Jetragon (Dragon/Fire)
- Location: Volcanic crater (southwest)
- HP: ~65,000
- Weakness: Water, Ground, Ice (Ground hits neutral)
- Drops: Ancient Parts, Ruby, Flame Organ, Legendary Schematic (Jetragon Saddle or Legendary Rocket Launcher)
- Mount speed: 3300 (fastest in the game)
- Saddle unlock: Level 50
Key tactics:
- Jetragon stays airborne. Bring Rocket Launcher.
- It lands briefly between attack patterns — that’s your damage window.
- Rocket barrage is telegraphed by a hover-and-aim animation.
- Frostallion is the best support Pal here (Ice attacks land neutral but Frostallion’s stats carry).
- Capture priority — 3300 mount speed is irreplaceable.
Paladius (Neutral)
- Location: Desert Plateau (northeastern desert)
- HP: ~75,000
- Weakness: Dark 2x
- Drops: Ancient Parts, Ruby, Legendary Schematic (Paladius Saddle or Legendary Pal Armor)
- Mount speed: 1500 (triple jump)
- Saddle unlock: Level 48
Key tactics:
- Paladius spawns paired with Necromus. They fight as a duo.
- Don’t try to split them — the engagement zone keeps them together.
- Focus Necromus first (lower HP, lower defense).
- Bring a mixed team: 3 Dark Pals for Paladius, 3 Dragon Pals for Necromus.
- Paladius charge attacks hit through Pal blockers — sidestep instead of tanking.
Necromus (Dark)
- Location: Desert Plateau (paired with Paladius)
- HP: ~70,000
- Weakness: Dragon 2x
- Drops: Ancient Parts, Ruby, Legendary Schematic (Necromus Saddle or Legendary Dark Armor)
- Mount speed: 1600 (double jump)
- Saddle unlock: Level 49
Key tactics:
- Necromus teleports — keep your back to a wall to avoid backstabs.
- Dragon Pals are the answer (Jetragon, Jormuntide, Relaxaurus Lux).
- When you defeat one of the duo, the survivor becomes more aggressive (~20% damage increase).
- Best ground mount in the game after capture — double jump beats most flying Pals for terrain navigation.
Alpha Bosses (World Bosses)
Alpha bosses are marked on the world map with a unique icon. They are stronger than standard Pals of the same species. Strategy is straightforward: type counter, ranged weapon, level appropriately.
Early Game Alphas (Level 10-25)
- Chillet — Level 11, Frozen Lake (northwest Grasslands). Dragon/Ice. Drops Ancient Parts, Ruby.
- Penking — Level 15, Fort Ruins. Water. Drops Ancient Parts, Ingots.
- Mossanda — Level 17, Eastern bamboo grove. Grass. Drops Ancient Parts.
- Kingpaca — Level 23, Northeast forest clearing. Neutral. Drops Ancient Parts, Wool.
Mid Game Alphas (Level 25-35)
- Grizzbolt — Level 20, No. 3 Wildlife Sanctuary. Electric. Drops Ancient Parts.
- Petallia — Level 30, Sakurajima island. Grass. Drops Ancient Parts.
- Beakon — Level 35, Desert. Electric. Drops Ancient Parts, Electric Organ.
Late Game Alphas (Level 35-50)
- Anubis — Level 47, Desert Tomb. Ground. Drops Ancient Parts, Ruby, Precious items.
- Jormuntide — Level 45, Desert Oasis. Water/Dragon. Drops Ancient Parts, Pal Fluids.
- Blazamut — Level 45, Volcano Interior. Fire. Drops Ancient Parts, Fire Organ.
- Astegon — Level 45, Under-snow cave. Dragon/Dark. Drops Ancient Parts.
Dungeon Bosses
Dungeons spawn randomly across the map with glowing cave entrances. Each has a boss at the end.
Dungeon mechanics:
- Respawn rate: every 60 minutes real time.
- Length: 3-5 rooms before the boss room.
- Difficulty: scales with the biome.
- Boss type: fixed per location, but rotation varies by seed.
Notable dungeon boss spawns:
- Grassland caves — Chillet variant or Penking (Level 11-18). Drops Ancient Parts, Pal Spheres.
- Forest caves — Mossanda or Kingpaca (Level 17-25). Drops Ancient Parts, Ingots.
- Desert caves — Beakon or Anubis variant (Level 30-45). Drops Ancient Parts, Refined Ingots.
- Volcanic caves — Blazamut variant (Level 40-48). Drops Ancient Parts, Fire Organ.
- Snow caves — Cryolinx or Frostallion Noct (Level 40-50). Drops Ancient Parts, Ice Organ.
Boss Progression Roadmap
The order most players follow. Check the Technology & Progression Guide for the matching leveling and tech roadmap.
- Zoe & Grizzbolt (Level 10-15) — Ancient Tech Point, unlocks incubator.
- Chillet Alpha (Level 10-15) — Ancient Parts for first tech.
- Penking Alpha (Level 15-18) — More Ancient Parts.
- Lily & Lyleen (Level 25-30) — Ancient Tech Point, mid-tier tech.
- Beakon Alpha (Level 33-38) — Electric Organ for spheres.
- Axel & Orserk (Level 35-40) — Ancient Tech Point.
- Marcus & Faleris (Level 40-44) — Ancient Tech Point.
- Blazamut / Jormuntide Alphas (Level 43-48) — Materials, Ancient Parts.
- Anubis Alpha (Level 45-48) — Ruby, Ancient Parts.
- Victor & Shadowbeak (Level 45-50) — Final Ancient Tech Point.
- Frostallion / Jetragon / Paladius / Necromus (Level 50) — Legendary schematics.
Endgame Boss Farming Route
At level 50, farm in this order for Ancient Civilization Parts and legendary schematics:
- Paladius + Necromus — Desert Plateau teleport. 12-16 Ancient Parts each. Respawn ~1 hour.
- Frostallion — Frostbound Mountains peak. 8-12 Ancient Parts per kill.
- Jetragon — Volcanic crater. 8-12 Ancient Parts.
- Alpha Anubis — Desert Tomb. 6-10 Ancient Parts + chance of Ruby.
- Alpha Jormuntide — Desert Oasis. 6-10 Ancient Parts + Pal Fluids.
Full circuit takes ~25 minutes and refills Ancient Parts for an entire crafting session.
Continue Reading
- Palworld Beginner’s Guide (2026) — Start your journey.
- Palworld Best Pals Tier List (2026) — Best Pals for each boss fight.
- Palworld Breeding Guide (2026) — Breed Pals optimized for boss battles.
- Palworld Pal Locations Guide — Where to find boss Pals.
- Palworld Base Building Guide — Build a base for boss prep.
- Palworld Resources & Materials Guide — Farm boss materials.
- Palworld Technology & Progression Guide — Leveling and tech unlock roadmap.