The 3 AM Heartbreak Every Palworld Breeder Knows
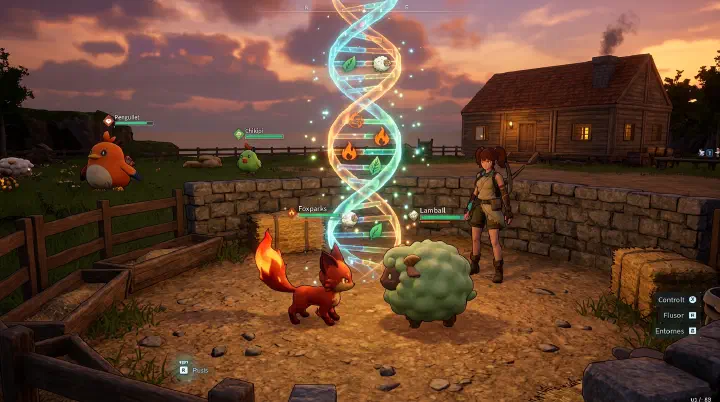
It’s 3 AM. You finally did it. You spent six real-world hours catching a male Anubis with Artisan + Lucky + Serious — three perfect work passives, the kind of Pal you brag about in Discord. Then another four hours hunting down a female Anubis with Work Slave + Ferocious + Burly Body. Two Pals, six total passives, every one of them top-tier.
You shove them into the breeding pen with the last Cake your base produced. The blue progress bar fills. The egg drops. You sprint it to the incubator at full speed.
Ten minutes of incubation. You’re shaking.
The egg hatches.
The Anubis stands up, stretches, and the passive screen reads: Coward. Clumsy. Slacker.
Zero of the six passives you carefully cultivated. Three negative passives that didn’t even exist on either parent. Your Anubis works at 60% speed and runs away from combat. You stare at the screen for a full minute, then quietly close the game and go to bed wondering if breeding in Palworld is just slot-machine randomness with extra steps.
It isn’t. The system is deterministic, the math is documented, and the reason you’ve been spinning your wheels for 50 hours is that nobody told you the actual rules. Let’s fix that.
See also: Breeding Combinations Guide, Base Building Guide.
Why Random Pairing Doesn’t Work (The Inheritance Math Nobody Explains)
Almost every Palworld breeding guide tells you “combine two Pals with good passives.” That advice is technically true and practically useless, because it skips the part where the game decides what gets passed down.
Here’s what actually happens when an egg is generated:
- The game looks at both parents’ passive lists combined. Two parents with 3 passives each = a pool of 6 passive slots, but duplicates are not stacked — if both parents have “Lucky,” it only counts once in the pool.
- For each passive in that pool, the game rolls independently. Inheritance is roughly 40% per passive on the first roll, dropping further on each subsequent roll.
- The offspring also has a small chance to roll completely new passives that neither parent had — including bad ones like Coward, Clumsy, or Slacker.
- The total passive count cap is 4. Once 4 slots fill, no more rolls happen.
Let’s do the math on your “two parents with 3 perfect passives each” scenario. Assume both parents have completely different passives — pool of 6 unique passives. The probability of any single specific passive being inherited is around 40%. Probability of all 4 ideal passives landing on one offspring? Roughly 0.4⁴ ≈ 2.5%. That’s one perfect Anubis per 40 eggs. At 5 minutes per Anubis egg, that’s over 3 hours of pure incubation time, ignoring cake production and pen cycling.
Now add the kicker: those 4 slots can be filled by new random passives instead of inherited ones. If the game decides to roll Slacker before it rolls Artisan, Slacker takes a slot and Artisan never gets considered. That’s why your hatchling came out with three passives nobody had.
The system isn’t random. It’s stacked against you unless you stack the deck back.
The Counter-Intuitive Truth: Fewer Passives Is Better
This is the part that breaks most players’ brains. Every guide says “use parents with the best passives.” Wrong move.
You want parents with EXACTLY the passives you’re targeting and NOTHING ELSE.
If your parents collectively have 6 different passives, the game has to pick 4 out of 6, and your specific 4 are competing with each other for slots. If your parents collectively have exactly the 4 passives you want — say, one parent with Artisan + Work Slave and another with Serious + Lucky — the inheritance pool is exactly 4. Now the math flips: the game tries to fill 4 slots from a pool of 4, and the probability of all 4 landing skyrockets to roughly 40-55% per egg.
The implication: before you start breeding for perfect passives, you must first breed AWAY the junk passives. A parent with Artisan + Lucky + Coward is worse than a parent with just Artisan, because Coward is taking up a slot and crowding out your good rolls. Spend the first breeding cycles producing “clean” parents — Pals with one or two desired passives and nothing else.
This is why veteran breeders keep what looks like a junk Palbox: dozens of Anubis with one passive each, organized by skill. They aren’t junk. They’re surgical breeding tools.
How Breeding Actually Works (The Boring Setup You Still Need)
Before you can run the optimization, you need the basic farm. Skim this if you already have a breeding base.
Requirements
- Breeding Pen — Unlocked at Technology level 19. Costs 2 Tech Points. Build with 100 Wood, 20 Stone, 50 Fiber, 10 Paldium Fragment.
- Cake — One per breeding cycle. Crafted in the Cooking Pot (unlocked level 17).
- One male + one female Pal — Gender icons visible in the Palbox.
- Egg Incubator — Unlocked at level 10.
- Flat building space — Pens need pathfinding room around them.
Breeding Pen Setup Steps
- Place the pen on flat ground with at least 5 tiles clear on every side.
- Throw or assign one male and one female Pal into the pen.
- Drop a Cake into the wooden box that spawns inside the pen.
- Wait 2-5 minutes of real time. The Pals interact, the cake is consumed, an egg drops.
- Pick up the egg, place in incubator, wait for the species-specific incubation time.
Egg incubation times scale with rarity. Common eggs hatch in about 2 minutes. Rare eggs (Anubis, Jormuntide) take roughly 5 minutes. Epic eggs run 10 minutes. Legendary eggs (Frostallion, Jetragon, Paladius, Necromus) need 15-20 minutes and require extreme temperatures — either heated by multiple campfires or cooled by multiple coolers, depending on the Pal’s element.
Temperature Control in One Sentence
If the incubator UI shows a yellow or red temperature warning, place campfires nearby for cold-element eggs (Frostallion needs extreme cold — paradoxically that means surrounding it with heaters works because the Pal type inverts), or place coolers/build in cold biomes for fire-element eggs. Test by watching the incubation time estimate: when it stops decreasing, you’ve got the wrong temperature.
Cake Automation: The Real Bottleneck
You will hit one wall before any other in breeding: cake supply. Each breeding cycle eats one cake. A serious breeding operation runs 3-4 pens simultaneously, which means you need a cake every 1-2 minutes during active breeding.
A single cake requires:
- 5 Flour (from milled Wheat — Wheat Plantation unlocked level 30)
- 8 Eggs (Chikipi ranch — easiest ingredient)
- 7 Milk (Mozzarina ranch — easy once you breed a Mozzarina)
- 2 Red Berry (any Berry Plantation)
- 2 Honey (Beegarde on ranch, or wild drops)
That’s 24 ingredients per cake. Without automation, you spend more time crafting cakes than hatching eggs.
The automation chain that solves it:
- One Wheat Plantation with a Planting Pal + Watering Pal assigned.
- One Mill running 24/7 — converts wheat into flour automatically.
- One Ranch with at least 3 Chikipi (for eggs), 3 Mozzarina (for milk), 1 Beegarde (for honey).
- One Berry Plantation with a Planting Pal.
- One Cooking Pot with a high-Kindling Pal assigned (Jormuntide Ignis with Kindling 4 is ideal).
Pro shortcut: assign Jormuntide (Watering 4) to the Wheat Plantation. It hits both planting and watering needs efficiency-wise, and your wheat output triples.
Breeding Combinations: The Combos You Actually Care About
Palworld uses a deterministic offspring formula based on internal Pal IDs. Roughly: (Parent A ID + Parent B ID) / 2 = Offspring ID. The Pal whose internal ID lands closest to that average is the offspring. Ties round to the higher ID.
This means combos are not RNG — given parents, the offspring is always the same species. Here are the combinations worth memorizing. For exact spawn locations of all parent Pals listed below, see the Pal Locations Guide.
Essential Breeding Combos
| Parent A | Parent B | Offspring | Why You Want It |
|---|---|---|---|
| Rushoar | Nitewing | Anubis | Easiest S-tier Handiwork Pal |
| Relaxaurus | Foxsparks | Jormuntide Ignis | S-tier Kindling (cooking/smelting) |
| Relaxaurus | Direhowl | Jormuntide | S-tier Watering |
| Rushoar | Cinnamoth | Astegon | S-tier Mining |
| Petallia | Mossanda | Lyleen | A-tier Planting + Medicine |
| Mossanda | Foxsparks | Grizzbolt | Electric combat Pal |
| Jolthog | Grizzbolt | Orserk | Electric/Dragon generator |
| Nitewing | Beakon | Shadowbeak | Dark-type S-tier combat |
| Vanwyrm | Anubis | Faleris | Fast flying mount |
| Foxcicle | Hangyu | Frostallion | Legendary ice (rare) |
| Elphidran | Kingpaca | Paladius | Legendary Neutral |
| Astegon | Relaxaurus | Necromus | Legendary Dark |
This table is intentionally short. The full combo list is in the Breeding Combinations Guide — I’m keeping only the combos a normal player will actually use to bootstrap a base.
The Chain-Breeding Method That Cuts 50 Hours to 10
Here is the method that real breeders use. It assumes you’ve accepted the counter-intuitive truth from earlier: clean parents beat loaded parents.
Phase 1: Junk Farming (3-5 hours)
- Catch 8-10 of your target Pal species. For Anubis, breed Rushoar + Nitewing — both are easy catches.
- Open each one’s stats. Look for any Anubis with a single desirable passive and nothing else, or two desirable passives and nothing else.
- Discard (release or condense) every Anubis with negative passives or 3+ random passives.
- Goal: end Phase 1 with 4-6 “clean” Anubis, each holding 1-2 of your target passives.
Phase 2: Two-Skill Consolidation (2-3 hours)
- Pair clean Anubis with complementary single passives. Example: Anubis (Artisan) ♂ × Anubis (Work Slave) ♀.
- Hatch 5-10 eggs from this pair. You’re looking for offspring that inherit both Artisan AND Work Slave, with nothing else.
- Once you have one Anubis with exactly Artisan + Work Slave, set it aside as a breeder.
- Repeat with the other passive pair: Anubis (Serious) × Anubis (Lucky). End Phase 2 with two two-passive breeders.
Phase 3: Four-Skill Finalization (1-2 hours)
- Pair your two clean two-passive Anubis: (Artisan + Work Slave) ♂ × (Serious + Lucky) ♀.
- This is the magic pairing. Combined passive pool: exactly 4. Combined slot count: exactly 4. The math is in your favor for the first time.
- Hatch 5-15 eggs. Expect a 40-55% success rate per egg.
- First or second perfect Anubis usually appears within 8 eggs.
Phase 4: Mass Production (Ongoing)
- Once you have a 4-passive perfect Anubis, breed it with another perfect Anubis of opposite gender.
- Every offspring is now a candidate for either further use or Pal Essence Condenser condensation up to 4 stars.
Total time, with cake automation in place: 8-12 hours of mostly AFK breeding. Without the clean-parents method? Players regularly report 50-80 hours and still no perfect Pal.
Passive Skill Priority Lists
You don’t need to memorize all 50+ passives. You need to know which ones are worth breeding for.
Top Worker Passives (Stack These on Handiwork/Production Pals)
- Remarkable Craftsmanship — +75% Work Speed. Rarest and best. Don’t expect to get it.
- Artisan — +50% Work Speed. The realistic top-tier choice.
- Work Slave — +30% Work Speed, but -30% Attack. Fine for non-combat Pals.
- Serious — +20% Work Speed. Reliable filler.
- Lucky — +15% Work Speed AND +15% Attack. Versatile.
- Nocturnal — Works at night without sleeping. Niche but powerful for 24/7 bases.
Top Combat Passives (Stack These on Battle Pals)
- Legend — +20% Attack, +20% Defense, +15% Speed. Legendary Pals only at first; can be bred onto others.
- Ferocious — +20% Attack. Stacks well.
- Musclehead — +30% Attack, -50% Work Speed. Combat-pure Pals only.
- Burly Body — +20% Defense. Survivability for tank Pals.
- Element Emperor passives (Flame Emperor, Ice Emperor, Celestial Emperor) — +20% damage of that element. Stack on matching-element Pals.
Passives to Actively Avoid (Negative Passives)
- Coward — Flees from combat. Useless on any combat Pal.
- Clumsy — Reduces work speed.
- Slacker — Random work pauses.
- Bottomless Stomach — Doubles food consumption.
- Glutton — Same problem, slightly different curve.
Negative passives are the #1 reason your hatchlings come out trash. If even one parent has Coward, expect 25-30% of offspring to inherit it, eating a precious passive slot.
Pal Essence Condenser: The Multiplier on Top of Breeding
The Pal Essence Condenser (unlocked level 22) lets you upgrade a Pal’s stats by sacrificing duplicates. This is why mass-breeding matters — the byproduct copies aren’t waste, they’re upgrade fuel.
- 1 Star — Sacrifice 4 same-species Pals. +5% ATK/DEF.
- 2 Stars — 16 total sacrificed. +10% ATK/DEF.
- 3 Stars — 32 total. +15% ATK/DEF.
- 4 Stars — 64 total. +25% ATK/DEF and maxed partner skill.
A 4-star perfect-passive Anubis is the endgame: roughly twice as effective as a fresh-caught Anubis at the same level. Plan your breeding output assuming you’ll need 64 copies of your perfect Pal — or more realistically, 64 imperfect copies plus 1 perfect to condense.
Legendary Breeding: How to Get Legend Passive on Anything
The four legendary Pals (Frostallion, Jetragon, Paladius, Necromus) come with the Legend passive built in. See the Boss & Tower Guide for capture strategies — assume you’ve already got one.
- Capture a male legendary Pal (Frostallion is the most common starting point).
- Breed it with a female of any species you want Legend on.
- Some offspring will inherit Legend. Once you have a non-legendary offspring with Legend, that Pal becomes your Legend-transfer breeder.
- Chain-breed Legend onto your combat Pals: Shadowbeak, Blazamut, Faleris, etc.
A combat Pal with Legend + Ferocious + Musclehead + element-Emperor is the strongest end-state in the game.
Common Breeding Mistakes That Waste Hours
- Breeding without checking parents’ passives first — Open the Pal info screen every time. Negative passives ruin the run before it starts.
- Manual cake crafting — If you’re crafting cakes by hand, you’re losing 30% of your breeding throughput. Automate first, breed second.
- Single breeding pen — Cake supply allowing, run 3-4 pens. Eggs are the cheap part; finding the right parent combo is the expensive part.
- Forgetting to level parents — Hatchling level matches parent level cap, sort of. Level both parents to 50 before breeding final-product Pals.
- Releasing “bad” Pals too early — That Anubis with one Artisan passive and nothing else is gold. Don’t toss it just because it has no other passives. Clean parents are the whole strategy.
- Wrong incubator temperature — Cuts incubation speed 50-70%. Always check the temperature indicator.
Quick Reference: Full Combo Cheat Sheet
Common pairings you’ll cycle through during a normal playthrough:
- Lamball × Cattiva → Chikipi
- Cattiva × Chikipi → Lamball
- Foxsparks × Pengullet → Rooby
- Rushoar × Nitewing → Anubis
- Penking × Bushi → Anubis (alternative recipe)
- Relaxaurus × Foxsparks → Jormuntide Ignis
- Relaxaurus × Direhowl → Jormuntide
- Bushi × Botan → Lyleen
- Petallia × Mossanda → Lyleen (alternative)
- Rushoar × Cinnamoth → Astegon
- Shadowbeak × Astegon → Necromus
- Elphidran × Kingpaca → Paladius
- Vanwyrm × Anubis → Faleris
- Mossanda × Foxsparks → Grizzbolt
- Jolthog × Grizzbolt → Orserk
- Nitewing × Beakon → Shadowbeak
- Foxcicle × Hangyu → Frostallion (rare)
- Katress × Bushi → Blazamut
- Relaxaurus × Cryolinx → Suzaku
- Surfent × Relaxaurus → Azurobe
- Dinossom × Kingpaca → Elphidran
For the complete combo database with every Pal pairing in the game, see the Breeding Combinations Guide.
The Final Word
Breeding in Palworld feels random because nobody explains the inheritance pool mechanic. Once you accept that the path to a perfect Pal goes through dozens of intentionally minimalist parents, not through pairing your best Pals together, the system goes from gambling to engineering. Ten hours of focused, clean-parent breeding will produce a result that 50 hours of “pair the best with the best” never will.
Stop chasing perfect parents. Start manufacturing minimal parents. The egg gods reward discipline, not optimism.
Continue Reading
- Palworld Beginner’s Guide (2026) — Start here if new to Palworld.
- Palworld Best Pals Tier List (2026) — Which Pals to prioritize breeding.
- Palworld Base Building Guide — Where to set up your breeding base.
- Palworld Pal Locations Guide — Where to catch parent Pals for breeding.
- Palworld Boss & Tower Guide — Capture legendary Pals for breeding stock.
- Palworld Resources & Materials Guide — Farming ingredients for cakes.
- Palworld Technology & Progression Guide — Technology unlock roadmap.