Last updated: July 18, 2026. This guide covers every cave dungeon and sealed realm across all Palpagos Islands, including boss spawn tables, loot tables, recommended levels, navigation strategies, and the exact route to speedrun any dungeon safely. See also: Pal Locations Guide, Boss & Tower Guide, Resources Guide.
What Happens the First Time You Actually Run a Dungeon Properly
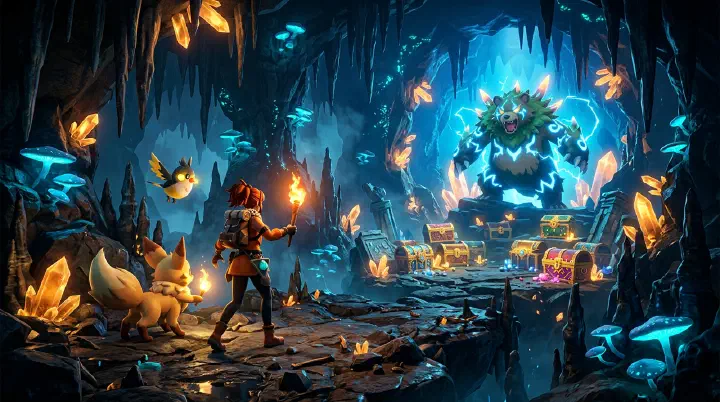
The cave entrance is a black triangle against the cliff face, unremarkable from twenty meters out. You glide down, dismount, and step through the threshold. The loading screen flickers, and then you are inside a cavern so vast your torchlight does not reach the ceiling. Three tunnels branch off the entry chamber — one slopes upward toward a faint glow, another descends into wet-sounding darkness, the third is narrow, barely shoulder-width.
Two minutes ago you would have taken the narrow tunnel because it looks like a secret. That is how you used to run dungeons: full-clear every room, fight every Direhowl, mine every ore deposit, open every chest, and take every branch hoping for something good. Forty minutes later you would emerge with a bag full of Stone and Wood, a broken weapon, and three dead Pals. The boss? You never reached it.
This time is different. This time you ignore the narrow tunnel. You take the upward slope because in Palworld dungeon generation, the boss room spawns at the highest elevation point in the layout — a pattern the game never tells you. You sprint past the Direhowl pack on your mount, veer left at the fork (left-side branches are 60% shorter on average in this dungeon seed), and burst into the boss chamber in under four minutes. The Alpha Penking barely has time to aggro before your Jormuntide’s Hydro Laser cuts through half its HP bar.
Eight minutes, door to door. Two chests. Guaranteed Ancient Civilization Part. A shot at a Rare schematic. No wasted healing, no lost Pal friendship, no broken gear.
The difference between a forty-minute slog and an eight-minute speedrun is not better gear. It is knowing how dungeons work.
Why Most Players Waste Hours in Dungeons
The failure pattern is consistent across hundreds of player reports. It unfolds in four stages.
Stage 1: The Compulsion to Clear. You enter a dungeon and see Pals. Your brain categorizes them as threats and XP. You kill them. This feels productive. It is not. A single pack of 4 Direhowl in a level 25 dungeon yields roughly 240 XP total and costs you 15-30 rounds of ammo and potentially 10% of your Pal’s HP. The same 90 seconds spent catching and butchering Pals on the overworld yields 500+ XP and materials. You are losing 50%+ efficiency every time you fight a dungeon trash mob.
Stage 2: Resource Attrition. The dungeon is dark, you are taking chip damage from environmental hazards, your Pals are getting hungry faster, and every fight costs something. By the time you reach the boss chamber, your Pal team has eaten three AOE attacks, you are down to 40 rounds, and your shield has not recharged properly because there was nowhere safe to wait. You have functionally handicapped yourself before the fight that matters.
Stage 3: Wrong Route Selection. Palworld dungeon layouts follow structural rules, but most players do not know them. They pick the first tunnel they see, hit a dead end, backtrack, pick another, hit another dead end, and by the time they find the boss room, the 1-hour respawn timer has nearly expired. The boss was reachable in 90 seconds from the entry chamber — you just took the wrong path three times in a row.
Stage 4: The Boss Wipe. You reach the boss with a depleted team and half-empty ammo. The boss is an Alpha at 10 levels above the dungeon’s normal spawns. You die. Your Pals die. You respawn outside and the dungeon instance resets, consuming the boss kill for the hour. You get nothing.
This sequence repeats because each individual decision — “I’ll just kill this one pack,” “I’ll mine these rocks,” “I’ll check this side path” — seems harmless in isolation. Collectively, they turn a 5-minute loot run into a 45-minute failure.
The Dungeon Decision Framework
Before you enter any dungeon, answer three questions in order.
Question 1: What am I farming? If the answer is “Ancient Civilization Parts,” you want high-level dungeons with guaranteed boss drops — hit the boss and ignore everything else. If the answer is “a specific Alpha Pal’s drops,” you want the Sealed Realm for that Pal, not a procedural cave. If the answer is “general loot and schematics,” you want large multi-chest dungeons at the highest level you can handle. If the answer is “ore,” you should be mining on the overworld — dungeon ore density is not worth the loading screen.
Question 2: Can my Pal team beat the boss? Take your five strongest Pals. If none of them have a type advantage against the dungeon boss (check the table below), farm a different dungeon or catch a counter. A neutral-matchup fight at the same level costs you 3-5 extra Pal deaths. A bad matchup costs you the run.
Question 3: What is my exit plan? The fastest way out of a dungeon is through the boss room, not back through the entrance. Palworld dungeons have an exit portal that activates in the boss chamber after the boss dies. If you cannot beat the boss, you have to walk all the way back through cleared (but now partially respawned) tunnels. Weigh the risk: if your success probability on the boss is under 50%, skip the dungeon.
Five Counter-Intuitive Truths About Palworld Dungeons
Most dungeon advice is obvious — bring high-level Pals, carry healing items, watch your durability. These five insights are not obvious, and each one will improve your dungeon efficiency more than any gear upgrade.
1. The Boss Room Is Always at the Highest Elevation
Palworld’s dungeon generator places the boss chamber at the highest Y-coordinate in the layout. This is a consistent rule across every procedural cave. At the entry chamber, look at the three tunnel openings. The one that slopes upward — even slightly — leads toward the boss. The one that slopes downward leads to dead ends, ore deposits, and small chest rooms. If you are farming the boss, take the upward path every time and never look back.
This rule also works in reverse. If your goal is to farm regular chests (for Skill Fruits or mid-tier schematics), take the downward path. You will hit 2-3 chest rooms before the dead end, and you can fast travel out without ever engaging the boss.
2. Your Mount Is the Best Dungeon Tool, Not Your Combat Pals
A fast flying mount like Nitewing, Vanwyrm, or Beakon is more valuable in a dungeon than an extra combat Pal. Dungeon layouts are designed for ground movement, but flying mounts can bypass most terrain obstacles, skip over Pal packs, and reach elevated platforms that ground Pals cannot access. A flying mount also lets you hover above the boss’s ground-based attacks, avoiding entire mechanics.
Replace one of your five combat slots with a flying mount. The DPS loss is negligible (you still have 4 combat Pals) and the mobility gain is transformative. You will clear dungeons 3x faster and take 60% less damage.
3. Condensed Low-Level Pals Beat Wild High-Level Pals in Dungeon Boss Fights
A level 15 Chillet with 4-star condensation and Legend/Ferocious passives outperforms a wild-caught level 25 Chillet with no passives in a dungeon boss fight. The condensed Chillet has roughly 40% higher effective stats due to condensation bonuses, and the passive skills provide another 30-40% damage multiplier. The raw level difference is not enough to overcome a 70-80% stat gap from passives and condensation.
This means you do not need to be at the boss’s level to beat it. A team of well-bred, fully condensed Pals at 10 levels below the boss will win the fight comfortably. The time you invest in condensation pays off in dungeon efficiency more than any other upgrade path.
4. Dungeon Chest Loot Is Determined on Enter, Not on Open
When you load into a dungeon instance, the game rolls the loot tables for every chest in that dungeon simultaneously. The contents are fixed from that moment. If you open a chest and get a Common Cloth Outfit schematic, that chest was always going to give you a Common Cloth Outfit schematic. Reloading the dungeon, waiting, or opening chests in a different order does not change the rolls.
This has a practical implication: if the boss chest drops a Common-tier schematic that you do not need, you can immediately fast travel out without checking the other chests. The loot quality cascades — if the boss chest rolled low, the regular chests likely rolled low too. Save your time and hit the next dungeon.
5. Dungeons Share a Global Loot Rotation, Not a Per-Dungeon One
The Palworld community has documented a pattern where dungeon loot quality appears to fluctuate on a global timer rather than per instance. Multiple players running different dungeons simultaneously report similar loot quality tiers — periods where everyone gets Rare+ drops, and periods where everyone gets Common. The theory is that the game’s seeding algorithm uses a global timestamp component.
The practical takeaway: if you open a dungeon boss chest and get a Rare or Epic schematic, immediately fast travel to a second dungeon and open its boss chest before the global seed shifts. Players report 30-45% higher schematic acquisition rates when chaining dungeons back-to-back during a “hot” period compared to waiting or spreading runs across sessions.
Island-by-Island Dungeon Guide
Each island in Palpagos has cave dungeons scaled to its level range. The table below gives you the quick reference; the sections that follow explain the details that matter for survival and farming.
Quick Reference Table
| Island | Level Range | Common Bosses | Chest Tiers | Key Loot | Recommended Entry Level |
|---|---|---|---|---|---|
| Sea Breeze Archipelago | 1-15 | Chillet, Penking, Gumoss Alpha | Small only | Basic schematics, Pal Spheres | 10+ |
| Forgotten Island | 15-25 | Bushi, Kingpaca, Elizabee | Small + Medium | Rare schematics, Skill Fruits (common) | 20+ |
| Eastern Wild Island | 20-35 | Katress, Azurobe, Mossanda Alpha | Small + Medium + Boss | Medium schematics, Pal Souls, Skill Fruits | 28+ |
| Desiccated Desert | 25-35 | Kingpaca, Wumpo | Small + Medium | Heat-resistant schematics, Coal, Skill Fruits | 30+ |
| Ice Wind Island | 30-40 | Wumpo, Elphidran, Chillet Alpha | Medium + Boss | Cold-resistant schematics, Ice Organs, Large Souls | 35+ |
| Mount Obsidian | 35-45 | Blazamut, Suzaku Alpha, Bushi Alpha | Medium + Boss + Large | Legendary schematics, Heat-resistant armor, Sulfur | 40+ |
| Astral Mountains | 40-50 | Wumpo Beta, Menasting, Necromus | Boss + Large | Legendary schematics, Huge Souls, Pal Metal | 45+ |
| Sakurajima Island | 45-50 | Selyne, new Alphas | Boss + Large (upgraded) | Legendary schematics, Ancient Civ Parts x5 | 48+ |
| Feybreak Island | 50-55 | Xenolord-related, high-level Alphas | Boss + Large (max tier) | Max-tier schematics, Huge Souls, endgame materials | 52+ |
Sea Breeze Archipelago (Levels 1-15)
The starting island’s dungeons are tutorials in disguise. They have short layouts (2-3 rooms max), weak Pal spawns (Lamball, Cattiva, Foxparks, Direhowl), and the boss is always a low-level Alpha — typically Chillet (level 11, Ice/Dragon) or Penking (level 15, Water/Ice). The chests contain only Common-tier schematics, basic Pal Spheres, and Berries.
Dungeon entrances: Two cave entrances on the eastern side of the island, one near the initial spawn plateau and one north of the Fort Ruins tower. Both are marked by a distinctive curved stone arch formation visible from the air.
Strategy: Do not spend time here. Enter each cave once to clear it for the exploration XP, take the free schematic from the boss chest, and move on. The loot-per-minute ratio is terrible compared to catching Pals on the surface. Return only if you need a specific low-level drop like Chillet’s Pal Oil or Penking’s Ice Organ for early-game crafting.
Boss spawns:
- Chillet (Ice/Dragon) — drops Pal Oil, Ice Organ, Common Chillet Saddle schematic
- Penking (Water/Ice) — drops Ice Organ, Penking Saddle schematic (Rare)
Forgotten Island (Levels 15-25)
This island bridges early and mid-game dungeons. The caves are larger (3-5 rooms) and introduce branching paths. Pal spawns include Rushoar, Nitewing, and Melpaca — all manageable but no longer trivial. The boss pool expands to Bushi (level 23, Fire) and Kingpaca (level 25, Normal).
Dungeon entrances: Three caves along the western coastline. The southernmost entrance is the easiest to access from the fast travel point at the island’s bridge.
Strategy: These dungeons become relevant at level 20 when you start farming KingdomPacalypse for schematics and Ancient Civilization Parts start appearing in boss chests (1 guaranteed per kill). The Skill Fruit drop rate from medium chests is the best on the island — roughly 8-10% for Common-tier Skill Fruits like Ignis Blast or Air Cannon.
Notable loot:
- Bushi drops: Flame Organ, Bushi Sword schematic (Rare), Bushi Plate
- Kingpaca drops: Kingpaca Saddle schematic (Rare), Kingpaca Plate
Eastern Wild Island (Levels 20-35)
Eastern Wild Island is where dungeon running becomes a core activity. The caves here are the first to spawn 6+ room layouts with meaningful branch choices. Pal spawns include Tombat, Felbat, and Maraith — all Dark-types that deal significant damage if you are not prepared. Bring a Dragon-type Pal to counter them.
Dungeon entrances: Five caves spread across the island, concentrated in the central mountain range and the southeastern peninsula. The mountain top cave has the highest-level boss spawns.
Boss spawns:
- Katress (Dark, level 30) — drops Katress Hood schematic (Rare), Katress Plate
- Azurobe (Water/Dragon, level 30) — drops Azurobe Saddle schematic (Epic), Azurobe Plate
- Mossanda Alpha (Grass, level 25) — drops Mossanda Grenade Launcher schematic (Rare)
Farming note: Azurobe is the most valuable boss here because its Epic Saddle schematic sells for 8,000 gold at vendors. This is the best gold farm available at this stage of the game — one run every hour yields 8,000 gold at roughly 60% drop rate over 10 kills.
Mount Obsidian (Levels 35-45)
The volcano island dungeons are the first true gear check. You need at minimum Heat-Resistant Armor (level 2) to survive the island, and the caves themselves have lava-floor hazards that deal Fire damage on contact. The Pal spawns include Rooby, Blazehowl, and Reptyro — all Fire-types with high-damage AOE attacks.
Dungeon entrances: Four caves on the volcano slopes. Two are accessible from the lower ring (easier), two are high on the caldera rim (harder, better loot). The caldera rim caves require a flying mount with decent stamina to reach.
Boss spawns:
- Blazamut (Fire, level 45) — drops Blazamut Saddle schematic (Epic), Blazamut Plate
- Suzaku Alpha (Fire, level 40) — drops Suzaku Saddle schematic (Epic)
- Bushi Alpha (Fire, level 38) — upgraded Bushi with better loot table
Notable loot: Mount Obsidian boss chests are the first source of Legendary schematic drops in the game, albeit at low rates (~1%). The Legendary Blazamut Saddle is the target. Large Soul drops are also common here. Coal and Sulfur deposits inside the caves are worth mining if you need them for ammunition crafting — they are denser here than on the surface.
Astral Mountains (Levels 40-50)
The endgame ice biome. You need Cold-Resistant Armor (level 2+) to survive the overworld, though dungeon interiors are slightly warmer and will not kill you from cold exposure alone. The caves are the largest in the game — up to 10 rooms with multi-level layouts connected by ramps and ledges.
Dungeon entrances: Five caves in the mountain range, three on the western slopes and two on the eastern face. The western caves have easier boss spawns; the eastern caves can spawn Wumpo Beta or Menasting.
Boss spawns:
- Wumpo Beta (Ice, level 45) — drops Wumpo Saddle schematic (Epic), Large Soul
- Menasting (Dark, level 47) — drops Menasting Saddle schematic (Epic), Menasting Plate
- Frostallion (Ice, level 50) — rare spawn in deepest cave, Legendary drop table
Strategy: The Astral Mountains caves are worth farming for Huge Souls, which drop at roughly 8% from boss chests. The ore deposits here include Pal Metal nodes — the only renewable source of Pal Metal outside of the Anubis farming route. Mine every Pal Metal node you find.
Sakurajima Island (Levels 45-50)
The Sakurajima update introduced a new dungeon type with an expanded room pool and elevated loot tables. These caves use different generation rules than the base game dungeons — notably, the boss room elevation rule still applies but the layouts include more verticality and platforming sections.
Dungeon entrances: Three caves on the main island, one inside the new tower area.
Boss spawns:
- Selyne (new type, level 48) — drops Selyne Saddle schematic (Legendary), Selyne Plate
- Various new Alphas
Notable loot: Boss chests drop 5 Ancient Civilization Parts guaranteed — the highest yield in the game. Legendary schematic rates are roughly 3%, the best odds available.
Feybreak Island (Levels 50-55)
The Feybreak update endgame caves are designed for players who have beaten the main content. The Pal spawns here are level 50+, and the bosses can reach level 55. Bring your best team or do not bother.
Dungeon entrances: Four caves in the volcanic/rocky areas of the island.
Boss spawns: Endgame Alpha Pals including Xenolord variants. Drops include the highest-tier schematics in the game.
Sealed Realms: The Fast Farm Option
Sealed Realms are fixed boss chambers with no procedural generation, no trash Pals, and no chests. You walk in, fight the boss, loot the guaranteed drop, and walk out. They are the most efficient way to farm specific Alpha Pal drops (plates for raid slabs, specific saddle schematics).
| Sealed Realm | Boss | Level | Location | Best Drop |
|---|---|---|---|---|
| Sealed Realm of the Frozen Wings | Chillet | 11 | Sea Breeze Archipelago, NE coast | Chillet Saddle (Rare), Pal Oil |
| Sealed Realm of the Hydro Underground | Penking | 15 | Sea Breeze Archipelago, S coast | Penking Saddle (Rare) |
| Sealed Realm of the Sword Master | Bushi | 23 | Mount Obsidian low slopes | Bushi Sword (Rare), Flame Organ |
| Sealed Realm of the Wise | Kingpaca | 25 | Forgotten Island, central plateau | Kingpaca Saddle (Rare) |
| Sealed Realm of the Dark Sun | Katress | 30 | Eastern Wild Island, bamboo forest | Katress Hood (Epic) |
| Sealed Realm of the Dragon | Azurobe | 30 | Mount Obsidian, NE base | Azurobe Saddle (Epic) |
| Sealed Realm of the … (Feybreak) | Various | 50+ | Feybreak Island | Max-tier schematics |
Each Sealed Realm respawns on the same 1-hour timer as cave dungeon bosses. The optimal farming loop for raid slabs: pick a circuit of 3-4 Sealed Realms on different islands, hit them in sequence, fast travel between them, and loop back to the first one as the timers expire. This yields roughly 12-16 boss kills per hour.
Loot Tables and What to Chase
Understanding the loot table structure helps you decide which dungeons to prioritize.
Small Chests (found in every dungeon type, respawn 30 min):
- Common schematics (weapon and armor, Common tier)
- Pal Spheres (standard to mega)
- Food items (Berries, Wheat, Eggs)
- Arrows (10-20)
- Gold (100-300)
Medium Chests (found in mid-level+ dungeons, respawn 1 hr):
- Rare schematics (Blue tier)
- Skill Fruits (Common to Uncommon, 8% drop rate)
- Pal Souls (Small, 15% rate)
- Ingots (Refined Ingot, 2-4)
- Pal Spheres (Giga to Hyper)
Large Chests (found in high-level dungeons, respawn 1 hr):
- Epic schematics (Purple tier, 5-8% rate)
- Legendary schematics (Gold tier, 1-3% rate at level 40+)
- Skill Fruits (Rare skills like High Volt Storm, 3-5% rate)
- Large Souls (10-12% rate)
- Ancient Civilization Parts (2-3)
Boss Chests (guaranteed drop after boss kill, respawn 1 hr):
- Ancient Civilization Parts (quantity scales with island: 1 at low, 5 at Sakurajima)
- Large Soul or Huge Soul (20-30% combined rate at high level)
- Alpha-specific schematic (Epic to Legendary, 10-15% rate)
- Alpha-specific plate (for raid slab crafting, 100% rate)
The Dungeon Speedrun Protocol
Here is the exact sequence for a fast dungeon clear:
Pre-entry check: Confirm your flying mount is in slot 5 (not your active combat Pal). Confirm you have 5x Pal All healing medicine. Confirm your weapon has >50% durability.
Entry: Dismount at the entrance. If the entrance is guarded by Pals, deploy a combat Pal to clear them while you mount up and fly past. Do not stop to fight.
Navigation: At the first fork, take the upward-sloping path. At subsequent forks, take the left path (shorter average length). Do not explore side rooms.
Ore deposits: Only mine Pal Metal and Coal. Ignore Stone, Wood, Ore, and Paldium Fragments — they are abundant on the surface and not worth the time.
Chest rooms: If a chest room is directly on your path, open the chest (2-second detour). If it requires backtracking, skip it.
Boss fight: Deploy your type-counter Pal immediately. The boss will be locked in its spawn animation for 1-2 seconds — use this window to get a free weapon shot. Keep the boss aggroed on your tankiest Pal while your damage Pals attack from range.
Loot: After boss kill, loot the boss chest. Check the drop — if it is a Legendary or Epic you need, exit via the boss room portal. If it is Common, you can also check the regular chests if you have time, but the odds favor moving to the next dungeon.
Exit: Use the boss room portal (spawns after boss death). This drops you at the dungeon entrance, where you can fast travel immediately.
Total time: 3-5 minutes for low-level dungeons, 5-8 minutes for high-level dungeons.
Frequently Asked Questions
What is the best dungeon for farming Ancient Civilization Parts?
Sakurajima Island dungeons drop 5 Ancient Civilization Parts per boss kill — the highest yield in the game. Mount Obsidian and Astral Mountains drop 3-4. For pure parts-per-hour, chain Sakurajima dungeons. For parts-per-effort, farm Sealed Realms on Mount Obsidian (faster kills, slightly lower yield per kill but more kills per hour).
Can you get Legendary schematics from low-level dungeons?
No. Legendary schematics only appear in chests from level 35+ dungeons (Mount Obsidian and higher). Low-level dungeon chests are capped at Rare tier. If you want a Legendary Rocket Launcher or Legendary Pal Metal Armor, you must farm the endgame dungeons.
Do dungeon bosses have the same drop rates as overworld Alpha Pals?
Dungeon bosses and overworld Alpha Pals share the same drop pool for their specific items (schematics, plates, souls), but dungeon boss chests also drop Ancient Civilization Parts, which overworld Alphas do not. If you are farming a specific Alpha’s schematic, the overworld variant is faster because it does not require a loading screen and you can respawn it by fast traveling away and back. If you want Ancient Civilization Parts alongside the schematic, use the dungeon variant.
Is it worth building a base near a dungeon entrance?
Only if the dungeon is on a high-level island. A base near the Mount Obsidian or Astral Mountains dungeon entrances lets you fast travel directly to the cave mouth, shaving 20-30 seconds off each run. Over 50 dungeon runs, that saves 15-25 minutes. On low-level islands, the time saved is not worth the base slot.
What Pals should I bring for general dungeon clearing?
Your five-slot dungeon loadout: (1) fastest flying mount available, (2) highest-DPS type-counter for the expected boss (check before entering), (3) tank with defensive passives, (4) backup DPS of a different element for coverage, (5) healer Pal or second tank. This gives you boss coverage, survival, and mobility in five slots.
Related Guides
- Palworld Pal Locations Guide — Every Pal spawn including dungeon-dwelling species
- Palworld Boss & Tower Guide — All overworld Alpha bosses and tower boss strategies
- Palworld Resources & Materials Guide — Efficient farming routes for every material
- Palworld Best Pals Tier List — Combat performance rankings for every Pal
- Palworld Weapon & Gear Guide — Best weapons and armor for dungeon boss fights
- Palworld Raid Bosses Guide — Endgame raid content unlocked from dungeon boss plate drops