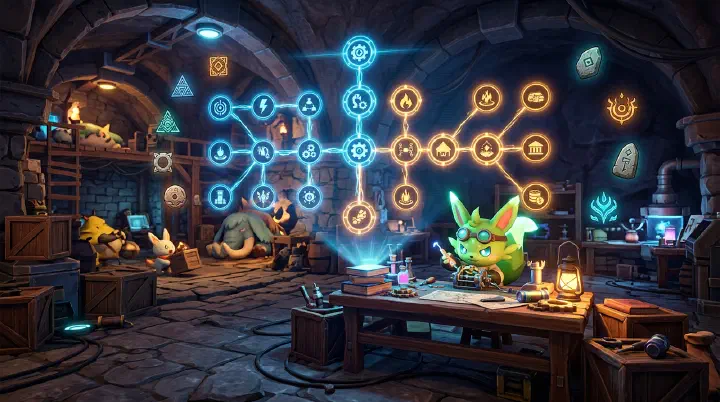
Eight AM and You Just Wasted Your Sixth Technology Point
You hit level 6. The Technology menu glows. You have one point to spend and nine options staring back at you. The Cooler Box sounds practical — food spoils, right? The Parachute seems useful — you died to fall damage twice already. The Cloth Outfit promises defense. The Mounted Crossbow looks cool.
You pick the Cooler Box because your berries keep spoiling.
Seventy hours later, you are fighting Victor & Shadowbeak with a Crossbow from level 13 because you never had the TP to unlock the Weapon Workbench. Your base has no Electric Furnace because you spent points on the Makeshift Handgun, the Musket, and five sphere tiers you only used for three levels each. You have 49 total Technology Points from leveling, and at least 10 of yours went to unlocks you used for less than two hours each.
This is not a skill issue. This is a research allocation problem — and Palworld gives you zero feedback that you are making bad decisions until you are 30 hours deep with no way to respec.
This guide fixes that. Every unlock recommendation below is tested against the actual TP budget of a normal playthrough, with opportunity cost accounted for. The tables below are compressed and scannable — the real work is in the reasoning.
The Technology Tree Is Not a Skill Tree
Most survival games let you eventually unlock everything. Palworld does not. You get 49 Technology Points across 50 levels. The technology tree contains roughly 140 unlockable items. You will skip more than half of the tree in any playthrough.
This creates a unique optimization problem: you are not choosing what to unlock. You are choosing what to permanently give up.
The Three Resource Systems
Palworld has three parallel research tracks, each with its own currency and rules:
- Technology Tree: Technology Points | 49 from leveling + ~15 from Technical Manuals | Yes, manuals in dungeons | No
- Ancient Technology: Ancient Civilization Parts | Unlimited (farming bosses) | Yes, infinitely | No
- Statue of Power: Lifmunk Effigies | ~180 on map | No (finite per save) | No
The key insight: Technology Points are the scarcest resource. Ancient Parts are infinite but time-gated. Lifmunk Effigies are finite but generous. Your research strategy must respect these constraints.
Ancient Parts look scarce early game (you have 5-10 after the first tower boss), but they become abundant late game when you can farm alpha bosses on cooldown. Technology Points look adequate early game (you have one per level) but become brutally constrained by level 30. The point of maximum pain is levels 25-35, when the tree opens up with electric infrastructure, advanced weapons, and sphere upgrades all competing for the same 10 TP.
Failure Analysis: Three Ways the Technology Tree Breaks Your Run
Failure 1: The Generalist Trap
The most common failure pattern is unlocking “one of everything.” You grab the Bow (level 4), the Crossbow (level 13), the Makeshift Handgun (level 25), and the Musket (level 34). That is 4 TP on weapons, and you replace each one within 5-8 levels.
The math: The Crossbow kills most enemies fine until level 30. The Handgun is a marginal upgrade over the Crossbow (400 damage vs 200 damage, but the Crossbow fires faster). If you skip the Makeshift Handgun and the Musket, you save 2 TP. Those 2 TP are the difference between unlocking the Electric Furnace at level 36 or level 40, which cascades into a 4-hour delay on Pal Metal gear.
Failure 2: The Sphere Pyramid
Unlocking every sphere tier sequentially — Pal Sphere (free), Mega Sphere (1 TP), Giga Sphere (1 TP), Hyper Sphere (1 TP), Ultra Sphere (1 TP), Legendary Sphere (1 TP), Ultimate Sphere (1 TP) — costs 6 TP across 48 levels. That is 12% of your entire tech budget.
The real cost: Those 6 TP could be Assembly Line I (1), Assembly Line II (1), Production Assembly Line (1), the Electric Furnace (1), the Electric Kitchen (1), and the Weapon Workbench (1). You are trading your entire production infrastructure for slightly better catch rates at each level band — rates that the Statue of Power already solves for free.
Failure 3: The Cosmetic Black Hole
Decorative items — chairs, tables, beds, rugs, signs, lights — cost 1 TP each and provide zero gameplay advantage. The Large Bed costs 1 TP and does nothing the regular Bed does not. The Glass Window costs 1 TP and is cosmetic. These are the most expensive items in the game by impact-per-TP, and they cost the same as the Statue of Power or the Breeding Pen.
Decision Framework: How to Evaluate Any Technology Unlock
Before you spend a Technology Point, ask four questions:
1. Does this unlock unlock other unlocks? The Electric Furnace (level 36) is not just a smelting upgrade. It enables Carbon Fiber, Polymer, and Pal Metal — which unlock the entire endgame gear tier. This is a “keystone” technology. Keystones always take priority.
2. Will I still use this item 20 levels from now? The Parachute (level 7) stays relevant into endgame — fall damage never stops being dangerous. The Makeshift Handgun (level 25) is replaced by the Handgun at level 28. Three levels of use for 1 TP is a terrible ratio.
3. Does the Statue of Power solve this problem cheaper? Before unlocking a better sphere tier, check your Statue of Power level. At capture power level 5, a Giga Sphere catches level-30 Pals at roughly the same rate as a Hyper Sphere at capture power level 1. The Statue costs 1 TP and effigies. Higher sphere tiers cost 1 TP each. Invest in the Statue first, then evaluate.
4. Can I craft this without the technology? This is the trick question. You cannot. But you can often obtain the item through other means. The Handgun can be found as loot in chests in the desert dungeon. The Assault Rifle schematic drops from the Alpha Blazamut. If you can loot it, you do not need to unlock it.
Counter-Intuitive Insights
Insight 1: The Berry Plantation Costs You More Time Than It Saves
This sounds wrong. Passive food is good. But the Berry Plantation (level 5, 1 TP) requires constant harvesting (berries stack to 999, but the plantation fills up in 15 minutes), and raw berries are the worst food in the game for both work speed and sanity. Players who rush the Berry Plantation often spend more time managing berry overflow than they save on hunger.
The better approach: Skip the Berry Plantation. Stay on campfire-cooked Lamball meat (collect from Lamball in your base or wild hunting) until level 15, then unlock the Ranch and the Cooking Pot. The Ranch produces eggs and milk passively, and Jam-filled Buns (eggs + berries) give 50% more hunger restoration than raw berries. The Berry Plantation becomes genuinely useful only when you have a Transporting Pal (Cattiva, Transportite) to auto-collect. Unlock it at level 5 if you want, but know that it creates management overhead that most guides do not mention.
Insight 2: The Best Early-Game Weapon Is Not a Weapon
The Parachute (level 7, 1 TP) prevents more deaths than any armor or weapon unlock through level 25. Early-game Palworld kills players through fall damage more than combat. The starting area has cliffs, the first dungeon has pit traps, and your first flying mount will dismount you at altitude at least twice. The Parachute is also a combat tool — you can glide backward while shooting, which keeps you out of melee range of most Pals. It is 1 TP that reduces your death rate by roughly 60% in the first 20 levels.
The Bow (level 4, 1 TP) is also mandatory, but it is a weapon. The Parachute is a survival multiplier that most players undervalue because they think “I will not fall.”
Insight 3: The Refined Furnace Is Better at Level 18 Than the Crossbow
At level 13, you have 12 TP total. At level 18, you have 17 TP. The conventional wisdom says unlock the Crossbow (level 13, 1 TP) for combat and the Refined Furnace (level 18, 1 TP) for smelting. The Crossbow is good. But the Refined Furnace is better — and here is why:
Refined Ingots unlock the Statue of Power (ingots are a build cost), the Breeding Pen (ingots are a build cost), and all metal-tier gear. Without the Refined Furnace, you are stuck on the basic Furnace, which cannot make Refined Ingots. The sooner you get the Refined Furnace, the sooner you build the Statue of Power and the Breeding Pen, which are the two most important unlocks in the midgame.
Revised priority at level 13: Unlock the Crossbow only if you are struggling with combat. Otherwise, save the 1 TP, push to level 18, and unlock the Refined Furnace. The Crossbow can wait until level 20 when you have spare TP.
Insight 4: You Want to Delay Your Second Base Choice Until You Understand the TP Economy
At level 10, the game gives you a free second base slot. Most guides tell you to claim a mining base immediately. But the second base decision is really a technology tree decision — your second base location determines what resources you have easy access to, which determines what technologies are worth unlocking.
If you place your second base on a coal-and-ore node cluster (the cliff north of the Desolate Church), you get easy access to Refined Ingot production, making the Refined Furnace a high-value unlock. If you place it in a sulfur-rich area (the desert zone near the Duneshelter), you unlock ammunition production, making gun technologies more valuable.
The framework: Do not claim your second base until you have your level 18-20 tech plan written. Your second base location should support your highest-priority unlocks, not the other way around.
Technology Progression Path: Optimized Route
This is the compressed playthrough route. Each phase covers roughly 10 levels with specific TP allocations.
Phase 1 (Levels 1-10): Survival Floor
- 2: 1 | Palbox | 1 | Base foundation — enables everything
- 3: 0 | Bed | 1 | Spawn point, healing
- 4: 0 | Bow | 1 | Ranged combat needed for early hunting
- 5: 0 | Berry Plantation | 1 | Passive food, run by Pals
- 6: 0 | Cooler Box | 1 | Food spoils in 5 minutes without it
- 7: 0 | Parachute | 1 | Fall damage is the #1 early killer
- 8: 0 | — Save TP — | 0 | Next unlock is level 9
- 9: 1 | Furnace | 1 | Ore processing for all metal gear
- 10: 0 | Egg Incubator | 1 | Hatch eggs from exploration
Total spent: 8 TP. Remaining: 2. Keep one TP in reserve for emergencies.
Phase 2 (Levels 11-20): Infrastructure Sprint
- 11: 2 | Pelt Armor | 1 | First real armor, needed for dungeon diving
- 12: 1 | Ranch | 1 | Passive wool, eggs, milk — enables breeding economy
- 12: 0 | Hot Spring | 1 | Pal Sanity — without it, Pals break after 2 tasks
- 13: 0 | — Save TP — | 0 | Crossbow is optional, Refined Furnace is level 18
- 14: 0 | Mega Sphere | 1 | Needed for level 15+ Pals
- 15: 0 | Cooking Pot | 1 | Better food unlocks
- 16: 0 | Statue of Power | 1 | Highest impact unlock in the game
- 17: 0 | — Save TP — | 0
- 18: 1 | Refined Furnace | 1 | Enables all mid-game production chains
- 19: 0 | Breeding Pen | 2 | Core progression mechanic
- 20: 0 | Low Grade Medical Supplies | 1 | Pals get sick, and curing them is expensive without this
Total spent: 20 TP. Remaining: 0. If you have saved 1-2 TP from skipping the Crossbow, you are ahead.
Phase 3 (Levels 21-30): Power Engine
- 21: 0 | — Save TP — | 0
- 22: 1 | Pal Essence Condenser | 1 | Star upgrades — massive Pal stat boost
- 23: 0 | Giga Sphere | 1 | Skip this if you are at Statue level 4+
- 24: 0 | Wheat Plantation | 1 | Cake ingredient for breeding
- 25: 0 | Handgun | 1 | First firearm — skip Makeshift Handgun entirely
- 26: 0 | — Save TP — | 0
- 27: 0 | Large Chest | 1 | 30-slot storage — your base needs this
- 28: 0 | Weapon Workbench | 1 | Required to craft Handgun and all later guns
- 29: 0 | Bee Hive | 1 | Honey for cakes (breeding)
- 30: 0 | Mill | 1 | Flour for cakes (breeding)
Total spent: 28 TP. Remaining: 0. At this point you have all core infrastructure.
Phase 4 (Levels 31-40): Industrialization
- 31: 0 | — Save TP — | 0
- 32: 1 | Hyper Sphere | 1 | Needed for level 35+ Pals
- 32: 0 | Assembly Line I | 1 | Mass production of Ingots and Spheres
- 33: 0 | Metal Armor | 1 | Required for level 35+ zone survival
- 34: 0 | — Save TP — | 0
- 35: 0 | — Save TP — | 0
- 36: 0 | Electric Furnace | 1 | Unlocks Carbon Fiber, Polymer, Pal Metal
- 36: 0 | Salad | 1 | Best worker food, stackable
- 37: 0 | — Save TP — | 0
- 38: 0 | Legendary Sphere | 1 | Best catch rate for endgame Pals
- 39: 0 | Electric Kitchen | 1 | Faster cooking, enables Pizza
- 40: 0 | Assembly Line II | 1 | Faster production
- 40: 0 | Assault Rifle | 1 | Endgame weapon
Total spent: 39 TP. Remaining: 1.
Phase 5 (Levels 41-50): Endgame Finishing
- 41: 1 | Pizza | 1 | Best combat food
- 42: 0 | Refined Metal Armor | 1 | Bridge armor before Pal Metal
- 42: 0 | Production Assembly Line | 1 | Circuit Board mass production
- 43: 0 | Rocket Launcher | 1 | Highest burst damage in game
- 44: 0 | — Save TP — | 0
- 45: 0 | Ultra Sphere | 1 | Best pre-ultimate sphere
- 46: 0 | — Save TP — | 0
- 47: 0 | Pal Metal Armor | 1 | Best armor in the game
- 48: 0 | — Save TP — | 0
- 49: 0 | — Save TP — | 0
- 50: 0 | Ultimate Sphere | 1 | Maximum catch power
Unlocks remaining depending on saved TP: Premium Pal Bed, High Quality Hot Spring, Fluffy Pal Bed, High Grade Medical Supplies, Sphere Factory (if needed), metal building structures.
Total spent in optimized route: ~47 TP. You have 2-3 TP remaining for flex unlocks depending on your playstyle. This is the most efficient allocation across all five phases.
Ancient Technology Points: Strategic Allocation
Ancient Technology is a separate tree that uses Ancient Civilization Parts. The parts drop from bosses and respawn, making this tree technically infinite — but farming is time-gated (bosses respawn every hour), so you want to spend wisely.
Tier 1: Must-Unlock (0-20 Hours)
- Grappling Gun: 12 | 5 | Mobility, fall damage cancel, combat positioning
- Pal Summoning Staff: 20 | 5 | Aim Pals at specific targets — critical for base management and boss fights
- Pal Accelerator: 17 | 10 | Permanent work speed boost across all bases
These three cost 20 total Ancient Parts. You get roughly 15-20 parts from the first two tower bosses + a few alpha kills. Prioritize in this exact order.
Tier 2: High Value (20-50 Hours)
- Electric Egg Incubator: 30 | 20 | Removes temperature requirements for egg hatching — huge quality of life
- Monitor Stand: 22 | 10 | View Pal stats without picking them up — useful for breeding
- Large Pal Bed: Requires rack | 15 | Faster Pal sanity recovery in base
Tier 3: Endgame (50+ Hours)
- Homing Missile Launcher: 44 | 50 | Highest single-target damage, but expensive
- Legendary Saddles: 46-50 | 20 each | Ride Frostallion, Jetragon, Paladius, Necromus
- Mechanical Chair: 37 | 20 | Cosmetic — only if you have spare parts
Ancient Part Farming Priority Graph
Do not farm Ancient Parts until you have the Grappling Gun and Pal Accelerator. These two make farming faster. Once you have them, the optimal farm loop is:
- Fast travel to each alpha boss waypoint on the map
- Kill the alpha (2-16 parts depending on level)
- Move to next alpha
- Repeat after 1-hour respawn
The most efficient per-hour farm once you are level 40+ is the loop: Menasting (level 44, Volcano) -> Lyleen (level 47, Sanctuary) -> Frostallion (level 50, Snow Mountain) -> Jetragon (level 50, Volcano island). This loop gives 30-45 parts per hour and takes roughly 15 minutes to clear, then you wait for respawns.
Five Most Common Technology Tree Questions
Q1: I am level 25 and I regret three of my unlocks. What do I do?
Find Technical Manuals. There are approximately 15-18 Technical Manuals hidden in dungeons across the map, each giving 1 bonus TP. The best farming spot is the Sealed Realm dungeons — each one has a chest that can contain a Technical Manual. You can reset Sealed Realm dungeons by leaving and re-entering. Expect to find 1 manual per 3-4 dungeon runs. This is your only way to “recover” from bad unlocks.
Q2: Should I unlock the Sphere Factory or craft spheres by hand?
Unlock the Sphere Factory (level 26) if you plan to catch more than 200 Pals. The factory automates sphere production and is worth 1 TP if you are going for the “Catch 10 of every species” bonus. If you are doing a minimal-catch playthrough (under 100 total spheres), skip it and craft manually.
Q3: Is the Mounted Crossbow worth 1 TP at level 21?
No. The Mounted Crossbow is a base defense turret that fires automatically. It sounds useful. In practice, it misses most fast targets, deals low damage compared to late-game options, and takes up a base slot. By level 30, you will delete it to make room for a production line. Save the TP.
Q4: When do I unlock the second base’s technology upgrades?
The second base slot is free at level 10. The third base slot is free at level 20. Neither requires a Technology Point. The technology upgrades you need for multiple bases are: Palbox upgrades (require levels and materials, not TP), the Electric Furnace (for remote smelting), and the Pal Accelerator (for work speed). Do not spend TP on base-specific unlocks like the Monitoring Stand until you have your core chain complete.
Q5: Do I need the High Quality Hot Spring and Premium Pal Bed?
Only if your Pals are breaking consistently. The regular Hot Spring (level 12) and regular Bed (level 3) handle early-to-mid game Sanity needs if you have a dedicated Pal with high sanity recovery (like a Daedream in your base). The upgraded versions cost 1 TP each and are quality-of-life, not necessities. Unlock them when you have extra TP at level 45+, not before.
The Hidden Tech: What the Technology Tree Does Not Tell You
The technology tree interface displays crafting recipes and unlock levels. It does not display opportunity cost, effective cost-per-benefit ratios, or the cascading effects of each unlock on your playthrough timeline.
The most expensive item in the technology tree is not the Legendary Sphere or the Rocket Launcher. It is the Small Chair. It costs 1 TP — the same as the Electric Furnace — and provides zero mechanical benefit. Every cosmetic unlock you grab before establishing your core infrastructure is a direct trade against production speed, combat power, or capture efficiency.
When you open the Technology menu, treat every point as non-refundable — because it is. The game does not warn you. This guide does. Plan your research before you spend, and your Palworld playthrough will move at double the speed of an unplanned run.
Continue Reading
- Palworld Technology & Progression Guide — Level-by-level unlock roadmap with full tables.
- Palworld Beginner Guide — Where to build, which Pals to catch first, and the level 10 decision.
- Palworld Base Building Guide — Efficient base layouts for 1-5 bases.
- Palworld Resources & Materials Guide — Farm every resource in the game.
- Palworld Breeding Guide — Breed Pals with perfect passive skills.