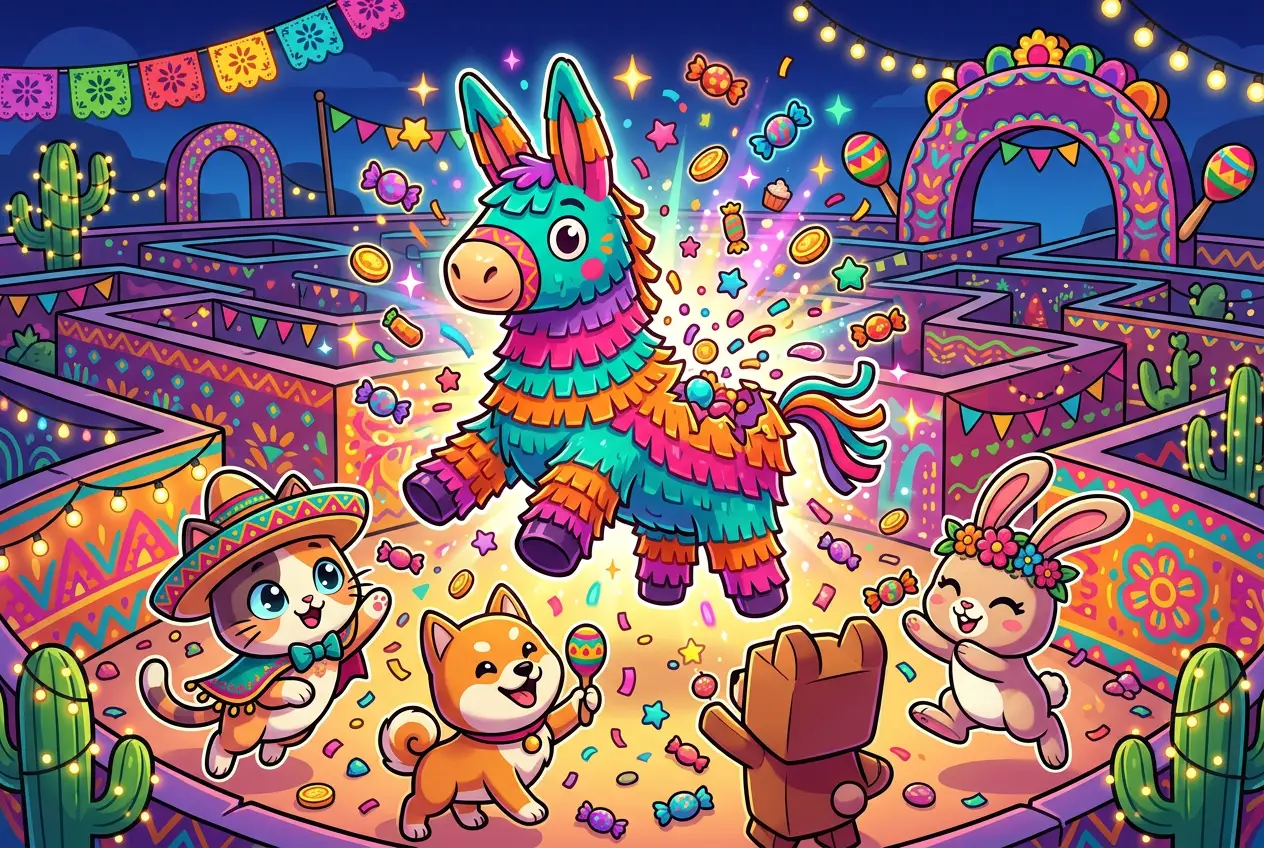
You teleport into the Fiesta Maze for the first time. Confetti sprays across the screen. A giant Piñata swings overhead. There are three tunnel entrances in front of you — Easy, Hard, and Insane — and a countdown timer ticking. You pick Hard because you have a decent team. Thirty seconds later you are dead, respawning at the entrance, staring at zero loot.
Welcome to Update 88. The Piñata Maze event launched August 8, 2026, and it is not a walk-in-the-park seasonal reskin. It layers four separate progression systems — maze difficulty scaling, Press Your Luck point gambling, Piñata Hatching leveling, and an Upgrade Machine with 20 tiers — on top of each other. Making the wrong call on any of them costs you hours of progress.
This guide breaks down how each system actually works, where players trip up, and the routing decisions that separate a one-hour Titanic Sombrero Chihuahua unlock from a five-hour frustration loop.
Piñata Maze Mechanics — Difficulty Tiers, Room Clearing, and Solo vs. Team
The maze is not a single fixed dungeon. Each time you enter, the game generates a series of connected rooms with damage checks at the entrance. The difficulty you pick — Easy, Hard, or Insane — determines three things: enemy HP scaling, the number of rooms before the Boss Piñata room, and the loot multiplier on your final chest.
How Difficulty Scaling Actually Works
Easy mode throws Breakable Piñatas at you with roughly 50q HP each. A mid-game player with a couple of Huge pets clears a room in 15-20 seconds. The catch: Easy mode Boss Piñatas drop Fiesta Orbs at a 0.3x rate, and you cannot get Fiesta Keys from Easy at all. You are essentially running Easy for XP and Piñata Hatching progress — you will never see a Titanic from an Easy clear.
Hard mode scales enemy HP to roughly 150q-300q per Piñata. This is where most players with one or two Titanics live. Room clears take 30-45 seconds. Boss Piñatas here have a roughly 9% Fiesta Key drop rate, and the orb multiplier sits at 1.0x. Hard is the efficiency sweet spot for key farming (more on this in the Prize Room section).
Insane mode pushes HP past 500q. The damage check at the entrance is unforgiving — if your best pet deals under 200q per hit, the game literally warns you before you enter. Boss Piñatas here drop keys at roughly 12% and orbs at 1.8x. But room clears take 90+ seconds, and one death resets your current room progress. Insane mode is a trap for anyone who is not running three or more fully enchanted Titanics with complementary enchants.
The Solo vs. Team Decision
Here is the scene you will face repeatedly: you are standing at the maze entrance, the lobby is filling up, and someone sends you a group invite. Do you accept?
The math is not as simple as “more players equals faster clears.”
Solo runs give you 100% of every drop. The maze also scales enemy count per room to your player count — one player gets roughly 8-12 Piñatas per room, while a 4-player group gets 20-30. The HP per Piñata does not change, but the total damage required per room goes up linearly with player count. If all four players deal roughly equal damage, you clear rooms about 40% faster than solo. The raw loot volume per minute increases.
But here is where groups fall apart: the split. If a Titanic Sombrero Chihuahua egg drops in the Prize Room, one person gets it. The other three walk away with consolation orbs. In a solo run, that egg is always yours.
The decision framework:
- Solo if your best pet deals 250q+ damage and you have at least one Titanic. You clear Hard rooms in 30 seconds, you keep everything, and you never wait for a slow teammate to catch up.
- Duo or trio if you are in the 100q-200q range. Two mid-tier players clear rooms faster than one, and the loot split on orbs and keys is manageable. Coordinate enchants — one person runs Diamond/Magnet, the other runs pure damage.
- Avoid 8-player groups. The difficulty spike is steep, and one player running an unenchanted Huge pet as their best unit drags every room to a crawl. You will spend more time reviving teammates than clearing Piñatas.
- Never group with randoms on Insane. The death penalty — resetting room progress — means one undergeared player wipes 90 seconds of work for everyone.
Common Failure: Overestimating Your Damage Floor
The number one mistake players made in the first 48 hours: picking Insane because “my best pet shows 500q in the inventory.” That number is your peak damage against a stationary target with all enchants active. In the maze, you are moving, dodging Piñata AoE attacks, and your damage uptime is closer to 60-70% of that number.
Recovery strategy: If you load into Insane and the first room takes over two minutes, leave immediately. Do not sunk-cost your way through three rooms just to die at the Boss. Switch to Hard, clear consistently, and test Insane again after you unlock Upgrade Machine tier 15+.
Press Your Luck — The Point-Gambling Minigame That Can Zero You
Press Your Luck is a standalone minigame accessed from the event hub. You walk up to a board of Piñatas, pick one, and smash it. Each Piñata either drops Fiesta Points or it is a “dud” — a dud wipes your entire current point total to zero.
The minigame is pure streak management. It is not random in the way a dice roll is random. The game tracks your consecutive wins and scales the dud probability upward.
How the Streak Risk Works
From player testing across the first two days, the dud probability curve looks roughly like this:
- 1-3 wins: dud chance is around 5-8%. You are almost always safe to keep going.
- 4-6 wins: dud chance climbs to around 15-20%. This is where most players get greedy and lose everything.
- 7-9 wins: dud chance hits roughly 30-40%. Every additional pick is a coin flip with your entire point stack on the line.
- 10+ wins: dud chance exceeds 50%. You are statistically destroying yourself by continuing.
The points per win also increase with streak length — your 7th win gives substantially more points than your 2nd win. That escalating reward is the temptation. It is designed to make you think “just one more.”
The Counterintuitive Advice: Dud Management Matters More Than Streak Length
New players fixate on racking up 10+ streaks. They see leaderboard screenshots of someone hitting 15 wins and assume that is the goal. It is not.
The actual optimal strategy: treat Press Your Luck as a volume game, not a high-score game. Bank after 4-5 wins every single time. Over 100 rounds, banking at 5 wins each time nets you roughly 40% more total points than pushing for 8+ streaks — because the dud at win 6 or 7 wipes your accumulated points from that entire round. One dud after 6 wins erases more points than three conservative 5-win banks combined.
The decision framework at each pick:
- After win 3: always pick again. The risk is negligible.
- After win 4: if you have under 500 total points, pick again. If you are past 1,000 points, seriously consider banking.
- After win 5: bank. Do not think about it. Press the bank button.
- After win 6: you are already in the danger zone. If the point total is under 800, maybe push one more. If it is over 1,500, you are gambling with a lead you already won. Bank.
- After win 7+: bank immediately. No exceptions. The dud probability at this point is high enough that continuing is negative expected value.
Common Failure: The “Just One More” Spiral
You hit 7 wins. Your point total is 2,400 — enough for three Fiesta Gifts. You think: “One more and I can get five gifts.” You pick. Dud. Zero.
The psychological trap is real. The points are not real until you bank them. The number on your screen is a promise, not a payout. Treat it that way.
Recovery strategy: If you just got dudded at a high streak, do not immediately go again. The tilt is real. Walk to the maze, run two Hard rooms, come back. Breaking the loss-chase cycle saves you from back-to-back duds that can wipe an hour of point farming.
Piñata Hatching — Leveling Your Personal Piñata
Piñata Hatching replaces standard egg hatching for the event’s duration. Instead of opening eggs, you smash your personal Piñata. Each smash drops a mix of gold, pets, and Fiesta Orbs. As your Piñata levels up, the quality of drops improves and you unlock bigger Huge luck boosts.
The Upgrade Priority
Your Piñata has a level that goes up every time you smash it enough times — think of it as an XP bar tied to your personal event participation. Leveling it is not optional; it is how you access the event’s Huge pets outside of the Prize Room.
Here is what each level threshold actually unlocks:
- Level 1-5: Common to Rare pets. Orb drops are minimal. You are essentially warming up.
- Level 6-10: Epic and Legendary pets start appearing. Orb drops increase. Huge luck boost activates at level 8 — this is the first real power spike.
- Level 11-15: Huge pets enter the drop pool at roughly level 12. The luck boost scales noticeably here. Most free-to-play players should aim for level 12 as their first-week goal.
- Level 16-20: Titanic-eligible pool opens at level 18. The Huge luck boost at level 20 is the maximum available outside the Prize Room.
How to Level Your Piñata Efficiently
Every Piñata smash in the maze contributes XP, plus bonus XP at the end of each room clear. The fastest leveling route:
- First 10 levels: Spam Easy maze clears. You clear rooms in under 20 seconds, you never die, and the XP-per-minute is higher than struggling through Hard at low Piñata level.
- Levels 10-15: Switch to Hard mode. By now your damage output from leveled Piñata drops should be sufficient. Hard gives roughly 1.4x the XP of Easy per clear.
- Levels 15-20: Mix Hard maze clears with Press Your Luck runs. Press Your Luck wins give direct Piñata XP, and by this point you want the Fiesta Points anyway for Fiesta Gifts.
Spending Fiesta Orbs on Piñata XP boosts from the Upgrade Machine (tier 3, 5, and 8) pays for itself by level 12. Get those three upgrades before anything else in the machine.
Common Failure: Ignoring Piñata Level and Wondering Why Drops Suck
This mistake is everywhere in the first two days. Players jump straight into Hard maze, grind for three hours, get zero Huge pets, and complain in chat. The reason: their Piñata is level 4. The Huge drop pool literally does not exist for them yet.
Recovery strategy: Check your Piñata level in the event hub before you commit to a farming session. If it is under level 12, your priority is XP — not loot. Run Easy rooms, smash everything, and level up. The loot comes after.
Reward Overview — What Comes From Where
| Reward | Source | Difficulty / Cost | Rarity Notes |
|---|---|---|---|
| Titanic Sombrero Chihuahua | Prize Room (Fiesta Key unlock) | 5 Fiesta Keys per unlock | Estimated 0.5-1% per egg open |
| Titanic Piñata Cat | Press Your Luck (point redemption) | 50,000+ Fiesta Points | Guaranteed at threshold; grind target |
| Titanic Alebrije Pegasus | Leaderboard (top 100) | Top 100 players by event score | Competitive; requires 6+ hrs/day |
| GARGANTUAN Sombrero Cat | Race (first to Level 150,000) | Global first-clear only | Single winner; see section below |
| Huge Sugar Skull Raccoon | Piñata Hatching (level 12+) | Piñata level 12+ | Random from smash drops |
| Huge Alebrije Crocodile | Tier 2-3 Boss Piñatas | Hard/Insane maze | ~2% per Boss clear |
| Huge Sombrero Axolotl | Fiesta Gifts | 800-1,500 Fiesta Points per gift | Random gift contents |
| Huge Sugar Skull Skunk | Piñata Hatching (level 14+) | Piñata level 14+ | Random from smash drops |
| Huge Piñata Monkey | Prize Room | 5 Fiesta Keys | Lower rate than Titanic |
The Prize Room deserves a deeper look. You need 5 Fiesta Keys — dropped by Tier 2 and Tier 3 Boss Piñatas — to unlock the room once. Inside is a locked egg that can hatch any of the event’s Titanic or Huge pets, with the Titanic Sombrero Chihuahua as the chase item. The egg is not guaranteed to give a Titanic; the estimated rate is somewhere around 0.5% to 1% per open. Most players will open 5-10 Prize Room eggs before seeing anything above a Huge.
Do not burn keys as soon as you get 5. Stack 10-15 keys and do 2-3 Prize Room runs back to back. The psychological benefit of not pinning all your hope on a single 0.5% roll is real, and the orb drops from the Prize Room itself partially refund your farming time.
Race to the Gargantuan — Is Level 150,000 Realistic?
The Race to the Gargantuan is a global first-clear event: the first player in the world to reach Level 150,000 in the event’s progression track wins the GARGANTUAN Sombrero Cat, which also comes in an ultra-rare Rainbow Shiny variant.
Let us be direct: this race is already effectively over for 99.99% of players. The top grinders hit level 20,000+ within the first 24 hours. By the time you read this on August 10, the leading players are likely past level 40,000. The 150,000 target is a marathon designed for players running 16-hour days with fully optimized teams.
That said, the race track itself is worth engaging with. Every 1,000 levels on the progression track gives a Fiesta Gift and an orb bundle. Levels 1,000 through 20,000 are achievable for a dedicated player over the event’s duration and provide steady supplemental rewards. Just do not treat the Gargantuan as your goal — treat the track as a passive reward stream that ticks up while you farm other objectives.
If you do want to push levels efficiently: run Insane maze rooms back to back with a coordinated trio, keep Fiesta Booster II (XP) active at all times from the Upgrade Machine, and stack every XP multiplier the game offers. Insane clears give roughly 2.3x the track XP of Hard clears per room.
Upgrade Machine & Fiesta Booster Priority
The Upgrade Machine has 20 tiers, each costing progressively more Fiesta Orbs. You cannot max everything in your first week unless you are playing 8+ hours a day. Choosing the wrong upgrades early locks you into a slower farming pace that compounds over time.
The Early-Game Priority Order (Orbs 0-5,000)
- Tier 1: Damage Boost I — costs almost nothing, applies immediately. First upgrade, no exceptions.
- Tier 3: Piñata XP Boost I — accelerates Piñata leveling, which unlocks Huge drops sooner. Get this before any cosmetic or comfort upgrade.
- Tier 5: Piñata XP Boost II — more XP per smash. Combined with Tier 3, your Piñata levels roughly 35% faster through the crucial 1-12 range.
- Tier 2: Fiesta Orb Boost I — more orbs per room clear. Orbs fund everything else, so this pays for itself quickly.
- Tier 8: Piñata XP Boost III — completes the XP trio. By this point your Piñata should be past level 12 if you have been farming consistently.
Mid-Game (Orbs 5,000-15,000)
- Tier 4: Damage Boost II — needed to comfortably clear Hard mode Boss Piñatas under 45 seconds.
- Tier 12: Fiesta Booster I (Damage) — this is a consumable booster, not a passive upgrade. It gives a 25% damage buff for 15 minutes. Stock up on these before dedicated key-farming sessions.
- Tier 10: Fiesta Orb Boost II — more orbs, faster future upgrades.
Late-Game (Orbs 15,000+)
- Tier 15+: Fiesta Booster II (Damage & XP) — the tier II boosters are where Insane mode becomes viable. The damage bump is noticeable (roughly 40%), and the XP booster II cuts the grind to level 20,000+ on the race track significantly.
- Remaining tiers in any order — by this point you understand your own farming rhythm.
Common Failure: Buying Fiesta Booster I Before Piñata XP Upgrades
Fiesta Booster I (Tier 6) looks tempting — a 15-minute damage buff for orb farming sounds efficient. But at low Piñata levels, your damage baseline is too low for the 25% multiplier to matter. Boosting 50q damage to 62.5q damage still leaves you slow-clearing Hard rooms. Get your Piñata to level 10+ first, then boosters actually amplify something worth amplifying.
The Fiesta Booster Usage Loop
Do not pop a Fiesta Booster and then spend five minutes in the hub organizing your inventory. The timer ticks whether you are in the maze or not. The efficient loop:
- Stack 3-5 Fiesta Boosters from the Upgrade Machine.
- Queue up at the Hard maze entrance.
- Pop the booster the moment you enter the first room.
- Run 3-4 full Hard clears back to back (roughly 12-15 minutes).
- Exit, dump loot, restock boosters, repeat.
One booster covers roughly four Hard clears if you move efficiently. Wasting booster uptime on lobby standing-around is one of the quietest efficiency killers in the event.
FAQ
How Do I Avoid Losing All My Fiesta Points in Press Your Luck?
Bank your points every 3-5 successful Piñata breaks. The dud rate increases noticeably after consecutive wins — the game tracks your streak and raises the risk. If you hit 5 green Piñatas in a row, the next one has a roughly 30% chance of being a dud. Walk away. The points you have are worth more than the points you might get.
Should I Solo the Maze or Team Up? Which Gives Better Rewards?
Solo if your team has at least one fully enchanted Titanic with damage above 250q — you keep 100% of drops and the maze scaling for solo players caps lower than group scaling. Team up if you are under 150q damage. A 3-4 player squad clears rooms roughly 60% faster, and the extra loot volume outweighs the split. Avoid 8-player groups — the difficulty spike is brutal and one undergeared player turns every room into a slog.
What Is the Fastest Way to Get the Titanic Sombrero Chihuahua from the Prize Room?
Run Tier 2 Boss Piñatas exclusively — Tier 3 drops Fiesta Keys at a slightly higher rate (about 12% vs 9%) but takes nearly twice as long to clear. Tier 2 gives you more keys per hour. Pair this with the Fiesta Booster II (Damage) from the Upgrade Machine at level 12+ and target solo runs. With consistent clears, you can farm one Fiesta Key every 8-12 minutes. You need 5 keys per Prize Room unlock, so budget roughly one hour of focused farming per attempt.
The Piñata Maze event packs more systems into one update than most games ship in a year. But the complexity cuts both ways — players who understand the routing decisions (Hard over Insane for keys, bank at 5 in Press Your Luck, Piñata XP upgrades before damage boosters) will farm Titanics while everyone else is still respawning at the maze entrance.
The event runs for a limited window. The Upgrade Machine, the Gargantuan race, and the Press Your Luck leaderboard all reset when it ends. Start with your Piñata level, learn the Hard maze cadence, and do not let a dud Piñata tilt you into bad decisions.
Good luck in the maze.