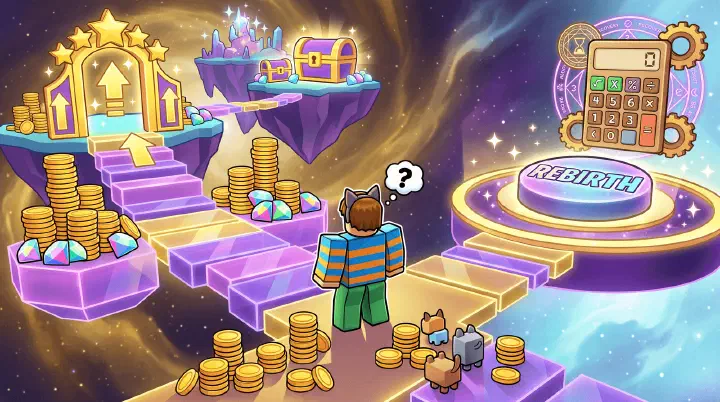
You Rebirth. You’re Stuck. You Regret It.
You’ve been grinding for three hours. Your pets are finally clearing Area 25 breakables in one hit. The coin counter ticks past 15,000. Then the rebirth tutorial pops up: “Rebirth to gain permanent bonuses! Reset your progress for +10% Damage!” It sounds incredible. Permanent bonuses! Free power!
You click the button. The screen flashes white. The music stutters. And then you’re standing in Area 1 with zero coins, the same pets you had before, and a “+10% Damage” buff that does almost nothing when your pets were already one-shotting Area 1 enemies. The best egg in Area 1 costs 500 coins. You have 0 coins. You sit there watching your pets slowly break the same wooden crates you destroyed three hours ago, earning 65 coins per minute. It takes you 45 minutes just to reach Area 10 — the same place you were 30 minutes ago before you rebirthed. You expected to feel stronger. Instead, you feel punished.
This is the rebirth trap. It’s the single biggest progression mistake in PS99, and it happens because the game tells you rebirth is good but never tells you WHEN it’s good. Rebirth too early, and you lose hours of progress. Rebirth at the right time with the right bankroll, and you blast back through the early areas in 5 minutes and come out ahead.
The Rebirth Recovery Formula
Here’s what actually determines how long you’ll be stuck after a rebirth:
| |
The “Coins Per Minute After Rebirth” is determined by your pets, not the rebirth bonus. The “+10% Damage” from Rebirth 1 adds almost nothing to your clear speed in Areas 1-10 because your pets already one-shot everything there. The bottleneck isn’t damage — it’s breakable respawn speed. You’re waiting for breakables to reappear, not struggling to break them.
The real recovery accelerator is having enough coins saved BEFORE rebirth to skip the slow early areas. Here’s the math for each rebirth:
| Rebirth | Unlock At | Bonus | Coins Needed Pre-Rebirth | Recovery Time | Net Progression Gain? |
|---|---|---|---|---|---|
| R1 | Area 25 | +10% Damage | 50K-100K | ~30 min | Small gain — +10% Damage helps at Areas 20+ |
| R2 | Area 50 | +1 Pet Slot | 100K-200K | ~45 min | Worth it — extra pet slot is 20% more DPS |
| R3 | Area 75 | +1 Egg Slot | 250K-500K | ~60 min | Worth it — faster egg hatching |
| R4 | Area 100 | +5% Luck | 500K-750K | ~75 min | Marginal — 5% Luck is tiny |
| R5 | Area 125 | Fantasy World access | 1M+ | ~90 min | Worth it for Fantasy World |
| R6 | Area 150 | +1 Pet Slot | 2M+ | ~2 hours | Worth it — 2nd pet slot is huge |
| R7 | Area 180 | +5% Shiny Chance | 5M+ | ~3 hours | Skip for now — Shiny chance is too low |
| R8 | Area 219 | Void World access | 10M+ | ~4 hours | Worth it — Void World is endgame |
Why Your Rebirth Timing Is Costing You Days
Most players don’t fail at rebirth because they’re bad at the game. They fail because the game presents rebirth as a reward for reaching an area, when it’s actually a loan you have to pay back with time. Here are the five mistakes that turn a 20-minute setback into a multi-day stall:
Mistake 1: Rebirthing the instant the button unlocks. Area 25, 50, 75 — the game dangles rebirth like a prize. It isn’t. The unlock is a gate, not a green light. Treat it as permission to consider rebirthing, not an order to do it immediately.
Mistake 2: Believing the damage bonus will speed up recovery. That +10% Damage from Rebirth 1 is meaningless in Areas 1-10. Your pets already one-shot everything. The real bottleneck is breakable respawn speed. You’re standing around waiting for crates to reappear, not struggling to break them.
Mistake 3: Rebirthing with “just enough” coins. If you have exactly 50,000 coins for R1, you buy the best Area 1 egg and then you’re broke again. One unlucky hatch and you’re farming manually for 20 minutes. You need a buffer — at least 1.5x the minimum recommendation.
Mistake 4: Ignoring the time-to-next-unlock math. If you’re at Area 25 and could reach Area 50 in 40 minutes, but rebirthing will cost you 50 minutes of recovery, you just lost 10 minutes AND delayed your R2 unlock. Always ask: “How long until the next rebirth area?” before you reset.
Mistake 5: Rebirthing before you log off. Recovery requires momentum. You need to buy eggs, equip pets, and push through areas in one continuous session. Rebirthing at 11 PM and logging off means you wake up to Area 1 with no forward energy. You’ll spend the next morning re-learning how slow early areas are.
The Rebirth Calculator
Use this framework to decide whether to rebirth right now or keep farming. It replaces guesswork with a simple decision chain.
Step 1: The Coin Buffer Check Do you have at least 1.5x the “Coins Needed Pre-Rebirth” from the table above?
- Yes → Continue to Step 2.
- No → Farm more. Do not rebirth.
Step 2: The Recovery Budget Check Can you afford 30-90 minutes of uninterrupted play to recover to your previous area?
- Yes → Continue to Step 3.
- No → Wait until you have a free session. Do not rebirth.
Step 3: The Next-Unlock Distance Check How many areas until the next rebirth unlock?
- Within 10 areas → Push to the next unlock first, then rebirth. One big rebirth beats two small ones.
- More than 10 areas → Continue to Step 4.
Step 4: The Sprint Simulation Buy the best Area 1 egg with your saved coins (without actually rebirthing). Time yourself reaching Area 10.
- Under 5 minutes → Rebirth now. Your bankroll is solid.
- 5-8 minutes → Borderline. Farm for one more area’s worth of coins, then rebirth.
- Over 8 minutes → Do not rebirth. Your pets or bankroll are too weak.
Quick Reference: If your current rebirth is X and your coin rate is Y per minute → do Z:
| Current State | Coin Farm Rate | Coins Saved | Action |
|---|---|---|---|
| R0, Area 25 | 5K/min | 50K | Borderline — farm 50K more |
| R0, Area 25 | 10K/min | 100K+ | Rebirth now |
| R1, Area 50 | 15K/min | 100K | Too low — farm to 200K |
| R1, Area 50 | 25K/min | 200K+ | Rebirth now |
| R4, Area 125 | 50K/min | 500K | Too low — farm to 1M+ |
| R4, Area 125 | 80K/min | 2M+ | Rebirth now |
The Tests: When You’re Actually Ready
Don’t rely on the coin number alone. Run these two tests before rebirthing:
Test 1: The Egg Test
Go to the Area 1 egg shop after rebirth (simulate it — don’t actually rebirth). Can you buy the most expensive egg in Area 1 with your current coins, equip those pets, and reach Area 10 within 5 minutes? If no: you don’t have enough saved. Keep farming.
Test 2: The 10-Area Sprint
After buying the best Area 1 egg and equipping pets, time yourself reaching Area 10. If it takes more than 8 minutes: your pets are too weak or your coin bankroll was too small. Farm more before rebirthing.
Real Account: Two Rebirth Journeys Compared
A player tracked two rebirth strategies on separate accounts, both starting from Area 1 with identical pets.
Account A (Early Rebirth): Rebirth at exactly Area 25 with 15,000 coins saved. Recovery to Area 25: 52 minutes. Had to farm Area 1-5 enemies manually because the best egg they could afford was the 500-coin Basic Egg. Net result: lost about 22 minutes of progression compared to if they’d just kept pushing forward without rebirthing.
Account B (Prepared Rebirth): Rebirth at Area 25 with 85,000 coins saved. Bought the best Area 1 egg immediately (25,000 coins). One-shot everything through Area 8. Reached Area 15 within 6 minutes. Back to Area 25 within 15 minutes. Net result: gained the +10% Damage buff with essentially zero downtime.
The lesson: The difference between a good rebirth and a bad one isn’t the rebirth itself — it’s the bankroll you bring into it. The “+10% Damage” buff is identical on both accounts. What changed the outcome was the 70,000-coin difference in starting capital.
Counter-Intuitive Rebirth Truths
These are the lessons that veteran players learned the hard way. They go against what the game suggests and what common sense might tell you.
1. Rebirthing more often is not always better. Each rebirth is a full reset to Area 1. Two rebirths with small bankrolls means you’re crawling through the early areas twice. One rebirth with a massive bankroll gets you back to endgame faster and with less total pain. Frequency hurts. Bulk helps.
2. The first rebirth is the most important and the most likely to be wasted. R1 gives +10% Damage — the smallest buff in the entire chain. New players see “only 10%” and assume it’s safe to rush. Wrong. R1 is the most dangerous because you haven’t experienced recovery yet. You don’t respect how slow Area 1 feels until you’re stuck there. The rebirth that teaches you the lesson is the one you waste.
3. Skipping a rebirth can be the optimal play. If you’re at Area 140 and R5 unlocks at 125, you might feel pressured to reset. Don’t. Push to Area 150 for R6 instead. One rebirth from R4→R6 with 2M+ coins is faster than two separate rebirths with 500K each. The game rewards patience, not button-mashing.
4. Your rebirth bonus does not help you recover. +10% Damage on pets that already one-shot everything is +0% speed. +5% Luck on eggs you can’t afford is 0% value. The rebirth bonus only matters once you’re BACK at your previous area. Until then, your saved coins are doing 100% of the work.
The Fantasy World Trap (Rebirth 5)
Rebirth 5 unlocks Fantasy World, and the game makes a big deal about it. New world! New pets! New content! Every player wants to unlock it as fast as possible.
Here’s the trap: Fantasy World enemies start at roughly Area 125 difficulty. If you rebirth to R5 at exactly Area 125 with minimum coins, you’ll spend 2+ hours crawling back to Area 125 before you can even enter Fantasy World. Meanwhile, a player who waited until Area 140-150 with 2M+ coins saved will recover in under an hour and enter Fantasy World sooner than the player who rushed.
The optimal Fantasy World unlock path: Don’t rebirth immediately at Area 125. Push to Area 140-150. Save 2M+ coins. THEN rebirth. You’ll reach Area 125 again in under an hour and enter Fantasy World with a coin bankroll that lets you immediately buy the best Fantasy World eggs. The player who rushed R5 at Area 125 with 50K coins will take longer to reach Fantasy World than you, even though they rebirthed 15-25 Areas earlier. The game rewards patience in the rebirth system. The rebirth button will always be there. The coins you save before pressing it determine whether you spend the next hour progressing or regretting. When in doubt, farm one more area.
The Pre-Rebirth Checklist
Before you press that button, verify all five:
- Coin bankroll: Do you have the recommended amount for your rebirth level (from the table above)? Yes → continue. No → farm more.
- Best pets equipped: Are your 5 strongest pets in your active slots? Rebirth keeps your pets but resets your area — you want maximum clear speed.
- Egg ready: Can you name the best egg in Area 1 that you’ll buy immediately after rebirth? If you don’t know which egg to buy, you’ll waste time in the shop.
- Enchantments checked: Are your key pets enchanted with at least Criticals and Coins? Rebirth amplifies enchanted pets’ value because they’ll be clearing more breakables per minute in the early areas.
- Time budgeted: Do you have 30-90 minutes to recover to your previous area? Don’t rebirth at midnight when you have 15 minutes before bed. You want to ride the momentum all the way back to your previous progress.
Five yes answers = rebirth now. Four yes + one “I’ll buy the right egg when I get there” = wait. Three or fewer = you’re not ready. Farm until you are.
Related Guides
- PS99 Beginner Guide — Worlds, Pets & First Huge
- PS99 Best Pets Guide — Meta Pets Ranked
- PS99 Team Compositions Guide — Best Builds for Every Mode
- PS99 Codes Guide — How to Never Miss Free Rewards
- PS99 Rebirth & Prestige Guide — Full Progression Path
- PS99 Enchantments & Upgrades Guide — Maximize Your Pet Power