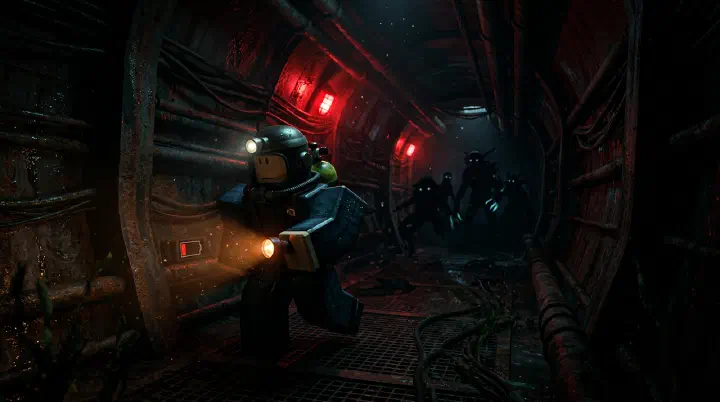
You are at Door 75. Your flashlight flickers at 12%. You have survived Pandemonium twice, dodged the Angler four times, and memorized every locker spawn on Floor 4. Your inventory is full. Three bandages, two batteries, a glowstick, and a keycard you have been saving since Door 34. You think you are going to make it. You think the hard part is behind you.
Then the lights cut out.
Not the entity flicker. Total blackout. You forgot to check your battery before entering the room. You fumble for the glowstick, but the activation animation is two seconds long, and Screech has already decided you are dinner. You die in the dark with three bandages untouched, two batteries still in your inventory, and a keycard that was never going to save you.
You did not die to the Angler. You did not die to Pandemonium. You survived every monster the Hadal Blacksite threw at you, and you died because your flashlight hit zero in a room with no ambient light. That is the real boss past Door 50. It is not any single entity. It is the slow erosion of your resources, your discipline, and your ability to make clean decisions while exhausted.
This guide is for players who already know what the Angler sounds like. You do not need another entity breakdown. You need the systems that keep you alive when the game stops playing fair.
Why Good Players Still Die After Door 50
Most players who reach Door 50 understand the basics. They know the locker mini-game. They can identify audio cues. They have survived enough runs to feel confident. Then they die at Door 63, or 71, or 89, and they blame bad luck. It is not luck. It is a category shift in how Pressure tests you.
Resource mismanagement kills more deep runs than entities do. Past Door 50, consumable spawns become less generous. The medbay that used to give two bandages now gives one. The supply closet you counted on is empty. Players who never built strict usage protocols bleed out slowly. They use batteries in rooms with decent ambient light. They heal from 80% health because it feels safe. By Door 70 they are running on fumes, and one bad room ends the run.
Overconfidence after surviving hard encounters is a silent killer. You dodge the Blitz. You nail the Pandemonium locker game. Your brain releases dopamine and decides you are untouchable. You stop scanning rooms on entry. You sprint through corridors you should walk. Then a ChainSmoker fills a room you did not check, and you are dead before your confidence fades.
Not adapting to entity combinations separates average players from deep runners. Early floors throw one entity at a time. Past Door 60, Pressure starts layering threats. You hear the Angler splash while A-60 is already sweeping. You cannot hide from both in the same locker. Players who only practiced single-entity responses freeze. The correct play is often counter-intuitive: sometimes you abandon the locker entirely and kite through a door you already cleared.
Ignoring the mental fatigue tax is fatal. A deep run takes time. Your concentration slips. You miss an audio cue you would have caught at Door 20. You enter a room without checking the minimap. Advanced players treat mental stamina as a resource. They take breaks between floors. They mute external audio. They recognize that Door 90 with a tired brain is harder than Door 50 with a fresh one.
Treating every room the same ignores the floor-specific danger curve. Floor 5 is not Floor 8. Locker density drops. Entity spawn rates increase. Room layouts become more claustrophobic. The same cautious pace that worked on Floor 3 is too slow on Floor 8, where lingering triggers more spawns. You must recalibrate your aggression level every floor, not just once at the start.
The Advanced Survival Framework
Advanced Pressure play is decision trees, not reflexes. Here is the framework that keeps you alive when the game stacks the deck against you.
If you are low on batteries (below 30%) → stop using your flashlight in any room with orange or red emergency lighting. Switch to your glowstick or NVCS-3000 immediately. Only use the flashlight in pitch-black rooms or during active entity encounters where visibility matters more than conservation.
If you are low on bandages (one or zero) → play proximity avoidance over speed. Do not rush through rooms. Check every desk and cabinet for medical spawns. Consider backtracking to a known medbay if it is within two doors. One bandage at 40% health is an emergency, not a plan.
If you encounter an Angler + A-60 combo → prioritize A-60 first. The Angler is proximity-based and gives you time to react. A-60 is timer-based and sweeps regardless of where you hide. Find a locker in an alcove off the main corridor, wait for the A-60 sweep to finish, then handle the Angler patrol.
If you encounter a Blitz + any other entity → abandon hiding. The Blitz ignores lockers. Your only play is perpendicular sprinting into a side room with a closed door. If another entity is active, use the side room as a buffer, then reassess. Never try to outrun the Blitz in a straight line.
If you have full health and find a bandage → leave it unless your inventory has space and you are past Door 60. Early hoarding wastes inventory slots that could hold batteries or keycards. Past Door 60, grab every bandage you see because spawns dry up.
If a puzzle room spawns past Door 70 → set a 45-second timer. If you have not solved it by then, use a keycard. The time you spend stationary is more dangerous than the resource you spend. Deep runs reward momentum, not thoroughness.
If you hear two audio cues overlapping → identify which is positional and which is environmental. Positional cues (splashing, breathing) mean the entity is nearby and hunting. Environmental cues (rumbling, static) often indicate a timed sweep. Handle the hunter first, then the timer.
Consumable Management in Deep Runs
Your inventory is a balance sheet. Every item is an asset with a depreciation schedule. Manage it like one.
| Consumable | Drop-Dead Threshold | Conservation Rule | Deep-Run Pivot |
|---|---|---|---|
| Flashlight Battery | 30% | Off in lit rooms; low beam in dim rooms | Switch to NVCS-3000 past Door 80 if found |
| Bandages | 1 remaining | Heal only below 60% HP with backup in inventory | Grab every spawn past Door 60 regardless of HP |
| Glowsticks | 1 remaining | Save for blackout rooms or Blitz encounters | Use freely past Door 90 when batteries are gone |
| Keycards | 1 remaining | Use only after checking for puzzle solutions | Burn freely past Door 70; time > keycards |
| Batteries (spare) | 0 in inventory | Pick up every spawn even if flashlight is full | Flashlight becomes disposable; batteries are the real currency |
The most common advanced death is the full-inventory death. You have items, but they are the wrong items at the wrong time. Fix this by conducting an inventory audit every 10 doors. Ask: what am I missing? If you have four bandages and no batteries, you are already on a death timer.
Room-Specific Tactics for Danger Zones
Not all rooms are equal, and past Door 60 the dangerous ones become lethal.
Flooded Corridors: Visibility drops. Entity audio becomes muffled. Movement is slower. The instinct is to rush. The correct play is to hug the right wall and never stop moving, but never sprint. Sprinting drains stamina you will need if an Angler spawns behind you. The right-wall rule guarantees you hit the exit door without getting turned around.
Narrow Maintenance Tunnels: These spawn fewer lockers and often have prop lockers mixed with real ones. The advanced play is to identify real lockers on entry by their audio. Real lockers make a faint metallic rattle when you approach. Prop lockers are silent. Check this before any entity spawns.
Multi-Door Hub Rooms: These feel safe because they have options. They are actually deathtraps because entities can spawn from any connected corridor. When you enter a hub, close every door behind you except the one you plan to exit through. This narrows spawn vectors and gives you audio warning when a door opens.
Dark Storage Rooms: No ambient light. High item spawn rate. Also the most common place to die to Screech or a missed audio cue. Enter with your flashlight on, scan for items in under five seconds, then exit. Do not loot thoroughly. The item density is bait.
Checkpoint Rooms: Advanced players do not rest here. They loot in under 10 seconds and push forward. Checkpoint rooms have a hidden mechanic where extended stays increase the spawn rate of the next entity. Momentum is your shield.
Entity Combinations and How to Beat Them
Single-entity practice is not enough. Here are the combinations that end deep runs, and the exact responses that work.
Angler + Screech in a dark room: The Angler forces you into a locker, but Screech spawns in darkness regardless. The solution is to activate your glowstick before hiding. The glowstick prevents Screech from spawning while you wait out the Angler. Most players enter the locker in total darkness and die to Screech while the Angler patrols outside.
Blitz + ChainSmoker: The Blitz forces you to run, but the ChainSmoker fills the escape path with lethal smoke. The counter-intuitive play is to move toward the smoke’s origin, not away from it. ChainSmoker smoke spreads outward from a central point. The origin point is the only safe path, and the Blitz’s charge line rarely intersects it.
Pandemonium + A-200: Both force you to stay still, but A-200 has multi-phase sweeps that last longer than Pandemonium’s locker game. Enter the locker, complete the mini-game, then stay inside through the remaining A-200 phases. Do not exit early because you “beat” Pandemonium. The phases overlap.
Double Angler spawn: Rare but possible past Door 80. Two Anglers mean two patrol paths. The safest locker is the one in an alcove between the two patrol routes, not the one farthest from either. They check lockers sequentially, and the middle alcove is in the patrol dead zone.
Counter-Intuitive Advice That Saves Runs
The best item is the one you never use. If you finish a deep run with a bandage and a battery still in your inventory, that is not waste. That is proof your conservation was perfect. The goal is not to consume everything. The goal is to have the right thing available at the moment you would have died without it.
Sometimes failing a puzzle is better than solving it. A puzzle that takes 90 seconds costs you more than a keycard. It costs mental focus, it costs exposure time, and it costs the stamina drain of standing still. Advanced players fail puzzles on purpose if the solution is not obvious within 15 seconds. The keycard is cheaper than the risk.
The safest room is sometimes the most dangerous. Medbays and supply rooms feel safe because they have items and lockers. Past Door 70, they are also high-traffic zones where entities spawn more frequently. The empty corridor with nothing in it is often safer because entities spawn based on player proximity to objective points. If there is nothing to loot, there is less reason for the game to spawn something to kill you.
Running backward is sometimes faster than running forward. If an entity spawns in a room with poor hiding options and you know the previous room had a guaranteed locker, the two-second door animation is faster than a ten-second death spiral trying to find a new hide. Your map knowledge of cleared rooms is a resource. Use it.
Healing to full health is often a mistake. If you are at 70% health and have two bandages, do not heal. Save the bandage for the entity encounter that drops you to 30%. Healing early wastes the consumable and gives you a false sense of security. The only exception is before a known dangerous room type, like a flooded corridor.
The Mental Game of Deep Runs
Past Door 80, Pressure becomes a test of endurance. Your hands are sweaty. You have been playing for 40 minutes. You know one mistake ends everything.
The advanced mental skill is compartmentalization. Treat each door as its own run. Do not think about Door 100. Do not think about your personal best. Think about Door 83. Then Door 84. The psychological weight of a deep run is what causes the careless mistake that kills you.
If you die, review the death immediately. Not to blame the game. To identify the decision tree failure. Was it resource? Positioning? Audio? Fatigue? Log it mentally. The players who reach Door 100 are not luckier. They have simply eliminated more failure modes than you have.
Final Thoughts
Surviving past Door 50 in Pressure is not about reaction time. It is about systems. It is about knowing that your flashlight battery is a countdown timer on your life. It is about recognizing that entity combinations require different priorities than single threats. It is about understanding that the game wants you to feel safe right before it kills you.
Build strict consumable protocols. Learn the room types that kill deep runs. Practice the entity combinations. And above all, treat your mental stamina as a resource with a depletion bar. The Hadal Blacksite does not get harder after Door 50. It just stops forgiving the mistakes you have been making all along.
Related Guides
- Pressure Beginner Guide
- Pressure Survival Tips Guide
- Pressure Entities Guide
- Pressure Entity Timing Guide
- Pressure Items and Puzzles Guide
- Pressure Items Loadout Tier List
- Pressure Locker Hiding Mechanics Guide
- Pressure Multiplayer Guide
- Pressure Speedrun Guide
- Pressure Floors and Locations Guide
- Pressure Endless Mode Guide
Disclaimer: This guide is based on Pressure as of July 2026. Game updates may change spawn rates, entity behavior, and consumable availability. Always verify current mechanics against the latest patch notes and official wiki.
Sources: