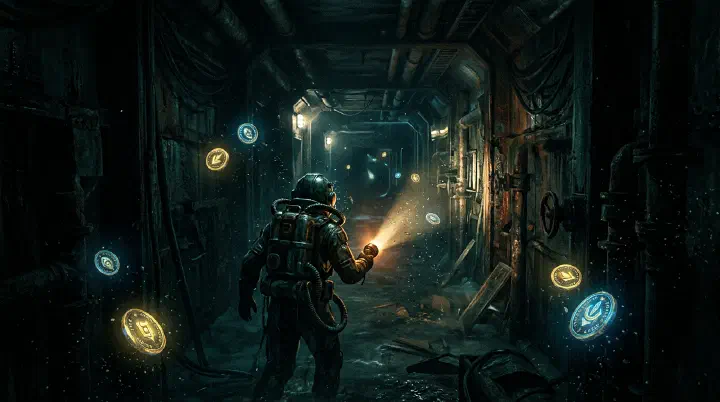
You are standing in the Pressure shop lobby. Your screen reads 1,025 Credits. You have been grinding for three days, dying at floor 20, dying at floor 22, dying at floor 17 because you skimped on Medkits. And now you finally have a four-digit number. You scroll through the shop and see the Blacksite Operative skin for 800 Credits. It looks incredible. Your friend bought it last week and the lobby flex is undeniable. You click purchase.
Three runs later, you are back at 150 Credits. You cannot afford a Medkit. You cannot afford a Code Breacher. You die at floor 15 because you ran out of heals and your Gummy Flashlight is still locked behind a 150 Credit paywall you have not yet crossed. The skin is sitting on your profile, unused, because you are too embarrassed to wear it while dying to floor-12 Anglers.
Pressure’s Credits economy is not complicated, but it is punishing. The game gives you a steady trickle of Credits and a shop full of items that range from “buy this immediately or you are throwing” to “this is a cosmetic trap that will set you back 10 hours of progression.” The difference between the two is not obvious to a new player. This guide covers every Credit source, the exact spending priority, the math behind Credit-per-minute farming, and the cognitive traps that keep players broke.
How Credits Work in Pressure
Credits are Pressure’s in-game currency. You earn them by surviving doors, opening lockers, completing minigames, and hitting milestone floors. You spend them in the pre-run shop on items that you carry into your next run. Credits are not shared between accounts, not purchasable with Robux, and not refundable. Once you spend them, they are gone.
Credit Sources — Every Way to Earn
Here is every Credit source in the game, ranked by reliability:
Door completion (1-10): 10-15 Credits per door. These are the early floors. The payout is small but consistent because entity spawns are rare and you can sprint through rooms with minimal risk.
Door completion (11-20): 15-20 Credits per door. The payout increases as the game expects you to survive longer rooms and more frequent entity encounters.
Door completion (21-30): 20-25 Credits per door. This is the sweet spot. Rooms are moderately challenging, but the Credit-per-minute ratio is at its peak. Seek appears somewhere in this range, which adds a one-time survival bonus.
Door completion (31-40): 25-30 Credits per door. The payout is highest in standard Hotel, but rooms are longer and entity density spikes. The Credit-per-minute ratio starts to dip slightly because you spend more time hiding and less time sprinting.
Door completion (41+): 30-40 Credits per door. Blacksite rooms pay more but take significantly longer. The Credit-per-minute ratio is worse than floors 21-30 if you are purely farming.
Locker loot: 0-50 Credits per locker. Lockers spawn 2-5 times per floor. The average Credit drop is 10-25 on early floors and 20-50 on deeper floors. Opening every locker on floors 1-10 is worth roughly 40-80 extra Credits per run. Opening every locker on floors 30-40 is worth roughly 100-200 extra Credits. The math is clear: locker loot scales with depth, and skipping lockers on deep floors is leaving Credits on the table.
Minigame rewards: 10-25 Credits per success. Breaker panels, pipe puzzles, and keycard hunts all award Credits on completion. These are worth doing on floors 1-20 when the puzzles are easy. On floors 30+, the time investment often outweighs the Credit reward unless you are also hunting a Code Breacher spawn.
Entity encounter survival bonus: 25-50 Credits per escaped encounter. This is a hidden mechanic — the game does not display a popup for it. After surviving an Angler, Pandemonium, or Searchlights encounter, 25-50 Credits are silently added to your total. It is the game’s way of rewarding you for not dying, and it adds up. A run with 10 entity encounters earns an extra 250-500 Credits from survival bonuses alone.
First-clear bonuses: 200-500 Credits, one-time. Reaching floor 25, 50, and 75 for the first time on your account awards a one-time Credit bonus. These are major early-game injections. Use them to buy your core loadout, not cosmetics.
Badge unlocks: 50-200 Credits, one-time. Some badges award Credits on unlock. The “Survivor” badge (floor 25) awards 100 Credits. “Veteran” (floor 50) awards 200. These are bonus Credits on top of the door earnings from the run itself.
Credit Per Run — The Math
| Floor Range | Door Credits | Locker Credits (est.) | Entity Bonuses (est.) | Total Range | Time (est.) |
|---|---|---|---|---|---|
| 1-10 | 100-150 | 40-80 | 25-75 | 165-305 | 5-8 min |
| 11-20 | 150-200 | 60-100 | 50-100 | 260-400 | 6-10 min |
| 21-30 | 200-250 | 80-150 | 75-150 | 355-550 | 8-12 min |
| 31-40 | 250-300 | 100-200 | 100-200 | 450-700 | 10-15 min |
| 41-50 | 300-400 | 100-200 | 100-200 | 500-800 | 15-25 min |
A full Hotel clear (floor 50) earns roughly 900-1,500 Credits total. A floor-40 death earns roughly 500-800. A floor-20 death earns roughly 200-400. The drop-off is steep — dying early costs you not just the run, but the Credits you would have earned from the deeper floors.
The most important number in this table is the Credit-per-minute ratio. Floors 21-30 earn roughly 40 Credits per minute. Floors 41-50 earn roughly 25 Credits per minute. The game pays you more for early-to-mid floors relative to the time invested. This is why Credit farming is about consistency, not depth. A player who reaches floor 30 in 15 minutes and resets earns more Credits per hour than a player who grinds to floor 50 in 45 minutes.
The Credit Spending Priority — What to Buy First
The Pressure shop has over 20 items. You cannot afford most of them as a new player. The order in which you buy them determines how fast you escape the “broke beginner” phase. Here is the exact priority.
Tier 1: Buy Immediately (First 500 Credits)
Gummy Flashlight — 150 Credits. This is the single most important purchase in the game. It provides infinite light with no battery management. It frees an inventory slot that would otherwise hold Batteries. It eliminates the recurring 25-Credit Battery cost. Buy this before anything else. If you are sitting on 150 Credits and do not own a Gummy Flashlight, you are playing the game wrong.
Medkit x2 — 50 Credits each. Two Medkits give you a heal buffer. One Medkit is not enough — if you use it on floor 15, you have zero heals for the next 35 floors. Two Medkits means you can heal after a bad encounter and still have a backup for the next one. At 50 Credits each, Medkits are the cheapest investment in the game relative to the runs they save.
Code Breacher — 200 Credits. Locked doors past floor 20 end runs. A Code Breacher is a one-button bypass. Do not rely on finding keycards — they are RNG-dependent and sometimes spawn three rooms away from the locked door. The Code Breacher guarantees you pass the door. At 200 Credits, it is expensive, but the alternative is dying to a locked door at floor 28 with 500 Credits of earnings lost.
Total for Tier 1: 450 Credits. You have 50 Credits left as a buffer. Do not spend the buffer. The buffer is for replacing a lost Medkit after a bad run.
Tier 2: Buy After Core Loadout (Next 500 Credits)
Sprint Potion x2 — 150 Credits each. Sprint Potions are your answer to Searchlights, Blitz variants, and corridor stretches with no lockers. One is not enough — you need one for the Seek chase and one for the Blacksite. Buy two once your core loadout is stable.
Hand-Cranked Flashlight — 300 Credits. This is an upgrade over Gummy Flashlight. It provides brighter light at the cost of a 1.5-second crank animation. The brightness is genuinely useful in the Blacksite where dark rooms are larger and entity spawns are harder to spot. But it is not essential — the Gummy Flashlight works fine through floor 50. Buy the Hand-Cranked when you have a Credit surplus, not when you are still building your core loadout.
Total for Tier 2: 600 Credits. You now have a full competitive loadout: Gummy or Hand-Cranked Flashlight, 2 Medkits, 1 Code Breacher, 2 Sprint Potions. This loadout can carry you to floor 50 consistently.
Tier 3: Situational Upgrades (1,000+ Credit Surplus)
Lantern — 200 Credits. Useful in co-op where one player runs Lantern and the other runs utility. Not worth it in solo play — the slot is better used for a Sprint Potion or third Medkit.
Lockpick — 100 Credits. Opens heavy lockers without RNG. Useful on floors 1-30 where locker loot is richest. Past floor 30, the diminishing returns make it a flex slot item at best. Buy it when you have Credits to spare and want to maximize early-floor loot.
Noise Maker — 100 Credits. Distracts entities in specific situations. Useful for reviving downed teammates or crossing open rooms with active patrols. Not essential, but situationally powerful. Buy after you have everything else.
Tier 4: Never Buy (Credit Traps)
Cosmetics (skins, outfits, titles, profile borders). These cost 200-800 Credits and provide zero gameplay benefit. A skin does not help you survive an Angler. A title does not heal you. The Blacksite Operative skin costs 800 Credits — that is a Gummy Flashlight, two Medkits, a Code Breacher, and two Sprint Potions. You are trading your entire survival loadout for a cosmetic. Do not buy cosmetics until you have a 2,000 Credit surplus and can afford to burn 800 on a flex purchase.
Smoke Bomb — 100 Credits. The Smoke Bomb’s 3-second window is too short for most use cases. It works in rooms with no hiding spots, but those rooms are rare, and a Sprint Potion solves the same problem more reliably. The Smoke Bomb is a niche item that new players overestimate. Skip it.
Standard Flashlight — 100 Credits. On paper, it costs 50 Credits less than the Gummy Flashlight. In practice, it costs more because you also need Batteries (25 Credits each) and the inventory slot they occupy. The Standard Flashlight is a trap that looks cheaper but costs you runs. Buy Gummy Flashlight instead.
Bandages — 75 Credits. Bandages heal over time and are weaker than Medkits. They cost 25 Credits more than a Medkit for a worse effect. The only scenario where Bandages are useful is topping off between rooms when you are above 50 HP — but a Medkit does the same thing better. Skip Bandages entirely.
Duplicate utility items. Buying two Code Breachers at the start of a run wastes 200 Credits. Most runs encounter one locked door. Carry one Code Breacher. If you find a second in a locker, great. Do not buy a second pre-run.
The Saving vs Spending Framework
The most common Credit mistake in Pressure is not buying the wrong item. It is not buying anything at all. Players hoard Credits for a “big purchase” and run minimal loadouts in the meantime. They die more often. They earn fewer Credits. The hoarding strategy is mathematically worse than spending.
The Investment Principle
Credits spent on survival items are investments. A 50-Credit Medkit that saves a run to floor 35 generates roughly 500 Credits from that run. That is a 10x return. A 150-Credit Gummy Flashlight that enables consistent floor-30 runs across 20 attempts generates roughly 10,000 Credits over those 20 runs. That is a 66x return.
The math is not complicated: survival items pay for themselves. The faster you buy them, the faster you start earning compound returns. The player who buys Gummy Flashlight on run 3 earns more total Credits by run 20 than the player who saves for Hand-Cranked Flashlight and buys it on run 15. The early Gummy buyer has 12 extra runs of infinite-light survival, each earning 400-500 Credits. The saver has 12 runs of Standard Flashlight + Batteries, dying more often, earning less.
The Spending Decision Tree
When you are in the shop lobby, ask these three questions in order:
Do I have Gummy Flashlight? If no, buy it. If you cannot afford it, save until you can. This is the only item worth saving for from zero.
Do I have at least two Medkits and one Code Breacher? If no, buy the missing item. Do not enter a run with fewer than two Medkits. The game does not spawn enough healing in lockers to compensate.
Do I have at least 50 Credits left after buying? If no, skip the optional purchase. Always leave a 50-Credit buffer. The buffer absorbs a bad run — if you die at floor 5 and earn 40 Credits, the buffer means you can still afford a Medkit next run.
If all three answers are yes, you have a stable loadout. Spend your surplus on Sprint Potions, then Hand-Cranked Flashlight, then situational items. Only buy cosmetics when your surplus exceeds 2,000 Credits.
When to Save
There is exactly one scenario where saving Credits is correct: you are within 50 Credits of a Tier 1 item and your current loadout is functional. If you have 100 Credits and need 150 for Gummy Flashlight, run one more minimal-loadout attempt. If you have 130 Credits and need 150, run one more. But do not save for Hand-Cranked Flashlight (300 Credits) while running Standard Flashlight. The 150 Credits you save between now and the Hand-Cranked purchase are offset by the runs you lose to the weaker flashlight.
Failure Analysis: The Three Credit Killers
These three patterns are why most Pressure players stay broke. Recognize them and your Credit income will double.
1. The Cosmetic Sinkhole
You have 800 Credits. You have been grinding for a week. The Blacksite Operative skin is right there. You buy it. Your loadout is now: Standard Flashlight, one Medkit, no Code Breacher. You die at floor 18. You earn 140 Credits. You buy one Medkit. You die at floor 22. You earn 180 Credits. You buy one Medkit. You die at floor 15.
The cosmetic cost you 800 Credits upfront, but its real cost is the lost compound earnings from every run you could have survived with a proper loadout. If the Gummy Flashlight + Medkit + Code Breacher loadout would have carried you to floor 30 consistently (earning 400-500 Credits per run), the 800-Credit cosmetic cost you roughly 3,000-4,000 Credits in lost earnings over the next 10 runs.
Root cause: Treating Credits as a high score instead of a tool. Credits are not a measure of progress. They are fuel for survival items. The number on your screen does not matter. What matters is whether your loadout can reach floor 30 reliably.
Fix: Set a hard rule. No cosmetic purchases until your Credit surplus exceeds 2,000 and you own every Tier 1 and Tier 2 item. If you break this rule, you are choosing to die more for a profile picture.
2. The Budget-Build Death Spiral
You buy Standard Flashlight (100 Credits) because it is cheaper than Gummy (150). You also buy Batteries (25 Credits). Your loadout costs 125 Credits — 25 less than Gummy. You feel smart. Then your flashlight dies at floor 23. You swap Batteries. Your flashlight dies again at floor 31. You are out of Batteries. You navigate the next three floors in near-darkness. You miss a locker spawn. An Angler kills you.
The next run, you buy Standard Flashlight + 2 Batteries. Total cost: 150 Credits. The same as Gummy Flashlight. But you are using two inventory slots (flashlight + batteries) instead of one. You have one fewer slot for Medkits or Code Breachers. You die more often. You earn fewer Credits. The “cheaper” option cost you more.
Root cause: Comparing sticker prices instead of total cost of ownership. The Standard Flashlight’s 100-Credit price tag is misleading because the recurring Battery cost and the inventory slot cost are hidden. The Gummy Flashlight’s 150-Credit price tag is the full cost — no recurring expense, no extra slot.
Fix: Calculate the total cost of an item, not just the shop price. Total cost = shop price + recurring expenses + inventory slot opportunity cost. The Gummy Flashlight is the cheapest light source in the game by total cost. The Standard Flashlight is the most expensive.
3. The Over-Insurance Trap
You have a stable loadout: Gummy Flashlight, 2 Medkits, 1 Code Breacher, 1 Sprint Potion. You have 300 Credits. You buy a second Code Breacher “just in case” and a third Medkit “to be safe.” Your inventory is now six items deep but you only have five slots. You drop the Sprint Potion. At floor 42, a Searchlights chase starts. You have no Sprint Potion. You die.
You spent 250 Credits on items you did not need. The second Code Breacher was dead weight — your run encountered one locked door. The third Medkit was never used — you healed twice and finished the run with a full Medkit. The Sprint Potion you dropped would have saved your life.
Root cause: Treating Credits as insurance against edge cases instead of investing in the items that solve the most common problems. A second Code Breacher protects against the rare double-locked-door run, but a Sprint Potion protects against the common Searchlights encounter. Over-insuring against rare events leaves you underinsured against common ones.
Fix: Buy for the median run, not the worst-case run. The median run has one locked door, two healing emergencies, and one Searchlights chase. Your loadout should match that distribution. If you have extra Credits, buy a second Sprint Potion — not a second Code Breacher.
Decision Framework: The Credit Audit
Run this audit every time you are in the shop lobby. It takes 30 seconds and prevents 90% of bad Credit decisions.
Step 1 — Survival check. Do you have a light source that does not require Batteries? Do you have at least two healing items? Do you have a locked-door answer? If the answer to any of these is no, spend Credits on the missing item. Do not pass go. Do not check the cosmetic shop.
Step 2 — Surplus check. After buying your core loadout, how many Credits remain? If the answer is less than 50, stop spending. The 50-Credit buffer is non-negotiable. If the answer is 50-150, buy one Sprint Potion. If the answer is 150+, buy two Sprint Potions.
Step 3 — Upgrade check. Do you have 300+ Credits after Sprint Potions? If yes, compare your current flashlight to Hand-Cranked. If you are running Gummy and consistently reaching floor 40, Hand-Cranked is a valid upgrade. If you are still dying before floor 30, the extra brightness will not save you — spend the Credits on more Medkits and practice your survival skills.
Step 4 — Trap check. Is the item you are about to buy on the Never Buy list? If yes, do not buy it. The list exists for a reason. Cosmetics, Smoke Bomb, Standard Flashlight, Bandages, duplicate utilities — these items reduce your effective Credit pool and increase your death rate.
Step 5 — Goal check. What are you trying to achieve? If your goal is to reach floor 50, buy items that directly increase your survival rate (Medkits, Sprint Potions, Code Breacher). If your goal is to flex in the lobby, you are playing the wrong game. Flexing costs Credits and costs runs. Pick one.
Counter-Intuitive Insights
1. The Best Credit-Farming Strategy Is Dying at Floor 35
The math is counter-intuitive but irrefutable. A floor-50 clear takes 40-50 minutes and earns 900-1,500 Credits. That is roughly 25 Credits per minute. A floor-35 death takes 20-25 minutes and earns 500-700 Credits. That is roughly 28 Credits per minute. The floor-35 death earns more Credits per minute than the floor-50 clear.
The reason is simple: the Blacksite (floors 41+) is slow. Longer rooms, harder entities, more time spent hiding. The Credit payout increases, but not enough to compensate for the time. If your goal is purely to earn Credits, survive to floor 30-35, then let the run end naturally. Do not push for floor 50 unless you are hunting the Veteran badge or testing your skills.
This is not an argument for playing poorly. It is an argument for efficient farming. Spend your best energy on the floors that pay the most Credits per minute.
2. Hoarding Credits Reduces Your Total Lifetime Earnings
Players who save Credits for big purchases earn fewer total Credits than players who spend on survival items immediately. The reason is compounding. A 50-Credit Medkit bought on run 3 generates returns across runs 4-20. A 300-Credit Hand-Cranked Flashlight bought on run 15 generates returns across runs 16-20. The early Medkit has a 12-run head start on compounding.
The math: Player A buys Gummy Flashlight on run 3 (150 Credits) and reaches floor 30 consistently from run 3 onward. Player B saves for Hand-Cranked Flashlight (300 Credits) and buys it on run 15, running Standard Flashlight in the meantime. By run 20, Player A has earned roughly 7,000-8,000 total Credits. Player B has earned roughly 4,000-5,000. The early spender is 60% richer.
The lesson is the same as real-world personal finance: invest early, let the returns compound, and do not save for a luxury purchase while your basic needs are unmet.
3. The Most Profitable Item in the Shop Costs 50 Credits
The Medkit is the highest-ROI purchase in the game. It costs 50 Credits. It saves your run roughly once every 3-5 attempts. Each saved run earns 300-500 Credits that you would have lost to an early death. Over 20 runs, two Medkits generating 5-7 saved runs produce roughly 2,000-3,500 Credits in preserved earnings. The Medkits cost 100 Credits total. That is a 20x-35x return.
Compare this to the Hand-Cranked Flashlight at 300 Credits. Its brightness upgrade saves maybe one run in 20. The return is maybe 500 Credits saved over 20 runs. The return on investment is 1.6x. The Medkit is 20x more efficient. The lesson: buy the boring, cheap items first. They are boring because they are mathematically optimal.
4. The Shop Is Designed to Trick You
The Pressure shop is not a neutral store. It is designed with psychological traps. The most expensive items are placed at the top. The cosmetics are the most visually appealing. The Standard Flashlight is priced at 100 Credits — exactly 50 less than Gummy — to make you feel like you are getting a deal. The Bandages are priced at 75 Credits to make the Medkit at 50 look like a budget option even though Bandages are worse.
The shop uses anchoring, decoy pricing, and visual hierarchy to steer you toward bad purchases. Recognizing this is half the battle. The items you actually need are the least flashy: a green flashlight, a red medkit, a gray code breaker. The items that look cool are the traps.
5. Your Credit Total Is Not a Score
The number in the top corner of your screen is not a high score. It is not a measure of your skill. It is not a flex. It is a purchasing power indicator, and purchasing power that sits unused is purchasing power that is not generating returns. A player with 0 Credits and a full Tier 1 loadout is in a stronger position than a player with 1,000 Credits and a Standard Flashlight.
The game does not reward you for having a high Credit balance. It rewards you for surviving. Credits are only useful when converted into survival items. The conversion should happen as early as possible.
Credit Farming Strategies by Skill Level
Beginner (Floors 1-20)
Your goal is not Credit farming. It is building your core loadout. Focus on surviving to floor 20 consistently. Open every locker on floors 1-10 — the loot is abundant and the risk is low. Complete every minigame — the puzzle Credits add up fast when you are starting from zero. Die at floor 20 if you are low on resources and reset. Do not push past floor 20 without a full loadout.
Expected earnings: 200-400 Credits per run. Time per run: 10-15 minutes. Credits per hour: 800-1,600.
Intermediate (Floors 20-40)
Your core loadout is built. You have Gummy Flashlight, 2 Medkits, 1 Code Breacher. Your goal is consistent floor-30 runs. Skip lockers on floors 1-10 — the 10-Credit drops are not worth the time when you are already past the early-game Credit grind. Focus on opening lockers on floors 20-35 where the 30-50 Credit drops live. Sprint through early floors. Slow down only when entity cues trigger.
Expected earnings: 400-700 Credits per run. Time per run: 15-25 minutes. Credits per hour: 1,200-1,800.
Advanced (Floor 40+)
You are farming for luxury purchases: Hand-Cranked Flashlight, Lantern, cosmetic skins. Your goal is efficient floor-40+ runs. The strategy shifts: open lockers on floors 30-50 aggressively because the 50-Credit drops are your primary income source. Skip minigames — the 25-Credit reward is not worth the 30-second puzzle when you are earning 30-40 Credits per door. Buy Sprint Potions aggressively — the Blacksite requires mobility, and dying at floor 45 is a massive Credit loss.
Expected earnings: 700-1,200 Credits per run. Time per run: 30-45 minutes. Credits per hour: 1,200-1,600.
The intermediate player earns the most Credits per hour. The advanced player earns more per run but less per minute. The beginner earns the least by both measures. The fastest path to Credit wealth is graduating from beginner to intermediate as quickly as possible — which means buying your core loadout immediately.
Common Credit Mistakes — The Quick Reference
- Buying cosmetics before your core loadout. Every 200 Credits spent on a skin is a Medkit and Code Breacher you cannot afford. The skin does not save your run.
- Buying Standard Flashlight instead of Gummy. The 50-Credit savings is an illusion. The recurring Battery cost and inventory slot cost make Standard Flashlight more expensive over time.
- Running with fewer than two Medkits. One Medkit is not enough for a 50-floor run. You will find healing in lockers, but RNG is not reliable. Buy two.
- Saving Code Breachers past floor 30. The Breacher is meant to be used. If you hit a locked door past floor 20 and have no keycard in sight, use it. Do not save it for a door that might not exist.
- Hoarding Credits for a “big purchase.” Credits hoarded in the lobby earn zero returns. Credits spent on survival items earn compound returns across every subsequent run.
- Over-insuring with duplicate items. Two Code Breachers, three Medkits, two Lockpicks — these are dead slots. Buy one of each essential and let locker loot fill the gaps.
- Ignoring the Credit-per-minute math. Floor 50 is not the most efficient Credit farm. Floor 30-35 is. Farm efficiently, not impressively.
- Buying Bandages instead of Medkits. Bandages cost 25 Credits more and heal less effectively. There is no scenario where Bandages are the correct purchase over a Medkit.
- Not leaving a 50-Credit buffer. A zero-balance account after a shop visit means one bad run leaves you unable to afford a Medkit. The buffer is insurance against variance.
- Treating Credits as a score. Credits are a tool. The number does not matter. What matters is whether your loadout can survive to floor 30 consistently.
Related Guides
- Pressure Beginner Guide — Entities, Items & First Win
- Pressure Best Items & Loadouts Tier List
- Pressure Complete Items & Inventory Management Guide
- Pressure Survival Tips Guide
- Pressure Advanced Survival Strategies Guide
- Pressure Badges & Achievements Guide
- Pressure Endless Mode Guide
- Pressure Speedrun & Optimization Guide
Disclaimer: This guide is based on Pressure as of August 2026. Credit rates, item costs, and shop availability may change with game updates. Always verify current mechanics against the latest patch notes and official wiki.
Sources: