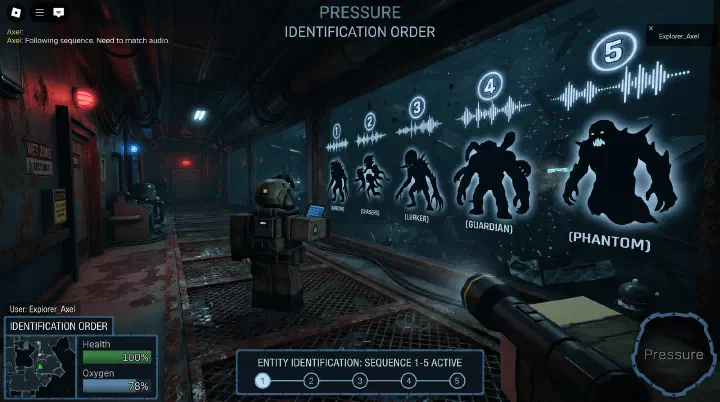
You are on Door 24. The lights flicker. Your heart rate spikes. You hear a distant screech growing louder. A new player freezes, dies three seconds later, and types “what killed me” in chat. An experienced player hears that same screech and is already inside a locker before the flicker ends.
The difference is not reaction speed. It is identification order — knowing which cues matter, in what sequence, and what action each cue demands. Pressure has over a dozen entities, each with its own audio, visual, and behavioral signature. You cannot learn them all at once. You need a priority system.
This guide gives you that system. You will learn the three identification tiers, the cue categories every entity falls into, the exact “hear X, do Y” response for each threat, and the deaths that teach you faster than any tutorial.
Why Identification Order Matters More Than Reaction Speed
Most new players think survival is about fast reflexes. It is not. It is about pattern recognition under pressure. When the lights flicker on Door 47, your brain has roughly two seconds to decide: locker, look away, look at it, freeze, or run. If you are still processing “what entity is this” during those two seconds, you are already dead.
The optimal learning order groups entities by how they announce themselves, not by how dangerous they are. A rare insta-kill entity matters less than a common entity you will face every run. Your brain needs to build automatic responses — the kind where your hands move before you consciously decide.
Here is the identification order that builds survival fastest:
- Learn Angler first. It spawns on virtually every run, often multiple times. Its audio-visual cue combo (flicker + screech) is the template every other node monster varies from. Master Angler and you instantly recognize four other variants by difference alone.
- Learn the Angler variants by their deviations. Pinkie removes the flicker. Froger adds a distinct frog croak and a rebound mechanic. Chainsmoker rattles and lingers. Blitz gives you almost no time. Each variant teaches you one new survival lesson.
- Learn Eyefestation and Wall Dwellers next. These two flip the default response. Eyefestation punishes looking. Wall Dwellers punish not looking. Mastering both forces your brain to stop defaulting to “hide in locker” as the only answer.
- Learn Pandemonium last among the common threats. Its locker minigame is a mechanics check, not an identification check. You only need to recognize its distinct audio — a distorted static screech — and then execute the minigame. Identification is trivial; execution is hard.
The Three Cue Categories: Audio, Visual, and Screen Effects
Every Pressure entity announces itself through one or more of three channels. Learning which entity uses which combination is the entire game of identification.
Audio Cues
Audio is your primary warning system. Most entities give you a sound cue before they become visible. The Angler family all share a rising screech pattern, but each variant distorts it differently:
- Angler: Clean, rising screech. Sounds like a jet engine spooling up.
- Froger: Same screech base, but layered with a distinct ribbit / frog croak.
- Chainsmoker: Lower-pitched, slower screech with metallic chain rattling.
- Blitz: Very short, very fast screech — almost a bark.
Non-Angler audio cues are equally distinct. Pandemonium announces itself with distorted, glitchy static that sounds like a corrupted audio file — completely different from the Angler screech. Wall Dwellers produce heavy, rhythmic footsteps above or behind you, like someone running on the ceiling. Eyefestation emits a low, resonant hum that builds as you get closer to its window.
Visual Cues — Lights and Doors
The flicker is your most reliable visual warning. When lights flicker and you are not in a dark room, a node monster from the Angler family is approaching. The flicker pattern itself does not tell you which variant — only the audio does — but the presence or absence of a flicker is critical information.
Here is the visual cue breakdown:
| Cue | What It Means | Response |
|---|---|---|
| Lights flicker | Angler family incoming (except Pinkie) | Locker, now |
| Lights flicker, no audio yet | You have 2-3 seconds lead time | Sprint to nearest locker |
| No flicker, but screech audible | Pinkie — zero visual warning | Locker immediately, no hesitation |
| Screen turns purple-blue | Eyefestation active in room | Look away from all windows |
| Door has subtle face-like features | Good People fake door | Do not open — find the real door |
| Room has ceiling footsteps, no flicker | Wall Dweller above you | Look up, find it, stare until it flees |
Screen Effects
Some entities bypass both audio and visual environment cues and affect your screen directly. These are the most disorienting because they break your normal information flow.
Eyefestation tints your screen with an increasing purple-blue glow. The intensity tells you how close you are to looking directly at it — the brighter the glow, the more health you are about to lose.
Pandemonium does not alter your screen before attacking, but once it attaches to your locker, your entire UI shifts into the minigame state. The transition is instantaneous and non-negotiable.
Tier 1 — Immediate Reaction Entities: Hear Cue, Locker Now
These entities give you a cue and demand one response: get in a locker within seconds. There is no decision to make, no alternative strategy. The only variable is which locker and how fast.
Angler — The Baseline Threat
Scenario: You are looting a desk on Door 31. The ceiling lights flicker twice. A distant mechanical screech starts rising in volume. You have roughly 3 seconds.
What you do: Drop the loot. Sprint to the nearest locker — the one you already noted when you entered the room. Enter it. Wait for the screech to peak, pass, and fade completely. Count one full second of silence after the sound stops. Exit.
Why this works: Angler is a straight-line node monster. It travels from the door behind you to the door ahead of you along a fixed path. Lockers break line of sight and block its damage hitbox. The key detail new players miss: always note where the nearest locker is when you enter any room. Angler does not give you time to scan the room during its approach.
Common death: You heard the screech, you panicked, you ran to a locker, but someone else was already in it. Pressure lockers are single-occupancy in most cases. Solution: always have a backup locker in mind. If your primary is taken, you need to reach the secondary in under one second.
Pinkie — The No-Flicker Killer
Scenario: You are in a well-lit room on Door 42. The lights are steady. Everything is normal. Then a screech starts — no flicker, no warning, just instant audio. You have roughly 2.5 seconds. Most new players die here because their brain is still waiting for a flicker that never comes.
What you do: Same as Angler — locker, immediately. The only difference is you do not get the 1-2 second flicker grace period to locate a locker. This is why the “note your locker on room entry” habit is not optional — it is what saves you against Pinkie.
Why Pinkie kills more intermediate players than any other entity: Players who have internalized “flicker = danger” become dependent on the visual cue. Pinkie punishes that dependency. The fix is simple: train yourself to react to the audio, not the lights. The lights are bonus information, not your primary trigger.
Froger — The Rebound Trap
Scenario: Lights flicker. You hear a screech with a distinct frog-like croak layered over it. You enter a locker. The screech passes. You reach for the exit key. Then it comes back.
What you do: Hear the ribbit? Stay in the locker after the first pass. Count to three. If silence holds for a full three-count, exit. If you hear the screech return — and Froger rebounds up to three times — stay put and reset your count.
Why new players die to Froger every single time: The standard Angler response is “enter locker, wait for silence, exit.” That muscle memory is lethal against Froger. You exit between rebound passes and get hit. The frog croak is your signal to override the default exit timing. No croak? Standard exit. Croak? Extended stay with a three-count per pass.
Chainsmoker — The Locker Lingerer
Scenario: Lights flicker. A low, grinding screech with metallic rattling approaches — noticeably slower than Angler, almost dragging. You enter a locker. The sound passes… then stays near your locker for several seconds longer than any other Angler variant.
What you do: Stay in the locker until the chain rattle completely fades. Do not rush. Chainsmoker’s danger is not its approach speed — it is the extended linger period that baits impatient players into exiting early.
Key audio distinction: The chain-rattling component is unique. If you hear metal clanking layered under the screech, it is Chainsmoker. The rule changes from “exit after silence” to “exit after the chains stop.”
Blitz — The Reflex Check
Scenario: The lights do not flicker so much as twitch. The screech is a fast, sharp burst — less than a second of warning. Blitz is the Angler variant that tests whether your locker habit is truly automatic.
What you do: If you are within arm’s reach of a locker, enter it. If you are not, you likely cannot reach one in time. Some experienced players attempt to dodge Blitz by hugging walls, but this is inconsistent. The real counter to Blitz is positioning — stay near lockers whenever you are in Angler-family territory.
Tier 2 — Observation Entities: Look, or Do Not Look
Tier 2 entities demand the opposite of Tier 1. You do not hide from them. You interact with them through gaze — either by refusing to look, or by staring directly at them until they leave. These entities break the “hide in locker” reflex that Tier 1 builds, and that is exactly why they kill players who never move past the Angler-family mindset.
Eyefestation — The One You Must Not Look At
Scenario: You enter a room with large underwater windows on Door 55. Your screen gains a subtle purple-blue tint. A low humming sound builds. In the window, a set of glowing eyes appears. Your instinct screams “look at the threat to track it.” That instinct will kill you.
What you do: Immediately look at the floor. Navigate the room by hugging walls and using peripheral vision to avoid obstacles. Do not glance at the windows even for a split second — Eyefestation’s damage ramps the longer your crosshair stays on it. A half-second glance costs roughly 4-5 percent HP. A full stare-down for three seconds can strip a quarter of your health bar.
Why this is counter-intuitive: In nearly every other horror game, you track the monster to avoid it. Eyefestation inverts that rule. Staring at it is the damage vector. Looking away is the survival mechanic.
Advanced tip: Some players use the “quick peek” method — letting their crosshair sweep across the window during normal movement to check Eyefestation’s position, then immediately snapping away. This only works if the glance is truly under 0.3 seconds. If your crosshair lingers, even accidentally, the damage ticks.
Wall Dwellers — The One You Must Look At
Scenario: You are walking through a corridor on Door 18. You hear heavy, rhythmic footsteps above you — thud, thud, thud — like someone running on the ceiling. A dark, humanoid shape scuttles along the wall in your peripheral vision.
What you do: Look directly at it. Center your crosshair on the Wall Dweller. Hold your gaze. It will freeze, then flee — it cannot attack while being observed. If you look away or lose line of sight, it resumes its approach and drops onto you for significant damage.
Why this is the perfect opposite of Eyefestation: One entity punishes looking. The other punishes not looking. Players who mix up these two responses die to both. The mnemonic is simple: if it is in a window (Eyefestation), look away. If it is on a wall or ceiling (Wall Dweller), look at it.
The audio tells you which one: Eyefestation hums. Wall Dwellers stomp. You can identify the correct response before you even see the entity.
Good People — The Door That Is Not a Door
Scenario: You reach a room with multiple numbered doors on Door 63. One door has an almost imperceptible face — two dark spots where eyes would be, a slight curve suggesting a mouth. The door next to it looks completely normal.
What you do: Open the normal-looking door. Never open the door with facial features. Good People doors are mimics — they look close enough to real doors to fool a rushing player. If you open one, it attacks. If you walk past it through the correct door, it does nothing.
The identification trick: Good People doors appear in rooms where you have a choice of doors. If a room has three doors and one looks even slightly “off” — slightly different color, slightly different handle, subtle face-like features — that is the fake. Scan doors quickly on room entry in the mid-game, especially after Door 50.
Tier 3 — Environmental and Event Entities
These entities do not hunt you through rooms the way Angler variants do. They are tied to specific rooms, specific triggers, or specific phases of a run. You identify them by context, not by universal cues.
Pandemonium — The Locker Minigame
Scenario: You hear a distorted, glitchy static screech — completely unlike the Angler family’s mechanical screech. You enter a locker. Instead of the entity passing by, your screen shifts into a minigame: a circular reticle you must keep aligned with a moving target while Pandemonium thrashes at your locker door.
What you do: Identification is easy — the sound is unmistakable. Survival is about execution. Keep your cursor inside the circle. Do not panic-track it with jerky movements; smooth, small adjustments work better. The minigame lasts roughly 8 to 12 seconds. If you fail, Pandemonium deals heavy damage or kills you outright. If you succeed, it leaves.
Why Pandemonium is a late-priority learn: You cannot practice the minigame without first identifying the entity and entering a locker. Both of those steps require Tier 1 skills. Learn Angler and its variants first. Pandemonium will kill you several times while you learn the minigame timing — that is normal and expected. It is not a failure of identification; it is a mechanics grind.
Searchlights — The End-Section Encounter
Scenario: You enter a large, dark arena with massive sweeping light beams scanning the floor. Searchlights move in patterns across the room. If a beam touches you, it locks on and begins pulling you toward the light source.
What you do: Identify the beam patterns before moving. Searchlights are not random — they sweep in fixed arcs. Hide behind crates, pillars, and debris to break line of sight. Move between cover during the gaps in the sweep cycle. Do not sprint blindly across open ground; once a beam tags you, breaking free is extremely difficult.
Turret — The Pattern Shooter
Scenario: You enter a room and hear a mechanical whir. A mounted turret sweeps its laser sight across the floor in a repeating pattern. The turret fires bursts at wherever the laser was pointing a split second ago.
What you do: Watch the laser pattern for one full cycle. Identify the safe timing window. Move during the gap. Turrets are purely environmental — you identify them by the red laser sight and the mechanical whir sound. No audio cue before the room, no flicker. They exist in specific rooms and nowhere else.
Sebastian and Mr. Lopee — The Non-Threats
Scenario for Sebastian: You reach the submarine shop area. A character appears offering items for sale. This is Sebastian, the shopkeeper. He is not hostile. Do not panic-hide.
Scenario for Mr. Lopee: You fall far behind your group or linger too long in a cleared room. A figure appears and teleports you forward. Mr. Lopee is an anti-idle mechanic, not an enemy. He does not deal damage. If you see him, you were going too slowly.
The identification rule for non-threats: If an entity is not preceded by any of the standard danger cues (no flicker, no screech, no screen tint, no ceiling footsteps), and it appears in a context that does not match any threat entity’s spawn conditions, it is probably not hostile. Sebastian always appears in the shop. Mr. Lopee only appears when you are lagging behind.
Entity Recognition Speed Reference
This table is for quick mental reference during runs. Do not memorize it — use it to confirm what you already learned from the sections above.
| Entity | Primary Cue | Cue Type | Response | Reaction Window |
|---|---|---|---|---|
| Angler | Rising mechanical screech + flicker | Audio + Visual | Locker | ~3 seconds |
| Pinkie | Rising screech, NO flicker | Audio only | Locker | ~2.5 seconds |
| Froger | Screech + frog ribbit + flicker | Audio + Visual | Locker, stay for rebounds | ~3 seconds |
| Chainsmoker | Low screech + chain rattle + flicker | Audio + Visual | Locker, wait for chains to stop | ~4 seconds |
| Blitz | Short, sharp screech burst | Audio only | Locker if close; otherwise dodge | ~1 second |
| Pandemonium | Distorted static screech | Audio | Locker, then minigame | ~3 seconds |
| Eyefestation | Purple-blue screen tint + low hum | Screen + Audio | Look AWAY from windows | Ongoing |
| Wall Dwellers | Ceiling footsteps | Audio | Look AT the entity until it flees | Ongoing |
| Good People | Door with face-like features | Visual | Open a different door | No rush |
| Turret | Red laser sight + mechanical whir | Visual + Audio | Hide behind cover, time movement | Ongoing |
| Searchlights | Sweeping light beams in dark arena | Visual | Hide behind cover | Ongoing |
| Sebastian | NPC in shop area | Visual | Buy items, do not panic | No rush |
| Mr. Lopee | Appears when player lags behind | Visual | Speed up next time | No rush |
Common Deaths and How to Recover
Every experienced Pressure player has died to every entity on this list at least once. The deaths that teach you the most are the ones you analyze after the fact. Here are the most common identification failures and what they teach.
Death 1: “I Heard the Screech but Could Not Find a Locker”
What happened: You knew it was an Angler-family entity. You ran. Every locker in the room was either already used or too far away. You died in the open.
Why: You did not note locker positions when you entered the room. Locker awareness is not a reaction skill — it is a preparation habit. Every time you cross a room threshold, your eyes should land on the nearest locker before you do anything else.
Fix: Train the habit in low-stakes runs. For five consecutive runs, do not loot anything in a new room until you have identified the nearest locker and a backup locker. It will feel slow at first. After those five runs, it becomes automatic.
Death 2: “I Exited the Locker and Froger Got Me”
What happened: You heard the screech, entered the locker, waited for silence, exited — and immediately took damage from Froger’s second pass.
Why: You did not register the frog ribbit. Your brain processed “screech = Angler” and executed the standard Angler exit timing. Froger’s rebound mechanic requires the “ribbit = stay in locker and count” override.
Fix: Between runs, listen to a Froger audio clip back-to-back with an Angler clip. The ribbit is obvious once you know what to listen for. In-game, if you hear anything layered under the screech that is not a pure mechanical tone, default to the cautious exit: count to three, and only exit if total silence holds.
Death 3: “I Looked at Eyefestation to See Where It Was”
What happened: You entered a room with purple tint. You instinctively looked toward the windows to track the threat. Your health melted in seconds.
Why: Your survival instincts from Tier 1 are wrong for Tier 2. You defaulted to “find the threat and react” when Eyefestation demands “look away and navigate blind.”
Fix: The moment you see purple on your screen, snap your crosshair to the floor. Do not think about it. Do not “just check.” The floor is your new default view until the hum stops and the tint fades. Wall-hugging through Eyefestation rooms is slow but safe.
Death 4: “Wall Dweller Dropped on Me While I Was Watching for Angler”
What happened: You heard footsteps above you. You assumed it was ambient sound or a distant entity. A Wall Dweller dropped onto you from the ceiling.
Why: You were listening for screeches, not footsteps. Your audio attention was tuned to a single frequency — the Angler-family screech — and you filtered out everything else.
Fix: Expand your audio attention. Footsteps above you are never ambient in Pressure. If the sound has a rhythm (thud-thud-thud), it is a Wall Dweller. Look up immediately and hold your gaze on it. The Wall Dweller flees within 2-3 seconds of being stared at.
Death 5: “I Opened a Good People Door Because I Was Rushing”
What happened: You sprinted into a room with multiple doors, clicked the first one you reached, and took damage from a fake door.
Why: Speed kills pattern recognition. You prioritized clearing the room fast over scanning the doors. Good People doors punish exactly this behavior — they exist to catch players who are not paying attention.
Fix: In any room with multiple doors after Door 50, pause for half a second and scan each door. The fake one will look slightly wrong — darker, textured differently, or with subtle facial features. If you cannot tell which is fake, approach slowly and check each door from arm’s reach before opening.
The Two-Second Decision Framework
When a cue fires — a flicker, a sound, a screen tint — you have roughly two seconds before the entity is on you. Those two seconds determine whether you live or die. Here is the decision flow that experienced players run through automatically:
- Is the screen tinting purple? If yes: floor, now. Eyefestation. Do not look at windows.
- Are there footsteps above you? If yes: look up. Wall Dweller. Stare until it flees.
- Did the lights flicker? If yes: Angler family. Which audio variant?
- Pure screech: Angler. Locker, standard exit.
- Screech + ribbit: Froger. Locker, stay for rebounds.
- Screech + chain rattle: Chainsmoker. Locker, wait for chains to stop.
- Fast bark: Blitz. Nearest locker or dodge.
- Screech but no flicker? Pinkie. Locker immediately — you have no visual grace period.
- Distorted static, not a screech? Pandemonium. Locker, then minigame.
- Multiple doors in current room, something looks off? Good People. Scan doors; open the normal one.
- None of the above? You are probably not in immediate danger. Continue, but stay near a locker.
This flow works because it eliminates entity types in order of cue uniqueness, not danger level. Eyefestation’s screen tint and Wall Dweller footsteps are the two most distinctive cues in the game — they cannot be confused with anything else. Checking them first eliminates two entire categories instantly. If neither is present, you fall through to the Angler-family decision tree, which is the most common.
Counter-Intuitive Advice That Saves Runs
Not Every Entity Wants You to Hide
The single most damaging assumption new players carry is “danger = hide in locker.” Eyefestation does not care about lockers. Wall Dwellers do not care about lockers. Good People doors are not bypassed by hiding. Entering a locker against Eyefestation wastes time and positions you facing a window when you exit — exactly where you do not want to be.
The first question after any cue is not “where is the nearest locker?” It is “which entity is this?” Identification always precedes action. The locker is the answer for one family of entities — a large, important family, but still only one.
The Most Dangerous Entity Is the One You Do Not Hear
New players fear Pandemonium because the minigame is hard. Experienced players fear Pinkie because there is no flicker. The danger hierarchy shifts as your skills develop. The entity you have not learned to identify yet is always the most dangerous one in the game, regardless of its objective threat level.
Your Flashlight Can Kill You
In dark rooms, new players keep their flashlight on constantly to see. This is correct for looting but dangerous for identification. Eyefestation’s purple tint is harder to notice with a bright flashlight washing out your screen. Wall Dwellers are harder to spot against the ceiling when your beam is pointed at the floor. Learn to flick your flashlight off briefly when entering a new room — even half a second of darkness reveals screen tints and peripheral movement that light hides.
How to Practice Identification Efficiently
You do not need hundreds of runs. You need focused practice that maximizes entity encounters per minute.
Method 1 — Sprint Runs: Start a run. Sprint through rooms. Do not loot. Do not buy items. Do not pause at doors. Your only goal is to trigger entity spawns as fast as possible. Let entities kill you — each death is a free identification lesson. Restart immediately. You will see 15 to 20 entity encounters in 30 minutes. Compare that to 2 to 3 encounters in a careful, loot-heavy run.
Method 2 — Audio Drills Between Sessions: Find Pressure entity audio comparisons on YouTube. Play Angler, Pinkie, Froger, Chainsmoker, and Blitz in sequence. Close your eyes. Can you name each one from audio alone? If not, loop the sequence until you can. Five minutes of this between play sessions builds audio recognition faster than any number of runs.
Method 3 — Single-Entity Focus Sessions: Pick one entity you struggle with. Play runs where you focus only on that entity. If Wall Dwellers kill you, pay zero attention to Angler cues — tunnel your audio awareness to ceiling footsteps. You will die to Angler more often during these sessions. That is fine. You are overloading one identification pathway to build it faster. Rotate your focus entity each session.
Mastering Pressure entity identification is not about memorizing a wiki page. It is about building a set of automatic responses — hear frog croak, stay in locker; see purple tint, look at floor; hear ceiling footsteps, find the Wall Dweller and stare. Each death builds one of those automatic responses. Each successful identification reinforces it.
The order matters. Learn Angler first, because everything else is a variation on its template. Learn Eyefestation and Wall Dwellers next, because they break the “hide in locker” default that Angler teaches you. Learn Pandemonium last among common threats, because its identification is trivial but its mechanics require practice.
Play sprint runs. Listen to audio comparisons. Die a lot on purpose. In twenty focused runs, you will identify entities faster than a player with a hundred careful runs.
Related Guides
- Pressure Complete Entities Guide — Every Monster Explained — Deep-dive profiles for every entity, including spawn conditions and damage values.
- Pressure Audio Identification Guide — Recognize Every Sound Cue — Side-by-side audio breakdowns with timestamps for practice drills.
- Pressure Locker Hiding Mechanics — When to Hide and When to Run — Locker occupancy rules, timing windows, and advanced exit strategies.
- Pressure Advanced Survival Strategies — Beyond the Basics — Positioning, resource routing, and team coordination for Door 50+.