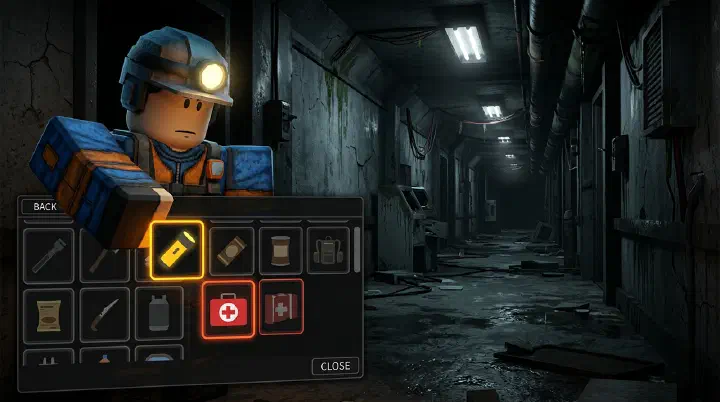
You have survived the Angler. You have memorized every locker spawn on the Hotel. Your inventory is full — four Medkits, a Gummy Flashlight, and a Code Breacher you have been saving since floor 8. You are at floor 34, and you feel invincible.
The lights flicker. You hear the static. You dive into a locker and wait. The Angler passes. You exit the locker and take two steps before your foot lands in a pool of water you did not see. The splash alerts a nearby Eyefestation. You take 40 damage. You open your inventory to heal, but your Medkits are in slots 3 and 4 — behind the Code Breacher and the spare batteries you were saving. You fumble the scroll. You take another 20 damage. You finally reach the Medkit, but you are at 15 HP and Eyefestation is still targeting you. The heal buys you two more seconds. The next hit kills you.
You died at floor 34 with 3 unused Medkits, a Code Breacher you never needed, and a full inventory of items that looked good on paper. You did not die because you lacked items. You died because you managed them wrong.
Pressure gives you five inventory slots and a shop full of tempting purchases. The game never explains the economy that underpins those slots — how Credits flow, when an item’s value peaks and decays, or why hoarding everything you find is a survival trap. Most players interpret “more items” as “more safety.” In Pressure, the opposite is often true. This guide covers the item economy from Credits to carry weight: how to earn, spend, and manage items so that every slot earns its keep through every floor.
How the Item Economy Works
Pressure’s item economy has three layers, and most players only understand the first one.
Layer 1: Credit Cost. This is the number on the shop label. It tells you what you pay to bring an item into a run. It is the least important number.
Layer 2: Slot Opportunity Cost. Every item occupies one of five slots for the entire run (or until you drop it). The true measure of an item’s cost is what you cannot carry because this item is in the way. A Gummy Flashlight costs 150 Credits, but it occupies one slot for potentially 100 floors — that slot is the price. A Code Breacher also costs one slot, but its value is concentrated in a single moment (passing a locked door), and after that moment it is dead weight.
Layer 3: Use-Timing Cost. This is the invisible killer. An item’s value depends entirely on when you use it. A Medkit used at 60 HP is worth 40 health preserved. A Medkit used at 15 HP is worth 15 health recovered — and often not enough to survive the next hit. The game does not penalize late use explicitly, but it does implicitly: by the time you reach for an item, it may be too late.
Credit Flow: How Fast You Earn
| Source | Credits Earned | Frequency | Notes |
|---|---|---|---|
| Door completion (1–20) | 10–15 per door | Every door | Bonus for first clears |
| Door completion (21–40) | 15–20 per door | Every door | Scales with floor depth |
| Door completion (41+) | 20–30 per door | Every door | Blackship bonus |
| Locker loot | 0–50 per locker | 2–5 per floor | RNG, higher on deeper floors |
| Minigame rewards | 10–25 per success | 1–3 per floor | Puzzles, breaker panels |
| Entity encounters survived | 25–50 bonus | After each escape | Hidden mechanic, not displayed |
| First clear of a floor range | 200–500 one-time | Once per account | Major early-game boost |
A player who reaches floor 40 earns roughly 500–800 Credits from that run. A player who dies at floor 15 earns roughly 100–200. The most efficient Credit-earning strategy is not deeper runs per se — it is consistent runs to floor 30–40 where the Credit-per-minute ratio peaks. Pushing past floor 60 yields more Credits per run but takes significantly longer and risks total loss.
The Real Cost of Every Item
| Item | Shop Price | Slot Cost | Peak Value Window | After Peak, It Is… |
|---|---|---|---|---|
| Gummy Flashlight | 150 | 1 slot, full run | Floors 1–100 | Still valuable (infinite light) |
| Hand-Cranked Flashlight | 300 | 1 slot, full run | Floors 15–100 | Upgrade over Gummy |
| Medkit | 50 | 1 slot, per heal | When HP < 60 | Dead weight after heal |
| Sprint Potion | 150 | 1 slot, one use | Floors 20–50 (first encounter with fast entity) | Gone after use |
| Code Breacher | 200 | 1 slot, one use | The exact locked door you need it for | Dead weight after use |
| Lockpick | 100 | 1 slot, per locker | Floors 1–25 (locker loot is richest) | Diminishing returns after 25 |
| Batteries | 25 | 1 slot, full run | Floors 1–30 (before you find infinite light) | Drop immediately on finding Gummy |
| Standard Flashlight | 100 | 1 slot, full run | Floors 1–25 (budget option) | Replace with any infinite source |
| Noise Maker | 100 | 1 slot, one use | Floors 1–40 (distraction works on Hotel entities) | Weaker in Blacksite |
| Smoke Bomb | 100 | 1 slot, one use | Extremely narrow (open rooms with no closets) | Usually a mistake to buy |
| Lantern | 200 | 1 slot, full run | Co-op support, not solo | Great for team, weak for solo |
| Bandages | 75 | 1 slot, per heal | Topping off between rooms (HP 50–80) | Weaker than Medkit in emergencies |
The key insight: most items have a “peak value window” after which they are actively harmful to carry because they block slots that could hold something better. A Code Breacher you buy at floor 8 and carry unopened to floor 50 cost you 42 floors of slot opportunity.
The Inventory Decision Tree
Managing five slots through a run is a continuous decision process. Here is the branching logic that top players run automatically.
On Entering Any Room with a Lootable Container
Step 1 — Check your light source. If you do not have Gummy or Hand-Cranked and you find either, drop whatever is in your flex slot (slot 5) and pick it up. If your flex slot is empty, drop Batteries first, then Bandages, then Lockpick. Never pass an infinite light source.
Step 2 — Check your heal count. If you have zero Medkits or Bandages and your HP is below 60, treat healing items as urgent. Loot the container even if it means dropping a Code Breacher you have not used yet. The Code Breacher does nothing if you are dead.
Step 3 — Evaluate the container item against your worst current item. Ask: “Will this item help me survive in the next five floors more than what I am currently carrying?” If yes, swap. If no, leave it. Taking everything “because it might be useful” is how inventories fill with junk.
Step 4 — Run the five-floor test. Look at the next five doors. If you are past floor 20 and have no Code Breacher, a locked door in the next five floors ends your run. A Code Breacher moves to urgent priority. If you are past floor 40 and have no Sprint Potion, a Searchlights chase is likely — Sprint Potion moves to urgent.
On Dropping Items You Bought
The sunk-cost fallacy kills more runs than any entity. You paid 25 Credits for Batteries. Now you found a Gummy Flashlight. Drop the Batteries. The 25 Credits are gone whether you carry the Batteries or not. What matters is what your five slots do for you from this moment forward.
| Current Loadout | You Find | Action | Reasoning |
|---|---|---|---|
| Standard Flashlight + Batteries | Gummy Flashlight | Drop Batteries + Standard, take Gummy | Two slots freed, infinite light gained |
| Gummy, Medkit, Code Breacher, Lockpick, Bandages | Sprint Potion | Drop Lockpick | Lockpick RNG is weaker than guaranteed escape |
| Gummy, Medkit, Medkit, Code Breacher, Batteries | Hand-Cranked Flashlight | Drop Batteries | Batteries are useless with Hand-Cranked |
| Gummy, Medkit, Sprint Potion, Code Breacher, Lockpick | Second Code Breacher | Drop Lockpick if past floor 20, else keep both | Lockpick value drops on deeper floors |
| Gummy, Medkit, Medkit, Medkit, Code Breacher | Lantern | Do not take | Three Medkits is already too many; Lantern does not replace your light |
Use vs Save Framework
This is the single most important framework in the guide. Every item in Pressure has a correct use window, and most players use items too late.
The Can-I-Survive Test
Ask: “If I do not use this item right now, will I die in the next 15 seconds?”
- Yes — Use the item immediately. The window is closing.
- No — Save the item. It is not yet needed.
- Maybe — Use the item. Uncertainty means you are already in the danger zone.
This test overrides every other consideration. It does not matter if you were “saving” the Medkit for a bigger emergency. If you are at 30 HP and an entity is active, the bigger emergency is now.
Item-Specific Use Rules
Medkit: Use when HP drops below 60 and you are in a safe room, OR when HP drops below 40 regardless of room safety. Never let your HP sit below 40 while you are searching for a safe room to heal in. The search often takes longer than the entity that will kill you.
Bandages: Use between rooms when HP is between 50 and 80, provided no entity is actively chasing. Do not use during chases — the 10-second heal animation locks you in place. Bandages are for topping off, not for emergencies.
Sprint Potion: Use only when a fast entity (Searchlights, Blitz variant) is actively chasing and you do not have a clear path to a locker or safe room. Do not use for convenience. Do not use because you want to move faster. The single use is too valuable.
Code Breacher: Use when you encounter a locked door past floor 20. Do not use on early-floor locked doors — those almost always have a keycard within one room. If you find a matching keycard naturally, save the Breacher for the next locked door.
Lockpick: Use on every heavy locker you encounter. The lockpick pays for itself if just one locker yields a Medkit or Code Breacher. Do not save Lockpicks — their value is highest when used early.
Noise Maker: Use when a teammate is downed and an entity is approaching their position, OR when you need to cross an open room and an entity is patrolling. Do not use to distract entities away from yourself — the distraction is unreliable at close range.
Smoke Bomb: Use in rooms with zero hiding spots when an entity spawns and you cannot reach the previous room’s safe zone. This situation is rare. If you bought a Smoke Bomb expecting to use it often, you overpaid.
The Entity-Specific Timing Table
| Entity | Item to Use | When | When NOT to Use |
|---|---|---|---|
| Angler | Nothing (hide in locker) | — | Do not waste Sprint Potion — lockers always work |
| Pandemonium | Nothing (complete locker game) | — | Do not use items — locker game is mandatory |
| Searchlights | Sprint Potion | When no locker is within 3 seconds of sprint | Do not use if a locker is close |
| Blitz | Glowstick or Sprint Potion | Glowstick if room has no lockers; Sprint if no glowstick | Do not use if you are already in a side room |
| Screech | Glowstick (prevent spawn) | Before entering a pitch-black room with Screech spawn history | Do not use if Screech has not spawned in 5+ rooms |
| A-60 | Nothing (hide) | — | Do not waste items — A-60 is timer-based, lockers always work |
| Eyefestation | Medkit (after damage) | Immediately after taking damage if HP drops below 60 | Do not use before taking damage |
| ChainSmoker | Sprint Potion | If you cannot reach the smoke origin point in 4 seconds | Do not use if the smoke origin is close |
Failure Analysis: The Five Inventory Deaths
These five patterns account for roughly 70% of all inventory-related deaths past floor 20. Name them, recognize them, and your survival rate jumps significantly.
1. The Full-Inventory Freeze
You have items in every slot. An entity spawns. You need a specific item (Medkit, Sprint Potion) but it is in slot 4 behind items you do not need right now. You scroll past the Code Breacher, past the Lockpick, past the spare Batteries. The scrolling takes 1.5 seconds. You die during those 1.5 seconds.
Root cause: Items are not organized by urgency. Slot 1 should always be your light source. Slot 2 should be your primary survival tool (Medkit or Sprint Potion, depending on the floor). Slots 3–5 should be backup or utility. Never put a Medkit in slot 5 and a Lockpick in slot 2.
Fix: Assign permanent hotkey slots and never vary them. Slot 1 = light. Slot 2 = instant survival (Medkit or Sprint). Slot 3 = secondary survival. Slot 4 = utility. Slot 5 = flex.
2. The Late-Heal Spiral
You take damage at floor 25. You are at 65 HP. You decide to save your Medkit “for a real emergency.” At floor 28, you take more damage — now you are at 45 HP. You still save the Medkit. At floor 31, you take a hit that brings you to 15 HP. You finally use the Medkit, but it brings you to 55 HP, and the next hit kills you because you never had a full health buffer.
Root cause: Treating Medkits as last-resort items instead of buffer-maintenance tools. A Medkit used at 65 HP prevents future deaths. A Medkit used at 15 HP only postpones the next one.
Fix: Use Medkits when HP drops below 60. Do not wait. The “real emergency” is any HP level that lets the next entity kill you in one hit.
3. The Keycard Confusion
You carry a Code Breacher through 40 floors without using it because you “have not needed it yet.” You also passed three locked doors where a keycard was available within one room — but you did not search for it because you had the Breacher. You effectively carried dead weight for 40 floors while simultaneously failing to use the item for its intended purpose.
Root cause: Over-saving a single-use item past its likely need window. Most runs encounter 1–2 locked doors that require Breachers. If you survive to floor 40 without encountering one, the probability of encountering two in the final stretch is very low — your Breacher is overinsurance.
Fix: Use the Code Breacher on the first locked door past floor 20 that does not have an obvious keycard spawn. Do not save it for a “more important” door. The most important door is the one in front of you.
4. The Hoarder’s Dilemma
You pick up every item you find in lockers — a Bandage here, a Battery pack there, a Lockpick, a spare Medkit. By floor 25, your inventory is full of items you picked up “just in case.” You have three Medkits, a Lockpick, Batteries, and your Gummy Flashlight. When you find a Code Breacher in a locker at floor 28, you cannot take it. You leave it. At floor 31, you hit a locked door and your run ends.
Root cause: Treating inventory as a collection instead of a loadout. Every item you pick up should be a conscious decision that displaces something else. If you are not willing to drop something to make room, you are already over-inventoried.
Fix: Maintain a maximum of two Medkits. Never carry a Lockpick and Batteries simultaneously — they compete for the same flex slot. Audit your inventory every 10 doors: drop anything you have not used in the last 10 floors.
5. The Wrong-Tool Death
You are in the Blacksite. A Searchlights chase starts. You have a Medkit and Bandages but no Sprint Potion. You survive the first hit, heal, take a second hit, heal again, and die on the third because you cannot outrun the entity. Your inventory had the tools to survive damage but not the tool to avoid it.
Root cause: Building an inventory for the floor you are on (Hotel) and not adjusting for the floor you are approaching (Blacksite). Hotel entities are slower and punishable with healing. Blacksite entities require mobility answers.
Fix: Before crossing floor 40, conduct a Blacksite readiness check. If you have no Sprint Potion, prioritize finding one. Drop a Medkit if necessary. A Sprint Potion in the Blacksite is worth more than a third Medkit.
Counter-Intuitive Insights
1. The Best Inventory Is One Item Short
Players who always keep all five slots filled die more often than players who leave a slot open. An empty slot is not waste — it is flexibility. It lets you pick up a Code Breacher from a locker at floor 30 without dropping anything. It lets you swap a Lockpick for a Sprint Potion when the floor changes. Keeping a slot open is the highest-value inventory decision because it preserves optionality.
The meta-skill in Pressure is not filling your inventory — it is knowing what not to pick up. Every item you leave behind is an inventory decision you did not have to undo later.
2. Hoarding Credits Is More Dangerous Than Spending Them
Players who save Credits for a “big purchase” (Hand-Cranked Flashlight at 300, or saving for cosmetics) and run minimal loadouts in the meantime are actively reducing their survival rate across multiple runs. A 50-Credit Medkit that saves a run to floor 35 generates more total Credits (roughly 500 from that run) than the 50 you spent. Credits spent on survival items are investments — they earn returns in the form of deeper runs and higher Credit payouts.
The player who buys nothing and hoards 600 Credits earns fewer total Credits than the player who buys a 150-Credit Gummy Flashlight and uses it to reach floor 40 consistently. The returns compound.
3. The Most Expensive Item in the Game Costs 25 Credits
Batteries (25 Credits) look like the cheapest item in the shop. They are actually the most expensive because of what they cost in slot opportunity. A Battery pack occupies one of five slots for most of your run. It provides value only in the brief windows when your flashlight is below 30%. The rest of the time, it is a dead slot that could hold a Medkit, a Sprint Potion, or a Code Breacher.
The true cost of Batteries is not 25 Credits. It is the run you lose because you carried Batteries instead of a Sprint Potion, and the Searchlights chase killed you. Gummy Flashlight at 150 Credits is cheaper in practice because it removes the need for Batteries entirely and frees that slot for the rest of your run.
4. The Single Most Valuable Inventory Action Is Dropping Things
Skilled players drop items multiple times per run. They drop Batteries for Gummy Flashlight. They drop Lockpick for Code Breacher. They drop Medkit for Sprint Potion when crossing into the Blacksite. Each drop is a recognition that the item’s peak value window has passed, and holding it is now costing them flexibility.
Beginners treat their inventory as fixed — they buy items at the start and carry them to the end. This is the single biggest difference between a player who reaches floor 30 and a player who reaches floor 80. The player who reaches floor 80 has dropped and swapped items a dozen times. The player who reaches floor 30 is still carrying the Loadpick they bought at floor 5.
Inventory Management by Game Mode
Solo Survival
Your inventory must be self-sufficient. Minimum loadout: Gummy Flashlight (or Hand-Cranked), 2 Medkits, 1 Code Breacher, 1 Sprint Potion. The fifth slot is flex. Solo players need every slot to carry its weight because there is no teammate to fill gaps.
Co-op
You can specialize. One player carries light + healing, another carries utility + mobility. Co-op inventories should complement each other. If your teammate has a Lantern, you can drop your flashlight and carry an extra Code Breacher. Coordinate before the run, not during.
Endless Mode
Resource scarcity escalates over time. Lockpicks gain value because locker loot is your primary resupply. Sprint Potions lose relative value because you learn entity spawn patterns and can position preemptively. The optimal Endless loadout shifts toward sustain: 1 light source, 3 healing items, 1 Code Breacher (replaced by Lockpick after floor 60 when lockers become the main loot source).
Speedrun
Inventory is minimized. Standard Flashlight (brightest, fastest for navigation), 2 Battery packs, 1 Code Breacher, 1 Medkit. Speedrunners trade safety for speed — they accept higher risk in exchange for faster clear times. The fifth slot is often left empty to avoid scrolling during movement.
Item Economy Summary
| Concept | Rule |
|---|---|
| Credit spending | Buy items that enable deeper runs, not items that look cool |
| Slot management | An item’s value is measured by what it contributes per remaining floor |
| Use timing | Use it when you need it, not when you think you might need it later |
| Drop discipline | Drop items the moment their peak value window passes |
| Inventory audit | Review your five slots every 10 doors and make at least one swap |
| Empty slot value | One empty slot is worth more than a slot filled with a never-used item |
| Run consistency | A consistent floor-30 runner earns more Credits than an inconsistent floor-60 runner |
| Co-op coordination | Fill gaps, do not duplicate — if your teammate has light, carry utility |
The final rule is the simplest: your inventory is not a museum of good finds. It is a survival kit for the next ten doors. If an item does not help with the next ten doors, it does not belong in your five slots. Drop it, use it, or leave it in the locker. The run does not reward sentimentality.
Related Guides
- Pressure Beginner Guide — Entities, Items & First Win
- Pressure Best Items & Loadouts Tier List
- Pressure Items & Puzzles Guide
- Pressure Survival Tips Guide
- Pressure Advanced Survival Guide
- Pressure Endless Mode Guide
- Pressure Floors & Locations Guide
Disclaimer: This guide is based on Pressure as of July 2026. Credit rates, item costs, and entity behavior may change with game updates. Always verify current mechanics against the latest patch notes and official wiki.
Sources: