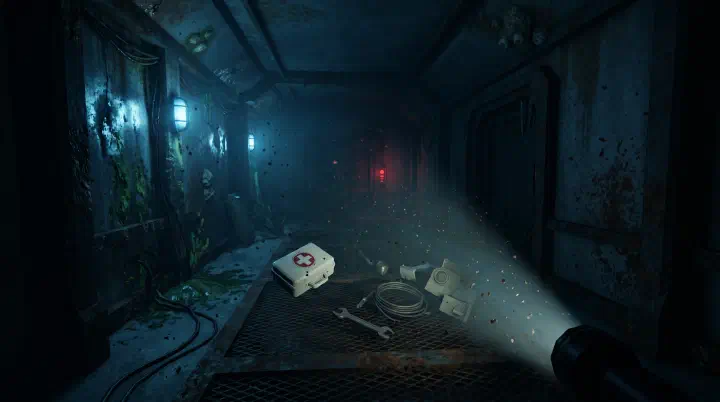
You hit floor 23 and the hallway goes dark. Your standard flashlight cuts out — three minutes went faster than you thought. You panic-open your inventory, but the battery slot is empty because you filled it with a Smoke Bomb that sounded cool in the lobby. Behind you, the telltale static of Pandemonium rises. You don’t make it to the safe room.
This is the story of every failed Pressure run. Not bad reflexes. Bad preparation. Five inventory slots decide whether you reach floor 50 or die in the dark with 200 Credits worth of regrets.
In this guide, we rank every item by survival value — not hype, not rarity, not how cool the icon looks. We break down the loadouts that consistently reach the Blacksite, the purchases that actually pay for themselves, and the ‘rare’ items that are secretly noob traps. We will also cover the failure patterns that kill experienced players, a decision framework for picking items on the fly, and the counter-intuitive truths the lobby won’t tell you. Whether you are saving your first 500 Credits or optimizing a speedrun PB, these tiers are built from run data, not lobby theorycrafting.
How Items Work in Pressure
You have 5 inventory slots. Every item you bring is an opportunity cost — carrying one thing means not carrying another. This tier list ranks every item by how many runs it saves vs how many runs its absence costs.
S-Tier: Never Leave Without
| Item | Cost (Credits) | Use | Rating |
|---|---|---|---|
| Gummy Flashlight | 150 | Unlimited light, no battery | 10/10 |
| Hand-Cranked Flashlight | 300 | Unlimited light, manual recharge | 10/10 |
| Medkit | 50 | Heals 40 HP | 10/10 |
Flashlight Comparison
| Flashlight | Brightness | Battery Life | Recharge | Best For |
|---|---|---|---|---|
| Gummy Flashlight | Medium | Infinite | None needed | Beginners, learning floors |
| Hand-Cranked Flashlight | Medium-High | Infinite | 1.5s crank animation | Experienced players |
| Standard Flashlight | High | 3 minutes | Requires Batteries | Speedruns (max brightness) |
| Lantern | Low-Medium | Infinite | None (area light) | Co-op support role |
The Gummy and Hand-Cranked are S-tier because they remove battery management entirely. In Pressure, managing batteries while dodging entities gets players killed. The less you juggle, the more you survive.
A-Tier: Strong Value Every Run
- Code Breacher (200 credits, 9/10): Opens locked doors instantly. Best on Hotel + Blacksite.
- Batteries (25 credits, 8.5/10): +3 min flashlight life. Best with standard flashlight on Hotel.
- Sprint Potion (150 credits, 8.5/10): 2x sprint speed for 8 seconds. Best on Blacksite for chase sequences.
- Bandages (75 credits, 8/10): Heals 25 HP over 10 seconds. Useful on any floor.
Code Breacher — The Run Saver
Locked doors behind keycard scanners block progress. Without a Code Breacher, you either find the keycard in that specific room (rare) or the run ends there. One Code Breacher guarantees you pass one locked door — often the difference between floor 25 and floor 45.
When to use: Save it for doors after floor 20. Early floor locked doors usually have a nearby keycard. Late floor ones rarely do.
Sprint Potion — Blacksite Essential
The Blacksite’s exclusive entities (Searchlights, Pandemonium) are faster than the player. Sprint Potion gives you 8 seconds of 2x speed — enough to reach the next safe room during a chase. Without it, certain Searchlights encounters are pure RNG.
B-Tier: Good, Situationally
- Flashlight (Standard) (100 credits, 7/10): Bright light, 3 min battery life.
- Lantern (200 credits, 7/10): Area light, no battery needed.
- Lockpick (100 credits, 6.5/10): Opens lockers and supply containers. RNG-dependent.
- Keycard (spare) (150 credits, 6.5/10): Saves a Code Breacher if you find the matching door.
- Noise Maker (100 credits, 6.5/10): Distracts entities for 5 seconds.
Lockpick — Good When It Works
Lockpicks open locked lockers and supply containers, yielding extra Medkits, Batteries, and occasionally Code Breachers. The RNG factor keeps it in B-tier — sometimes you get 3 Medkits back (paying for itself), other times you get nothing useful. Bring one if you have a free slot, don’t prioritize it.
C-Tier: Niche or Overpriced
| Item | Why C-Tier | Rating |
|---|---|---|
| Smoke Bomb | 3-second invisibility but short range | 5/10 |
| Adrenaline Shot | 5 seconds of invulnerability, then 30-second speed debuff | 5/10 |
| Flashlight Pro | Same as Standard but costs 200 | 4.5/10 |
| Spare Batteries (stack) | Redundant if using Gummy/Hand-Cranked | 4/10 |
D-Tier: Waste of Credits
| Item | Why It’s D-Tier | Rating |
|---|---|---|
| Cosmetics (any) | Zero gameplay benefit | 2/10 |
| Music Box | Calms entities for 8 seconds but attracts ALL entities in a 50-stud radius after it ends | 2/10 |
| Candle | Too dim to navigate with, purely atmospheric | 1/10 |
| Flashlight (Damaged) | Flickers randomly every 15-30 seconds, worse than nothing | 1/10 |
Failure Analysis: Why Players Actually Die
Most item guides tell you what is good. Few analyze what goes wrong. Here are the five failure patterns we see in actual runs.
1. The Battery Death Spiral You brought a Standard Flashlight to save 50 Credits. You burned through your first battery by floor 12. Your second battery went to a long Pandemonium chase. By floor 22, you are navigating by memory and UI glow. The death is technically an entity kill, but the root cause was choosing battery dependence in a game where inventory slots are fixed.
2. The Locked Door Wall You cleared floors 1–24 flawlessly. Then you hit a keycard scanner on floor 26 with no Code Breacher and no keycard spawn. The run ends not because you got chased, but because you could not open a door. This is the most expensive mistake in Pressure because it wastes a perfect run.
3. Heal Stacking Without Mobility Four Medkits look safe on paper. Then Searchlights spawns in the Blacksite. You take damage, heal, take damage, heal — but you cannot outrun it. Mobility problems require mobility answers. Medkits recover health; they do not prevent hits.
4. Inventory Panic You have the right items, but your flashlight is in slot 4 and your Medkit is in slot 5. During a chase, you scroll past the Code Breacher and lockpick. Fumbling costs seconds. Seconds cost runs. Keep your flashlight in slot 1 and your emergency heal in slot 2, always.
5. Vanity Spending Before Survival Players buy the Music Box or cosmetic hats before they own a Gummy Flashlight and Code Breacher. Those 200 Credits could have bought progression insurance. Cool items are fine — after your loadout is self-sufficient.
Decision Framework: How to Pick Items on the Fly
Use this five-step checklist when building a loadout or deciding what to keep from a locker.
Step 1: Lock in infinite light. If you do not have a Gummy Flashlight or Hand-Cranked Flashlight, fix that first. Battery management is a tax on your attention. In Pressure, attention is health.
Step 2: Guarantee one instant heal. Bring at least one Medkit. Bandages are cheaper, but the 10-second heal time is a liability during active chases. Bandages are for topping off between rooms, not for emergencies.
Step 3: Buy progression insurance. If you are past floor 20, carry a Code Breacher. The probability of a soft-locking locked door rises sharply after this point. One slot prevents a wasted run.
Step 4: Answer the floor-specific threat.
- Hotel (Floors 1–40): Entities are slower. Prioritize healing and light.
- Blacksite (Floors 41+): Entities are faster and more aggressive. Prioritize Sprint Potion over extra heals.
- Endless Mode: Bring Lockpicks for resource replenishment.
Step 5: Flex slot discipline. Your fifth slot is a flex. Do not fill it with ‘maybe useful’ items like Smoke Bombs. Fill it with either Batteries (if on standard light), a second Code Breacher (Blacksite), or a Lockpick (resource run).
Emergency Swap Rule If you find a Hand-Cranked Flashlight in a locker but your inventory is full, drop Batteries first, then Bandages, then the flex item. Never drop your only Medkit or Code Breacher unless you are replacing it with a better variant.
Best Loadouts by Floor
Hotel Loadout (Floors 1-40)
| Slot | Item | Reasoning |
|---|---|---|
| 1 | Gummy Flashlight | No battery management needed while learning |
| 2 | Medkit | Quick-access heal |
| 3 | Medkit | Backup heal |
| 4 | Code Breacher | For the locked door around floor 25-30 |
| 5 | Batteries or Lockpick | Flex slot |
Blacksite Loadout (Floors 41+)
| Slot | Item | Reasoning |
|---|---|---|
| 1 | Hand-Cranked Flashlight | Infinite light, you’ve learned entity timing |
| 2 | Sprint Potion | Survive Searchlights chases |
| 3 | Medkit | Quick-access heal |
| 4 | Medkit | Backup heal |
| 5 | Code Breacher | Multiple locked doors in Blacksite |
Speedrun Loadout
| Slot | Item | Reasoning |
|---|---|---|
| 1 | Standard Flashlight | Maximum brightness, fastest navigation |
| 2 | Batteries ×2 | Power the Standard Flashlight |
| 3 | Sprint Potion | Skip entity encounters |
| 4 | Medkit | Emergency only |
| 5 | Code Breacher | One locked door skip |
Co-op Support Loadout
| Slot | Item | Reasoning |
|---|---|---|
| 1 | Lantern | Light for the whole team |
| 2 | Medkit | Self-heal |
| 3 | Medkit | Heal teammate |
| 4 | Noise Maker | Distract entities away from downed teammates |
| 5 | Code Breacher | Team progression |
Item Purchase Priority Order
| Priority | Item | Credits | Cumulative |
|---|---|---|---|
| 1 | Gummy Flashlight | 150 | 150 |
| 2 | Medkit ×3 | 150 | 300 |
| 3 | Code Breacher | 200 | 500 |
| 4 | Sprint Potion | 150 | 650 |
| 5 | Hand-Cranked Flashlight | 300 | 950 |
| 6 | Lockpick | 100 | 1,050 |
| 7 | Extra Medkits | 50 each | — |
Counter-Intuitive Advice
These truths contradict common lobby wisdom, but they hold up in actual runs.
More Healing Can Get You Killed Four Medkits feel safe, but every Medkit beyond your second is a slot that could answer a different threat. A Sprint Potion prevents Searchlights damage entirely. A Code Breacher prevents a floor-30 soft lock. Carrying four heals means you are planning to take four hits. Plan to take fewer hits instead.
The Best Speedrun Light Needs Batteries The Standard Flashlight is brighter than both infinite options. That brightness lets you identify door paths and room layouts faster. For speedruns, the time saved on navigation outweighs the time spent swapping batteries — provided you practiced battery timing. The lobby myth that ‘infinite is always better’ is true for survival, false for pace.
Code Breachers Are Cheaper Than They Look At 200 Credits, a Code Breacher feels expensive early on. But one Breacher that saves a floor-28 run preserves 20+ minutes of progress and all the Credits you would have earned. The true cost of a Code Breacher is not 200 Credits. The true cost is the run you lose by not bringing one.
Drop Sunk-Cost Items Immediately You bought Batteries for 25 Credits. You find a Gummy Flashlight in a locker. Drop the Batteries. Do not think about the 25 Credits. Sunk-cost fallacy fills inventories with dead weight. The only metric that matters is what helps the next five floors.
Candles and Music Boxes Are Worse Than Empty Slots An empty slot at least does not trick you. A Candle gives just enough light to make you think you can navigate, but not enough to spot entities. A Music Box calms one threat then summons every entity in a 50-stud radius. These items do not just fail — they actively lower your survival odds by creating false confidence.