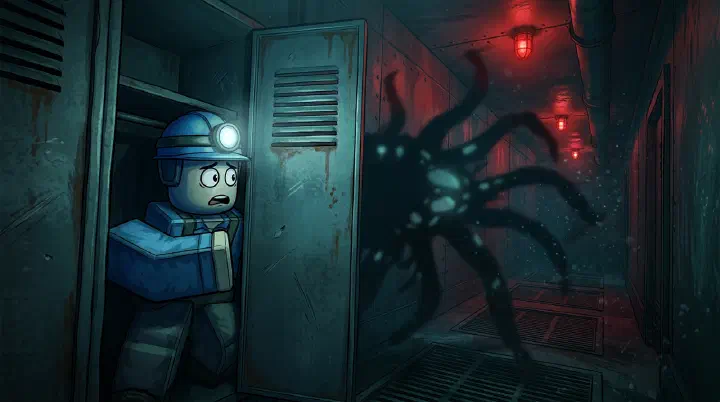
You hear the Angler’s scream tear through the hydro-station corridor. Your flashlight dies. The red emergency lights flicker. You sprint left, right, past the collapsed vending machine, and slam into a rusted green locker. The door slams shut. Your breath fogs the metal. You think you are safe.
Then the locker mini-game starts.
A shrinking circle pulses on your screen. Your cursor shakes. Your heart pounds in your ears. You mash E too early. You panic and mash it again. The circle turns red. The locker door rips off its hinges. The Angler’s twisted face fills your vision. You were safer running.
That death is not bad luck. It is a mechanics failure. Lockers in Pressure are not guaranteed safe rooms. They are situational tools with entity-specific rules, a punishing mini-game, and positioning requirements that most players learn only after dozens of avoidable deaths. This guide breaks down exactly how lockers work, which entities ignore them, and the advanced hiding mechanics that separate survivors from statistics.
Why Players Die in Lockers
Most locker deaths look like random bad luck. They are not. Here are the five mistakes that kill players inside hiding spots.
Hiding from the wrong entity. The Blitz does not care about your locker. It charges in a straight line and clips through walls, doors, and hiding spots. Players see the visual cue, panic, and jump into the nearest locker. The Blitz erases them two seconds later. If you do not know the entity’s locker behavior, you do not know whether to hide or run.
Failing the Pandemonium mini-game. Pandemonium is the only entity that actively hunts lockers. When it senses a player inside, it triggers a timing mini-game: a circle shrinks toward a center point, and you must press E at the exact moment they overlap. Spamming the key guarantees failure. The timing window tightens on lower floors, and the audio cue is subtle. Players who rely on visual reflexes alone die here consistently.
Choosing a locker too far from the spawn path. Lockers near the center of a corridor or directly in an entity’s patrol route are traps. The Angler pauses near occupied lockers and lingers. If your locker is on the main path, you spend longer inside, burn more flashlight battery, and increase the odds that a second entity spawns while you are trapped. The best lockers are offset in alcoves or behind cover objects.
Hiding too early or too late. Enter a locker before the entity’s audio cue finishes, and you may exit straight into its face. Enter too late, and the grab animation triggers before the door closes. There is a two-second vulnerability window after the open animation completes. Timing your entry to the entity’s scream or footstep cadence is critical.
Assuming lockers work the same on every floor. Floor mechanics change. Lower floors have fewer lockers, wider entity patrol zones, and faster mini-game timers. The same hiding strategy that saved you on Floor 1 will get you killed on Floor 7.
The Locker Mini-Game Explained
When Pandemonium hunts you into a locker, the screen locks and a circular prompt appears. A ring shrinks toward a fixed center marker. Your goal is to press E once, exactly when the ring meets the marker.
Here is what the game does not explain. The shrink speed scales with floor depth. On Floors 1 through 3, you have roughly 1.2 seconds to react. By Floor 9, that drops to under 0.7 seconds. The visual cue is slightly delayed by input lag on lower-end devices. The audio cue, a sharp metallic click, is more reliable than the visual ring. Headphones are not optional if you expect to survive deep runs.
Spamming E does not help. The game registers only the first input after the ring appears. If that input is early, you fail immediately. The correct technique is to wait, watch or listen, and commit to a single press. Treat it like a rhythm game, not a reaction test.
Entity-Specific Hiding Rules
This is the decision framework that keeps you alive. Memorize it.
| Entity | Locker Behavior | Recommended Action |
|---|---|---|
| Angler | Cannot detect occupied lockers; lingers nearby | Hide in any off-path locker |
| Pandemonium | Triggers locker mini-game; kills on failure | Hide and complete the timing check |
| Blitz | Ignores lockers entirely | Run perpendicular to its charge path |
| Depth Walker | Ignores lockers if no line of sight on entry | Hide only if behind cover before it spawns |
| The Looker | Stares at lockers; safe if eye contact is broken | Hide, then look away immediately |
Angler: The most common threat. When the scream hits, sprint to the nearest alcove locker. Wait for the footstep audio to fade. Do not exit until the heartbeat sound stops. If your locker is on the main corridor, expect a five-to-eight-second wait while it patrols past.
Pandemonium: If you hear the distorted breathing, identify a locker immediately. Enter before it rounds the corner. The mini-game triggers within two seconds of entry. Stay calm. One clean E press. If you fail, you die. There is no recovery.
Blitz: Never hide. Never. Its charge ignores geometry. When the screen shakes and the distant roar begins, identify its direction, then sprint at a ninety-degree angle into the nearest side room. Lockers are death traps against this entity.
Depth Walker: This one is situational. If you broke line of sight before it spawned and entered a locker behind a wall or object, you are safe. If you entered a locker in the open, it can detect the movement and pull you out. Always hide behind cover first, then enter the locker.
The Looker: The strangest behavior. It does not attack lockers directly. It stares. If you maintain eye contact through the locker slats, your sanity drains and you die. Enter the locker, then immediately turn your camera to the floor or wall. Breaking eye contact makes you invisible to it.
Counter-Intuitive Advice Most Players Ignore
Sometimes a locker is the worst place to be. If you are in a long corridor with multiple doorways and the Blitz spawns, a locker is a guaranteed death. A side room with a closed door is safer because the Blitz does not pathfind through closed interior doors. The best hiding spot is often not a locker at all. It is a doorway, a blind corner, or a vertical drop that breaks the entity’s line-of-sight check.
Staying calm during the mini-game is more important than being fast. Players who panic and spam E have a near-zero survival rate against Pandemonium. Players who treat it as a single deliberate action survive consistently, even on Floor 10. The game punishes anxiety more than it punishes slow reflexes.
Hiding early is sometimes worse than hiding late. If you enter a locker before the Angler’s spawn animation completes, the game can bug and place the entity’s hitbox adjacent to your locker. You exit into an instant kill. Wait for the audio cue to finish, then enter. Patience saves more runs than speed.
Locker Locations on Each Floor
Locker placement is procedurally generated, but there are anchor points that never change. Learning these lets you pre-plan escape routes.
Floor 1 — The Entry Bay: Lockers spawn in clusters of three near the starting medbay. There is always at least one locker in the secondary corridor past the first keycard door. Do not hide in the starting cluster; entities frequently patrol the spawn area.
Floor 2 — Hydro Processing: Guaranteed lockers behind the pipe puzzle room and inside the maintenance alcove near the flooded section. The flooded section locker is often missed because it is partially submerged and dimly lit.
Floor 3 — Storage Blocks: Lockers appear inside storage crate alcoves. These are excellent because the crate geometry blocks line of sight. Avoid the lockers in the main forklift corridor; they are exposed.
Floor 4 through 6 — Mid-Depth Zones: Locker density drops by roughly thirty percent. Anchor points shift to checkpoint doors and medbay stations. If you reach a checkpoint, note the nearest locker before proceeding. You will need it.
Floor 7 through 9 — Deep Pressure: Lockers become rare. Some floors spawn only two or three total. The mini-game timing tightens. Prioritize lockers in rooms with multiple exits so you are not cornered if a second entity spawns during your hide.
Floor 10 — The Abyssal Threshold: Lockers are scarce and often placed in high-traffic zones. Advanced players frequently skip lockers entirely on this floor, relying on door jukes and vertical drops instead.
Advanced Hiding Mechanics
Here are the mechanics the game never explains.
Locker doors have collision. If an entity is chasing another player, you can actually block its path by standing in front of a locker and letting the door swing open. This is situational and risky, but it can save a teammate in multiplayer runs.
The flashlight affects detection. If you enter a locker with your flashlight on, some entities have a larger detection radius near your position. Turn off your light before hiding. This is especially important against the Depth Walker.
Multiplayer changes everything. Only one player fits per locker. If two players sprint to the same locker, the second player is locked out. In coordinated runs, call your locker before the entity spawns. If you are the decoy, do not run toward a locker at all; kite the entity away from your teammates.
There is a brief window after exiting a locker where you are invisible to most entities. It lasts roughly 0.4 seconds. Speedrunners use this to clip past the Angler by exiting and immediately sprinting through its patrol path. The timing is frame-tight, but it is a viable advanced technique.
Final Thoughts
Lockers in Pressure are not safe rooms. They are situational survival tools with entity-specific rules, a punishing skill check, and positioning requirements that change every floor. The players who survive deep runs are not the fastest sprinters. They are the ones who know when to hide, when to run, and when a locker is just a metal coffin waiting for a victim.
Master the Pandemonium mini-game with audio cues. Memorize the guaranteed locker anchors. Turn off your flashlight. And never, under any circumstances, hide from the Blitz.