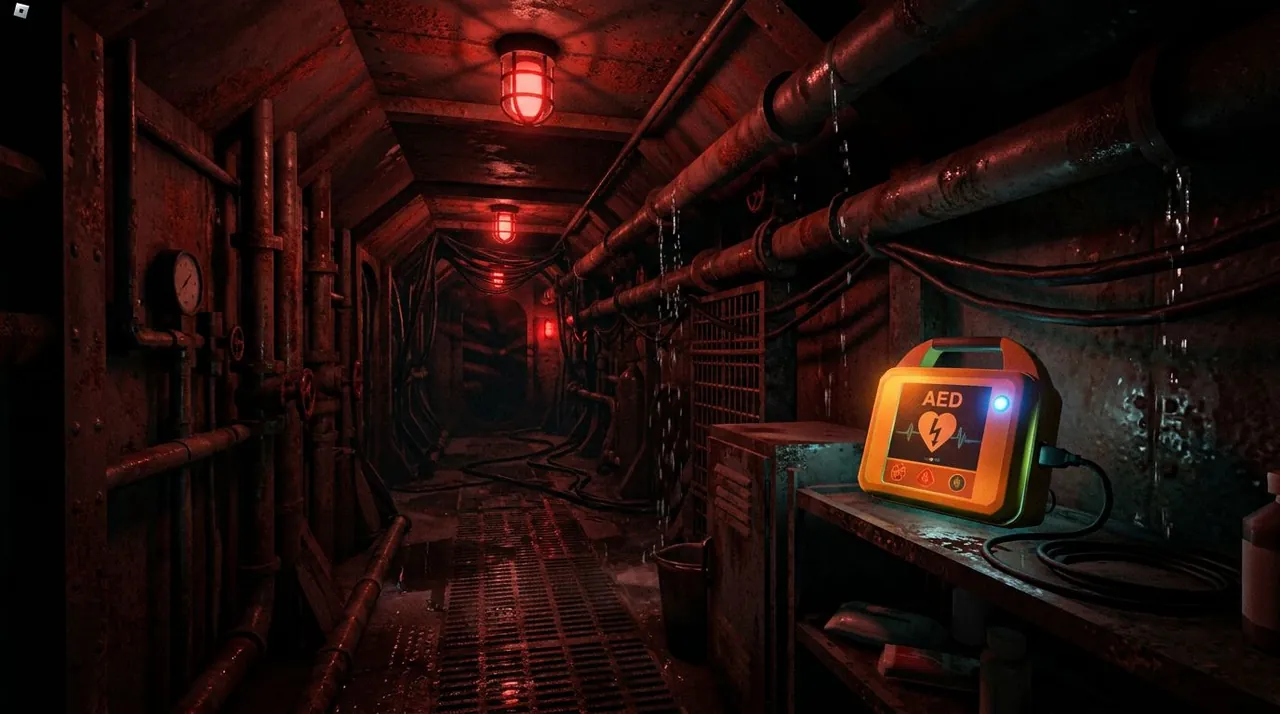
You’re at Door 84 in a three-player run, and your friend goes down. Not trapped in a locker — down. Body on the floor, death screen on their end, the run’s keycard and Code Breacher dying with them. The Angler that killed them just swept through and faded. You’re at 35 HP. The third player is on the other side of the room, frozen.
Your friend’s voice crackles through: “I’ve got a defib in my bag, can you get me?”
And now you have to make a call in about three seconds that decides whether one player stays dead or two more join them. This is the part of Pressure nobody teaches. Death is easy to understand — you lose the run. Revive is where it gets complicated, because the defibrillator is rare, single-use, multiplayer-only, and usually being carried by the exact person you’re trying to save.
This guide covers the whole death and revive loop: what you actually lose when you die, how the defib works and where to get it, the solo-versus-co-op split, and the speedrun tech that turns a teammate’s corpse into a skip.
What Actually Happens When You Die
Pressure does not punish death the way most horror games do. There’s no XP loss, no permanent item deletion, no account-level penalty. Death is permadeath for the run, nothing more.
Here’s the breakdown of what you actually lose and keep.
| What you lose | What you keep |
|---|---|
| All progress — you restart from the first door | Your meta currency (Kroner and Research) |
| Every item you found or bought that run | Every badge and unlock you’ve earned |
| Your team, if they can’t revive you | Any pre-run purchases for the next attempt |
That last column is the thing most new players miss. Death still pays you. You keep the door-completion currency you earned on the way down, and Pressure hands out death-related badges like candy — “Send In The Next Team” for dying once, all the way up to “The Floors Are Their Canvas” for 100 deaths. As our beginner survival guide puts it, early deaths are basically Credit farms with a free lesson attached.
The real cost of dying is time. A Door 76 death means you replay everything. If you’re in a team, there’s a second cost: your teammates either finish without you, or they burn a rare defib to bring you back.
So the death penalty is gentle in account terms and brutal in momentum terms. The thing that changes that math entirely is the defibrillator.
The Defibrillator: What It Is and How to Get One
The defibrillator — everyone just calls it the defib — is Pressure’s revive item. It does not shock a heart. The Urbanshade version, per the lore, rewinds the body to a state just before death and revives the player on the spot. In gameplay terms, you point it at a dead teammate’s body, activate it, and they come back.
That sounds simple. The catch is that the defib is rare, expensive, and limited.
How to get one:
- Rare floor spawn. It drops as loot, including inside item crates in the Code Breach area. Pure RNG.
- Sebastian’s shop. 500 Research, and it is not always in stock. You might pass through the shop on a run and never see it.
- Pre-round shop. 150 Kroner — but only after you earn the “Like Nothing Ever Happened” badge. This is the reliable source once you’ve unlocked it.
- Operation Heartburn. This special operation guarantees a defib at each airlock, near the airlock controls. The most consistent source if you just want to practice revives.
- Playing as Sebastian. The Sebastian character starts with one. Not a strategy, just a fun fact.
The limits:
- You can carry one defib at a time.
- A used defib needs five batteries to recharge, and you must have all five at once. Batteries are 15 Kroner each in the pre-round shop (max three per run, gated behind “Send In The Next Team”) or 50 Research each from Sebastian. A full recharge costs either 75 Kroner or 250 Research.
One thing worth flagging: the defib glows on the player’s back. That’s not flavor text. In dark rooms, a defib carrier is a walking light source — which means they’re also a walking “shoot me first” sign for anything that can see. We’ll come back to why that matters.
Locker Rescue vs. Defib: Two Different Things
Here’s where a lot of players get confused, because Pressure has two mechanics that both look like “saving a teammate,” and they are not the same.
Locker rescue is the older mechanic. When an entity like Angler or Pinkie drags a teammate into a locker, they’re not dead yet — they’re trapped. Another player can interact with the locker to pull them out before the entity finishes them. Our multiplayer guide covers this in detail, including the revival priority order.
The defib is the newer mechanic, added in the Worth The Wait update. It works on players who are already fully dead. Not trapped. Dead. Body on the floor, death screen showing.
The reason this distinction matters: for a long time, the community answer to “can I revive a dead teammate” was “no.” Once a player was fully dead, that was it. The defib changed that answer. If you’ve read an older guide that says fully dead players can’t be revived, that guide predates the defib.
So the mental model is: trapped player = locker rescue, free and no item needed. Dead player = defib, rare and single-use. If you try to “rescue” a dead body the way you’d rescue a trapped player, you’ll stand there pressing E on a corpse while the next Angler lines up.
Solo vs. Co-Op: The Revive Split
This is the most important thing to internalize before anything else.
In solo, revive does not exist.
The defib only targets another player’s body. You cannot revive yourself. If you queue solo and a defib drops, leave it. It’s an inventory slot doing nothing. Spend the slot on healing or a Sprint Potion — or check the items and puzzles guide for what actually saves solo runs.
In co-op, revive is the whole game.
The defib turns a wipe into a setback. One player dies, another revives them, the run continues. That single mechanic is why teams with a defib can shrug off a Door 84 Angler while solo players just reset.
The split also changes what “death” means for the team. Solo death is the end of the run. Co-op death is a question: does anyone have a defib, and is it safe to use it right now?
Decision Framework: Revive Them or Save Yourself
This is the three-second call from the opening scene, broken into a table you can actually use mid-run.
| Scenario | The if-then call |
|---|---|
| The killing entity is still active | If you can still hear or see the entity, don’t revive. Wait for the audio “all clear.” You revive into the path of a second pass, and now there are two bodies. |
| You’re below 40 HP | If you’re one hit from death, don’t run into the open. The player closest to healthy does the revive, not the player closest to the body. |
| The dead player carried the keycard or Code Breacher | If the run can’t progress without what they had, revive is top priority — but still wait for the clear. |
| You’re past Door 70 | If entity density is high, revive only with cover. A late-game dead body is bait, and a standing reviver is a target. |
| Multiple teammates are down | If two are dead and one of you holds a single defib, revive whoever is closer to a safe path, not whoever died first. |
| You’re solo | If there’s no other player, there’s no revive. Don’t carry the defib at all. |
The pattern underneath every row is the same: confirm the clear, send the healthiest player, and never trade two lives for one.
Failure Analysis: Where Revives Actually Go Wrong
Most failed revives aren’t bad luck. They’re the same mistakes repeated under pressure.
Error: Reviving the instant the entity passes. The Angler fades, you sprint to the body, and you activate the defib — while the entity loops back. Two bodies.
Cause: You never confirmed the “all clear.” You confused “it passed” with “it’s gone.”
Recovery: Count sweeps out loud like you would in a locker. For multi-pass entities like Ambush or A-60, wait for a full three seconds of silence. The revive window is generous enough to wait; it’s not a race against the body despawning in the next half-second.
Error: The defib carrier dies first. The person holding the revive item goes down at the front of the group, and now nobody can save anybody.
Cause: The defib glows on your back. In dark rooms, you read as a target. And if you’re scouting point, you’re the first thing an entity hits.
Recovery: The defib carrier stays mid-pack, never on point. Scout goes first. The defib carrier’s entire job is to survive long enough to use the item.
Error: Used the defib and forgot the recharge. You revive a teammate at Door 50, then at Door 80 someone else dies, and your defib is empty.
Cause: A used defib needs five batteries, and you banked none.
Recovery: Before a run where you plan to carry a defib, have five batteries ready, or know you can buy them from Sebastian mid-run. A defib without a recharge is a single-use item — plan around that.
Error: Reviving too far away. The body is across the room, behind a corner, or in a flooded section.
Cause: The team split, or the dead player went off alone before dying.
Recovery: Stick within line of sight of each other past Door 50. And know one bug up front: reviving someone underwater can make the revived player float to the ceiling of a flooded room, and they’ll need Mr. Lopee to teleport them back. Revive on dry floor when you can.
Counter-Intuitive Advice
The revive item puts you in danger, not the person you’re saving. This is counterintuitive. You’d think the defib makes the carrier safer because it’s the safety net. It does the opposite — it paints a glow on your back and makes you the highest-value target in the room. Teams that understand this put the defib on a mid-pack player who plays boring and survives. Teams that don’t lose their defib carrier at Door 30 and wonder why their revives never happen.
Letting a teammate stay dead is sometimes the correct play. If the entity is still in the room and a revive would expose two more players, the dead player waits. This feels wrong — your friend is down, the instinct is to go. But three players alive beats one alive and three dead. Wait for the clear, then move.
In speedruns, a teammate’s death is the setup, not the failure. The Crystal Skip V4, covered below, literally requires a player to die on purpose so another player can revive them at the exact right moment. The death isn’t the mistake. The timing of the revive is the whole trick.
The Crystal Skip V4: When a Death Is the Route
This is the speedrun tech worth knowing, both because it’s the single most famous use of the defib and because it proves the point that death and revive are tools in Pressure, not just punishments.
The Crystal Skip V4 is a multiplayer-only skip that needs three players and a defibrillator. Here’s the setup, straight from the speedrun community:
- One player camps the lever.
- The other two players go to the real door.
- One of those two dies to the speaker — on purpose.
- The other revives them with the defib as fast as possible.
- The lever is pulled the exact moment the dead player is being revived.
The revive timing is the entire trick. Pull too early or too late and the skip fails. It’s a frame-tight maneuver, which is why you see it in speedrun forums and almost nowhere in normal play.
For normal play, the takeaway isn’t “go learn the skip.” It’s that the defib’s value is not just as a safety net — it’s a mechanic with timing you can optimize. If you want the full speedrun context, the speedrun guide and the speedrun optimization guide cover routes and splits in depth.
How to Actually Farm the Badge
If you want the “Like Nothing Ever Happened” badge — and you should, because it permanently unlocks the defib in the pre-round shop — the fastest route is a coordinated two-player farm, not random co-op hope.
- Both players queue together, ideally on a private server or a quiet lobby.
- One player dies on purpose early — Sprint into an Angler, or just stand in front of a Rush.
- The other player, holding a defib, revives the body once the entity passes.
- Both players get the badge. The revived player also picks up “No Refunds” for free if they don’t have it.
The hard part is getting the defib in the first place before you have the badge, since the pre-round shop doesn’t sell it yet. That’s why Sebastian’s shop (500 Research, if it’s in stock) or a lucky floor spawn is usually your first defib. Once the badge pops once, you never have to farm for a defib again — you just buy it for 150 Kroner before the run.
For the full picture on where this badge sits in the completion order, check the badges and achievements guide — it groups “Like Nothing Ever Happened” with the other team badges like “No Refunds” and “Effective Motivator.”
The 60-Second Recap
When you die in Pressure, you lose the run and nothing else — you keep your currency and unlocks, and you still get paid for the doors you cleared. The only way back from a full death is the defib, a rare single-use item that only works on other players, needs five batteries to recharge, and glows on your back like a target. Solo, revive doesn’t exist. Co-op, revive is the difference between a wipe and a setback, and the whole skill is in the three-second call: confirm the clear, send the healthiest player, and never trade two lives for one.
If you’re still working on surviving long enough to need any of this, start with the beginner survival guide. If you’re building your loadout around a defib, the items and puzzles guide covers what else belongs in your five slots.
Disclaimer: This guide is based on Pressure as of August 2026, including the Worth The Wait update that added the defibrillator. Item costs, spawn rates, and shop stock change with patches, and the exact revive window in seconds is not confirmed in any official source — the “five minutes before death” line is lore flavor, not a documented gameplay timer. The Crystal Skip V4 details come from the speedrun community and may break with updates. Always verify against the current game and wiki.
Sources: