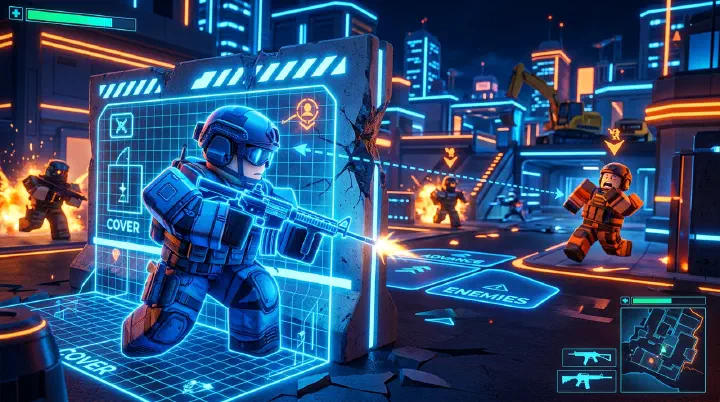
The Replay That Hurts to Watch
You have good aim. You hit the range for 20 minutes before every session. Your crosshair sits at head level. Your movement is clean — you can wall run, grapple, and slide without thinking.
You’re still losing 1v1s. You’re still getting picked first in team fights. You’re still bottom fragging in lobbies where your mechanics are objectively better than half the players.
You load the replay. You watch yourself push the same mid-angle on Downtown, three rounds in a row. The first time, you got a kill. The second time, you traded. The third time, the enemy pre-fired the corner before your shoulder even cleared it. You didn’t even see the muzzle flash. You just died.
On Warehouse, you held the catwalk for four consecutive rounds. It worked twice. Then the enemy started flanking through the lower tunnel every round. You never checked. You were so focused on the angle in front of you that you forgot to exist in 3D space.
On Factory, you heard footsteps on the metal grating. You knew exactly where the enemy was. You pushed anyway. You traded one kill for your death and lost the round because your team needed you alive for the retake.
Your mechanics didn’t fail you. Your decision-making did. Your positioning did. Your game sense — the thing that tells you where the enemy is, where they’re going, and what they expect you to do — was giving them free information.
This guide fixes that.
Why Good Mechanics Don’t Win Games
Most players think the skill hierarchy in RIVALS goes like this: aim > movement > abilities > game sense. The real hierarchy at Diamond+ is game sense > positioning > crosshair placement > movement > aim. Here’s why your mechanics aren’t translating into wins.
Mistake 1: You Play the Same Position Twice in a Row
The most common positioning error in RIVALS is predictability. If you got a kill from the rooftop on round 2, the enemy is checking that rooftop on round 3. If you held the alley on round 4, they’re pre-firing the alley on round 5. Every position has a lifespan of one successful use. After that, it becomes a death trap.
Good players treat positions like consumables. They use them once, get value, and rotate. Great players intentionally use a position once to set up a fake — then watch the pre-fire and punish the punisher.
Mistake 2: You Fight Without Knowing the Map State
You push an angle because you saw one enemy. You didn’t know their teammate was 5 meters away behind the same wall. You didn’t hear the third player rotating to your flank. You took a 1v1 and turned it into a 1v3 without realizing it.
Map state is everything you know and don’t know. Before every push, ask: Where are my teammates? Where did I last see enemies? What sounds did I hear in the last 10 seconds? If you can’t answer at least two of those questions, you don’t have enough information to push. Hold the angle instead.
Mistake 3: You Value the Kill Over Your Life
Trading kills is losing in most RIVALS modes. Your team needs bodies on the map to control space. If you push into a fight where the best outcome is a trade, you made a bad decision. The only time trading is acceptable is when you have the objective and the timer is low — then your life is worth less than the time you buy.
This is the hardest habit to break because kills feel good. But look at the scoreboard after your next loss. If you went 12-12 in a match your team lost, those 12 kills didn’t matter. The 12 deaths did.
Mistake 4: You React to Damage Instead of Processing It
Taking damage triggers a panic response. Most players immediately return fire or sprint for cover without thinking. The correct response is: identify where the damage came from, decide if you can win the fight, and then act.
That 2-second pause feels like an eternity. It’s not. It’s the difference between Diamond players who consistently win clutch rounds and Gold players who die with their abilities unused. Game sense is what happens in that pause.
Mistake 5: You Don’t Play the Clock
Every mode in RIVALS has a timer, and the timer determines who needs to act. If you’re defending and time is on your side, every second you live without fighting is a win. If you’re attacking and the clock is below 30 seconds, the defenders know you have to push. They’ll hold tighter angles and wait for your desperation.
Players who ignore the clock make terrible decisions. They push when they should hold. They hold when they should rotate. They take 50-50 fights when the math demands they play for survival. Time is a resource. Spend it wisely.
Positioning Fundamentals: Where to Stand and Why
Game sense tells you where the enemy is. Positioning puts you in the best place to act on that information. Most RIVALS players stand in the wrong spot even when they know exactly what the enemy is doing. Here’s how to fix that.
Angles: Tight vs Wide
A tight angle means you’re close to the corner you’re peeking from. A wide angle means you’re far back. Tight angles expose less of your body but limit your vision. Wide angles let you see more but expose more of your hitbox.
The rule: hold tight angles when you’re alone and expect a single peek. Hold wide angles when you have backup and want to see multiple entry points. Never hold a wide angle in a 1v1 — you’re giving the enemy more target to shoot at.
On Downtown, the alley corners are tight angles. The rooftop overlooking mid is a wide angle. Most players die on that rooftop because they treat it like a tight angle and get peek-shot from three directions at once.
Elevation: When High Ground Helps and When It Hurts
High ground gives you a headshot advantage and limits the enemy’s escape routes. But it also traps you. In RIVALS, abilities like Grapple Hook and Wall Run let enemies reach high ground fast. If you’re on a rooftop with no escape route, you’re a sitting duck.
Use high ground for one kill, then drop. The best high-ground positions have multiple escape routes — a ledge to drop from, a wall to run along, or a grapple point. If your only way down is a ladder or a long fall, it’s not a good position. It’s a coffin.
Cover: Hard vs Soft
Hard cover is a wall that blocks all damage. Soft cover is a wooden crate, a window frame, or a thin wall that some weapons can penetrate. In RIVALS, the Heavy Sniper and some abilities can ignore soft cover.
Always know whether your cover is hard or soft. If you’re behind a wooden crate and the enemy has a sniper, you’re not in cover. You’re behind a target. Position yourself behind concrete walls, thick pillars, and map geometry that completely blocks line of sight.
Spacing: The 15-Meter Rule
In team fights, spacing is more important than individual aim. If you’re within 5 meters of a teammate, one grenade or one spray-down kills both of you. If you’re more than 20 meters apart, you can’t trade kills when one of you gets pushed.
The sweet spot is 10-15 meters. Close enough to trade, far enough that the enemy can’t collapse on both of you at once. When your teammate pushes, don’t follow on their shoulder. Hold an adjacent angle 15 meters away. Now the enemy has two threats from two directions, and they can’t focus both.
The Game Sense Decision Tree
When you encounter an enemy — or think you might — your brain should run through this exact checklist. Practice it until it’s automatic. It takes less than 2 seconds once you’re used to it.
Step 1: Where Are They?
Identify the enemy’s position from sound, sight, or callout. If you don’t know exactly where they are, do not push. Information is the currency of RIVALS. Fighting without it is gambling.
Step 2: How Many?
One enemy is different from two. Two enemies close together is different from two spread across the map. If you hear footsteps and can’t distinguish one set from two, assume there are two. The cost of caution is low. The cost of being wrong is death.
Step 3: What’s My Health and Ability State?
Check your HP. Check your ability cooldown. Check your ammo. If any of these are low, your options shrink. A Grapple Hook on cooldown means you can’t escape a bad fight. An SMG with 12 bullets means you can’t take a prolonged duel. Know your state before you commit.
Step 4: What’s the Clock Say?
If you have time, force them to come to you. If you don’t, you need to create action. The clock changes your risk tolerance. Never forget it.
Step 5: What’s the Play?
Based on the above, you have four options:
Push — Only when you have information advantage, health advantage, or clock pressure. You know where they are. You know it’s a 1v1. You have an ability ready. Push fast and commit fully. Half-committing is the most common way to die.
Hold — The default choice. You have a good angle. You don’t know the full enemy position. Time is on your side. Hold, gather information, and let them make the mistake.
Rotate — When the enemy knows your position, when the angle is bad, or when your team needs you elsewhere. Rotating is not retreating. It’s choosing a better fight. The best players in RIVALS rotate constantly — they never give the enemy a stationary target.
Flank — Only when you know where the enemy is and they don’t know where you are. Flanking works once per match against good players. After that, they check their flanks. Use it as a surprise tool, not a default strategy.
Counter-Intuitive Truths That Win Games
The Best Position Is the One the Enemy Isn’t Checking
High ground wins fights until the enemy expects you on high ground. Tight angles win duels until they pre-fire the corner. The “best” position on any map is a moving target. Your job is to be where their crosshair isn’t.
Sometimes the Worst Play Is the Right Play
If you’ve been holding angles all game, pushing through the open with Wall Run is technically a bad play. But it’s unpredictable. Unpredictable plays win rounds against players who read patterns. Use one bad play per half to reset the enemy’s mental model of you.
Dying With Full Health Is Worse Than Dying Low
If you die at 100 HP, you wasted a resource. You had a chance to take risks, trade damage, or force the enemy to use their abilities. Dying full health means you played too scared. The ideal death in RIVALS is at 20 HP with your abilities on cooldown and your team in a better position because of the space you created.
The Quietest Player Wins the Information War
Sprinting, firing, and using abilities makes noise. Noise tells the enemy where you are. The player who makes the least noise knows the most about the map. Walk when you don’t need to sprint. Don’t shoot walls for no reason. Save your abilities until they create an advantage. Information is asymmetrical — the quieter you are, the more you have.
Good Game Sense Looks Like Aim
When you pre-fire the exact corner an enemy peeks, it looks like incredible aim. It isn’t. It’s game sense. You knew they’d peek because of the clock, the round history, and their position. The bullet was already on its way because your brain processed the pattern before your eyes saw the player. That’s what game sense looks like in practice. It masquerades as mechanics.
Failure Retrospective: My Silver-to-Diamond Climb Disaster
I went from Silver to Diamond in RIVALS over six months. Here’s how those six months went, and the three biggest mistakes that cost me hundreds of rank points.
Mistake 1: I Reviewed My Kills, Not My Deaths
For my first three months climbing out of Silver, I saved every kill clip. I’d review them, see my good plays, and feel good about my progress. Then I’d load into ranked and lose to the same patterns over and over.
The fix wasn’t reviewing kills. It was reviewing deaths. Every death has a cause. Every cause has a solution. Every solution is a game sense lesson.
After switching to death review only, my win rate jumped from 48% to 58% in two weeks. Same mechanics. Same hours. Same aim. The only change was which clips I saved.
Lesson: Save your deaths, not your kills. Kills feel good. Deaths teach you. The player who reviews deaths improves twice as fast as the player who reviews highlights.
Mistake 2: I Played Too Many Games Per Session
I was grinding 6-8 ranked games per session, every day. I thought more games meant more improvement. I was wrong.
By game 5, my decision-making was degraded. I was making faster, less thoughtful choices. I was tilting from earlier losses. I was burning out without realizing it.
The fix was a hard cap: 3 ranked games per session, then play a casual mode or stop. Quality over quantity. Three thoughtful games teach more than eight tilted ones.
My win rate climbed from 51% to 62% after the cap. The same hours invested, more rank points gained.
Lesson: Cap your ranked sessions at 3 games. More than that, and your decision-making degrades faster than your skills can compensate. Three sharp games beat eight tired ones.
Mistake 3: I Mained One Map
I had a comfort pick: Downtown. I knew every angle, every sound cue, every rooftop. I climbed to Platinum almost entirely on Downtown.
Then Diamond hit, and Diamond lobbies rotated maps more aggressively. Suddenly I was being forced into Warehouse and Factory — maps I didn’t know. I lost 200 rank points in a week.
The fix was map rotation practice. I forced myself to play 5 games of each non-Downtown map per session. Within two weeks, my win rate on the other maps climbed to match my Downtown rate. I went from Plat 2 back to Diamond 1 in three weeks.
Lesson: Don’t main one map. Map knowledge compounds. The player who knows all maps plays all maps at Diamond level. The player who knows one map is a Diamond on one map and a Gold on the others.
The Takeaway From Six Months
Three rules that emerged from those six months of climbing:
- Review deaths, not kills. Kills feel good. Deaths teach you.
- Cap ranked sessions at 3 games. Tilt degrades your decision-making faster than your mechanics can compensate.
- Don’t main one map. Map knowledge is the hidden MMR boost that separates Diamond players from Platinum.
If I could redo those six months, I’d hit Diamond in three. Same hours. Same mechanics. Different habits.
The Game Sense Training Plan
Most players develop game sense passively. They play, they lose, they hope to learn. That works eventually. Training it deliberately works in weeks.
Week 1: Death Review Discipline
Save every death for one week. After each match, watch your deaths and write down three things: where the enemy was, what sound gave them away, what pattern you repeated. Review your notes at the end of the week.
The first time you do this, you’ll discover patterns you never noticed. Most players repeat the same positioning error 5-10 times per match without realizing it.
Week 2: Active Information Gathering
For one week, force yourself to gather information before every push. Sound cues, sight lines, teammate callouts. If you don’t have at least one piece of information, don’t push.
You’ll feel slower. You’ll die less. By the end of the week, the habit is built.
Week 3: Decision Tree Practice
For one week, run the 5-step decision tree before every fight. Where are they? How many? My state? The clock? The play?
The tree feels artificial at first. By week 3, it’s automatic. You’re processing the same information, but faster and more reliably.
Week 4: Pattern Recognition Drill
For one week, focus on enemy patterns. Note the routes each player takes in rounds 1-3. Predict their behavior in rounds 4-6. Pre-aim where they’ll be.
This is the skill that separates Diamond players from Platinum. Pattern recognition is what makes Diamond players look like they have “instincts” — they don’t. They have data from previous rounds.
Quick Pick: If-Then Decision Table
Don’t have time to read the full guide? Find your situation and pick accordingly.
| If you want… | Then do this… | Why it’s the right move |
|---|---|---|
| Climb from Silver to Gold | Practice 1v1 duels and basic crosshair placement | Mechanics-first improvement, build foundation |
| Climb from Gold to Platinum | Focus on positioning and angle discipline | Game sense layer, where most players plateau |
| Climb from Platinum to Diamond | Master the decision tree and pattern reading | Strategic layer, separates Diamond from Platinum |
| Improve your team’s win rate | Use callouts and information sharing | Flanks fail when team has eyes on cross-routes |
| Stop getting picked first | Stop taking 50-50 fights and trading deaths | Most “first picks” are preventable positioning errors |
| Win more clutch 1v2 rounds | Use the 2-second pause and gather information | Slow decision-making beats fast reactions in clutch |
| Stop losing the same angle twice | Rotate after every successful use | Positions are consumables, not permanent |
| Hold better corners | Always know whether your cover is hard or soft | Wooden crates aren’t cover against snipers |
| Stop feeding flanks | Watch cross-routes, not just the enemy | Flanks happen because someone wasn’t watching |
| Improve your K/D ratio | Stop dying at full health | Play aggressively when you have HP, retreat when low |
Counter-Intuitive Truths About Game Sense
These sound wrong until you’ve played enough RIVALS at high ranks. Then they’re obvious.
Game sense beats aim at every rank above Gold. Players with worse aim but better game sense win more games than aim-bots with bad positioning. Aim is the floor. Game sense is the ceiling.
The quietest player has the most information. Sprinting, shooting, and using abilities makes noise. Noise tells the enemy where you are. The player who walks when they don’t need to sprint knows more about the map than the player who rushes.
Dying with full HP is worse than dying low. If you die at 100 HP, you wasted a resource. You had a chance to take risks, trade damage, or force the enemy to use their abilities. The ideal death is at 20 HP with your abilities on cooldown and your team in a better position.
Pre-firing a corner isn’t aim — it’s game sense. When you shoot the exact corner an enemy peeks before they appear, it looks like incredible aim. It isn’t. You knew they’d peek because of the clock, the round history, and their position. The bullet was already on its way.
Sometimes the “wrong” play is the right play. If you’ve been holding angles all game, pushing through the open with Wall Run is technically a bad play. But it’s unpredictable. Unpredictable plays reset the enemy’s mental model of you. Use one per half.
For comparison with other Roblox FPS games and how RIVALS fits into the bigger picture, see our Best Roblox FPS Games Compared guide. For RIVALS-specific basics, see the RIVALS Beginner Guide. For movement training that pairs with positioning, see the RIVALS Movement Mastery guide.
Disclaimer: RIVALS balance, character abilities, and map designs change with each major patch. This guide reflects the state of RIVALS in October 2026. Ability cooldowns, weapon stats, and meta positioning may shift with future updates — always check the latest patch notes before applying these strategies in ranked.
Related Guides
- Best Roblox FPS Games Compared — Rivals in the broader FPS context
- RIVALS Beginner Guide — Getting started in ranked
- RIVALS Movement Mastery Guide — Pair movement with positioning
- Best Roblox Fighting Games Compared — Action game alternatives
- RIVALS Complete Hub — Strategies, characters, and ranked tips