You Have Good Aim. You’re Still Losing.
The crosshair snaps to their head. You fire first. Three clean hitmarkers. Then you’re dead.
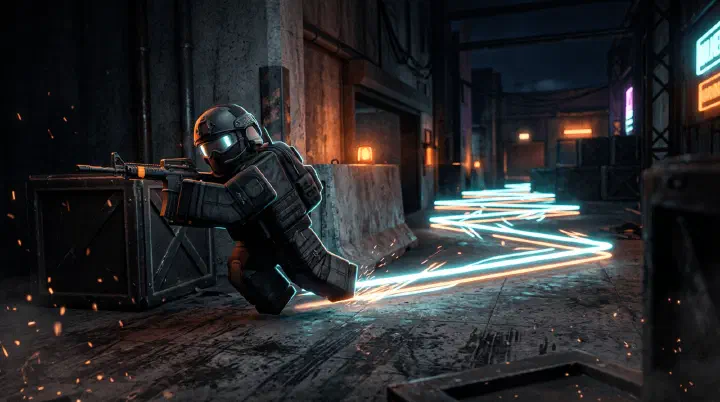
You were holding Bridge mid, peeking the pillar, and you saw him first. But you stepped out, stopped to aim, and stood perfectly still. He was already sliding — not at you, but across your sightline at 45 degrees, hitbox dropping and shifting in one frame. Your second burst tracked empty air. You had the better aim. You had the first shot. You lost because you gave him a stationary target while he gave you a ghost.
A player with Diamond-level aim and Bronze-level movement loses to a player with Gold aim and Diamond movement. Every time. Movement in RIVALS isn’t about looking cool. It’s about making your hitbox unpredictable.
New to the movement system? Start with the RIVALS Movement & Mechanics Guide for the raw inputs, then come back here to learn how to win fights with them.
Why Good Movement Gets You Killed
Good movement kills you when it becomes predictable. Five mistakes turn you into an easy frag:
1. Moving in straight lines. Sprinting straight at or away from a fight is the same as standing still. The enemy pre-aims the line. A dash used to charge straight at someone is the same mistake with a shorter travel time.
2. Jumping during gunfights. A jump is a committed parabola. Good players track apexes and shoot the landing. Never jump while being shot at. A double-jump breaks the arc once — don’t lean on it.
3. Sliding too early or too late. Slide while they’re looking away and you waste momentum. Slide while they’re firing and you’re committed to a direction with reduced control.
4. Not changing direction mid-fight. Strafing left… left… left… trains the enemy’s muscle memory. They stop reading and start predicting.
5. Over-committing to fancy tech. A wall-bounce into a grapple-swing has fixed end points. Flashy movement is predictable movement.
The Movement Decision Tree
Movement is a tool, not a style. Run this if-then check before you touch a movement key:
| If… | Then… | Why |
|---|---|---|
| Peeking a corner where an enemy is holding | Jiggle-peek | Bait the shot, gather info, expose nothing |
| Crossing open ground (Bridge center, Arena) | Slide-cancel | Speed + hitbox reduction, minimal predictability |
| Enemy is above you on a rooftop or ledge | Wall-bounce or reposition | Vertical surprise beats vertical aim |
| In a live 1v1 gunfight at mid-range | A-D rhythm | Breaks tracking without committing to a direction |
| Need to close distance fast in CQB | Dash sideways, then slide-cancel in | Drops hitbox, doesn’t telegraph a straight line |
| Need to escape after a missed shot | Dash or slide-cancel back to cover | Faster than backpedaling, harder to pre-aim |
| Grappling to a predictable landing point | Grapple-swing | Pass through the danger zone instead of landing in it |
| Enemy is jiggle-peeking you | Stop moving and hold the angle | Jiggle-peek loses to patience |
If you don’t know which situation you’re in, default to A-D rhythm. It’s never the best choice, but it’s never wrong.
Tech 1: Slide-Cancel (Easy, High Impact)
Execute: Sprint → hold crouch (slide begins, hitbox drops roughly 40%) → release crouch after about 0.5 seconds.
Why: A full slide dies at the end — no momentum, crouched, easy headshot. The cancel keeps the initial speed and low hitbox while cutting the vulnerable deceleration phase.
When: Crossing open sightlines. Exiting cover to engage. Escaping after a missed shot.
Mistake: Sliding straight at the enemy. They pre-aim where your slide ends and headshot you the moment you stand up. Always slide at an angle.
Tech 2: Dash (Medium, High Impact)
Dash is the ability most players waste on looking busy — a short, sharp burst of speed in one direction, like a slide without the crouch commitment. It keeps your hitbox full height but gets you out of the way instantly, gun up the moment it ends.
Dash sideways, not forward. A forward dash runs you straight down their barrel, same as a straight slide. A sideways dash breaks a tracking shot in one frame.
The pattern: peek, shoot, dash sideways behind cover, re-peek from the other side. It’s a jiggle-peek that covers several studs.
Mistake: panic-dashing on cooldown. It telegraphs where you’ll be and leaves you without an escape. Save the dash for crossing a sightline, not a nervous twitch.
Dash distance and cooldown vary by patch — treat the numbers here as approximate.
Tech 3: Double-Jump (Medium, Situational)
A double-jump is your one legal mid-air direction change. A normal jump is a committed arc; a double-jump re-routes it at the last moment, punishing anyone who pre-aims the first jump.
Use it to: dodge a close-range shotgun blast, reach a ledge a single jump can’t clear, break tracking after you’ve already jumped.
Don’t use it as your default dodge. It spends your air control on a trick that works once or twice. Against a long AR angle, the second half of the arc is still predictable — slide-cancel or dash instead.
The rule: the first jump is bait, the second is escape. If the first did nothing useful, the second won’t either.
Whether double-jump is baseline or loadout-tied has shifted between patches. Without it, slide-cancel, dash, and jiggle-peek carry you fine.
Tech 4: Jiggle-Peek (Medium, Extreme Impact)
Execute: Stand near a corner. Tap A and D fast — your shoulder flashes in roughly 0.2-second intervals. They fire at your shoulder, miss or graze. You now know their position and they’re in recoil. Wide-peek and fire while they can’t shoot back.
Why: It exploits reaction time. They see movement, fire, miss because only a sliver was exposed. Their shot goes on cooldown for roughly 0.3-1.5 seconds. You own that whole window.
Drill: Friend holds an angle, you jiggle-peek it 20 times. Goal: under 3 hits. A good jiggle-peek makes you unhittable 85%+ of the time. Then chain it into the dash re-peek — the full 1v1 duel entry.
Tech 5: A-D Rhythm (Easy, High Impact)
Execute: In a fight, strafe left-right-left-right. Change direction every 0.4-0.5 seconds. Never more than half a second in one direction.
Why: Human reaction time averages about 0.25 seconds. Change direction every 0.4-0.5s and their crosshair is always catching up — aiming at where you were 0.2s ago. A predictable left-left-left gets headshot; an unpredictable rhythm is almost impossible to track.
If your strafe feels jittery or you overcorrect, that’s usually sensitivity, not rhythm. Lock your sens first in the sensitivity and crosshair guide, then practice the rhythm on top.
Tech 6: Wall-Bounce & Grapple-Swing
Wall-bounce: Wall run toward a corner, jump off the wall, change direction mid-air. Use on Warehouse and Construction.
Grapple-swing: Grapple to a point but release early, using the momentum to swing past your target instead of landing at the point. A standard grapple is predictable; a swing passes through the landing zone at speed.
Both are commit-heavy with fixed end points. Use them to cross danger, not to dodge inside it.
A Fight I Lost to My Own Movement
Ranked match on Construction, 1v1, enemy low, both on the top floor. I had health, position, and my crosshair already at the corner.
Error. I went for the flashy play. Instead of jiggle-peeking or holding the angle, I wall-bounced off the support beam and grapple-swung across the gap, hoping to land behind him.
Cause. My movement had a fixed ending. Both techs have known end points. He heard the grapple, looked up, and his crosshair was waiting at my landing spot before I finished the swing. I died mid-air.
Recovery. I watched the clip and the pattern was obvious — I’d used the same “fly behind them” play twice already, and he’d learned it. Next rounds I stopped flying, held the high angle with jiggle-peeks, and let him make the fancy play instead. He did, twice, and I shot him out of both.
The lesson: the enemy learns your timing in real time. A tech shown once is a tech they aim at the second time. That’s the core of the ranked climbing guide too.
The 15-Minute Daily Movement Drill
Custom lobby, before your first ranked match. 15 minutes beats 2 hours of match play.
Minutes 0-5: Slide-cancel the length of every map. Don’t shoot. Goal: smooth rhythm, no accidental full slides.
Minutes 5-10: Jiggle-peek a corner 50 times. Count accidental wide-peeks. Goal: under 5 out of 50.
Minutes 10-15: A-D rhythm with a friend tracking your crosshair. They call “hit” when on target; change direction at each call. Goal: hits drop from every 3 seconds to every 8-10.
If you run Dash, add two minutes at the end: dash sideways, fire, dash back. Pair it with the aim training guide drills for a full warmup.
Counter-Intuitive Movement Truths
The best movement advice sounds wrong until you test it.
Sometimes standing still is the best movement. If they’re jiggle-peeking, your strafing just makes you miss. Plant your feet, hold the angle, and wait.
The fanciest tech is the one that kills you. Wall-bounces and grapple-swings have fixed animations. A simple A-D strafe has no tell, so it’s harder to hit.
Walking is underrated. Sprinting, sliding, and jumping all make noise. Walking silently around a corner wins you the first shot.
Stopping to shoot is not a mistake. RIVALS has first-shot accuracy on most weapons. Move between shots, not during them.
This is counterintuitive: the best dash is the one you don’t take. Every dash spends a cooldown and telegraphs a direction. The threat of the dash — the fact that they know you could dash — is worth more than the dash itself.
When the Enemy Moves Better Than You
Don’t try to out-move them. Limit their options.
Use narrow spaces. Fight in Warehouse corridors and Construction hallways where slides and dashes are restricted. Movement gods in open arenas become ordinary players in 5-stud-wide corridors.
Use audio. Slides, dashes, and wall-bounces have distinct cues. Predict where they’re going from sound, not position. Audio predicts; visual tracks.
Predict, don’t react. If they dash out of the same corner every round, pre-aim where the dash ends. Beat movement players by memorizing patterns, not matching speed.
Movement by Map: What Works Where
Warehouse (CQB): Slide-cancel around corners, wall-bounce off containers. Don’t jiggle-peek — short sightlines mean you’ll eat a shotgun blast.
Rooftops (Vertical): Grapple-swing between buildings, slide-cancel across open rooftops, A-D rhythm on the bridges. Wall-bounce is rarely useful — too few wall surfaces.
Bridge (Long-range): Jiggle-peek the pillars, slide-cancel across the open center, grapple to the under-bridge for flanks. A-D rhythm is weak at long range.
Construction (Mixed): Everything works. Best map for drills — all ranges and surfaces exist.
Downtown (Mid-range): A-D rhythm + jiggle-peek. Alleys are too narrow to slide in. Peek timing beats speed here.
Arena (Open): Slide-cancel the open center, grapple to the central platform, jiggle-peek the pillars. Speed matters most here.
Hangar (Long-range): Jiggle-peek the corners, slide-cancel between plane wreckage. Grapple is limited by the low ceiling.
For power positions and sightlines on every map, the maps and strategies guide has the full breakdown.
The Bottom Line
Unpredictability beats speed. The winners aren’t the fastest slide-cancellers or the flashiest grapple-swings. They never move the same way twice. They dash when you expect a slide, jiggle-peek when you expect a wide peek, and walk silently around the corner you were listening to. Movement mastery is making the enemy’s crosshair chase smoke.
FAQ
What’s the most important movement tech to learn first in RIVALS?
Slide-canceling. Sprint → hold crouch → release mid-slide. The cancel keeps your speed and low hitbox while cutting the slow, vulnerable end of the slide. Practice it for 10 minutes in an empty custom lobby first.
Should I jump while shooting in RIVALS?
No. A jump is a predictable parabola — good players aim at apexes and shoot the landing. Jump to traverse or wall-bounce, never while being shot at. The double-jump can break the arc once, but prefer a slide-cancel or direction change.
How do I practice movement if I don’t have friends online?
Solo custom lobby. Slide-cancel the length of a map. Strafe past an object and judge if your movement looks smooth or jerky. Jiggle-peek a wall with sub-0.2s shoulder flashes. Dash sideways and fire against a wall. Record it and review from the enemy’s view.
Does movement matter on controller, or is it just a keyboard thing?
More, because aim is slower. Predictable movement lets a controller player hold the stick steady and let you walk into shots. Unpredictable A-D rhythm and slide-cancels force constant re-adjustment and raise their miss rate. Full setup in the controller and console guide.
Why do I get headshot more when I slide-cancel?
You’re sliding in a straight line at or away from them. The cancel drops your hitbox but not your horizontal predictability. Slide at an angle so the hitbox reduction forces a direction change they have to track.
Related Guides
- RIVALS Movement & Mechanics Guide — Wall Run, Grapple & More
- RIVALS 1v1 Duel Strategies — Peek Timings & Mind Games
- RIVALS Aim Training — The Drills That Actually Transfer
- RIVALS Game Sense & Positioning Guide
- RIVALS Maps & Strategies — Every Map Breakdown
- RIVALS Ranked ELO Climbing — From Bronze to Platinum
- RIVALS Controller & Console Optimization Guide