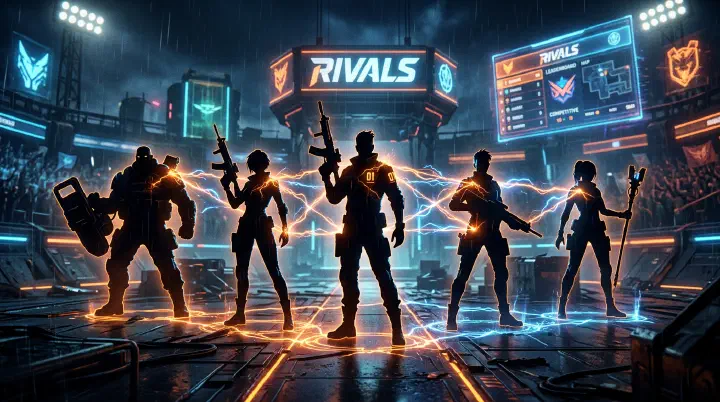
Last updated: May 12, 2026. This guide covers optimal team compositions in RIVALS for every game mode and map, including role synergies, counter-picking strategies, and ranked team coordination tactics.

Understanding Team Roles in RIVALS

RIVALS is a competitive 5v5 team-based shooter where team composition directly determines your chances of winning. A balanced team covers all critical roles: damage dealing, area control, support, and objective play.

The Four Core Roles

RolePrimary FunctionKey WeaponsPlay Style
DuelistFrontline combat, eliminationAssault Rifle, SMG, ShotgunAggressive, close to mid-range
SharpshooterLong-range precision, pick-offsSniper Rifle, DMRPatient, map awareness
ControllerArea denial, zone controlLMG, Grenade Launcher, RocketStrategic, positioning-focused
SupportTeam sustain, utilityMedical weapons, utility itemsTeam-oriented, positioning

Role Distribution for a 5-Player Team

The standard meta team composition follows one of these distributions:

CompositionDuelistsSharpshootersControllersSupportsBest For
Balanced (Meta)2111Most maps, ranked play
Aggressive3101Close-quarters maps
Defensive1211Long-range maps
Control1121Objective-based modes
Rush3011Fast-paced, time-limited rounds

Best Team Lineups by Map

Map 1: The Corridors (Close-Quarters)

The Corridors features tight hallways, multiple chokepoints, and limited sightlines. Short-range weapons dominate.

Recommended Composition:

PositionRoleWeapon ChoiceStrategy
Player 1DuelistSMGLead the push, clear corners
Player 2DuelistShotgunClose-range backup, room clearing
Player 3SharpshooterDMRCover long sightlines at map center
Player 4ControllerGrenade LauncherArea denial at chokepoints
Player 5SupportMedical Kit + UtilityHeal, provide cover fire

Map-specific tips:

  • Push as a unit – The Corridors punishes isolated players.
  • Use grenade launchers to clear rooms before entering.
  • The DMR player should hold the elevated central platform for overwatch.
  • Shotgun users excel in the side corridors where engagements happen at point-blank range.

Map 2: Open Range (Long-Range)

Open Range features wide open spaces, hills, and long sightlines. Precision weapons are essential.

Recommended Composition:

PositionRoleWeapon ChoiceStrategy
Player 1DuelistAssault RifleMid-range flex, adapt to pushes
Player 2SharpshooterSniper RiflePrimary long-range eliminations
Player 3SharpshooterDMRSecondary long-range, faster reload
Player 4ControllerLMGSuppressive fire, area denial
Player 5SupportMedical Kit + UtilitySustain the team during extended fights

Map-specific tips:

  • Two sharpshooters are critical on this map. They should set up on the highest ground available.
  • The LMG player provides suppressive fire to prevent enemy advancement.
  • Avoid close-quarters pushes unless you have a clear advantage.
  • Use the terrain for cover – there are multiple ridgelines that provide natural cover.

Map 3: Urban Zone (Mixed)

Urban Zone features a mix of open streets, buildings, and rooftops. Versatility is key.

Recommended Composition:

PositionRoleWeapon ChoiceStrategy
Player 1DuelistAssault RifleVersatile frontline, room-to-room
Player 2DuelistSMGFast flanking, building clearing
Player 3SharpshooterSniper RifleRooftop overwatch
Player 4ControllerRocket LauncherBreaching, area denial
Player 5SupportMedical Kit + UtilityRoaming healer, adapt to needs

Map-specific tips:

  • The sniper should take the tallest building for maximum sightlines.
  • SMG users should flank through buildings and side streets.
  • Rocket launcher is useful for breaching enemy positions in buildings.
  • Communication is critical – Urban Zone has the most complex layout of any map.

Map 4: Industrial Complex (Objective-Focused)

Industrial Complex is a capture-the-point style map with multiple objectives and industrial structures.

Recommended Composition:

PositionRoleWeapon ChoiceStrategy
Player 1ControllerLMGHold the objective area
Player 2ControllerGrenade LauncherZone denial around the point
Player 3DuelistAssault RifleAggressive push when needed
Player 4SharpshooterDMRMid-range cover, objective sightlines
Player 5SupportMedical Kit + UtilityPosition near objective for rapid healing

Map-specific tips:

  • Two controllers create an impenetrable zone around the objective.
  • The LMG should hold the closest building to the point.
  • Grenade launcher prevents enemy approach paths.
  • DMR player should rotate between the two elevated positions for best coverage.

Role Synergy Combinations

Certain role combinations create powerful synergies that amplify team effectiveness:

The “Push and Cover” Synergy

ElementRoleAction
PusherDuelist (SMG/Shotgun)Aggressively pushes enemy positions
CoverSharpshooter (Sniper/DMR)Provides overwatch, picks off enemies targeting the pusher

How it works: The pusher advances aggressively while the sharpshooter eliminates any enemy that attempts to stop them. The pusher creates pressure, and the sharpshooter capitalizes on distracted enemies.

Best maps: The Corridors, Urban Zone

Risk level: Medium – if the sharpshooter loses track of the pusher, they become vulnerable.

The “Zone Control” Synergy

ElementRoleAction
Zone SetterController (LMG)Establishes a kill zone with suppressive fire
FlankerDuelist (SMG)Flanks around the zone to catch enemies in crossfire

How it works: The controller pins enemies in place with LMG fire while the flanker moves around to their side or rear. Enemies must either push through fire or retreat to an unfavorable position.

Best maps: Industrial Complex, Open Range

Risk level: Low – the controller provides a safety net if the flank fails.

The “Anchor and Sweep” Synergy

ElementRoleAction
AnchorSupportStays at the rear, heals and provides utility
SweeperSharpshooter + Duelist comboOne picks off enemies, the other cleans up

How it works: The support anchors the team’s position, providing a safe zone for retreating teammates. The sharpshooter and duelist work together to sweep through enemy territory.

Best maps: All maps (universal composition)

Risk level: Low – the anchor provides insurance against wipes.

Counter-Picking Strategies

Counter-picking is the art of choosing your loadout and position to directly counter the enemy team’s composition.

Countering Enemy Compositions

Enemy CompWeaknessYour Counter
3 Duelists, 2 SupportsWeak long-range, easily pinned down2 Sharpshooters, 1 Controller, 1 Duelist, 1 Support
2 Sharpshooters, 1 Controller, 1 Duelist, 1 SupportSlow to react to close-range pushes3 Duelists (SMG/Shotgun), 1 Controller, 1 Support
2 Controllers, 1 Duelist, 1 Sharpshooter, 1 SupportLow mobility, vulnerable to flanking2 Duelists (SMG), 1 Sharpshooter, 1 Controller, 1 Support (flank-focused)
4 Duelists, 1 SupportNo area denial, predictable pushes1 Controller (LMG), 2 Sharpshooters, 1 Duelist, 1 Support

Loadout Counters

Enemy WeaponWeak AgainstYour Counter Weapon
Sniper RifleClose-range, flankingSMG, Shotgun
ShotgunMid to long-range, area denialAssault Rifle, LMG
SMGLong-range precision, trapsSniper Rifle, DMR
LMGFlanking, grenadesGrenade Launcher, Rocket
Assault RifleSpecialized countersDepends on range – adapt accordingly
Rocket LauncherSpeed, mobilitySMG, Assault Rifle (keep distance and pressure)

Positioning Counters

Enemy PositionCounterNotes
High ground sniperFlank from side, use smoke to approachNever approach from directly below
Camping controller in chokepointFlank through alternative routesUse grenades to flush them out
Roaming duelistSet up crossfire trapsTwo players covering different angles
Anchored supportPriority targetEliminating the support weakens the entire team

Ranked Team Coordination Tips

Communication Protocol

Effective communication is the single most important factor in ranked team play. Establish these conventions:

CommunicationExamplePurpose
Call out enemy positions“Sniper on roof, north building”Team awareness
Call out intentions“Pushing left, cover me”Coordinated action
Call out health status“Low HP, need heal”Support prioritization
Call out reloads“Reloading, 5 seconds”Team cover during vulnerability
Call out kills“Duelist down, 4v5”Morale and strategy adjustment

Ranked Strategy Timeline

PhaseActionPriority
Pre-round (0-15s)Discuss composition, assign positionsHigh
Opening (15-30s)Scout enemy positions, establish overwatchHigh
Mid-round (30-60s)Execute primary strategy, adapt to enemy compMedium
Closing (60s+)Push objective, eliminate remaining enemiesCritical

Team Roles in Ranked Play

RoleResponsibilities
IGL (In-Game Leader)Calls the strategy, makes adaptation decisions. Usually the most experienced player.
Entry FraggerFirst to push, creates openings for the team. Must be confident and aggressive.
Support/AnchorKeeps the team alive, provides utility. Must have strong map awareness.
Flex PlayerAdapts role based on team needs. Versatile loadout knowledge required.
Clutch PlayerPerforms in 1vX situations. Calm under pressure, strong mechanical skills.

Team Composition for Specific Game Modes

Team Deathmatch

PriorityRecommended Comp
#13 Duelists, 1 Sharpshooter, 1 Support
#22 Duelists, 2 Sharpshooters, 1 Support

TDM rewards aggressive play. Three duelists create constant pressure, while the sharpshooter picks off overextended enemies.

Domination

PriorityRecommended Comp
#11 Duelist, 2 Controllers, 1 Sharpshooter, 1 Support
#22 Duelists, 1 Controller, 1 Sharpshooter, 1 Support

Domination is about zone control. Controllers are essential for holding capture points.

Search and Destroy

PriorityRecommended Comp
#12 Duelists, 2 Sharpshooters, 1 Support
#21 Duelist, 2 Sharpshooters, 1 Controller, 1 Support

S&D requires precision. Sharpshooters can defend bomb sites from long range, while duelists execute pushes.

Cross-References