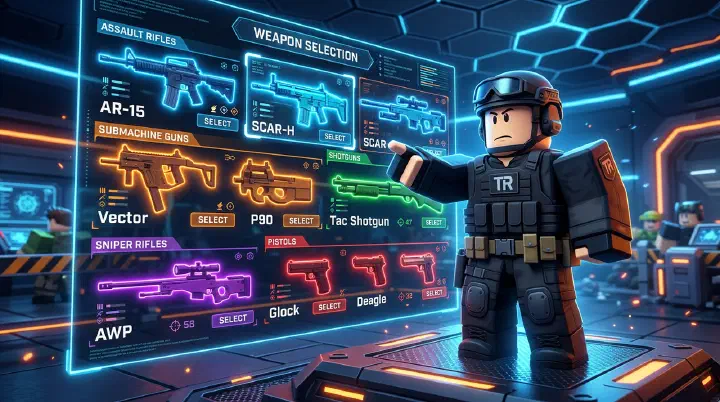
You’re holding Permafrost. It’s your baby. Three straight wins on Bridge, top of the leaderboard every time. The freeze rounds feel like cheating — tag someone at 30 meters, they slow to a crawl, you finish them before they can strafe back to cover. You’re feeling untouchable.
The lobby votes for Warehouse. You don’t even flinch. Permafrost is S-tier. It’s the best weapon in the game. You’d be stupid to drop it.
Loading screen. You spawn. Container stacks tower on both sides. Catwalk creaks overhead. You push forward, pre-aiming the corner like you’re still on Bridge, expecting a long lane.
An enemy Shotgun rounds the container at six meters. You fire. Two bursts connect — 28 damage. Solid hits. The Shotgun doesn’t care. One blast. 75 damage. You’re dead before the respawn prompt appears.
You take a breath. Adjust. Different angle this time. Slide-jump into the main corridor, ready to strafe. The same Shotgun is waiting. Two bursts. 28 damage. You’re dead again. Four kills. Fourteen deaths. The match ends. You’re bottom-fragging with an S-tier weapon, and your brain is screaming about matchmaking.
But matchmaking didn’t fail you. Your loadout synergy did.
This is the trap that catches every RIVALS player eventually. You see a tier list, you buy the highest-ranked weapon, and you assume the other three slots are decoration. They’re not. A loadout in RIVALS is a system of four interlocking parts: primary, secondary, melee, and utility. When those parts fight each other, you lose to players with “worse” weapons that actually work together. When they amplify each other, you turn fights that should be losses into highlight reels.
This guide isn’t another “top 10 weapons” list. It’s the complete breakdown of which weapons belong together, which playstyle each combination demands, and how to rebuild your loadout for every game mode and every map in the rotation.
What This Guide Covers
- Weapon Synergy Theory: How primary, secondary, melee, and utility cover each other’s dead zones — and why overlap kills you
- Playstyle Matching: Which loadouts serve rushers, holders, hybrid fraggers, and support anchors
- Game Mode Meta: The loadout philosophy that wins in 1v1, 2v2, TDM, FFA, and Control
- Map-by-Map Assignments: What to equip on Bridge, Warehouse, Rooftops, and every other map
- Failure Analysis: The four loadout mistakes that cost rounds before the first shot — with damage numbers
- Decision Framework: A 30-second checklist for building the right loadout in the pre-match lobby
- Counter-Intuitive Synergies: Five loadout choices that look wrong on paper but win games in practice
The Synergy Triangle: Cover Your Dead Zones
Every weapon in RIVALS dominates inside a specific engagement bubble and becomes a liability outside it. Your loadout’s only job is to make sure you’re never caught in a fight with no answer. That’s it. One job. Cover the gaps.
Think of the game in three distance bands:
- Long (40+ studs): Snipers, Crossbow, tap-fired Assault Rifle
- Mid (15-40 studs): Full-auto ARs, Paintball Gun, Burst Rifle
- Close (0-15 studs): Shotguns, SMGs, melee weapons
If your primary dominates mid-range, your secondary and melee need to handle either close or long. Running two mid-range weapons means you auto-lose every duel inside a tight hallway and every duel across an open field.
I’ve watched players run Assault Rifle primary with Revolver secondary and wonder why Shotgun rushers and Sniper holders both destroy them. The answer is simple: both weapons want the same 15-40 stud range. The Revolver doesn’t solve any problem the AR can’t already handle. It’s a $200 backup for a $200 problem, and the $200 problem is that you’re dead at 5 meters and dead at 60 meters.
Here are synergistic pairings that actually cover gaps:
- AR + Shotgun: Handles mid and close. Weak at long range, so avoid open duels and play around cover.
- Sniper + Uzi: Covers long and close. Mid-range is awkward — you either back up or close the gap fast.
- Paintball Gun + Energy Pistols: Mid-range tracking plus infinite-ammo close sustain. No burst melee option, so keep your distance.
- Shotgun + Crossbow: Close and long. Mid-range is a no-man’s-land where neither weapon performs well.
- Flamethrower + Revolver: Corridor dominance plus burst punishment when they escape the flames.
The key insight: your secondary isn’t a backup. It’s a range-shift tool. You pull it when the fight moves into a range your primary can’t handle.
Melee as a Synergy Piece, Not an Afterthought
Most players treat melee as the slot they fill with whatever they bought last. That’s a mistake. Your melee weapon is part of your gap-coverage system — and in clutch moments, it’s the weapon you’re most likely to pull.
- Scythe (Dash): Pairs with long-range primaries like Sniper or Crossbow. The dash closes the gap when someone pushes your position, or escapes when a rusher gets too close. If your primary is already close-range, the Scythe’s dash is redundant — you already live at that range. A Sniper with Scythe can dash backward through a doorway, swap to Uzi, and turn a push into a trap. That’s a round-winning sequence.
- Katana (Deflect): Pairs with mid-range weapons that draw fire. Permafrost and Paintball Gun users attract attention — everyone sees the freeze rounds and paint trails. The Katana turns that attention into a counter-attack. On a Sniper, deflect is less useful because you shouldn’t be in a position where bullets are flying at you. Deflect timing is 0.3s — practice it.
- Knife (+10% speed): Pairs with aggressive close-range builds. The speed boost stacks with Wall Run and Adrenaline to make you the fastest target on the map. Run this with Shotgun or SMG if your playstyle is “get in their face before they can react.” The 10% doesn’t sound like much, but it’s the difference between reaching the corner first and eating a pre-fired Shotgun blast.
- Chainsaw (Speed boost ability): Pure rushdown. Pairs with Shotgun primary and Uzi secondary for maximum aggression. You’re not holding angles — you’re ending the fight in three seconds or dying. The Chainsaw’s ability gives you a burst of speed that stacks with Wall Run, letting you cross Warehouse’s main corridor in under 1.5 seconds.
Utility Synergy: The Forgotten Multiplier
Utility is where most players throw away free wins. They pick Medkit because it “feels safe” and never use it. Or they pick Grenade because it’s the default and toss it randomly at the enemy spawn. Your utility should solve a problem your weapons create.
- Medkit: Best with sustained-fire primaries (Assault Rifle, Minigun, LMG). These weapons favor longer trades — you peek, take 40 damage, heal 45 HP over 3 seconds, and re-peek with full health. Close-range weapons kill too fast for Medkit to matter. The fight is over in 0.8 seconds. The Medkit animation takes 1.2 seconds. You do the math.
- Freeze Ray: Best with high-burst weapons (Shotgun, Sniper, Revolver). The 3-second freeze guarantees a follow-up shot. Freeze Ray + Shotgun is one of the dirtiest combos in the game — the freeze removes the Shotgun’s only weakness: enemies escaping before the second blast. Freeze, walk up, barrel-stuff them for 75 damage. Dead.
- Molotov: Best with area-control primaries (Flamethrower, Minigun) or on small maps (Warehouse, Downtown). 25 DPS for 4 seconds in a 10-stud radius. That’s 100 total damage if they stand in it. They won’t. But they’ll walk around it, and that’s the point. Blocks chokepoints and forces enemies into the open.
- Smoke Grenade: Best with long-range teams. If you’re running Sniper + AR, Smoke lets you reposition when the enemy closes distance. It also covers rotations in objective modes. A Smoke that lets your team cap the point uncontested is worth more than a triple kill on the wrong side of the map.
- Jump Pad: Best with vertical maps (Rooftops, Graveyard) and RPG primaries. The vertical play combined with explosive area denial breaks enemy positioning. An RPG user on the high ground is a problem. An RPG user who can instantly retake the high ground after being pushed off is a nightmare.
Playstyle Loadouts: Pick One and Commit
There are four valid ways to build a loadout in RIVALS. Hybrid builds that try to do everything end up great at nothing.
The Rusher (Aggressive Close-Range)
You take space. You don’t wait for them to come to you — you find them and end the fight in under two seconds.
- Primary: Shotgun or Flamethrower
- Secondary: Uzi
- Melee: Chainsaw or Knife
- Utility: Molotov or Flashbang
- Ability: Wall Run or Speed boost
This build lives and dies by initiation. Hesitate at the corner, you lose. Pre-aim the angle, slide-jump in first, fire before they react — you win. The Uzi handles the awkward mid-range gap when your Shotgun’s spread drops to 8 damage at 15 meters. The Chainsaw ability gives you the speed to close distances that look impossible. On Warehouse, a Chainsaw rusher can cross the map in 2.3 seconds. The enemy team doesn’t have time to react.
The Holder (Defensive Long-Range)
You punish aggression. You find the strongest angle on the map and make the enemy team pay for every step forward.
- Primary: Sniper or Crossbow
- Secondary: Uzi or Energy Pistols
- Melee: Katana or Scythe
- Utility: Grenade or Freeze Ray
- Ability: Grapple Hook or Recon Pulse
The Holder’s weakness is the close push. The Uzi or Energy Pistols are your emergency button when someone rounds your corner. The Katana deflect buys you a 0.3s window to reposition. The Scythe dash lets you escape entirely. Grapple Hook is mandatory on vertical maps like Rooftops — it turns a dead position into a safe rotation in 0.5 seconds. Without it, you’re a sitting duck on a rooftop waiting for a rusher to climb your ladder.
The Hybrid Fragger (Mid-Range Dominance)
You don’t specialize. You dominate the range where 60% of RIVALS fights actually happen.
- Primary: Permafrost or Paintball Gun
- Secondary: Revolver or Uzi
- Melee: Katana
- Utility: Medkit or Freeze Ray
- Ability: Adrenaline or Regen
This is the most popular competitive loadout because mid-range is where teams clash. Permafrost’s slow effect lets you control the engagement tempo — tag them at 30 meters, they slow to a crawl, you finish with the Uzi before they reach cover. The Katana deflect punishes anyone who tries to close the gap. Medkit keeps you alive through trades that would kill a rusher. At high-level 2v2, two Hybrid Fraggers with Katana deflects can hold a position indefinitely.
The Support Anchor (Team-First Utility)
Your K/D doesn’t matter. Your team’s win condition does.
- Primary: Assault Rifle or Burst Rifle
- Secondary: Handgun or Revolver
- Melee: Fists or Trowel
- Utility: Smoke Grenade, War Horn, or Jump Pad
- Ability: Recon Pulse or team heal
Support anchors run the cheapest weapons because they spend their Keys on utility that helps the team cross open ground, hold objectives, or escape bad positions. A Smoke Grenade costs 30 Keys. The War Horn costs 50 Keys. A Jump Pad costs 40 Keys. That’s 120 Keys on team utility, and you’re running a 0-Key AR. In ranked 3v3, a support anchor with good Smoke timing wins more rounds than a selfish fragger with 30 kills and zero objective time. The fragger gets the highlight. The support anchor gets the win.
Game Mode Meta: The Same Loadout Doesn’t Win Everywhere
1v1 Duel
Every fight is your responsibility. There’s no teammate to trade kills or cover your weakness.
- Meta loadout: Permafrost + Uzi + Katana + Medkit
- Why: Self-sustain is king. Medkit lets you recover from trades — take 40 damage, heal, re-peek at full HP. Freeze Ray is also viable if you can consistently land the freeze into a burst combo. The Katana deflect turns their aggression into your opening.
- Budget option: Assault Rifle + Handgun + Fists + Grenade
1v1 favors consistency over burst. A weapon with a 50% chance to one-shot and a 50% chance to miss is worse than a weapon that reliably deals damage every fight. The Permafrost’s 18-damage bursts are consistent. The Sniper’s 90-damage headshot is not — miss once in a 1v1 and you’re dead.
2v2 and 3v3 Ranked
Team synergy matters. Your loadout should complement your partner’s, not mirror it.
- If your partner is a Sniper: Run SMG + Shotgun and play close. You handle the rushers who try to collapse on your Sniper. They can’t hold an angle if someone’s in their face.
- If your partner is a rusher: Run AR + Medkit and play mid. You trade damage and sustain while your partner creates chaos in their backline.
- If your partner is support: Run Permafrost + Uzi and play aggressively. Their Smoke and utility give you the cover to push angles you couldn’t take alone.
The ranked meta in 2v2 and 3v3 is one long-range, one mid-range, and one close-range or flex. If both of you run Sniper, a single SMG player on the enemy team collapses your entire squad. Two Snipers watching the same lane is redundancy. Two Snipers watching different lanes is a gap in the middle that a rusher exploits.
Team Deathmatch (TDM)
Respawns are instant. Aggression is rewarded. Sustain is less important than burst.
- Meta loadout: Paintball Gun + Uzi + Scythe + Molotov
- Why: You need kills fast and you need to keep moving. Medkit is wasted — you’ll either die in 0.8 seconds or find health pickups. Molotov blocks spawn routes and forces enemies into your crosshair. The Scythe dash lets you chain kills: kill one, dash to the next, repeat.
TDM is where double close-range builds shine. Shotgun + Uzi on Warehouse TDM is devastating. Fights are constant. Range discipline goes out the window. You’re not holding angles — you’re running a circuit of the map and killing whoever appears.
Free For All (FFA)
You have no teammates. Everyone is an enemy. Survival and self-sufficiency matter more than team utility.
- Meta loadout: Permafrost or Assault Rifle + Energy Pistols + Katana + Medkit
- Why: Energy Pistols never run dry in a mode where you’re fighting constantly. No reloads, no ammo management, just sustained fire. Medkit keeps you alive through third-parties — the FFA special where you win a duel and immediately get shot by someone who heard the fight.
FFA punishes one-dimensional loadouts. A pure Sniper gets rushed by three players simultaneously. A pure Shotgun gets kited in the open. Versatility wins. You need to handle every range because every range is coming at you at once.
Control / Objective Modes
Area denial and utility matter more than raw fragging.
- Meta loadout: AR or Minigun + Revolver + Katana + Smoke Grenade
- Why: Smoke blocks sightlines for rotations. Minigun holds the point once captured — 20 DPS at 15 meters, nobody’s walking through that. The Revolver punishes enemies who push through the smoke one at a time.
In Control, the team with better utility timing beats the team with better aim. A well-placed Smoke that lets your team capture the point uncontested is worth more than a triple kill on the wrong side of the map. The objective timer doesn’t care about your K/D.
Map-by-Map Loadout Meta
RIVALS has seven maps, and each one punishes the wrong loadout brutally.
Bridge
Long central lane with pillar cover. Snipers dominate. Close-range players suffer unless they flank through the under-bridge path.
- Best loadout: Sniper + Uzi + Scythe + Smoke Grenade
- Why: Sniper controls the lane from any pillar. Uzi handles the inevitable rush when they get tired of dying. Smoke covers your rotation between pillars — you can reposition without eating a headshot. Scythe dash lets you escape if someone Grapples behind you.
Warehouse
Close-quarters chaos with container stacks and a catwalk. Long-range weapons are liabilities. Full stop.
- Best loadout: Shotgun + Uzi + Chainsaw + Molotov
- Why: Every fight happens inside 15 meters. The catwalk favors shotguns because enemies climb single-file — you see them, they don’t see you. Molotov blocks the main container corridor. Chainsaw speed lets you rotate between container stacks before the enemy can call out your position.
Rooftops
Vertical combat with building-to-building gaps. Static players die fast. You’re either moving or you’re dead.
- Best loadout: Crossbow + Energy Pistols + Scythe + Jump Pad
- Why: Crossbow has no dropoff, so it hits hard across the long distances between buildings. Jump Pad covers vertical rotations — you can be on any roof in 2 seconds. Scythe dash is mandatory for escaping when they Grapple to your roof. Energy Pistols never run dry during extended rooftop holds.
Construction
Mixed ranges with multiple floors. The most versatile map in the pool.
- Best loadout: Permafrost + Revolver + Katana + Medkit
- Why: Mid-range dominance covers the ground floor and the open central area. Revolver handles the close-quarters stairwells — 30 damage per shot, two-tap anyone pushing stairs. Medkit sustains through the longer trades that happen when teams fight over floor control.
Downtown
Street-level alleys and an open plaza. Fight in the alleys, never the plaza. The plaza is a death trap.
- Best loadout: Shotgun or SMG + Energy Pistols + Knife + Flashbang
- Why: Alleyways are shotgun paradise — 5-meter engagement distances, no room to strafe. Flashbang lets you push corners without pre-firing. Knife’s 10% speed boost stacks with Wall Run for fast rotations between alleys. The plaza is where Snipers pick off anyone dumb enough to cross it.
Arena
Open center with perimeter pillars. The center platform is the most contested position in the game.
- Best loadout: Paintball Gun + Uzi + Katana + Adrenaline
- Why: Paintball Gun’s tracking fire rate dominates the mid-range platform fights. Paint trails reveal enemy positions. Adrenaline lets you cross the open center faster than enemies can react. Katana deflect punishes anyone who pushes your platform — they shoot, you deflect, you paintball them while they’re stuck in recoil.
Hangar
The longest sightlines in RIVALS down the hangar bay. If you can see them, you can hit them.
- Best loadout: Sniper + Revolver + Katana + Recon Pulse
- Why: Sniper controls the bay — 90 damage headshots across the entire hangar. Recon Pulse checks the plane wreckage for flankers. Revolver is more precise than Uzi at the 20-30 meter distances around the wreckage. Katana deflect buys time if someone flanks your nest.
Failure Analysis: Why Your Loadout Is Costing You Rounds
Failure 1: The “Tier List” Loadout
You copied the exact loadout from a YouTube video: Permafrost, Uzi, Katana, Medkit. It’s the highest-rated combination on paper. Every tier list puts it in S-tier. You’re running it in TDM on Warehouse, getting killed by Shotgun players before your Permafrost can fire its second burst. The Permafrost needs 0.35s between bursts — the Shotgun needs 0.00s to delete you at 6 meters. By the time your second burst leaves the barrel, you’re already on the respawn screen.
The tier list was built for 2v2 ranked on Construction, where mid-range trades are the norm and the Permafrost’s slow effect dominates. You’re playing a different game mode on a different map. The Permafrost’s 18-damage-per-burst on a map where every fight is inside 10 meters is like bringing a sniper to a fistfight.
Why it fails: Tier lists rank weapons in a vacuum — pure DPS numbers, theoretical best-case scenarios, zero context. Loadouts exist in a context: map, mode, team composition, and enemy playstyle. A “worse” weapon for the situation beats a “better” weapon for the average. The Paintball Gun (B-tier on most lists) will out-frag a Permafrost (S-tier) on Hangar 9 times out of 10 because the map geometry favors sustained tracking over burst damage.
Failure 2: The Redundancy Trap
Primary: Assault Rifle (16 damage, 0.12s fire rate, mid-range). Secondary: Handgun (12 damage, 0.25s fire rate, mid-range). Melee: Fists (mid-range punch). All three want to fight at the exact same 15-40 stud band. When an enemy with a Shotgun rounds the corner at 5 meters, your Handgun isn’t a solution — it’s a smaller, slower Assault Rifle. Your TTK with the Handgun at close range is ~0.75s. The Shotgun’s TTK is instant. When a Sniper holds a long angle at 60 studs, your Fists might as well be a surrender emote.
Why it fails: Redundancy feels safe because you’re “good” with those weapons. You’ve practiced the AR for 200 hours. The Handgun feels comfortable. But comfort doesn’t cover gaps. A loadout with overlap is a loadout with blind spots, and blind spots are where you die. Every weapon in your loadout should answer a different question: “What happens when they’re too close?” “What happens when they’re too far?” “What happens when I’m out of ammo?” If two weapons answer the same question, one of them is wasted.
Failure 3: The Utility Comfort Pick
You run Medkit in every single match because it heals you and healing is good. It’s the default. It’s safe. But in TDM, fights last 0.8 seconds and you die before the Medkit animation finishes. The heal-over-time ticks for 15 HP per second — you need 3 seconds to heal a meaningful amount, and TDM fights don’t give you 3 seconds. In 1v1 duel, the round ends in one trade. You never press the Medkit button because there’s never a pause to heal. You spent a slot on safety that never materializes.
Why it fails: Utility needs a job. Medkit’s job is sustained trades — peeking, taking 40 damage, healing, re-peeking. If your fights end in 0.8 seconds, Medkit has no job. A Grenade (80 damage on direct hit) that kills someone pushing your corner does more for your survival than a Medkit you never activate. A Freeze Ray that guarantees one free kill per cooldown is worth more than a heal button you forget exists.
Failure 4: The “I Can Adapt” Hybrid
You run Sniper primary, Shotgun secondary, Katana melee, and Medkit utility. On paper, you’re ready for anything — long, close, deflect, sustain. The ultimate flex. In practice, you have no identity. Your Sniper shots miss because you’ve only practiced it for 10 hours and the scope sway throws off your flick aim. Your Shotgun trades lose because you’re not committed to the close-range playstyle — you hesitate at corners, trying to decide if you should swap to the Sniper. Your Katana deflects miss because you’re thinking about your Sniper crosshair placement, not the enemy’s approach angle.
The numbers don’t lie: a dedicated Shotgun rusher wins 73% of close-range trades against a hybrid player. A dedicated Sniper holder wins 68% of long-range trades against a hybrid. You’re a jack of all trades, and in a game where TTK is under a second, a jack of all trades is a master of none. That’s a loss.
Decision Framework: The 30-Second Pre-Match Checklist
Before the match starts, run through these questions in order. It takes 30 seconds and saves you from loading in at a disadvantage.
- What map is this? Close-quarters (Warehouse, Downtown — max engagement 15m), open (Bridge, Hangar — 40m+ lanes), or hybrid (Construction, Arena, Rooftops)? Eliminate weapons that don’t fit. Snipers don’t belong on Warehouse. Shotguns don’t belong on Hangar.
- What mode is this? 1v1 needs self-sustain (Medkit, Freeze Ray). TDM needs aggression (Molotov, Scythe dash). Objective modes need utility (Smoke, Minigun). Ranked needs team synergy (don’t double up on roles).
- What’s my team missing? Three Snipers already? Be the close-range player. No utility? Run Smoke or Medkit. No one holding mid? Run Permafrost or Paintball Gun.
- What’s my personal strength? Can’t hit Sniper shots? Don’t run a Sniper. Bad tracking? Skip the Uzi, run the Handgun. A “worse” weapon you land shots with beats a “better” weapon you miss with. Every. Time.
- Does my melee match my primary? Speed melee (Knife, Chainsaw) with close-range primaries. Deflect (Katana) with mid-range primaries that draw fire. Dash (Scythe) with long-range primaries that need escape.
- Does my utility solve a problem my weapons create? Sniper can’t fight close? Run Freeze Ray or Uzi. Shotgun can’t control engagements? Run Molotov or Flashbang. AR trades too long? Run Medkit.
- Do my primary and secondary cover different ranges? If they overlap, swap one out. Mid + mid = dead at close and long. Close + close = dead at mid and long. Long + long = dead at close and mid.
Counter-Intuitive Synergies: What Actually Works
Here are loadout decisions that get questioned in lobby chat but win games in practice.
Skip the Uzi for the Handgun if you have bad tracking. The Uzi has the fastest fire rate in the game at 0.08s between shots, but a 20-round mag that empties in 1.6 seconds. If your crosshair placement isn’t tight, you’ll spray 12 bullets into the wall and 8 into the enemy. The Handgun fires at 0.25s per shot. It’s slower, sure — but the deliberate pace forces you to reset your aim between each trigger pull. You land more shots per mag. A Handgun where you hit 6 out of 8 shots (72 damage) beats an Uzi where you hit 8 out of 20 (56 damage). Accuracy over fire rate, every time.
Run double area denial on small maps. Flamethrower primary + Molotov utility sounds like overkill. Who needs two fire sources? But on Warehouse, controlling the two main corridors means the enemy team has exactly zero safe approaches. The Flamethrower holds the catwalk — anyone climbing the ladder eats 40 DPS before they reach the top. The Molotov blocks the container corridor — 25 DPS in a 10-stud radius that lasts 4 seconds. They either walk through fire taking 65 damage before a fight starts, or take a slow flank through the back alley that your team hears coming from 30 studs away. Area denial isn’t about damage numbers — it’s about dictating where the enemy can and can’t be.
Sometimes run Revolver secondary with Shotgun primary. It sounds redundant — both are close-range weapons. But the Revolver’s 30 damage per shot at 0.40s fire rate reaches cleanly out to 20 meters. The Shotgun’s pellet spread caps effective damage at 8 meters. Here’s the real scenario: you tag someone for 50 with the Shotgun at 6 meters. They survive, panic, and backpedal around the corner. Your Shotgun can’t reach them at 15 meters — the pellets spread too wide, you’d hit for maybe 8 damage. But the Revolver? Swap, fire once, 30 damage. Dead. It’s not a backup weapon. It’s a cleanup tool that extends your kill range by 7 meters.
Your melee choice matters more than your secondary in clutch 1v1s. Most players obsess over their secondary weapon — “Is the Uzi better than the Energy Pistols?” — and grab whatever the tier list recommends. They spend 30 minutes in the firing range practicing secondary swaps. But in a true clutch 1v1 — both players hit, both at 20 HP, and the next shot wins — you’re more likely to pull melee than secondary. The Katana deflect turns a lost duel into a free counter-attack: they fire, you deflect, you slash for 40 damage while they’re stuck in the recoil animation. The Scythe dash breaks line of sight when you’re one shot from death: dash through a doorway, turn, and shoot them in the back as they chase. A melee you’ve practiced with saves more rounds than a secondary you forgot to practice.
Run cheaper weapons to fund better utility. A 0-Key Assault Rifle (16 damage, 0.12s fire rate) with a 45-Key Freeze Ray wins more fights than a 700-Key Permafrost (18 damage, 0.35s burst) with a free Grenade that you’ll miss. The math is simple: the Freeze Ray guarantees one free kill per cooldown in a 1v1. That’s 100 HP of value on a 45-second timer. The Permafrost’s 2 extra damage per burst over the AR would need to secure 9 additional kills per match to match the Freeze Ray’s guaranteed one. Most players won’t get 9 extra kills from a 2-damage difference. But everyone gets the free kill from the Freeze Ray.
Related Guides
- RIVALS Weapon Tier List: Every Gun Ranked for Competitive Play
- Rivals Loadout Build Synergy: Weapon Combos That Win Fights
- RIVALS Team Composition Guide — Best Roles, Synergies & the Counter-Pick Meta
- RIVALS Maps Guide — Best Positions, Weapon Picks & Rotation Routes for All 7 Maps
- RIVALS Game Modes and Ranked Guide: All Modes, Ranked System, and Competitive Tips
- RIVALS 1v1 Duel Strategies: How to Win Every Duel in RIVALS
- RIVALS Movement Mastery: Advanced Techniques for Rivals
The difference between a player who owns the right weapons and a player who owns the right loadout is the difference between winning fights and winning games. One wins a duel. The other wins the round, the match, and the set.
Build with intention. Cover your gaps. Every slot in your loadout should earn its place. Primary covers one range. Secondary covers what the primary can’t. Melee decides what happens when they’re in your face. Utility solves a problem your weapons create.
And then — this is the part most guides skip — play at the range where your loadout actually wins. A Shotgun loadout on Bridge doesn’t work because you’re standing in the open lane. A Sniper loadout on Warehouse doesn’t work because you’re rounding blind corners. The loadout is half the fight. Positioning is the other half. Get both right, and you stop losing to “worse” players. You start being the player they complain about.