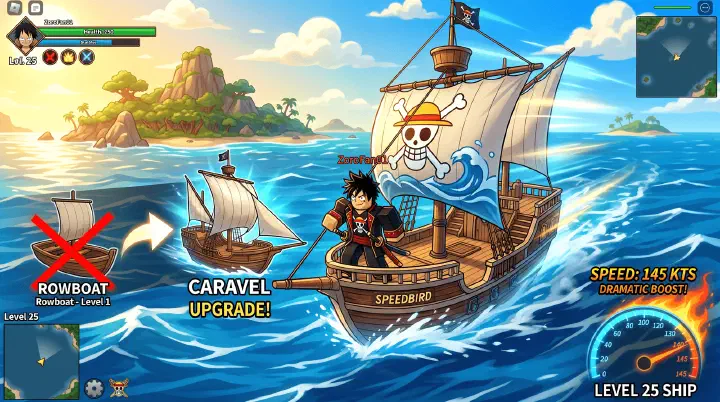
You are level 45. You finally scraped together 50,000 Beli. You buy the Caravel, spawn it at the dock, climb aboard, and point it toward Jungle Island. Three minutes later you step onto the shore. For the first time in Sailor Piece, the ocean felt like a road instead of a prison.
Then you open the ship upgrade menu.
Speed upgrades. Hull durability. Cannon damage. Crew capacity. Material costs with names you cannot pronounce. An upgrade tree that branches in three directions with no explanation of what actually matters. You have 2,000 Beli left and no idea what to click first.
This guide exists because the upgrade menu does not explain itself. It tells you what each upgrade costs. It does not tell you what each upgrade actually does for your gameplay. By the time you finish reading, you will know which upgrades pay for themselves, which ones are resource traps, and exactly how to get your ship from “it floats” to “it survives the Cursed Energy barrier on the way to Shinjuku Island.”
If you are still deciding which ship to buy, start with the Sailor Piece Ship Progression Guide — it covers the full ship tree from Rowboat to Dragon Ship. If you need island-by-island navigation routes, the Ships & Navigation Guide has every route mapped. This guide is about what happens after you own the ship: the upgrade system, the material economy, and the decisions that separate a ship that gets you there from one that sinks halfway.
The Ship Upgrade System: What You Are Actually Buying
The ship upgrade menu in Sailor Piece presents several upgrade categories. Each ship has its own upgrade ceiling — a Rowboat can only be upgraded so far, while a Dragon Ship has significantly more headroom. Understanding what each category does in practice, not in tooltip text, is the difference between an efficient build and a Beli sink.
Speed
Speed moves your ship faster across water. This is the compounding upgrade — every second saved per trip adds up over hundreds of trips. A Caravel with two speed upgrades cuts the Starter-to-Jungle route from roughly 3 minutes to roughly 2 minutes. One minute saved, multiplied by 50 trips, is nearly an hour of your life back.
But speed has diminishing returns. The first two speed upgrades are transformative. The third and fourth are noticeable but less dramatic — you are paying escalating material costs for marginal gains. Community consensus: apply two speed upgrades on any ship before investing elsewhere.
Speed is also the upgrade category that pays for itself fastest. A 10,000-Beli speed upgrade that saves you 60 seconds per island hop, over 50 hops before your next ship purchase, saves you 50 minutes of sailing. In those 50 minutes, you can farm roughly 15,000-25,000 Beli at mid-game rates. The upgrade costs 10,000. It generates more value than it costs. No other upgrade category has this mathematical self-repayment property at the early-game level.
Hull Durability
Hull durability determines how much damage your ship absorbs before sinking. This matters in exactly two situations: Sea Beast encounters and environmental hazard zones.
The environmental hazard zone is the one that surprises players. The Cursed Energy barrier around Shinjuku Island deals passive, unavoidable damage to your ship every few seconds. An unupgraded Caravel hull has roughly enough HP to survive 30 seconds of barrier exposure. The crossing from the barrier edge to Shinjuku’s dock takes roughly 45-60 seconds. The math is not complicated — your ship sinks before you arrive.
Here is something the game does not tell you: when your ship sinks in open water, you respawn at the nearest island dock. You lose your sailing progress. If you were 80% of the way to Shinjuku and your hull gives out, you start over from the nearest Sea 1 dock. That is not a 2-minute setback. It is a 15-minute setback plus whatever supplies you burned on the trip. Hull durability is insurance against lost time.
If you are strictly island-hopping between safe zones and avoiding sea combat, hull durability is a low priority — one upgrade is plenty. If you are farming Sea Beasts or making the Shinjuku run, it jumps to the top of the list.
Cannon Damage
Cannon damage affects ship-mounted cannon output during sea combat. Cannons are supplementary — your primary damage against Sea Beasts comes from your character’s combat stats: fruit abilities, sword, fighting style. Cannons help chip away at health bars, but they are not your main DPS source.
Upgrade cannons after speed and hull, and only if you are actively farming Sea Beasts. A cannon upgrade on a ship you use exclusively for island-hopping is wasted Beli.
Crew Capacity
Some ships allow you to increase crew slots through upgrades. More crew means more passive buffs and combat support during sea encounters. The value of crew capacity scales with the quality of your crewmates — an extra slot for a Navigator with high Navigation stat is worth far more than an extra slot filled with a generic tavern recruit. For crew optimization details, see the Crew & Ship Guide.
Upgrade Materials: What They Cost and Where They Come From
Ship upgrades consume three resource types: Beli, common materials (wood, metal, cloth — exact names vary by ship tier), and rare boss drops for high-tier upgrades.
| Upgrade Tier | Beli Cost (Approx.) | Common Materials | Rare Materials | Recommended Level |
|---|---|---|---|---|
| Tier 1 (Rowboat/Caravel) | 5,000-15,000 | Wood Scraps, Iron Fragments | — | 15-50 |
| Tier 2 (Caravel/Galleon) | 20,000-50,000 | Reinforced Wood, Steel Ingots | Sea Beast Scale | 50-200 |
| Tier 3 (Galleon/Frigate) | 75,000-150,000 | Hardened Timber, Titanium Alloy | Kraken Hide, Sea Serpent Fang | 200-350 |
| Tier 4 (Frigate/Dragon) | 200,000-500,000 | Ancient Shipwright’s Blueprint | Dragon Scale, Cursed Core | 350+ |
Most common materials drop from island enemies and chests. The farming strategy is straightforward: kill enemies on islands at your level, open every chest you see, complete quests that reward material caches. The inefficiency comes from farming the wrong island for your current upgrade tier.
Jungle Island enemies drop materials appropriate for Tier 1-2 upgrades. Desert Island and Snow Island enemies drop Tier 2-3 materials. Rare materials — Sea Beast Scale, Kraken Hide, Sea Serpent Fang — come exclusively from Sea Beast kills. If you cannot reliably kill Sea Beasts yet, do not plan your upgrade path around rare materials. Max out common-material upgrades first.
Scene: The Shinjuku Run — Why Hull Durability Is Not Optional
You have been watching the JJK Expansion content roll out. You have read the JJK Expansion Guide. You know Shinjuku Island has scalable bosses, the Ascend System, and two new fighting styles. You want in.
You pull out your Caravel. Two speed upgrades. Zero hull upgrades. You feel fast. You feel ready.
You sail northeast. The sky starts looking wrong — a purple-black streak on the horizon that does not match any weather effect you have seen before. You keep going. The screen distorts. Heat-haze effect, but darker. The Cursed Energy barrier.
Your ship starts taking damage. Not from an enemy. From the environment. Passive. Unavoidable. Ticking every few seconds.
You check your hull HP. It is dropping faster than you expected. You are 30 seconds into the barrier. Your hull is at 40%. You can see Shinjuku’s dock on the horizon — maybe 20 more seconds of sailing. Your hull hits zero at the 32-second mark. Your ship breaks apart. You respawn at the nearest Sea 1 dock.
You lost 15 minutes of sailing. You burned through 5,000 Beli in supplies. You gained nothing. And worst of all, you now know the barrier is not bugged — your hull was simply not ready.
The fix: a Galleon (250,000 Beli) with two hull durability upgrades. Community testing suggests the barrier deals percentage-based damage, meaning higher raw hull HP gives you proportionally more survival time. A Frigate with Tier 3 hull upgrades tanks the full barrier crossing with room to spare. A Dragon Ship does not even notice the barrier exists.
This scene teaches the upgrade lesson that applies everywhere in Sailor Piece: match your upgrades to what you are actually doing. Speed upgrades get you to the barrier faster. Hull upgrades get you through it. One without the other is a sunk ship.
Fast Upgrade Strategy: Route-Based Farming That Does Not Waste Your Time
Most players approach ship upgrades the wrong way. They pick a target upgrade, look at the material list, and farm each material one at a time. Wood first. Then iron. Then Beli. Then the rare drop. Then the next upgrade. This is the linear-farming trap — you spend more time traveling between farming spots than actually farming.
The efficient approach is route-based: pick an island or island chain where enemies drop all or most of the materials you need for your current upgrade tier, and loop it. One circuit. Multiple material types. No wasted sailing.
Early-Game Route (Levels 15-50): The Jungle Circuit
You just bought your Caravel. You need Beli and Tier 1 materials for those first two speed upgrades.
Start at Jungle Island. Clear the beach enemies — they drop Wood Scraps and low-tier cloth. Move inland to the monkey packs — they drop Iron Fragments and Beli. Loop through the interior cave — chests in there respawn on a timer, and community reports suggest roughly 5-10 minutes between respawns. One full Jungle circuit takes about 8-12 minutes and nets roughly 3,000-5,000 Beli plus material drops sufficient for one Tier 1 upgrade every two circuits.
While doing this, pick up every Jungle Island quest. Quests add roughly 40% more Beli per circuit compared to raw grinding. Do not skip quests to “farm faster” — the quest reward Beli per minute spent is higher than enemy-only farming at this level range. Grab the quest, do the circuit, turn in, repeat.
Mid-Game Route (Levels 50-200): Desert to Snow
Once you unlock Desert Island, the material quality jumps. Desert bandits drop Reinforced Wood and Steel Ingots — your Tier 2 upgrade materials. Snow Island enemies add the higher-tier cloth and metal variants.
The Desert-to-Snow loop works like this: clear the Desert Island exterior camps, sail to Snow Island (roughly 3-4 minutes), clear the Snow Island exterior camps, sail back. Total loop time: roughly 20-25 minutes. This funds approximately one Tier 2 upgrade every three to four loops.
Here is the efficiency insight most players miss: the 3-4 minute sail between Desert and Snow is not dead time. Open your inventory during the sail. Sort materials. Queue your next upgrade at the shipwright menu. Plan your next loop route. The players who complain about sailing time are the ones staring at the ocean doing nothing during it. Use the sail time as inventory-management time and the loop becomes seamless.
The Combined Approach: Leveling While Upgrading
Ship upgrades and character leveling share the same core activity: killing enemies on islands. The separation is artificial. Every Desert bandit you kill gives XP toward your next level AND drops materials for your ship upgrades AND drops Beli for your next ship purchase.
Here is a concrete scenario. You need 50,000 Beli for the Caravel. You are level 20. You have two choices:
- Farm level 10 Thieves on Starter Island. Earn roughly 500 Beli per hour. Reach Caravel in roughly 100 hours. Be level 15 when you get there. Get destroyed by Jungle Island enemies because you are underleveled.
- Farm enemies 5-10 levels above you. Earn roughly 2,000 Beli per hour plus full XP. Reach Caravel in roughly 25 hours. Be level 35 when you get there. Walk onto Jungle Island at-level.
The second path is faster in calendar time AND produces a stronger character. Always farm at or slightly above your level. The Beli returns scale with enemy level. The material drops scale with enemy level. The XP scales with enemy level. There is no scenario where farming below your level is the right call for ship upgrades.
Decision Framework: Upgrade Your Current Ship or Save for the Next One?
You have a Caravel with two speed upgrades. You have 80,000 Beli. The Galleon costs 250,000 Beli. Do you invest in more Caravel upgrades, or save every Beli for the Galleon?
This is the most common ship-economy decision in Sailor Piece. The answer depends on one question: will the upgrade pay for itself before you would have bought the next ship anyway?
When to Upgrade Your Current Ship
Upgrade your current ship when:
The upgrade unlocks content you cannot currently access. If your unupgraded Caravel cannot survive the Cursed Energy barrier and Shinjuku is your goal, a hull upgrade is not optional — it is the price of admission. You cannot save for a Galleon if you cannot reach the islands where Galleon-level Beli farming happens.
The upgrade directly increases your income rate. Speed upgrades reduce travel time, which means more farming loops per hour. A second speed upgrade on a Caravel that saves you 60 seconds per island hop, over 50 hops between now and your Galleon purchase, saves you 50 minutes. In those 50 minutes you can farm roughly 15,000-25,000 Beli. The upgrade costs 10,000. It pays for itself and then some.
You are farming Sea Beasts and need survivability. If a hull upgrade prevents one death per farming session, and each death costs you 10 minutes of repositioning plus lost kill credit, the math is simple: prevent two deaths and the upgrade is profitable. For Sea Beast hunting specifics, the Sea Beasts & Boss Hunting Guide covers spawn mechanics and kill strategy in detail.
When to Save for the Next Ship
Save for the next ship when:
Your current ship already reaches all content you are doing. If your Caravel gets you to every island you are farming and you are not dying to sea encounters, more upgrades are marginal gains. Save.
The next ship is a transformative upgrade and you are close to affording it. The jump from Caravel to Galleon is roughly a 40% base speed increase plus access to Sea Beast hunting viability. If you have 170,000 of the 250,000 needed, do not spend 30,000 on Caravel upgrades. Spend nothing. Save. Push to Galleon.
Upgrades on your current ship do not carry forward. This is the big one. Every Beli you spend on Caravel upgrades is Beli that could have gone toward the Galleon. Ship upgrades are ship-specific. They die with the vessel. Treat your current ship as a tool, not a project.
The Counterintuitive Advice: A Fully Upgraded Lower-Tier Ship Is Better Than a Naked Higher-Tier One
Here is something that trips up nearly every new player: the most expensive ship is not always the best ship for your situation.
A fully upgraded Caravel — purchase (50,000 Beli) plus all Tier 1-2 upgrades (roughly 100,000 Beli) — costs roughly 150,000 Beli total. A base Galleon costs 250,000 Beli with zero upgrades.
The fully upgraded Caravel is faster than a base Galleon. It has more hull durability. It does more cannon damage. It costs 100,000 less Beli.
The player who rushes the Galleon at 250,000 Beli and has zero Beli left for upgrades is sailing a ship that is objectively worse than a kitted-out Caravel — and they paid 100,000 more for the privilege.
The rule: a ship one tier lower with two or more upgrades is generally better than a ship one tier higher with zero upgrades. Do not rush a ship purchase if it leaves you broke. Each ship tier’s base stats assume you will apply at least one or two upgrades. A naked Galleon is not a Galleon — it is a Caravel-shaped object with a Galleon price tag.
Ship Upgrades for Sea Combat: The Beast-Hunting Build
Sea Beast hunting is the most upgrade-sensitive activity in Sailor Piece. Your ship build directly determines whether you kill the Beast or watch it despawn at 15% HP with nothing to show for your time.
The Sea Combat Upgrade Priority
For Sea Beast hunting, the standard upgrade priority flips:
Hull Durability first. A Sea Beast slam can one-shot an unupgraded Caravel. Two hull upgrades on a Galleon give you enough survivability to tank one or two hits. That is usually enough time for your crew to stabilize aggro and your DPS rotation to kick in. Without hull upgrades, you are gambling on not getting hit — and Sea Beasts hit.
Speed second. You need to close distance on the Beast before it drifts out of range. Speed also lets you reposition when the Beast telegraphs its AoE slam — the tell is visible, and a faster ship gives you the reaction window to dodge rather than tank.
Cannon Damage third. Cannons supplement your character damage. They matter, especially during the engagement phase when you cannot yet reach the Beast with melee or fruit abilities. But they are not your primary DPS source. Upgrade cannons after you can survive the fight.
Crew Capacity fourth. More crew slots mean more passive buffs during the fight. A Navigator plus Swordsman plus Doctor crew covers speed, damage, and healing — a solid baseline for any hunting build.
The Despawn Problem and How Upgrades Solve It
Sea Beasts have a despawn timer. If you do not deal enough damage fast enough, the Beast vanishes. You lose the kill. No Bloodline Stone. No Clan Reroll. No rare drop. Just an empty ocean and another hour gone.
Speed upgrades solve the engagement problem — you reach the Beast faster, which means more time on target before the despawn window closes. Hull upgrades solve the survivability problem — you spend less time dead and respawning, which means more damage uptime. Together, they convert the dreaded “15% HP despawn” into a kill confirmed.
The setup that community hunters swear by: Galleon with two hull upgrades, two speed upgrades, and one cannon upgrade. Total investment: roughly 350,000-400,000 Beli including the ship. This build handles every Sea Beast variant in Sea 1 and is viable for early Sea 2 hunting with a competent crew.
Common Mistakes and How to Recover From Them
Mistake 1: Buying the Sailboat
You are level 15. The Rowboat is miserable. The shop offers a Sailboat for 10,000 Beli. It looks faster. It feels like progress. You buy it.
Two hours later, you discover it cannot reach Desert Island or anything beyond. You need a Caravel. Those 10,000 Beli are gone. You just added roughly 2-3 hours to your Caravel grind.
Recovery: Do not compound the error by buying upgrades for the Sailboat. Cut your losses immediately. The Sailboat can reach Jungle Island — use that. Farm Jungle Island enemies. Save every Beli. Buy the Caravel. The Sailboat’s only value is getting you to Jungle Island marginally faster than the Rowboat. Extract that value and move on. Do not spend one more Beli on it.
Mistake 2: Upgrading a Ship You Are About to Replace
You have 200,000 Beli. The Galleon costs 250,000. You decide to treat yourself to a 30,000-Beli speed upgrade on your Caravel while you save the last 50,000.
Now you have 170,000 Beli. Your Caravel is slightly faster. Your Galleon is 80,000 Beli away instead of 50,000. Congratulations — you delayed your Galleon by roughly 6-8 hours of farming for a speed upgrade that becomes irrelevant the moment you buy the Galleon.
Recovery: There is no recovery. The Beli is spent. The upgrade does not transfer. The only thing you can do is learn the lesson: ship upgrades are permanent investments in a temporary vessel. If you are close to the next tier, save. If you are far from the next tier and need the performance now, upgrade. But never upgrade when the next ship is within striking distance.
Mistake 3: Ignoring Hull Durability Before Hazard Zones
You have heard about Shinjuku Island. The scalable JJK bosses. The Ascend System. You sail northeast in your speed-upgraded Caravel, hit the Cursed Energy barrier, and your ship explodes. You try again from a different angle. Same result. You try a third time. Same result.
The barrier is not bugged. Your hull durability is too low. You have been running speed upgrades exclusively and skipping hull because “I do not do Sea Beasts.” The barrier is environmental damage — it does not care what content you usually run. It cares about your hull HP stat.
Recovery: Farm Desert Island or Snow Island for Tier 2 hull upgrade materials. Apply two hull upgrades to your current ship. Try the Shinjuku run again. If it still sinks, the issue is your ship tier — the Caravel hull ceiling may be too low for the barrier regardless of upgrades. Community testing suggests Galleon with two hull upgrades as the minimum viable Shinjuku vessel. If you are on a Caravel and cannot afford a Galleon yet, Shinjuku waits. Do not keep throwing yourself at the barrier.
Mistake 4: Farming Materials on Islands Far Below Your Level
You need Wood Scraps for a Tier 1 upgrade. You are level 80. You sail back to Starter Island and start killing level 10 Thieves. Each kill gives you 20 Beli and a roughly 5% chance at Wood Scraps. You spend an hour doing this. You get 12 Wood Scraps and 2,000 Beli.
Meanwhile, Desert Island bandits drop Reinforced Wood — which can be exchanged or downgraded for Wood Scraps through certain shipwright NPCs. And they drop roughly 10 times the Beli per kill. In that same hour at Desert Island, you could have earned the equivalent of 50 Wood Scraps and 20,000 Beli.
Recovery: Farm at your level. Always. Higher-level enemies drop materials that are either what you need for your current upgrade tier or can be traded down through NPC exchanges. The Beli efficiency alone makes low-level farming a losing proposition. If you need low-tier materials and you are high level, farm high-level enemies for Beli and buy the low-tier materials from other players or the shipwright — the Beli-per-hour math makes purchasing cheaper than grinding.
Level 1 to Shinjuku: A Concrete Ship Progression Plan
Here is the full ship path that minimizes wasted Beli and maximizes upgrade efficiency, from your first spawn to your first Shinjuku landing.
Level 1-25: The Rowboat Phase. Complete every Starter Island and Shell Island quest. Kill enemies on both islands. Open every chest. Do not spend Beli on anything. Do not buy a Devil Fruit. Do not buy a sword. Do not buy the Sailboat. Save every single Beli. Target: 50,000 Beli.
Level 25-30: Caravel + Dual Speed. Buy the Caravel. Immediately apply two speed upgrades — roughly 15,000 Beli total. This is your workhorse. It reaches every Sea 1 island. With dual speed upgrades, your farming loop efficiency jumps by roughly 40% compared to an unupgraded Caravel.
Level 30-150: The Workhorse Phase. Run the Jungle-to-Desert circuit. Apply one hull upgrade to the Caravel — enough for basic Sea Beast survivability if you dabble in hunting. Save remaining Beli for the Galleon. The sweet spot for Caravel investment: two speed upgrades and one hull upgrade. Total spent on Caravel: roughly 80,000-100,000 Beli including purchase. Do not over-invest — every extra upgrade delays your Galleon.
Level 150-200: Galleon + Dual Speed + Dual Hull. Buy the Galleon (250,000 Beli). Apply two speed upgrades and two hull upgrades immediately. This is your Shinjuku-capable vessel and your Sea Beast farming ship. The dual hull upgrades let you survive the Cursed Energy barrier. The dual speed upgrades keep your farming loops efficient in Sea 2.
Level 200+: Frigate Comfort Zone. Buy the Frigate (500,000 Beli) when Beli allows. Apply speed and hull as needed. Frigate is your comfortable endgame daily-driver. Dragon Ship (1,000,000+ Beli) is luxury — buy it when you have nothing else to spend Beli on and want the absolute fastest sailing speed in the game.
Shinjuku-ready threshold: Galleon, two speed upgrades, two hull upgrades. Total investment: roughly 350,000-400,000 Beli. Achievable by level 150-200 with focused route-based farming. Once you hit this threshold, the JJK Expansion Guide has everything you need for what to do once you land.
Conclusion
Your ship in Sailor Piece is not cosmetic. It is not a convenience. It is the single biggest determinant of how much of the game you actually get to play versus how much you spend staring at open water.
The upgrade system rewards planning and punishes impulse. Every Sailboat purchase is a Caravel delayed. Every upgrade on a ship you are about to replace is progress deleted. Every hull upgrade you skip is a Shinjuku run that ends at the bottom of the ocean.
Two speed upgrades on every ship. Hull upgrades before you enter hazard zones. Farm at your level, not below it. A fully upgraded lower-tier ship outperforms a naked higher-tier one. Save for the next ship before over-investing in the current one.
The ocean is not the game. The islands are the game. The bosses are the game. Your ship is how you get there. Upgrade it like it matters — because it does.
Related Guides
- Sailor Piece Ship Progression Guide — Rowboat to Dragon Ship, Every Ship Tier & Why Speed Is the Best Stat
- Sailor Piece Ships & Navigation Guide — Sea Beasts, Island Routes & Sea 2 Unlock Requirements
- Sailor Piece JJK Expansion Guide — Shinjuku Island, the Two New Specs & the Ascend System
- Sailor Piece Sea Beasts & Boss Hunting Guide — Spawn Zones, Ship Builds & 5+ Kills Per Hour