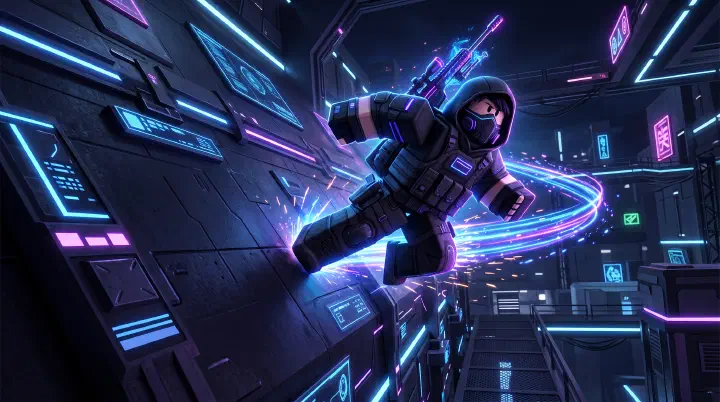
You’re 3-3 in ranked overtime. One round from promotion. Your palms are sweating, but you’ve got this. You know the basics. You wall run across open lanes. You strafe between shots. You don’t stand still like a statue in the open.
You peek mid, spot an enemy, trade a shot, and Dash behind cover. You’re playing smart — smarter than half the lobby.
You peek again, pre-aiming the angle. And you’re dead. Headshot. You never even saw them.
On the death cam, the Diamond player barely showed their shoulder. Just a flicker on your screen for maybe a tenth of a second. A Silent Peek. You did everything “right” for a Gold player. But “right” doesn’t keep you alive against someone who knows the tech that separates Diamond from everyone else.
It isn’t aim. Your aim was fine. It’s about taking shots that are physically impossible to react to. This guide is for that moment — and every moment like it.
Last updated: June 24, 2026.
What Players Get Wrong About Advanced Techniques
Most players crash and burn on advanced tech because they go about it backwards. They load up a montage, see a Thunder Dash into Wall Run combo, and spend three hours in a private server learning it. Then they queue ranked, try it, die, and conclude “advanced tech is just for show.”
Wrong. Here’s what actually goes wrong.
Practicing the wrong techniques for your rank. If you’re Silver, mastering Silent Peek before you can b-hop consistently is like learning calculus before addition. You’ll mess up the fundamentals and develop bad muscle memory that haunts you later.
Trying to learn everything at once. Players jump from Dash Cancel to Wall Run chains to Slide Cancel in one session. Nothing sticks. Your brain needs repetition, not variety. Pick one technique and live with it for a week.
Using advanced tech at the wrong time. A Silent Peek is beautiful in a 1v1 duel. It’s suicide when you’re flanked by two players. Advanced techniques are situational tools, not a personality trait. The best players in SNIPE aren’t doing flashy stuff every second. They’re doing the right thing at the right time — and sometimes the right thing is boring.
When to Use Which Technique: A Priority System
Don’t drown in the tech pool. Here’s the exact order to learn things so you actually climb.
Priority One: Dash Cancel. This is the foundation. It makes every other technique possible. You need to scope and fire out of a Dash without thinking. Drill it until it’s automatic.
Priority Two: Wall Run to B-Hop Chain. Once you can Dash Cancel, you need speed. This chain gets you across the map and breaks tracking. It’s your escape tool and your rotation tool.
Priority Three: Silent Peek. Only after movement is second nature. Silent Peek is the offensive technique that wins duels. It’s hard. It’s frustrating. It takes fifty hours. But once it’s consistent, you’ll win gunfights you have no business winning.
Priority Four: Ability Tech. Animation cancels and combo abilities are the final layer. They add percentage points to your win rate, but only if the first three are locked in.
Priority Five: Fake Retreat and B-Hop Scope. These are matchup-specific tricks. Situational, but devastating when the moment is right.
Skip the order and you’ll look flashy dying. Follow it and you’ll look boring winning.
Advanced Movement Techniques
Dash Cancel (DC)
The most versatile technique in SNIPE. Combines Dash mobility with scoped accuracy.
Input Sequence:
- Dash in any direction (double-tap movement key or ability bind)
- Scope in (right-click) during the dash animation — timing window: ~0.3 seconds
- Fire (left-click) at the peak of dash momentum
- Unscope and continue movement before landing
Applications:
- Offensive DC: Dash sideways out of cover, scope mid-dash, fire, land behind different cover. Enemy sees you for <0.5 seconds.
- Defensive DC: Dash backward while scoping to create distance from a pushing knife player. Fire during backward momentum.
- Vertical DC: Dash toward a wall, wall run, jump off, scope mid-air, fire before landing. Creates the most unpredictable angle in the game.
Practice Drill: Stand 10m from a wall in a private server. Dash sideways → scope → fire at the wall → unscope. Repeat until the bullet hole consistently appears at crosshair center. Then add strafe direction changes.
Wall Run to B-Hop Chain
Links wall running, bunny hopping, and sliding into one continuous high-speed movement chain.
Input Sequence:
- Sprint toward a wall at a 20-30° angle
- Jump + hold strafe toward the wall to begin wall running
- At the end of the wall run (or when you choose to disengage), jump off the wall
- The moment you land, crouch (Ctrl) + jump (Space) simultaneously for a b-hop
- Upon landing from the b-hop, hold crouch to slide
- Jump out of the slide to maintain momentum, repeat from step 1
Why It Works: Each movement type preserves a percentage of the previous momentum. Wall run → b-hop preserves ~80% speed. B-hop → slide preserves ~70%. Chained together, you move 2-3x faster than sprinting with an erratic trajectory that breaks aim tracking.
Practice Drill: Find a long corridor with walls on both sides. Chain wall run → wall run (bounce between walls) without touching the ground. Add b-hop and slide once comfortable with the rhythm.
Slide Cancel Shooting
Slide around a corner while maintaining the ability to fire accurately.
Input Sequence:
- Sprint toward a corner
- Crouch to slide just before reaching the corner
- During the slide, scope in
- Fire as your crosshair clears the corner
- Jump to cancel the slide and return to cover
Key Timing: The slide lasts ~1.2 seconds. You have a ~0.4 second window where your crosshair is clear of the corner while still sliding. Fire during this window.
Combat Techniques
Silent Peek (Frame-Perfect Peek)
The defining technique of high-level play. When executed correctly, you can fire at an enemy with your character model barely rendering on their screen.
Input Sequence:
- Position behind cover, unscoped, with your crosshair pre-aimed at the expected enemy position
- Scope in the instant before you begin strafing out of cover
- Strafe out — your scope clears the wall edge
- Fire within 1-2 frames of your crosshair clearing the wall
- Immediately strafe back into cover and unscope
Frame Breakdown (at 60 FPS):
- Frame 1-3: Scope animation begins
- Frame 4-6: Strafing out, crosshair approaching corner
- Frame 7-8: FIRE (crosshair clears corner)
- Frame 9-10: Strafing back into cover
- Frame 11-12: Unscope, fully behind cover
The enemy sees your character model for approximately frames 6-10 — roughly 0.08 seconds. By the time their brain registers your position, you’ve already fired and returned to cover.
Practice Method:
- Private server with a friend standing at a fixed position
- Ask them to call out when they can see your character model
- Adjust your timing until they report seeing only a “flicker” before taking damage
- Drill 50 repetitions per session until muscle memory develops
B-Hop Scope (Mid-Air Accuracy)
Fire an accurate scoped shot during a bunny hop.
Input Sequence:
- Build momentum with a sprint + jump
- On landing, crouch + jump (b-hop input)
- At the peak of the b-hop arc, scope in and fire
- Unscope before landing to maintain movement flow
Why It’s Effective: Most players can’t track a b-hopping target. Adding a scoped shot at the apex of the jump makes you both untrackable and lethal. The apex of the b-hop is the most stable mid-air moment — scope sway is minimal.
Wall Run Peek
Fire from a wall run position — an angle most players never check.
Input Sequence:
- Wall run on a surface that provides a sightline over or around cover
- At the highest/widest point of the wall run, scope and fire
- Jump off the wall immediately after firing
This is particularly effective on maps with elevated wall run surfaces that overlook common hold positions. Players check head-height and ground-level angles — they rarely check wall-height angles.
Fake Retreat (Bait Technique)
Pretend to retreat, then kill the enemy who chases.
Input Sequence:
- Engage an enemy, fire 1-2 shots (hit or miss)
- Turn and Dash away from the engagement (make sure they see you leave)
- Immediately wall run or b-hop to a nearby off-angle position
- The enemy pushes forward expecting you to be retreating
- Fire from your new position — they’re sprinting in a straight line toward where you were
This exploits the most common psychological mistake in FPS games: assuming a retreating player is vulnerable.
Counter-Intuitive Insight: Stop Moving Sometimes
Every guide tells you to never stand still. That’s solid advice — until it isn’t.
At long range, against another skilled player, your b-hop and strafe actually make your own shots harder while giving them a predictable pattern. Your movement becomes rhythmic. They’ll track it.
The real counter-play? Stop. Crouch. Take the shot. Reset.
It sounds like heresy, but a stationary crouch-shot at 50+ meters is often more accurate than a hopping one, and the enemy’s muscle memory is tuned to track motion, not stillness. They’ll overswing. You’ll land the hit. Then you move.
Advanced technique isn’t always about doing more. Sometimes it’s about knowing when to do nothing.
Ability Tech
Dash Animation Cancel (DAC)
Cancel the Dash recovery animation to fire faster.
Input: Dash → the instant the dash ends, scope → fire. Scoping cancels the brief (~0.15 second) recovery animation where you can’t fire after a dash.
Without DAC, there’s a noticeable pause between dashing and shooting. With DAC, the transition is seamless.
Thunder Dash → Wall Run Combo
Chain Thunder Dash into a wall run for an ultra-fast entry frag.
Input: Thunder Dash toward a wall → the stun trail deploys behind you → wall run off the surface you hit → scope mid-wall run → fire on stunned enemies below.
This is the single most devastating entry-frag technique in the game when executed with team coordination. The stun trail disables enemies; the wall run gives you a clean shooting angle on stationary targets.
Forcefield Angle Play
Use Forcefield not just for protection, but to create unique shooting angles.
Place Forcefield at a 45° angle to a corner. Enemies see the Forcefield and pre-aim where you’d normally peek from. Instead, peek from the opposite side of the corner — their crosshair is on the Forcefield, not on you.
Ranked Climbing Guide
Ranked mode in SNIPE uses a tier system. Here’s exactly what you need to improve at each rank to climb.
Bronze → Silver: Fundamentals
What’s holding you back: You miss shots on stationary targets. You stand still while shooting. You don’t use your ability.
Focus on:
- Hit stationary targets consistently (90%+ accuracy on unmoving enemies)
- Never stand still while shooting — always strafe between shots
- Use your ability at least once per life (even if suboptimally)
- Learn the map layouts — know every spawn point and power position
Practice: 30 minutes of aim training (private server, shoot wall markers while strafing) before every ranked session.
Silver → Gold: Movement Foundation
What’s holding you back: You can’t wall run or b-hop consistently. You ADS in the open. You don’t reposition between kills.
Focus on:
- Wall run on command (not accidentally) — at least 80% success rate
- B-hop 3+ times in a row without losing momentum
- Scope → shoot → unscope → move — never stay scoped for more than 2 seconds
- After every kill, rotate to a different position before engaging again
Practice: Wall run + b-hop chains in empty maps for 20 minutes daily. Then play Kill Race lobbies to apply under pressure.
Gold → Platinum: Technique Integration
What’s holding you back: You know the techniques but can’t execute them in combat. Your Dash Cancel is inconsistent. You don’t Silent Peek.
Focus on:
- Dash Cancel at 70%+ consistency in live matches
- Begin implementing Silent Peek (even if only 30-40% consistent — start using it)
- Pre-aim common peek angles based on map knowledge
- Track enemy ability cooldowns — if an enemy Dashes, you have X seconds before they can do it again
Practice: 1v1 duels against Gold/Platinum players. Focus exclusively on using the technique you’re worst at. Lose the duel but land the technique — that’s the priority.
Platinum → Diamond: Optimization
What’s holding you back: Your Silent Peek is inconsistent under pressure. Your decision-making in endgame scenarios. Your ability usage isn’t fully optimized.
Focus on:
- Silent Peek at 80%+ consistency — this is non-negotiable at Diamond
- Predict enemy positions based on spawn patterns, audio, and kill feed
- Ability usage optimized per matchup — swap abilities based on lobby composition
- Endgame composure — make the smart play, not the flashy one
Practice: Review your own gameplay (record matches). Identify every death and determine: was it a mechanical error (missed shot, failed tech) or a decision error (bad push, bad position)? Decision errors should approach zero at this level.
Diamond → Top 500: Game Sense Ceiling
At this level, everyone has perfect mechanics. The differentiator is game sense — predicting enemy behavior before it happens.
- You know where every enemy is likely to be based on kill feed, audio, and spawn logic
- You know which enemy is about to push you before they do
- You manipulate spawn patterns by controlling which areas of the map are “safe” to spawn in
- You adapt your playstyle mid-match based on the specific players in your lobby
Practice Routine for Daily Improvement
| Time | Activity | Focus |
|---|---|---|
| 10 min | Wall run + b-hop chains (empty map) | Movement consistency |
| 10 min | Dash Cancel drills (private server) | Technique execution |
| 10 min | Silent Peek reps with a partner | Frame-perfect timing |
| 15 min | 1v1 duels or Kill Race | Apply techniques under pressure |
| 30+ min | Ranked matches | Decision-making and climbing |
Consistency beats intensity. 45 minutes of focused practice every day produces more improvement than 4-hour marathon sessions once a week.
Advanced techniques in SNIPE aren’t flashy extras — they’re the baseline requirement for high-ranked play. Drill the movement chains, master the Silent Peek, optimize your ability usage, and approach ranked with a tier-by-tier improvement plan. The leaderboard doesn’t reward the player with the best aim. It rewards the player who’s hardest to hit.
Related Guides:
- SNIPE Beginner Guide: Controls, Movement & First Match
- SNIPE Weapons & Abilities Guide: Tier List & Loadouts
- SNIPE Maps & Strategies Guide: Positioning & Advanced Tactics
- SNIPE Game Modes Guide: Every Match Type, Scoring & Win Conditions
- SNIPE Positioning & Angles Guide: Win Every Duel
- SNIPE Movement Mechanics Guide: B-Hop, Wall Run & Momentum
- SNIPE Weapons Tier List: Best Guns for Ranked