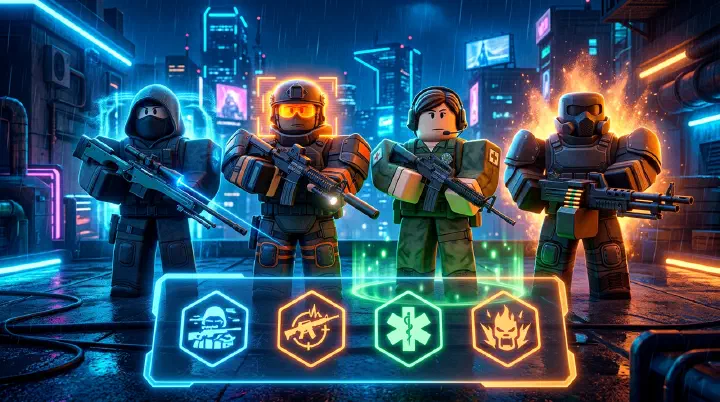
You’ve been stuck in mid-Platinum for three weeks. Your aim is decent — you win fair fights, hit headshots at range, know the spawn routes. But you keep queuing Target because the tier list says it’s S-tier, and you keep dying to Thunder Dash players who close distance faster than your scope can track.
Here’s what’s actually happening: Target gives you wallhacks. You see the enemy through a shipping container on Docks. You pre-aim the left edge, expecting a peek. But he Thunder Dashes straight through your crosshair, the stun trail clips your ankle, and by the time your scope unlock animation finishes, he’s already lining up the headshot from your right flank. You had the information. You had the S-tier ability. You lost anyway — not because Target is bad, but because Target rewards a patient, pre-aim playstyle, and you play aggressive.
The problem isn’t your aim, your settings, or your map knowledge. The problem is you’re playing an Intel agent when you should be playing a Storm agent.
Snipe’s seven abilities function like distinct agent classes. Each one rewards a different approach to combat, a different positioning philosophy, a different risk profile. The players who climb fastest aren’t the ones who pick the highest-ranked ability — they’re the ones who identify their natural playstyle and match it to the right agent. This guide breaks down every ability, maps them to playstyle archetypes, ranks them in the current meta, and shows you exactly how to use each one effectively.
The Seven Agents — Ability Deep Dive
Each “agent” in Snipe is defined by its ability. The weapon you carry matters, but the ability determines how you fight, where you position, and when you engage.
The Intel Agent — Target
Effect: See enemy players through walls for approximately 3 seconds. Cooldown: roughly 18 seconds.
Target is the information-control agent. Every fight you take starts with you knowing exactly where the enemy is, where they’re looking, and which way they’re moving. No guesswork, no reaction-time deficit — you’re always shooting from a position of knowledge.
Strengths:
- Prevents ambushes entirely — you never walk into a held angle blind
- Lets you pre-aim exactly where the enemy’s head will appear
- Reveals rotation patterns, allowing you to intercept enemies mid-route
Weaknesses:
- Zero combat utility — it doesn’t help you win the fight, only find it
- Predictable timing — experienced players count your cooldown and push during your downtime
- Scope glint gives away your position while you’re staring through walls
Best maps: Refinery, Outpost, Bridge — any map with long sightlines and multiple hiding spots where information is scarcer than combat power.
Worst maps: Warehouse, Downtown — close-quarters maps where enemies are already visible or audible, reducing Target’s value.
The Storm Agent — Thunder Dash
Effect: Dash forward approximately 20 studs, leaving a trail that stuns enemies for 1-1.5 seconds. Cooldown: roughly 14 seconds.
Thunder Dash is the aggression agent. The stun trail is the most disruptive non-lethal effect in the game — it interrupts scopes, cancels reloads, and locks enemies in place long enough for an easy headshot. Unlike Dash, which purely moves you, Thunder Dash actively denies space.
Strengths:
- Stun creates guaranteed kill windows against any enemy
- Breaks enemy sightlines by forcing them to move or be stunned
- Works as both engage and disengage — stun the pursuer, not the target
Weaknesses:
- Long cooldown creates a vulnerability window after use
- The dash trail is visually obvious — good players sidestep it
- Commit-heavy: once you Thunder Dash forward, you’re in close range with no quick retreat
Best maps: Arena, Docks — medium-range maps where the stun trail covers chokepoints.
Worst maps: Refinery, Hangar — open maps where long sightlines let enemies shoot you mid-dash before the stun connects.
The Sentinel Agent — Forcefield
Effect: Creates a hemispherical shield that blocks incoming projectiles for 5 seconds. Cooldown: roughly 20 seconds.
Forcefield is the defensive anchor. Pop it when you’re pinned, when you need to reload safely, or when you want to hold an angle without fear of being counter-sniped. The shield is opaque from the outside but transparent from the inside — you can shoot through it while enemies can’t shoot in.
Strengths:
- Creates safe zones in otherwise exposed positions
- Lets you win trades by forcing the enemy to either push through or wait out
- Provides cover for reloads and heals that would normally be suicide
Weaknesses:
- Longest cooldown in the game — misuse punishes hard
- Stationary — once placed, you’re committed to that area
- Smart enemies simply wait the 5 seconds and re-engage from a better angle
Best maps: Construction, Old Town — vertical maps where you can shield a ladder or stairwell and control elevation.
Worst maps: Arena, Docks — open maps with multiple flank routes that bypass your shield entirely.
The Phantom Agent — Dash
Effect: Quickly dash 10-12 studs in the direction you’re moving. Cooldown: roughly 8 seconds.
Dash is the mobility agent. Short cooldown, instant activation, versatile application. Unlike Thunder Dash’s commitment, Dash is low-risk — you can use it to peek, to dodge, to escape, to close distance, or to reset a fight. It’s the ability that rewards mechanical skill most directly.
Strengths:
- Shortest cooldown means you can use it every fight
- Unpredictable movement pattern makes you hard to hit
- Works for both aggressive and defensive playstyles
Weaknesses:
- No damage or stun component — pure movement
- Short range limits escape options against coordinated pressure
- Can become predictable if you dash in the same direction every time
Best maps: All maps — Dash is the most universally viable ability.
Worst maps: None — it’s viable everywhere, though it underperforms on extreme long-range maps compared to Target.
The Sky Agent — Super Jump
Effect: Launch vertically approximately 25 studs. Cooldown: roughly 12 seconds.
Super Jump is the vertical surprise agent. On maps with elevation, it creates angles that don’t exist for any other ability. On flat maps, it makes you a momentarily exposed target. The skill ceiling comes from knowing which maps reward vertical play and when to jump.
Strengths:
- Creates angles that enemies don’t pre-aim because they can’t normally be held
- Combine with scope timing to land shots during the jump arc’s peak
- Can clear obstacles and walls that normally restrict movement
Weaknesses:
- Predictable arc makes you an easy target for players with tracking aim
- Landing animation locks you for a brief moment — your most vulnerable state
- Useless on maps without vertical elements (Docks, Arena)
Best maps: Refinery, Old Town, Construction — maps with elevated platforms, catwalks, and multi-floor layouts.
Worst maps: Docks, Arena, Hangar — flat maps where Super Jump just makes you a clay pigeon.
The Architect Agent — Platform
Effect: Spawns a horizontal platform that moves forward 15-20 studs, then disappears. Cooldown: roughly 16 seconds.
Platform is the creative positioning agent. The platform lets you stand, crouch, or jump from it, effectively giving you a temporary mobile walkway. In the hands of a creative player, it bypasses entire map sections that other players are forced to navigate normally.
Strengths:
- Creates temporary cover in open areas
- Reaches elevated positions without using predictable climb routes
- Bait potential — enemies shoot the platform instead of you
Weaknesses:
- High skill floor — most players never learn to use it effectively
- Platform duration is short, limiting setup time
- Predictable trajectory means experienced players shoot where the platform will arrive
Best maps: Refinery, Bridge — maps with gaps and elevation differences that Platform can shortcut.
Worst maps: Warehouse, Downtown — close-quarters maps with no space to deploy platforms meaningfully.
The Blitz Agent — Speed
Effect: Gain 50% movement speed boost for approximately 4 seconds. Cooldown: roughly 10 seconds.
Speed is the rush agent. Its design intention is obvious — get somewhere fast. But the community consensus has settled on D-tier because the boost is short, the movement is linear, and good players track you anyway. Speed’s true value is hidden in a playstyle most players never try: knife-centric close-quarters rushing.
Strengths:
- Lets you reposition across the map faster than any other ability
- Combined with knife, closes distance before enemies can scope and fire
- Useful for rotating to power positions before other players arrive
Weaknesses:
- Linear movement means skilled players lead their shots and hit you
- Short duration limits the window of advantage
- Provides no combat utility — you’re still fighting with raw aim and movement only
Best maps: Warehouse, Downtown — close-quarters maps where knife kills are viable and quick rotations matter.
Worst maps: Refinery, Bridge — long-range maps where speed boost just gets you shot sooner.
Failure Analysis: Why You’re Losing With the “Best” Ability
The most common ranked plateau pattern goes like this: you unlock Target because every tier list calls it S-tier. You play 20 matches. Your score doesn’t improve. You blame your aim. You grind aim trainers. Your aim improves 10%. Your rank doesn’t.
Here’s what’s actually happening:
| Symptom | Root Cause | Fix |
|---|---|---|
| You see enemies through walls but still lose the duel | Target gave intel, but Thunder Dash interrupted your scope-in | Switch to Thunder Dash or Dash — your playstyle is aggressive, not patient |
| You get kills early but die mid-match repeatedly | You’re playing Sentinel (Forcefield) but pushing like a Storm agent | Stay near your shield or switch to an aggressive ability |
| You win 1v1s but lose FFA matches | You picked a dueling ability (Dash) in a mode that rewards area control | Switch to Thunder Dash or Target for multi-enemy awareness |
| You die mid-air constantly | You’re using Super Jump on flat maps | Only use Super Jump on vertical maps |
| Your score is inconsistent — pop-off one match, bottom-frag the next | Your ability choice doesn’t match the lobby size | Small lobbies: Target. Large lobbies: Thunder Dash. |
The pattern is clear: playstyle mismatch costs more rank than ability tier differences. A B-tier ability that matches your natural rhythm will outperform an S-tier ability that fights it.
Decision Framework: Find Your Agent
Answer these three questions to identify your natural agent:
1. When a fight starts, what’s your first instinct?
- A: Stop, scope, find the enemy → Intel Agent (Target)
- B: Close distance, force the fight → Storm Agent (Thunder Dash)
- C: Create space, reset, re-approach → Phantom Agent (Dash)
- D: Find cover, wait for an opening → Sentinel Agent (Forcefield)
2. What’s your biggest weakness in gunfights?
- A: I get flanked — I don’t see enemies approaching → Target or Thunder Dash
- B: I lose aim duels — I need more time to line up shots → Forcefield or Platform
- C: I get stuck in bad positions and can’t escape → Dash or Speed
- D: I’m too predictable — enemies know where I’ll be → Super Jump or Platform
3. Which map type do you perform best on?
- A: Open, long sightlines → Target or Thunder Dash
- B: Vertical, multi-level → Super Jump or Forcefield
- C: Close-quarters, tight corridors → Dash or Speed
- D: Mixed — I adapt to anything → Dash or Thunder Dash
Match your answers to your agent:
| Majority Answer | Your Agent |
|---|---|
| Mostly A’s | Intel Agent — Target |
| Mostly B’s | Storm Agent — Thunder Dash |
| Mostly C’s | Phantom Agent — Dash |
| Mixed A/B | Sentinel Agent — Forcefield |
| Mixed with vertical preference | Sky Agent — Super Jump |
| Creative / map-exploit mindset | Architect Agent — Platform |
| Aggressive knife-focused | Blitz Agent — Speed |
Counter-Intuitive Insights
1. Target Can Actually Hold Back Your Improvement
Target is S-tier for winning individual matches but C-tier for getting better at the game. Here’s why: when you always know where enemies are, you never develop the sixth sense for reading opponent movement, predicting spawns, and anticipating rotations. Players who main Target in Platinum often hit a hard wall in Diamond because they face opponents who know how to play around wallhacks — dead angles, unpredictable pathing, and cooldown counting.
The counter-intuitive truth: spending 50 matches on Dash or Thunder Dash will make you a better long-term player than spending 500 matches on Target. You’ll develop the game sense that Target would have compensated for. When you eventually switch back to Target at Diamond+, you’ll be unstoppable instead of hardstuck.
2. Speed Is Not Useless — You’re Using It on the Wrong Maps
Speed’s reputation as D-tier comes from the majority of players using it on maps where range decides fights. On Refinery or Bridge, a speed boost just gets you to your death faster. But on Warehouse, Downtown, and the close-quarters sections of Old Town, Speed enables a knife-focused playstyle that catches snipers completely off guard.
The counter-intuitive truth: Speed has a higher win rate on Warehouse than Target does, if you commit to the knife build. The burst lets you close 30 studs while a sniper is scoping. One knife swing kills. Then you Speed out the nearest doorway before their teammates react. The problem isn’t the ability — it’s that the ability demands a radically different playstyle than the rest of the game.
3. Thunder Dash Is Better as a Defensive Tool Than an Offensive One
Every Thunder Dash guide tells you to use it aggressively — dash toward enemies, stun them, take the kill. This works against average players. Against skilled players, aggressive Thunder Dashes get punished because:
- The dash animation is predictable in direction
- Good players track the trail and sidestep it
- You commit forward with no quick retreat
The counter-intuitive truth: Thunder Dash’s highest-value use is defensive. When an enemy pushes you, dash past them — the trail stuns them as they chase, and now you’re behind their position with them stunned in front of you. This reversal works at every rank because it violates the expectation of forward commitment. Defensive Thunder Dashes win more fights per cooldown usage than aggressive ones past Platinum rank.
4. Platform Wins Games at High Ranks — But Almost Nobody Plays It
Platform is ranked C-tier in every public tier list because the majority of players can’t use it effectively. But in high-rank lobbies (Diamond+), Platform has a small but dedicated playerbase that consistently places top 3. Why? Because at high ranks, every player pre-aims every predictable position. Platform lets you shoot from positions that shouldn’t exist on the map geometry — positions that no player pre-aims because you can’t normally stand there.
The counter-intuitive truth: Platform is secretly A-tier on maps with complex geometry. The reason it’s C-tier in aggregate data is that 90% of Platform users play it on maps where it doesn’t work. On Refinery, Bridge, and the Bunker section of Outpost, Platform creates sightlines that bypass the entire sightline meta. If you’re willing to invest 10-15 hours learning Platform setups on those three maps, you’ll out-position players who mechanically outclass you.
Agent Tier List (July 2026)
Ratings assume the ability is used on appropriate maps with a matching playstyle. Using Target on Warehouse or Speed on Refinery drops the rating by at least one tier.
| Tier | Agent (Ability) | Best For | Skill Floor |
|---|---|---|---|
| S | Intel Agent (Target) | Information control, pre-aim playstyle | Low |
| S | Storm Agent (Thunder Dash) | Aggressive push, stun-lock kills | Medium |
| A | Sentinel Agent (Forcefield) | Defensive anchor, angle holding | Low |
| A | Phantom Agent (Dash) | Versatile mobility, all-rounder | Low |
| B | Sky Agent (Super Jump) | Vertical surprise, high-ground control | High |
| C | Architect Agent (Platform) | Creative positioning, off-angle creation | Very High |
| D | Blitz Agent (Speed) | Knife rush, close-quarters rotation | Medium |
The real ranking (playstyle-adjusted):
- For passive, patient players: S-Tier = Target, A-Tier = Forcefield, B-Tier = Dash
- For aggressive, push players: S-Tier = Thunder Dash, A-Tier = Dash, B-Tier = Speed
- For creative, unorthodox players: S-Tier = Platform, A-Tier = Super Jump, B-Tier = Thunder Dash
- For all-rounders: S-Tier = Dash, A-Tier = Thunder Dash, B-Tier = Target
How to Use Agent Abilities Effectively — Per-Agent Strategy
Target: The Pre-Aim Cycle
- Activate Target from a safe position — do not use it mid-fight
- Note all enemy positions and their facing direction
- Pick the enemy that’s most exposed or most isolated
- Pre-aim the edge they’ll peek from
- Fire the moment they appear — do not wait for a perfect headshot
- Immediately relocate — they know where you are now
Thunder Dash: The Stun Trade
- Never open a fight with Thunder Dash — open with a shot first
- After firing (hit or miss), Thunder Dash toward the enemy
- The stun trail catches them if they’re peeking or chasing
- Follow up with a knife kill or close-range hipfire headshot
- Retreat to cover and wait for cooldown before re-engaging
Forcefield: The Shield Hold
- Place Forcefield in a position that blocks one approach but leaves you a retreat
- Do not stand in the center of the shield — peek from its edges
- When the shield is about to expire, decide: push the enemy or retreat
- Never place Forcefield in a position with only one exit
- Use it to win 1v2 situations by shielding while you kill one, then turn on the other
Dash: The Micro-Reset
- Use Dash to jiggle-peek corners — dash into peek, fire, dash back
- When you miss a shot, Dash to a new angle immediately (not backward — enemies track backward dashes)
- Combine with knife for a dash-slash-kill combo at close range
- Never Dash in a straight line twice in a row — mix left, right, and diagonal
Super Jump: The Vertical Timing
- Scope in before jumping — you can’t scope mid-air
- Fire at the peak of the jump arc (the split-second pause before descent)
- Never Super Jump in the same spot twice — enemies will pre-aim your landing
- Save Super Jump for the mid-round phase when enemies are settled into predictable positions
Platform: The Geometry Exploit
- Deploy Platform while running toward a wall or obstacle you want to cross
- Use the platform to stand at head-height above a common peek angle
- Enemies will be aiming at crouch-height — your head is where they don’t expect it
- Platform + Scope is surprisingly stable; you can hold angles from mid-air
Speed: The Knife Rush
- Equip knife as your active weapon before activating Speed
- Speed toward the nearest enemy position identified by audio
- Do not stop to scope — keep moving and close to knife range
- After the kill, Speed continues for the remaining duration — use it to escape
- Repeat: Speed uptime is your scoring window, downtime is your survival phase