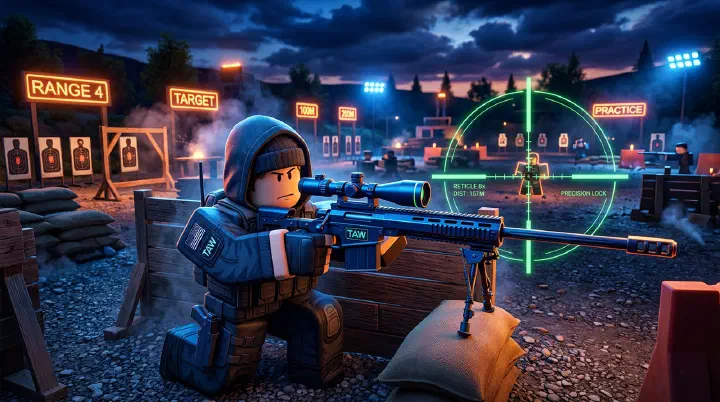
You’ve been grinding aim trainers for three weeks. Your stats look great: 72% accuracy on static targets, 65% on tracking scenarios, and your reaction time is down to 185ms. You load into SNIPE ranked, confident. Rooftops loads. You scope in on mid, track a sliding enemy, fire — and the shot sails past his shoulder. You adjust, fire again. Miss. He one-taps you while you’re re-scoping.
The killcam shows your crosshair was consistently 3-4 pixels behind him. Not because you’re slow, but because your aim training taught you to hit stationary dots at a fixed distance, and SNIPE’s sniper rounds have travel time, scope-in delay, and a movement penalty that no external trainer simulates. You’ve been training for a game that doesn’t exist.
This is the trap that keeps 80% of Gold players in Gold. They practice aim in isolation, get good at the training scenario, and fail when the real game adds variables the trainer doesn’t account for. The result is a player who can hit 9 out of 10 static targets in a private server and misses every shot in ranked because the enemy is moving, scoping, and shooting back.
The gap between your aim trainer score and your ranked performance isn’t a talent gap. It’s a training gap. You’re practicing the wrong thing in the wrong environment with the wrong metrics. This guide fixes all three.
Why Your Aim Training Is Failing You
Three specific mistakes destroy your aim improvement in SNIPE, and you’re probably making all of them.
Mistake 1: You practice at slow speed, then expect fast-speed execution. Every aim trainer and casual DM session lets you take your time between shots. You line up the crosshair, breathe, fire. In ranked, you have 0.4 seconds between spotting an enemy and dying. Your brain can’t speed up muscle memory that was built at a slow pace. The solution: practice under a time constraint. In every drill, give yourself a 0.5-second window to fire. If you don’t take the shot, it counts as a miss. This trains your brain to execute at game speed, not practice speed.
Mistake 2: You ignore the scope-in variable. SNIPE’s scope-in animation takes approximately 300ms. During that 300ms, your crosshair position drifts because your character’s shoulder shifts when the sniper scope comes up. If you practiced your flick on a hip-fire crosshair, the scoped crosshair lands in a slightly different position. Diamond players compensate for this drift automatically because they’ve done 10,000+ scope-in reps. Gold players wonder why their shot was “on target” in the killcam but missed. The scope drift is the invisible variable.
Mistake 3: You measure the wrong thing. Accuracy percentage is a vanity metric. It tells you how many shots you hit, but it doesn’t tell you whether you hit the right shots. A player who takes 20 safe shots and hits 80% is less impactful than a player who takes 10 difficult shots and hits 60%. The high-impact player made more kills. The high-accuracy player fed their K/D. Measure kills per engagement, not accuracy. If you’re winning 1v1 duels, your aim is working. If you’re losing 1v1 duels despite 70%+ accuracy, you’re taking the wrong shots.
The Four Pillars of SNIPE Aim
Aim in SNIPE isn’t one skill. It’s four distinct skills that stack on top of each other. Most players train only one or two and wonder why the third and fourth pillars collapse under pressure.
Pillar 1: Crosshair Placement
What it is: Keeping your crosshair at head height, aimed at the most likely enemy position, at all times — even when no enemy is visible.
Why it matters: Crosshair placement eliminates the need to aim. If your crosshair is already at head height and aimed at the corner an enemy will peek, you don’t need to flick. You just need to click. This single habit reduces your “time to kill” by 300-400ms — the difference between dying to the first shot and landing the first shot.
The metric: In a 10-minute casual match, check your crosshair position every time you move. If it’s pointed at the floor or wall more than 20% of the time, you’re not placing it. Reset your aim after every movement.
Drill: Load into a private server on Bridge. Walk from spawn to the far end of the map. Keep your crosshair at head height against the nearest wall the entire time. Every time you turn a corner, pre-aim the corner edge. Every time you climb a ladder, keep the crosshair at the top edge. Do this walk five times without firing a shot. Then add shots and see how many times you can land a headshot on the first frame of seeing a target.
Pillar 2: Flick Accuracy
What it is: The ability to snap your crosshair to a target in a single motion, regardless of where the target appears relative to your current crosshair position.
Why it matters: In SNIPE, you don’t always have the luxury of pre-aiming. An enemy slides around a corner, drops from a wall-run, or grapples from a blind angle. Flick shots are your emergency response — and in a game with one-shot headshots, your flick determines whether you survive or die.
The metric: Track your flick accuracy in a 10-minute session of 1v1 duels. Count how many flicks land within one head-width of the target. Below 40% = needs work. 40-60% = average. 60%+ = Diamond level.
Drill: Place two markers on a wall in a private server, 30 degrees apart. Stand 30 studs from the wall. Switch between the two markers by flicking — don’t trace, snap. Do 50 reps. Then increase the angle to 60 degrees. Then 90. At 90 degrees, you’re practicing the maximum flick you’ll need in any ranked engagement. Most SNIPE fights happen within 60 degrees of center-screen.
Pillar 3: Tracking Consistency
What it is: The ability to keep your crosshair on a moving target while the target changes direction, speed, and elevation.
Why it matters: SNIPE’s bullet travel time means you can’t just flick and fire. You need to track the target’s movement for 100-200ms to lead the shot correctly. Players who flick and fire immediately are guessing. Players who track for a fraction of a second before firing are calculating.
The metric: In a Kill Race lobby, count how many of your missed shots were “behind” the target (tracking too slow) vs “ahead” (tracking too fast). If more than 70% are behind, increase your sensitivity by 200 eDPI. If more than 70% are ahead, decrease by 200 eDPI.
Drill: In a private server, spawn a bot and set it to strafe left-right at medium speed. Track the bot’s head with your crosshair without firing for 30 seconds. Then add the shot. Track for 100ms, then fire while maintaining the track through the shot. The bullet should land exactly where the crosshair was — if it doesn’t, you’re moving the crosshair at the moment of firing.
Pillar 4: Scope Timing
What it is: The precise coordination between clicking scope-in, acquiring the target, and firing during the scope animation window.
Why it matters: Scope timing is the pillar that separates Gold from Platinum. Gold players scope in, then aim. Platinum players aim while scoping in and fire the instant the scope settles. The difference is 200-300ms of dead time where the Gold player is vulnerable and the Platinum player is already repositioning.
The metric: Record your scope-to-fire time in a private server. Gold players average 600-800ms. Platinum players average 400-500ms. Diamond players average 300-400ms — they fire within 100ms of the scope fully opening.
Drill: Stand behind cover on any map. Pre-aim the corner. Scope in, peek, fire, unscope, return to cover. The entire sequence should take under 1 second. If you’re slower, you’re hesitating. The hesitation is usually mental — you’re confirming the target before firing. Trust your pre-aim. If your crosshair was at head height, the shot is valid. Fire first, confirm later.
Sensitivity Calibration: Find Your Permanent Setting
Your sensitivity is the single most important variable in aim improvement. Change it weekly and you’ll never build muscle memory. Here’s the calibration process that takes 30 minutes and gives you a sensitivity you’ll use for the next year.
Step 1: The 360 Test. Stand in a private server facing a wall. Move your mouse from the center of your mousepad to the far right edge in one smooth motion. Your character should rotate approximately 180 degrees. If you rotate more than 270 degrees, your sensitivity is too high. If you rotate less than 90 degrees, it’s too low. Adjust DPI or in-game sensitivity until a full mousepad-width swipe = 180 degrees.
Step 2: The Micro-Adjustment Test. Place two targets on a wall 5 pixels apart. Flick between them. If you overshoot both targets, lower your sensitivity. If you undershoot both, raise it. If you overshoot one and undershoot the other, your sensitivity is correct — your brain is compensating for small inconsistencies, which is a sign of a well-calibrated setting.
Step 3: The Stress Test. Play one full Kill Race at your new sensitivity. If you feel like you’re fighting the mouse (overcorrecting, struggling to track), adjust by 200 eDPI and test again. If you don’t notice the sensitivity at all, it’s perfect. The best sensitivity is the one you forget about.
The golden rule: Once you find your sensitivity, never change it. Not after a bad session. Not because a streamer uses a different setting. Not because you feel “slow” one day. Muscle memory is built over thousands of reps. Every time you change sensitivity, you reset the counter. Diamond players have used the same sensitivity for 6+ months.
| DPI | In-Game Sens | eDPI | Best For |
|---|---|---|---|
| 400 | 2.0-4.0 | 800-1600 | General purpose |
| 800 | 1.0-2.0 | 800-1600 | Most common range |
| 800 | 1.5 | 1200 | Community sweet spot |
| 1600 | 0.5-1.0 | 800-1600 | High-DPI, same range |
| 400 | 3.0 | 1200 | Equivalent to 800@1.5 |
Keep your DPI at 800 if your mouse supports it. It’s the most widely supported setting and avoids the pixel-skipping issues that occur at very high DPI values.
The 30-Day Training Routine
This routine is designed to build all four pillars simultaneously. Each week focuses on a different combination. Follow it for 30 days and you’ll see measurable improvement in every ranked engagement.
Week 1: Foundation (Crosshair Placement + Sensitivity Familiarity)
Daily (30 minutes):
- 10 minutes: Bridge walk drill (crosshair placement only, no firing)
- 10 minutes: Static flick drill (two markers at 30 degrees, 50 reps)
- 10 minutes: Casual match with one rule — you must hit the first shot or disengage. No follow-up shots for 3 seconds. This teaches you to value the first shot over spray-and-pray.
Week 1 goal: Your crosshair is at head height 80%+ of the time in casual matches. You can hit a 30-degree flick within one head-width 50% of the time.
Week 2: Speed Introduction (Flick + Scope Timing)
Daily (30 minutes):
- 5 minutes: Warm-up flicks (30 degrees, 20 reps)
- 10 minutes: Scope timing drill (behind cover, scope-peek-fire-unscope, under 1 second per cycle)
- 15 minutes: Kill Race with a flick-only rule — no pre-aiming, force yourself to flick to every target
Week 2 goal: Scope-to-fire under 500ms consistently. Flick accuracy at 60 degrees reaches 40%+.
Week 3: Tracking + Pressure (Live Application)
Daily (35 minutes):
- 10 minutes: Tracking drill (bot strafe, track 100ms before firing, 30 reps)
- 10 minutes: 1v1 duels with a time limit — you must take the shot within 0.5 seconds of seeing the enemy or you lose the round
- 15 minutes: Ranked. Focus on one pillar per match. Match 1: crosshair placement only. Match 2: scope timing only. Match 3: flick accuracy only.
Week 3 goal: Tracking accuracy reaches 60%+ on strafing targets. Ranked K/D improves by 0.2-0.4 from your Week 1 baseline.
Week 4: Integration (Full Pressure)
Daily (40 minutes):
- 10 minutes: All-four-pillar drill — 10 flick reps, 10 tracking reps, 10 scope-timing reps, 10 placement reps
- 10 minutes: Kill Race with the rule that you must scope in a different position every time — no repeeking the same angle
- 20 minutes: Ranked. Review every death. If more than 2 deaths per match are from mechanical aim errors (missed flick, bad tracking, slow scope), do 10 extra minutes of that specific pillar drill.
Week 4 goal: All four pillars are integrated. Your scope-to-fire is under 400ms. Your flick accuracy at 60 degrees is 50%+. Your crosshair placement is automatic. You stop thinking about aim entirely and start thinking about positioning.
Counter-Intuitive Truths About Aim in SNIPE
These four ideas contradict everything you’ve heard about aim training. They’re also the reasons Diamond players don’t grind aim trainers.
External aim trainers make your aim worse in SNIPE. The most controversial statement in this guide and the most important one. Every hour you spend in Aim Lab or KovaaK’s is an hour of practicing the wrong movement patterns. Those trainers use hitscan mechanics, instant scope, and no movement penalty. SNIPE uses projectile bullets, 300ms scope delay, and a 20% accuracy penalty while sliding. The muscle memory you build in an external trainer actively conflicts with the muscle memory you need in SNIPE. The only exception is the first 2-3 hours to calibrate sensitivity. After that, stop.
The best way to improve aim is to lose 1v1 duels on purpose. Winning feels good. Learning feels bad. If you’re winning 60%+ of your duels, you’re not improving — you’re coasting on the skills you already have. Deliberately queue into duels against players who out-aim you. Watch how they move. Notice when they fire. Steal their timing. You’ll lose 20 duels in a row and learn more than winning 200 against worse players. The best aim practice is the one that frustrates you.
You should aim with your feet, not your hands. This sounds like nonsense until you watch a Diamond player warm up. They don’t flick wildly. They strafe into the shot. Their crosshair is already at head height (placement), and they use movement keys — not the mouse — to make the final 2-3 pixel adjustment. Mouse aim handles the big movements (30-180 degrees). Movement aim handles the micro-adjustments. If you’re using your mouse for both, your micro-adjustments will be jittery and inconsistent. Let your strafe do the fine work.
Aim has a 30% ceiling in SNIPE. Once your crosshair placement is automatic, your scope timing is under 400ms, and your flicks are 60%+ accurate, further aim improvement gives you single-digit returns. The Diamond players who dominate aren’t the ones with the best aim. They’re the ones who combine competent aim with elite positioning, movement, and game sense. If you’re hardstuck Platinum with 65% flick accuracy, your aim isn’t the bottleneck. Your positioning is. The Positioning & Angles Guide will fix more of your ranked deaths than another 100 hours of aim drills.
The Aim Decision Matrix
Use this matrix to decide what to practice based on your specific weakness. Don’t guess. Diagnose.
| If You… | Your Weak Pillar | Do This Instead of General Aim Training |
|---|---|---|
| Miss the first shot but hit the follow-up | Crosshair Placement | Bridge walk drill, 10 min daily |
| Overshoot targets consistently | Flick Accuracy | Lower sensitivity 200 eDPI, two-marker flick drill |
| Undershoot targets consistently | Flick Accuracy | Raise sensitivity 200 eDPI, two-marker flick drill |
| Hit stationary targets, miss moving ones | Tracking Consistency | Bot strafe drill, track 100ms before firing |
| Die while scoping in | Scope Timing | Cover drill, scope-peek-fire-unscope under 1s |
| Aim well in DM, miss in ranked | All pillars | Pressure-conditioning: 1v1 duels with stakes |
| Feel “slow” in close range | Sensitivity | 360 test: full mousepad = 180 degrees, adjust if less |
| Feel “shaky” at long range | Sensitivity | Micro-adjustment test: 5-pixel targets, adjust if overshooting |