You load into Bridge. The skybox is clear, the central lane stretches out like a shooting gallery, and you already know how this goes. You flick to your Heavy Sniper — the scope snaps up, enemies appear at long range, and you don’t even flinch. Headshot. Kill. Headshot. Another kill. You finish the match at 18 kills, 3 deaths, and the lobby chat fills with accusations and vote-kick threats. You feel unstoppable. The Heavy Sniper isn’t just your weapon; it’s your identity. You are a sniper main, and Bridge is your home.
Next match: Warehouse. The loading screen flashes and you don’t even check your loadout. Why would you? The Heavy Sniper got you 18 kills last round. The map spawns. The lighting is dim, corridors are tight, and every sound echoes off metal containers. An enemy rounds the corner at 8 meters with a Tactical SMG. You try to scope. The scope animation takes 0.4 seconds. The SMG kills in 0.3. You die before your crosshair finishes blooming. Respawn. Die again to a shotgun at point-blank. Die again to another SMG rounding a different corner. Match ends: 3 kills, 16 deaths. The same lobby now types what you’re already thinking.
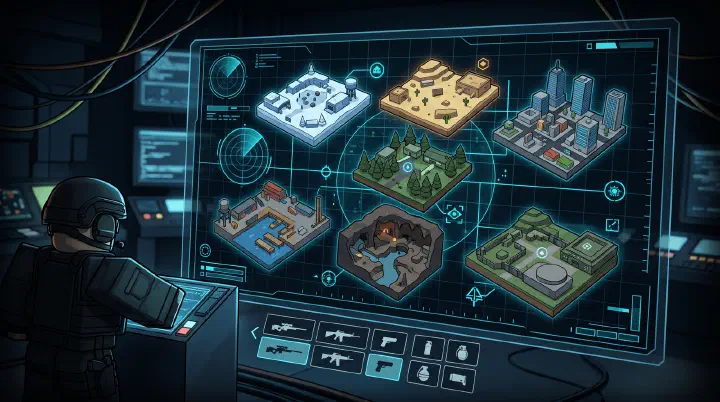
You didn’t suddenly become bad at SNIPE. You brought the wrong weapon to the wrong map. SNIPE has 7 maps, and each one has an optimal engagement distance. Bridge, Rooftops, and Hangar are long-range maps where the Heavy Sniper dominates — sightlines are 50-150 meters and you can scope comfortably. Warehouse and Downtown are close-range maps where SMGs and Shotguns kill snipers before they can scope — engagement distances are 5-25 meters. Construction and Arena are mid-range maps where the Assault Rifle or Semi-Auto Sniper works best.
You don’t need to master every weapon in the game. You need exactly two: one long-range weapon for the three open maps, and one close-range weapon for the two CQB maps. For the two mid-range maps, either weapon works depending on your playstyle. Two weapons. Seven maps. That’s the minimum viable arsenal for consistent performance across all of SNIPE.
The players who identify as “sniper mains” are telling you they dominate on three maps and get destroyed on two. They’ve accepted a 40% disadvantage on Warehouse and Downtown because they won’t spend 5 hours practicing the SMG. Five hours of SMG practice in casual mode would double their kills on those maps. Being a “main” of anything in SNIPE isn’t a badge of honor — it’s an admission that you’ve avoided learning half the game.
When you see the map loading screen, you have 3 seconds to swap your loadout. Bridge, Rooftops, or Hangar: equip Heavy Sniper and Grapple Hook. Warehouse or Downtown: equip Tactical SMG and Wall Run. Construction or Arena: your choice based on playstyle. This single habit — swapping weapons based on map rather than preference — adds 3-5 kills per match for the average player.
On Bridge, hold the pillars on either side of the central lane. Peek, shoot, reposition to the other pillar. Never hold the same pillar for more than 15 seconds — the enemy pre-aims where you last appeared. The under-bridge path is the best flank route on the map but exposes you to players watching from above. On Warehouse, the central catwalk controls the map. Whoever holds the high ground wins. Never walk the open warehouse floor — you’re exposed from three angles simultaneously. Wall Run between container stacks instead. On Rooftops, the AC unit corner is the strongest position. Grapple between buildings — never take the stairs between levels, they’re always camped. A static sniper on Rooftops is a dead sniper within 20 seconds.
Why Map Knowledge Alone Doesn’t Win Rounds
Knowing every corner and callout on a map means nothing if you keep making these same positioning mistakes.
Holding the “default” angle. Every player who watches a YouTube guide rushes to the same three spots. Bridge pillars, Warehouse catwalk, Rooftops AC unit. These angles are strong because they’re obvious — which means enemies pre-aim them every round. If you’re dying to pre-fires and wall-bangs, it’s because you’re holding the angle everyone expects.
Playing every map with the same aggression level. Bridge rewards patience. Warehouse punishes it. The player who camps a corner on Bridge often wins, while the same player who camps a corner on Warehouse gets flanked in 10 seconds because the map geometry allows three entry points to every position. Map knowledge isn’t static; your aggression has to shift with the layout.
Ignoring audio cues and rotation timing. You memorized the flank route, but you didn’t listen for footsteps. You know the spawn layout, but you rotate 5 seconds too early and run straight into the enemy’s secondary push. Map knowledge is spatial; round sense is temporal. Most players have the first and ignore the second.
Forcing the same loadout across all seven maps. This is the most common failure. The Heavy Sniper player who refuses to swap on Downtown isn’t just disadvantaged — they’re feeding. Every map has an optimal engagement distance, and stubborn loadout loyalty creates a skill ceiling you can’t aim through.
The Map-Specific Strategy Framework
Use this simple decision tree during the 3-second loadout screen to pick your approach for every map.
On Bridge, Rooftops, and Hangar → hold long angles, play patient. These maps have 50-150 meter sightlines. Equip Heavy Sniper and Grapple Hook. Hold power positions that overlook chokepoints, but relocate after every 2-3 kills. Never repeek the same window after getting a kill — the enemy marksman is already aiming at it.
On Warehouse and Downtown → hold high ground, play fast. Engagement distances are 5-25 meters. Equip Tactical SMG or Shotgun with Wall Run. Control vertical space first; whoever owns the catwalk or rooftop controls the map. Never walk the open floor unless you’re rotating behind cover. Aggression wins because hesitation gives the enemy time to flank.
On Construction and Arena → hold flex positions, play adaptive. These are mid-range maps where the fight shifts between 20 and 60 meters. Equip Assault Rifle or Semi-Auto Sniper. Use cover-to-cover movement rather than pure long-range camping or full CQB rushing. Your positioning should change based on which side of the map the enemy is pressuring.
Counter-Intuitive Positioning That Catches Enemies Off-Guard
These tactics break the “common sense” that most players follow — which is exactly why they work.
The best angle is the one nobody expects. The statistically strongest position on any map is also the most predictable. Rooftops AC unit wins duels but gets grenade-spammed and rushed every round. The second-best angle — the one that requires a Grapple Hook to reach and lacks a clean sightline — is often safer because enemies never check it. Strong positioning beats perfect positioning if perfect positioning gets you prefired.
Sometimes the worst position on the map is the best. The open warehouse floor on Warehouse is usually suicide. But during the final 30 seconds of a match, when every enemy is holding catwalk and expecting you to challenge high ground, walking the floor and shooting up is the last thing they anticipate. Situational bad positions become good positions when the enemy’s mental model doesn’t include them.
Playing the “wrong” weapon for the map can work — if you change where you fight. Bringing a Heavy Sniper to Warehouse is normally a death sentence. But if you specifically avoid the close corridors and instead hold the one long hallway near spawn, you turn the map into a single-lane shooting gallery. The weapon isn’t wrong; the route is. Force the map to fit your weapon by controlling the one area where your range advantage exists.
Rotating away from the fight often gets you more kills than pushing into it. When your team is trading kills at mid, the instinct is to join the chaos. But the player who flanks through the empty lane while the enemy is focused on mid gets free backshots. Map mastery includes knowing which routes are empty at which times — not just where the enemies are, but where they aren’t.
Your safest spawn is often your most dangerous. Spawn protection makes players complacent. They stand still in spawn selecting loadouts or waiting for teammates. On Hangar and Rooftops, experienced players pre-aim common spawn exits and pick off players who walk out predictably. Treat your spawn like a hot zone: move immediately, take the unexpected exit, and never assume you’re safe because you just respawned.
Related Guides
- SNIPE Beginner Guide — Controls, Game Modes & First Win
- SNIPE Weapons & Abilities Tier List — Best Loadouts
- SNIPE Solo vs Squad — Strategy & Loadout Comparison
- SNIPE Ranked Climbing Guide — RP System & Tier Strategy
- SNIPE Positioning & Angles — Advanced Spots & Peeks
- SNIPE Movement Mechanics — Wall Run, Grapple & Advanced Mobility