You round the corner on Metro platform B with your crosshair already hugging the pillar edge. Two enemies barrel out of the tunnel, sprinting toward mid — completely silent on their own screens, but their footsteps echo off the tile walls like a warning siren. You do not panic-scope. You already know the pillar gives you a 1-stud wide pixel peek they cannot see from the tunnel. One shot. Two shots. Double elimination. They never even knew where it came from.
That is not aim. That is map knowledge winning the fight before the first bullet leaves the barrel.
This guide breaks down every major SNIPE map — Cargo, Metro, and Warehouse — with callouts, power positions, rotation paths, and the specific mistakes that cost players rounds they should have won.
The Mistakes That Lose Games
Before we talk about where to stand, let us talk about where standing still gets you killed.
Auto-piloting the same route every spawn. You spawn, you sprint to tower, you die. You spawn, you sprint to tower, you die. SNIPE punishes repetition harder than almost any Roblox FPS. If you have taken a path three times in one match, the enemy is pre-aiming it. Guaranteed.
Ignoring audio cues for specific zones. Metro’s tunnels amplify footsteps. Warehouse’s metal rafters make a distinct clang when someone walks them. Cargo’s shallow water lets you move with zero audio. Players who play with music on or who never stop sprinting hand the enemy a free wallhack.
Not adapting to spawn positions. Your team just got wiped and respawned on the west side. You are still pushing east. That means the entire enemy team is now between you and your teammates. You are not flanking — you are surrounded. Good players check the scoreboard and listen for teammate spawns before they commit to a push.
How to Choose a Rotation Path
Rotation in SNIPE is not random movement. It is a decision tree you run every 5-10 seconds.
Start by asking three questions:
- Which zones does my team control? If you own mid and east, your rotation should reinforce west or cut off enemy flanks from north.
- Where did I last fire from? Every shot paints a target on that position. Your next angle should be at least 45 degrees away, preferably on the opposite side of the map’s centerline.
- What ability is off cooldown? If Target is ready, you can afford a riskier rotation through open space because you will see enemies before they see you. If everything is on cooldown, hug walls and use flank routes.
Here is the framework in practice. You are on Cargo, holding central tower. You take a shot at someone in the east container row. They know you are on tower. Do not drop down the ladder — that is where they are pre-aiming. Instead, wall run along the tower’s back face, drop onto the west walkway, and re-engage from a completely different sightline. The rotation took 4 seconds. Their crosshair is still on the ladder.
The Counter-Intuitive Play
Sometimes the worst position on the map is the best one because nobody checks it.
On Metro, the open tracks between platforms look like a death trap. No cover, long sightlines, complete exposure. But in a 1v1 endgame with 10 seconds left, standing on the tracks behind a pillar — not on the platform, but down on the rails — breaks every pre-aim in the book. Your opponent clears platform corners, checks the catwalk, peeks the tunnel. They do not look down.
On Warehouse, the ground floor is a slaughterhouse. Everyone fights from the office windows or the rafters. But crouched behind the forklift on the north wall, you have a clean sightline through the entire open floor, and the glare from the skylight above masks your scope glint. It is a trash position for a firefight, but a genius position for one free pick.
The rule: if a spot feels too obvious or too stupid, test it for one round. The surprise factor often beats pure cover.
Cargo
Size: Large | Best Abilities: Target, Forcefield | Best Modes: Team Deathmatch, FFA
Cargo is the launch map and still the most balanced classroom for learning SNIPE. Shipping containers create a maze of vertical and horizontal angles, with elevated walkways overlooking the central yard.
Key Callouts and Sightlines
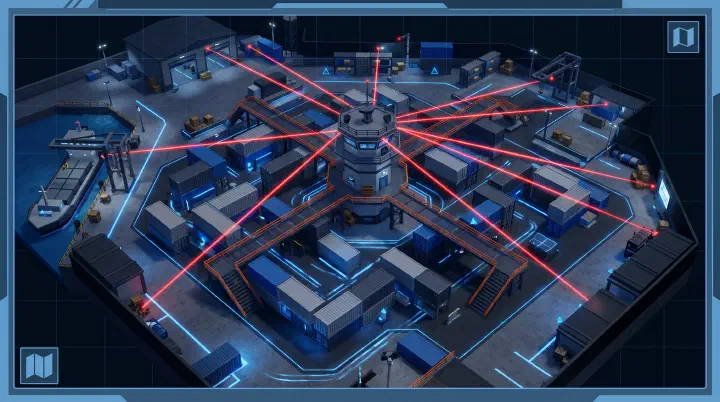
- Central Tower — sees the entire yard and both side lanes. It is the most powerful and most pre-aimed spot on the map. Use it for one shot, then leave.
- East Container Row — a long line of blue containers with 1-stud gaps between them. You can shoot through these gaps, and enemies rarely expect it.
- West Walkway — elevated catwalk running the length of the west wall. Covers mid yard and tower flank, but you are exposed from the spawn warehouse roof.
- Spawn Warehouse Roof — low risk, low reward. Good for catching enemies rotating out of their spawn, but you cannot see mid from here.
- Crane Hook (East) — climbable. Not many players know this. It gives you an off-angle over the east container row that looks directly into tower.
Cargo Power Position: Central Tower (Used Correctly)
The tower is not a home. It is a drive-by.
- Climb up and immediately pop Target.
- Take one shot on the best target you see.
- Wall run off the back face toward the west walkway or drop to the container maze.
- Re-engage from East Container Row or the crane hook.
If you stay longer than 5 seconds, you will hear a Thunder Dash followed by a shotgun blast. That is the sound of someone punishing your camping.
Cargo-Specific Tactics
- The water along the map’s southern edge is shallow. Walk through it and you make zero footstep noise. It is the best rotation path when you are low on health and need to disappear.
- Containers have tiny gaps at the corners. Learn the two or three gaps that align with common head-level positions. You can wall-bang without exposing yourself.
- Never slide into the central yard from the east ramp. It is the most predictable entry on the map. Use the water path or the container gaps instead.
Metro
Size: Medium | Best Abilities: Thunder Dash, Target | Best Modes: 1v1 Duels, Team Deathmatch
Metro is a three-lane map disguised as a maze. Two platforms run parallel, connected by a central tunnel and two end tunnels. The trains sitting on the tracks are not just cover — they define every sightline.
Key Callouts and Sightlines
- Platform A (North) — the longer platform with the broken ticket booth. Great for long angles down the east tunnel, but vulnerable to flankers coming through the central stairwell.
- Platform B (South) — has the maintenance closet and the climbable light fixtures. The light fixtures are the best off-angle on the map. Most players never look up.
- Central Tunnel — the lowest point on the map. Whoever controls the tunnel stairs controls the flow between platforms. It is a chokepoint, not a hangout spot.
- East Tunnel — long, straight, and deadly. If you must cross it, slide-jump and wall run along the ceiling pipes. Never walk.
- West End — dark and narrow. Perfect for Thunder Dash rushes because the ability’s audio gets swallowed by the tunnel reverb.
Metro Power Position: Platform B Lights
Climb the light fixtures above Platform B. You are silhouetted against the station ceiling, which sounds bad, but the broken neon creates visual noise that hides your model. From here you see:
- The entire east tunnel exit
- The central stairs
- Players peeking from Platform A ticket booth
The counter is a wall run from the east tunnel directly at you, so relocate to the maintenance closet roof after one or two kills.
Metro-Specific Tactics
- Footsteps echo. If you hear metal screeching, someone is on the tracks. If you hear muffled thuds, they are in the tunnels. Use this to pre-aim before you ever see them.
- The trains have windows. You can shoot through them, and the glass does not slow bullets. Use this to tag players hiding behind the train cars.
- In 1v1 Duels, never start a round on Platform A. It is the default spawn-side position. Instead, drop to the tracks immediately and take the west tunnel to Platform B. You will catch 90% of opponents still setting up their crosshair on the ticket booth.
Warehouse
Size: Medium-Large | Best Abilities: Forcefield, Dash | Best Modes: Team Deathmatch, FFA
Warehouse is an open box with a ceiling problem. The ground floor is a killing field of pillars and pallets, while the office windows and rafters overlook everything. Elevation wins here.
Key Callouts and Sightlines
- Office Windows (South) — two broken windows overlooking the open floor. The most contested spot on the map. Whoever holds these windows shuts down half the ground floor.
- Rafters (Ceiling) — metal beams running east-west. You can walk them, but every step clangs. Crouch-walk to stay silent, or accept the noise and use it as bait.
- Forklift (North Wall) — the “stupid” position that works. Crouch behind it for a sightline through the entire south half of the floor.
- Loading Dock (East) — elevated and covered. Great for spawn protection, bad for mid control because the pillars block your view.
- Pillar Maze (Center) — eight concrete pillars creating a grid. Never fight inside the grid. Use the pillars to block line of sight while rotating, but never stop between them.
Warehouse Power Position: Rafters Over Office
Get onto the rafters directly above the office. From here you can drop down onto window holders, or shoot down through the skylight gaps. Most players on the ground floor never check straight up. The risk is a Thunder Dash player who knows the wall run route up. If you hear the ability charge, immediately drop to the office floor — do not fight on the beams.
Warehouse-Specific Tactics
- The skylight casts a glare from the south. If you are looking north from the office, you are backlit and easy to see. If you are looking south from the rafters, enemies are silhouetted. Always fight with the light behind you.
- Forcefield is strongest on the ground floor. Drop it between two pillars and you create a no-scope zone that forces enemies to rotate into your teammate’s crosshair.
- In FFA, spawn and immediately go up. The first 10 seconds of a Warehouse match are a ground-floor bloodbath. Let them kill each other, then pick the survivors from the rafters.
1v1 Duel Strategy
1v1 Duels are best-of-5 with no respawns. The mental game matters more than your K/D.
Round 1 is everything. Use your safest strategy and your best ability. Going 1-0 up forces the opponent to adapt, which means they are reacting instead of executing.
Change positions every single round. If you won from Platform B lights in round 1, round 2 you go to the Metro tracks or the maintenance closet. Never let them pre-aim your last spot.
Ability cooldowns persist between rounds. If you burned Thunder Dash to win round 1, you might not have it at the start of round 2. Play conservative until it is back.
The 30-second rule. If nobody has fired by 30 seconds, the first player to move usually loses — unless you have Target. Pop it, find them, and pre-fire their position before they can react.
Team Deathmatch Roles
In 6v6 TDM, not everyone should peek the same angle.
- Anchor (Forcefield) — holds defensive angles near spawn and covers the flank route nobody wants to watch. Your job is to stay alive and call out pushes.
- Slayer (Thunder Dash) — creates chaos. You push enemy positions, trade one-for-one at worst, and force the enemy to look at you while your Anchor lines up free shots.
- Intel (Target) — you do not need the most kills. You need the most information. Call rotations, track the enemy Anchor, and tell your Slayer where to dash next.
- Flex (Dash) — fill the gap. If your Anchor died, hold the flank. If your Slayer is pinned, create a distraction. Flex players win TDMs.
A balanced team runs two Anchors, two Slayers, one Intel, and one Flex. Six Slayers lose to coordination every time.
Practice Routine
Spend 20 minutes before ranked on these drills:
- Minutes 0-5: Empty server. Run every map without shooting. Find three new climbable spots or gaps you have never used.
- Minutes 5-10: Free-for-All with only your knife. Forces you to learn escape routes and survival angles.
- Minutes 10-15: Empty server. Practice the peek-shot-reposition cycle on a landmark. Scope, fire, slide cancel, wall run, re-scope. Do it until your hands move before your brain decides.
- Minutes 15-20: One 1v1 Duel. Apply one new position from your first drill. Win or lose, note why.
Map knowledge beats aim in SNIPE. You can miss a shot and reposition. You cannot out-aim a player who already knows where your head will be.
Frequently Asked Questions
What is the best map for learning SNIPE fundamentals? Cargo. It has a bit of everything — long lanes, elevation, tight corners, and flank routes. If you can control tower without camping it, you understand the core loop of SNIPE positioning.
How do I stop getting flanked on every map? You are probably over-committing to one angle. The golden rule is: take one shot, then move. Also, check your spawn. If your team just respawned on the opposite side of the map, the enemy is now behind your old position. Rotate back toward your team instead of deeper into enemy territory.
Should I use the same power position every round in 1v1 Duels? Absolutely not. Power positions win you round one. Round two, your opponent pre-aims that exact spot. Use a power position for one pick, then rotate to a secondary angle that covers the approach to that power position. Let them walk into your scope while hunting your old spot.