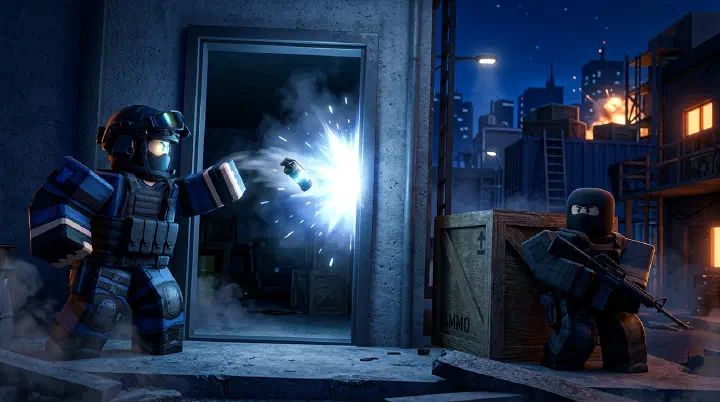
It’s match point. 4–4. Your team is pushing B-site on Depot. You have a flash and a smoke in your kit. Your entry fragger calls “Going in” and you panic-throw the flash over the doorframe. It clips the jamb, bounces back, and detonates at eye level. The screen goes white. Not for the enemy—for you and your teammate. You both hear footsteps. By the time vision returns, you’re spectating. The enemy player didn’t even move. He just held the angle and clicked twice while two blind players stumbled into his crosshair. Your utility didn’t help you. It killed you. That single flash cost the round, the map, and possibly your rank-up. This isn’t a hypothetical. This is every other low-to-mid rank lobby in Snipe. Players buy utility because they think it’s supposed to help, but they throw it like they’re trying to get rid of a hot potato. Utility in Snipe isn’t a bonus item. It’s a weapon with its own skill ceiling. And until you learn how to use it, your grenades are more dangerous to your team than to the enemy.
Why Your Utility Is Hurting Your Team
Before you learn lineups, you need to stop throwing like a liability. Here are the five utility mistakes that lose rounds in ranked Snipe.
Flashing your own teammates. This is the most common and the most painful. A flashbang in Snipe has a wide radius and a short fuse. If your entry fragger is two steps ahead of you and you throw a flash over his shoulder, you just blinded the one person who needed to see the enemy. Always call your flash before you throw it. Use voice chat or the in-game ping. If you can’t call it, don’t throw it.
Smoking off your own angles. A smoke is a wall. If you throw it in front of your own team while you’re trying to hold a site, you’ve given the enemy free cover to push through. The classic mistake is smoking the doorway you’re standing in. The enemy can walk through the smoke and pre-fire you before you even see them. Smoke the enemy’s position, not yours. If you must smoke a choke point, make sure your team is on the far side of it.
Wasting utility early. Throwing a frag at the start of the round into a random corner because “maybe someone’s there” is a waste of credits and a giveaway of your position. Early-round utility should only be used if you have a specific purpose: a smoke to cross mid safely, a flash to help a teammate peek an angle, or a molotov to delay a push. Random throws at 0:00 help nobody.
Not calling your utility. Even if you throw a perfect flash, it doesn’t matter if your team doesn’t know it’s coming. Communication in Snipe is not optional. Use simple, consistent callouts. “Flash B-tunnel in 3.” “Smoke A-long.” “Frag out, quad.” The two seconds it takes to call your utility will save your team more rounds than your aim ever will.
Dying with full utility. If you have a smoke and a flash and you die without using either, you didn’t just waste your own money—you wasted your team’s opportunity. Utility is a resource that expires when you do. If you’re holding a site and you know the push is coming, use the smoke. Use the flash. Dying with full utility means you were either too scared or too slow. Both are fixable.
The Utility Economy: When to Buy, Save, and Spend
Utility in Snipe costs credits. Credits win rounds. If you’re buying utility you don’t use, you’re buying losses. Here’s how to think about your utility economy across the round structure.
Round 1 (Pistol Round): Do not buy utility. On pistol rounds, credits are extremely tight. A smoke costs the same as armor upgrades, and a single frag won’t kill a full-health enemy. The only exception is if your team has a specific, practiced strategy that requires a smoke to cross mid safely. Otherwise, buy armor or a better sidearm. You need every credit for Round 2.
Round 2 (Force Buy / Eco): Buy one smoke or one flash, but not both. On a force buy, your primary is weak and your armor is light. A smoke to cross an open angle or a flash to help your entry can turn a disadvantaged round into a win. But don’t blow your whole budget. If you lose Round 2, you need to be able to full-buy in Round 3.
Full Buy Rounds (Round 3+ with credits): Buy full utility. A smoke, a flash, and a frag. If you have extra credits, buy a second flash or a molotov. Full buy rounds are where utility matters most. The teams that coordinate their utility usage win these rounds. The teams that treat it like deathmatch lose them.
Eco Rounds: Save your utility or buy one cheap smoke. On an eco round, your goal is not to win. Your goal is to farm a weapon or plant the bomb. A single smoke can get you past a choke point for a bomb plant. Do not waste frags or flashes trying to get kills with a pistol. Save the money for the next full buy.
1vX Clutch Situations: Save your utility unless it directly wins you the round. If you’re in a 1v3 and you have a smoke, don’t throw it randomly. Use it to deny the defuse, to hide your rotation, or to create a fake push. Utility in clutches is about information and time, not damage.
Core Utility Types and Their Roles in Snipe
Snipe has four primary utility types. Each one has a specific job. Using them outside their role is how you lose rounds.
Smokes (Tactical Denial): Smokes block vision. That’s it. They don’t do damage, they don’t blind, and they don’t stop bullets. Use smokes to cross open angles, to block off a site during a bomb plant, or to deny a sniper’s line of sight. A smoke lasts roughly 18 seconds in Snipe. That’s 18 seconds where the enemy either has to push through blind or give up the angle. Don’t waste smokes on corners you can already hide behind.
Flashbangs (Entry and Denial): Flashes blind everyone who looks at them. In Snipe, the blind duration is 3–5 seconds depending on proximity and angle. Use flashes to help your entry fragger take a site, to deny a push, or to escape a bad angle. The key word is help. A flash is a team tool. If you throw it for yourself, you’re only getting half the value.
Frag Grenades (Pre-Damage and Flush): Frags do area damage. In Snipe, a direct frag can kill a full-health enemy, but most of the time you’ll use them for pre-damage. Throw a frag into a stacked site before your push to weaken the defenders. Or throw it behind cover to flush an enemy out. Frags have a long throw animation and a loud pin-pull sound. The enemy will hear you. Use that sound to force a peek, or throw from cover so they can’t punish you during the animation.
Molotovs / Incendiaries (Area Denial): Molotovs create a fire zone that damages over time. In Snipe, they last about 7 seconds. Use them to delay a push, to force an enemy out of a common hiding spot, or to deny a bomb defuse. Molotovs are your most expensive utility. Don’t throw them at random. Use them when you know the enemy has to be somewhere, like a post-plant defuse or a retake path.
Map Lineups and Timing for Executes
Every Snipe map has 2–3 essential smokes that win rounds. Learn them. Practice them in a private lobby. A lineup is a specific standing position and crosshair placement that guarantees a smoke lands where you want it.
Dusty Depot:
- Mid Cross Smoke: Stand at the edge of the T-spawn platform, aim at the top-left corner of the billboard, and throw. The smoke lands in mid-cross, blocking the sniper angle from CT spawn.
- B-Tunnel Smoke: Hug the left wall outside B-tunnel, aim at the light fixture on the ceiling, and jump-throw. The smoke blocks the entire tunnel entrance, allowing a safe push without exposing your team to the back of site.
- A-Long Smoke: Stand at the dumpster near A-long, aim at the second window frame from the left, and throw. This smoke blocks the balcony angle and lets you take A-site without getting picked from above.
Warehouse:
- Connector Smoke: From T-spawn, aim at the small vent on the right wall and throw. The smoke lands in the connector hall, blocking the rotation from B to A.
- B-Site Execute Smoke: Stand at the forklift outside B, aim at the top of the crane light, and throw. This smokes off the back of B-site, forcing defenders to fight from the front where your entry fragger has the advantage.
- Retake Molotov: From A-site, aim at the base of the forklift on the right and throw. The molotov lands on the default plant spot, denying the defuse for 7 seconds.
Rooftop:
- Helipad Smoke: From the stairwell, aim at the center of the helipad marking and throw. This blocks the long sightline from CT spawn to the bombsite.
- Elevator Flash: Hug the left wall at the elevator shaft, aim at the ceiling light, and throw a flash. It pops as it hits the wall, blinding anyone holding the elevator angle without affecting your team.
Timing is just as important as placement. A smoke thrown at 0:45 is information. A smoke thrown at 0:15 is a wall. If you’re executing a site, throw your smokes at 0:20–0:25. This gives your team time to rotate and push before the smoke fades, but it’s late enough that the enemy can’t just wait it out and retake. Flashes should be thrown 2–3 seconds before your entry fragger peeks. This gives the flash time to pop and the enemy time to look away, but not enough time for them to re-peek before your team is in.
Counter-Intuitive Utility Advice That Wins Rounds
Sometimes the best play is the one that feels wrong. Here are three pieces of counter-intuitive utility advice that will instantly improve your win rate in Snipe.
Sometimes the best flash is no flash. If your team is already in a chaotic fight, throwing a flash will blind your teammates more than the enemy. In a scramble, the enemy is already looking at angles and pre-firing. A flash gives them free kills. If the fight is already hot, don’t add noise. Use your gun.
Don’t smoke the obvious spot. Most players throw smokes at the most common choke point. The enemy expects this. Instead, smoke the angle they had to take to get to that choke point. Smoke behind them, not in front of them. This forces them to push through a blind zone or retreat into your crosshair. It’s the difference between blocking vision and creating a trap.
Wasting utility is better than dying with full utility. If you’re in a 1v2 and you have a smoke and a flash, use them. Even if the throw isn’t perfect, even if it doesn’t get you a kill, it forces the enemy to respect the possibility. A smoke in a random hallway makes them check a corner. A flash into a room makes them look away. You might die anyway, but you might also buy the two seconds your teammate needs to rotate. Dying with full utility is a guaranteed loss. Dying after using it is a maybe.
Round-Specific Scenarios: When Utility Wins and When It Doesn’t
Scenario 1: The Fast Push. Your team is rushing B-site. You’re the second man in. The entry fragger calls “Going B.” Do not throw a flash over his head. Wait until he is in the site, then throw a flash behind him to cover the rotation. If you throw early, you blind him. If you throw late, you blind the rotators. The window is 1–2 seconds. Learn it.
Scenario 2: The Post-Plant. You planted the bomb and you’re holding from off-site. You have a smoke and a molotov. Save the molotov for the defuse. Do not throw it at the first enemy you see. Wait until you hear the defuse sound, then throw it. The molotov forces them off the bomb or kills them. The smoke is for your escape if they push your position. Use them in the wrong order and you die with a defuse.
Scenario 3: The Retake. You’re rotating to retake A-site. You have one smoke and one flash. The enemy is on site, you don’t know where. Throw the smoke at the most common plant spot to block their vision. Do not throw the flash. A flash tells them exactly where you’re coming from. Instead, use the smoke as cover and peek the off-angles. The flash is for the final push onto the bomb, not the entry.
Conclusion
Utility in Snipe is not a side item. It is a primary weapon that requires as much practice as your aim. The difference between a Silver player and a Diamond player is often not headshot percentage—it’s whether the Diamond player smokes the right angle, flashes for the entry, and saves the molotov for the defuse. Learn the lineups. Learn the economy. Call your utility. And stop flashing your teammates. Your grenades should win rounds, not lose them.
If you’re just starting out, check out the Snipe Beginner Guide and Beginner Mistakes Guide to avoid the most common traps. For advanced mechanics, the Advanced Techniques Ranked Guide and Weapon Ability Combos Guide will help you master the deeper systems. Understanding your economy is also critical—read the Economy Credit Management Guide to know when you can afford full utility and when you should save. Finally, if you want to coordinate better with your squad, the Map Callouts Communication Guide and Solo vs Squad Guide will sharpen your team play.