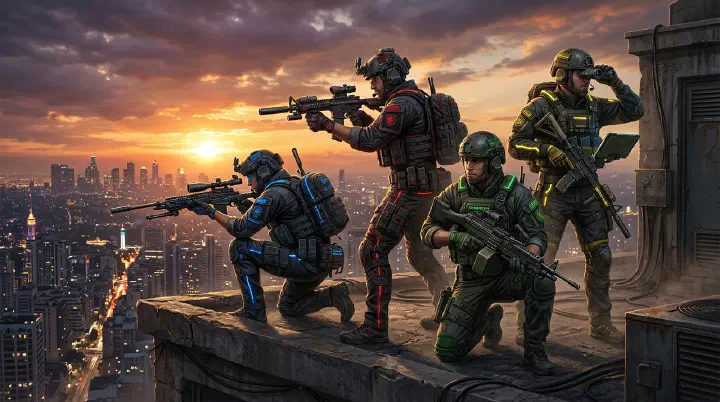
You’re in a 4-stack on Discord. Everyone’s Diamond. You’ve been grinding together for two weeks. In the pre-game lobby, all four of you lock Target. Why wouldn’t you? It’s S-tier. Wallhacks win games. Your squad has four of them.
The match starts on Refinery. The first 30 seconds feel great — you see every enemy through walls, call positions, pre-aim angles. You get the opening pick. Then the enemy team adjusts.
Their Thunder Dash player pops stun, dashes through your mid hold, and tags two of your teammates before anyone can scope. Their Forcefield drops in the catwalk corridor, creating a safe lane their second Thunder Dash uses to push your flank. Your Target is on cooldown. So is your teammate’s. So is everyone’s — because all four of you popped it at the same time, like you always do.
In the next 18 seconds, you lose three players. The fourth dies trying to hold a 1v4 with no combat utility, no shield, no stun, no escape. Kill feed lights up. Your stack of four S-tier abilities just got wiped by a team with a balanced comp — and one of their players was running Speed.
Here’s what happened: you didn’t lose because your aim was worse. You didn’t lose because they out-positioned you. You lost because your team had four copies of the same solution and zero answers for anything that solution couldn’t handle.
Team composition in Snipe isn’t about picking the best abilities. It’s about picking abilities that cover each other’s weaknesses. Four Targets is four players with the same strength (information) and the same weakness (zero combat utility during cooldown). A balanced team has one player covering each weakness. That’s the difference between a stack and a team.
How Team Composition Actually Works in Snipe
Snipe doesn’t have formal agent classes or role-locking. You pick an ability in the pre-game lobby, and that ability defines your function for the entire match. The game won’t stop you from running four Thunder Dashes or four Forcefields. It won’t warn you that your comp has a hole. It just lets you die and shows you the scoreboard.
Team composition is the invisible layer between individual skill and match outcome. A player with Diamond-level aim can get hardstuck in Platinum because their team comp has no aggression — they’re getting picks but can’t convert them into space. A player with average aim can climb to Diamond because their comp covers their weaknesses — the Intel player tells them where to aim, the Anchor player gives them safe peeks, the Aggressor creates chaos they can capitalize on.
The core idea is simple: every ability has a job it does well and a job it does terribly. A team comp works when every critical job is covered by at least one player.
Those critical jobs are:
- Information: Knowing where enemies are before they know where you are. Target owns this. Thunder Dash partially covers it by forcing enemies to reveal themselves when they dodge the stun trail.
- Aggression: Creating openings, forcing enemy movement, getting the first pick. Thunder Dash and Dash own this. Speed partially covers it on close-quarters maps.
- Defense: Holding space, creating safe zones, anchoring positions. Forcefield owns this. Platform partially covers it by creating temporary cover.
- Mobility: Rotating quickly, escaping bad fights, repositioning to off-angles. Dash owns this. Super Jump and Speed partially cover it.
- Disruption: Interrupting enemy plans, breaking holds, punishing predictable positioning. Thunder Dash owns this. Super Jump partially covers it by creating unexpected angles.
No single ability covers all five jobs. Target gives you information but zero aggression, defense, mobility, or disruption. Thunder Dash gives you aggression and disruption but zero information or defense. Forcefield gives you defense but zero information, aggression, or mobility. The math is unforgiving: you need at least three different abilities to cover the five critical jobs, and you need four to cover them well.
The Three Roles: Aggressor, Support, Anchor
Every effective Snipe team comp distributes players into three roles. Some players flex between roles depending on the round state, but every player has a primary function they’re responsible for.
The Aggressor (Entry Fragger)
Abilities: Thunder Dash, Dash Job: Create the first opening. Get the first pick or force the enemy to reposition.
The Aggressor goes first. They’re the player who pushes the contested angle, who dashes into the enemy hold, who forces the enemy team to react. The Aggressor’s job isn’t to survive — it’s to create chaos that the rest of the team converts into kills.
A good Aggressor with Thunder Dash doesn’t just dash at the enemy. They dash at the enemy’s strongest position — the one the enemy team is counting on to hold. The stun trail forces the defender to move or be stunned. Either way, the hold breaks. The rest of the team pushes through the gap.
A good Aggressor with Dash plays differently. They don’t commit. They dash-peek, fire, dash out. They’re testing the enemy’s reaction time, mapping their positions, baiting shots. The Intel player (Target) watches the wallhack feed and calls which enemy is exposed after the Aggressor’s feint.
Aggressor requirements: You need to be comfortable dying. Your K/D will be lower than the rest of the team. That’s intentional. One Aggressor pick that breaks a hold is worth more than two Anchor kills that happen after the hold is already broken.
The Support (Intel / Flex)
Abilities: Target, Dash Job: Feed information to the team. Fill gaps. Convert the Aggressor’s chaos into kills.
The Support is the team’s eyes. With Target, they’re calling enemy positions, rotations, and cooldown states. A good Target player doesn’t just say “one at mid.” They say “one at mid, facing left, scoped, hasn’t seen us.” That’s the difference between useful intel and noise.
Between Target cooldowns, the Support plays flex — holding the angle the Aggressor isn’t covering, watching the flank the Anchor can’t see, rotating to wherever the fight is tilting. The Support is the player who’s always in the right place because they know where the enemy is before the fight starts.
With Dash instead of Target, the Support becomes a second Aggressor — but one who peels instead of commits. They dash in when the main Aggressor gets a pick, they dash out when the trade goes bad. They’re the safety net that turns a 1-for-1 trade into a 2-for-1 advantage.
Support requirements: You need to talk. Constantly. A silent Support is a wasted ability slot. If you’re not comfortable calling positions, rotations, and cooldown states every 5-10 seconds, play Anchor instead.
The Anchor (Defensive Hold)
Abilities: Forcefield, Platform Job: Hold space. Create safe zones. Be the fallback.
The Anchor is the team’s insurance policy. When the Aggressor’s push fails and the enemy counter-pushes, the Anchor’s Forcefield is the thing that stops the wipe. When the team needs to reset after a bad trade, the Anchor’s position is where everyone retreats to.
A good Anchor doesn’t camp. They hold a position that’s behind the Aggressor and adjacent to the Support — close enough to provide cover, far enough that the enemy can’t push both at once. The Anchor’s Forcefield should cover the retreat path, not the front line. If the Aggressor dies, the Anchor’s shield buys time for the Support to rotate and the Flex to reset.
With Platform, the Anchor becomes a geometry player — creating temporary elevated positions that give the team off-angles. A Platform Anchor on Refinery can create a firing position above the catwalk that no enemy pre-aims. The Aggressor pushes low, the Support holds mid, and the Anchor shoots from a position that doesn’t exist on the map geometry. Three vectors, one fight.
Anchor requirements: You need patience. You’re the last to die, the one who wins the clutch, the one who holds the 1v2 while the team respawns. If you get bored holding angles and start pushing, you’re not an Anchor — you’re a second Aggressor who forgot their job.
The Synergy Rules That Make a Team Work
Team synergy in Snipe isn’t about “which abilities combo together.” It’s about which abilities cover each other’s downtime.
Every ability has a cooldown window where it provides nothing. Target’s cooldown is roughly 18 seconds. Thunder Dash’s is roughly 14 seconds. Forcefield’s is roughly 20 seconds. Dash’s is roughly 8 seconds. During that window, the player is just a rifle and a knife — no ability advantage.
A team with synergy staggers its cooldowns so that someone always has an ability online. A team without synergy pops everything at the same time, wins the first 5 seconds, then gets wiped in the 15 seconds where nobody has anything.
Rule 1: Never pop the same ability type at the same time.
If you have two Targets, stagger them. Player A pops at 0 seconds. Player B pops at 9 seconds. Now your team has wallhacks on a 9-second cycle instead of an 18-second cycle with a gap. Same logic applies to Thunder Dash, Forcefield, everything.
Rule 2: Each ability should cover a different threat vector.
If your team has Thunder Dash (aggression) and Target (intel), you have two vectors covered. If your team has Thunder Dash and another Thunder Dash, you have one vector covered twice. The second Thunder Dash is redundant — the first one already creates the opening. The second one should be Dash (mobility) or Forcefield (defense) instead.
Rule 3: The Anchor’s ability dictates the team’s positioning.
The Forcefield or Platform player decides where the team holds. The Aggressor pushes from the Anchor’s position. The Support rotates around the Anchor’s sightlines. If the Anchor picks a bad position, the entire team’s structure collapses. The Anchor is the least flashy role and the most important one.
Rule 4: The Aggressor and Intel player must be in sync.
The Intel player calls a position. The Aggressor pushes it. If the Intel player calls “one at forklift” and the Aggressor pushes “one at containers,” the team is fighting two separate fights. The Intel player’s calls determine the Aggressor’s target. If the Aggressor ignores the call, the Intel player is wasting their ability.
Failure Analysis: Three Ways Bad Team Comps Get You Killed
Pattern 1: The All-Aggression Stack
Your team runs Thunder Dash, Thunder Dash, Dash, Dash. The match starts. You push hard, get two opening picks, feel unstoppable. Then the enemy Forcefield drops. Your stuns bounce off the shield. Your dashes put you in close range with no cover. The enemy Target has been calling your positions the whole time. Their Anchor holds the shield. Their Support picks you off one by one while you’re stuck in the open.
Why it fails: Aggression without information is gambling. You’re pushing positions you don’t know are safe. You’re committing to fights without knowing if the enemy has backup. You’re using mobility to get into trouble faster instead of out of it.
The fix: Swap one Thunder Dash for Target. Swap one Dash for Forcefield. Now you have intel before the push and a safe retreat if the push fails. The aggression still works — it just works with information and a safety net.
Pattern 2: The All-Intel Stack
Your team runs Target, Target, Target, Target. You see everything. Every enemy, every rotation, every peek. You call positions perfectly. Your team pre-aims every angle. And you still lose.
Why it fails: Target tells you where the enemy is. It doesn’t help you kill them. Four Targets means four players who can see through walls and zero players who can push through them. The enemy team realizes you’re all intel and no teeth — they stop peeking predictable angles, rotate through cover, and push during your synchronized cooldown window. When all four Targets are on cooldown, you’re four players with no abilities fighting a team that still has theirs.
The fix: Keep one Target. The other three become Thunder Dash (aggression), Forcefield (defense), and Dash (mobility). Now the Target player feeds intel to three players who can actually act on it. One pair of eyes is enough. Four is a surveillance system with no soldiers.
Pattern 3: The No-Anchor Stack
Your team runs Thunder Dash, Target, Dash, Super Jump. You have aggression, intel, mobility, and vertical control. Looks balanced. The match starts. Your Aggressor gets a pick, your Support calls the rotation, your Flex takes the high ground. Then the enemy counter-pushes. Your Aggressor dies. Your Support gets traded. Your Flex is isolated on a rooftop. Your Super Jump player is mid-air with no cover.
Nobody had a shield. Nobody had a fallback position. Nobody could create a safe zone for the team to reset. The enemy pushed through your team like you weren’t there — because without an Anchor, you weren’t.
Why it fails: Every team comp needs at least one player whose job is “don’t let the team wipe.” Without Forcefield or a Platform player holding the retreat lane, every lost fight becomes a lost round. There’s no reset button. No safe space to reload, heal, and re-approach.
The fix: Drop the Super Jump for Forcefield. The vertical control is a luxury. The Anchor is a necessity. On maps where Super Jump is strong (Old Town, Refinery), drop Dash instead — but never drop the Anchor.
Map-Specific Team Setups
The same comp that dominates on Warehouse gets farmed on Refinery. Map geometry dictates which roles are essential and which are optional.
Warehouse (Close Quarters)
Priority roles: Aggression, Mobility Recommended comp: Thunder Dash, Dash, Dash, Forcefield
Warehouse is tight corridors, blind corners, and knife-range engagements. Long-range intel (Target) is nearly useless — you can hear enemies before you see them, and the sightlines are too short for pre-aiming to matter. Two Dashes give you constant mobility through the corridors. Thunder Dash stuns are nearly unavoidable in the narrow hallways. One Forcefield blocks the central corridor chokepoint and gives your team a safe reload zone.
Avoid: Target, Super Jump. Target’s wallhacks show you enemies that are already 10 studs away and audible. Super Jump puts you into the ceiling.
Refinery (Long Range)
Priority roles: Information, Defense Recommended comp: Target, Target, Forcefield, Dash
Refinery is open sightlines, multiple elevation levels, and sniper duels at 100+ studs. Information is everything — you need to know which catwalk the enemy is holding before you peek. Two Targets on staggered cooldowns gives you near-constant wallhack uptime. Forcefield provides safe peeks on the long sightlines. Dash rotates between the catwalk and ground level.
Avoid: Thunder Dash, Speed. Dashing across open ground is a death sentence — the enemy has 100+ studs to track and shoot you before your stun connects.
Old Town (Vertical)
Priority roles: Vertical control, Defense Recommended comp: Super Jump, Forcefield, Target, Dash
Old Town’s multi-level buildings and rooftop access make vertical control essential. The Super Jump player contests rooftops and calls enemy positions from above. Forcefield anchors the stairwell chokepoints. Target provides intel through the building interiors. Dash flexes between rooftop support and ground-level aggression.
Avoid: Speed. The vertical geometry makes Speed’s linear boost nearly useless. Thunder Dash can work as a flex pick but is risky — dashing on staircases often clips geometry and wastes the stun.
Docks (Mixed Range)
Priority roles: Flexibility, Information Recommended comp: Target, Thunder Dash, Dash, Forcefield
Docks has long sightlines (container alley) and close-quarters zones (warehouse interior). The balanced comp works here. Target handles the long lanes. Thunder Dash dominates the interior. Dash rotates between zones. Forcefield provides cover during the zone transitions.
Avoid: Super Jump. Docks is mostly flat. Super Jump just makes you a target.
Counter-Picking Against Enemy Teams
The pre-game lobby shows you the enemy team’s ability picks. Most players ignore this information. You shouldn’t.
Enemy comp: 3+ Thunder Dashes They’re going to rush you. Hard. Counter with double Forcefield. Two shields create overlapping safe zones that stun trails can’t penetrate. The Thunder Dash players will commit forward, hit your shields, and stand there with no ability while you shoot them from cover. They built their entire comp around aggression. Deny the aggression and they have nothing.
Enemy comp: 3+ Targets They have wallhacks but no combat power. Counter with double Thunder Dash. Push during their cooldown window — you know when it is because all Targets pop at roughly the same time. The 18 seconds after their synchronized pop is your window. Rush them. They can see you coming and still can’t stop you because Target doesn’t provide any defensive utility.
Enemy comp: 3+ Forcefields They’re playing for time. They want to force long, slow rounds where shields determine trades. Counter with one Thunder Dash and one Dash — mobility beats stationary defense. The Thunder Dash player stuns through the shield gap (Forcefield has a small opening at the base). The Dash player rotates to off-angles that see around the shield. Don’t fight the shield head-on. Fight around it.
Enemy comp: Balanced (one of each type) This is the hardest comp to counter because it has no obvious weakness. Your best move is to mirror their structure but counter-pick their strongest individual player. If their Aggressor is carrying, run double Forcefield to shut down their entries. If their Intel player is calling everything, run double Thunder Dash to push faster than their calls can be acted on. Target the player, not the comp.
The Optimal Team Balance Framework
After hundreds of matches across every rank and map, one comp structure consistently outperforms the rest:
1 Aggressor + 1 Intel + 1 Anchor + 1 Flex
- Aggressor (Thunder Dash or Dash): Creates openings. Dies first. Starts fights.
- Intel (Target): Feeds information. Calls rotations. Prevents ambushes.
- Anchor (Forcefield or Platform): Holds space. Provides retreat. Wins clutches.
- Flex (Dash or map-specific pick): Fills the gap. Adapts to the enemy comp. Rotates between roles.
This framework covers all five critical jobs (information, aggression, defense, mobility, disruption) with four players. The Flex slot is the adjustment knob — on Warehouse, the Flex plays second Dash for more mobility. On Refinery, the Flex plays second Target for more intel. Against a rush-heavy enemy comp, the Flex plays second Forcefield.
The framework works at every rank because it doesn’t rely on any single player’s mechanical skill. The Aggressor can whiff. The Intel player can make a bad call. The Anchor can miss their shield placement. But the structure survives individual mistakes because the roles cover each other. That’s what synergy actually means — not flashy combos, but resilience.
Counter-Intuitive Truths About Team Composition
1. A Well-Balanced Team of B-Tier Abilities Beats a Stack of S-Tier Abilities
Target is S-tier. Thunder Dash is S-tier. Four of them on one team should be unstoppable. It’s not. A comp of Dash (A-tier), Forcefield (A-tier), Super Jump (B-tier), and Speed (D-tier) will beat four Targets more often than not — if the players know their roles.
Why? Because the B-tier comp has role diversity. It has mobility (Dash), defense (Forcefield), vertical surprise (Super Jump), and close-quarters rush potential (Speed). The S-tier stack has information four times. The B-tier comp covers four different jobs. The S-tier stack covers one job four times. Jobs covered beats tier ranking every time.
2. The Worst Player Should Play the Most Important Role
Conventional wisdom says put your best player on the hardest carry role — the Aggressor. Counter-intuitive truth: put your best player on Anchor.
The Aggressor dies. A lot. That’s their job. If your best player is the Aggressor, your best player spends half the match in the respawn screen. Put your best player on Anchor instead. They’re alive longer. They’re in more clutch situations. They’re the last line of defense. A Diamond player on Anchor wins more rounds than a Diamond player on Aggressor — because the Anchor is alive to win them.
Put your weakest player on Aggressor. Their job is to create chaos, not to survive. Even a bad Aggressor forces the enemy to react. That reaction is what your better players capitalize on.
3. Speed Has a Place in a Coordinated Team Comp
Speed is D-tier in solo queue. It’s situationally viable in a coordinated 4-stack. Here’s the play: Speed player on Warehouse. Rest of the team runs Target, Thunder Dash, Forcefield. The Target player calls an isolated enemy. The Speed player rushes them with knife out. The Thunder Dash player follows 3 seconds behind as cleanup. The Forcefield player holds the retreat lane.
The Speed player gets the kill or forces the enemy to turn. Either way, the Thunder Dash player arrives while the enemy is distracted. Two kills, zero fair fights. Speed works when the team builds around it — not when one player picks it and hopes for the best.
4. The Best Team Comp Changes After Every Round
Enemy team just lost a round. They’re tilted. They’re going to switch abilities. The comp that won you round one might lose you round two because the enemy counter-picked.
Check the enemy ability picks every round. If they swapped a Target for a Thunder Dash, they’re going aggressive. Adjust your Flex pick accordingly. If they swapped a Forcefield for a second Target, they’re going all-in on intel. Punish with aggression. Static comps lose to adaptive comps. The pre-game lobby is free information. Use it.
5. Communication Quality Matters More Than Composition Quality
A perfectly balanced comp with silent players loses to a triple-Thunder-Dash comp with good comms. Every time. The Thunder Dash players call their pushes, stagger their cooldowns, and coordinate their stuns. The balanced comp sits in silence, each player doing their job independently, none of them aware of what the others are doing.
Role distribution only works if the roles talk to each other. The Intel player needs to call positions. The Aggressor needs to confirm pushes. The Anchor needs to call shield status. The Flex needs to announce rotations. If your team doesn’t communicate, your comp doesn’t matter. Fix comms first. Fix comp second.
Related Guides
- Snipe Agents & Abilities Complete Guide — Which Playstyle Fits You
- Snipe Weapon & Ability Combo Guide — Build a Loadout That Works
- Snipe Ranked Climbing Guide — RP System & Tier Strategy
- Snipe Solo vs Squad Guide — Team Play & Communication
- Snipe Positioning & Angles Guide — Off-Angles & Sightlines
- Snipe Map Callouts & Communication Guide
- Snipe Maps & Strategies Guide — Positioning & Advanced Tactics
- Snipe Beginner Mistakes Guide — 10 Errors That Get You Killed