SNIPE’s loadout system is intentionally minimal: one sniper rifle, one knife, and one ability. But within those constraints, the interplay between your weapon handling, ability choice, and movement creates distinct playstyles that can hard-counter certain opponents.
This guide breaks down every weapon stat, every ability’s tactical value, and the best combinations for different match situations.
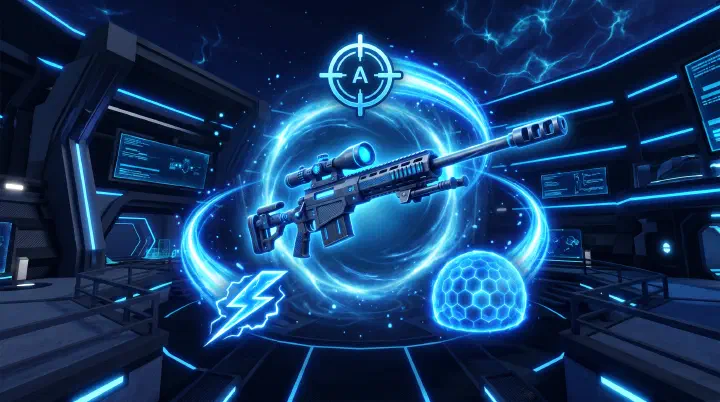
The Sniper Rifle
Every player uses the same sniper rifle. There are no variants, no attachments, no skins that affect performance. This is by design — SNIPE’s skill expression comes from how you use it, not what you use.
Rifle Stats
| Attribute | Value | Notes |
|---|---|---|
| Damage | 100 (body), 200 (head) | One-shot kill anywhere |
| Fire rate | ~1.2 seconds (bolt cycle) | Practically a single-shot weapon |
| Scope zoom | 4× | Fixed magnification |
| Bullet type | Hitscan | No travel time, no bullet drop |
| Hipfire spread | Extreme | Only viable within 5 studs |
| Reload | 2.5 seconds | 5-round magazine |
| Movement penalty | 40% slower while scoped | Encourages repositioning over hard-scoping |
Scoping Mechanics
Scoping is binary — you’re either fully scoped (accurate) or you’re not. There’s no “partial scope” accuracy ramp. This means:
- Quickscoping works — scope in, fire the instant the scope overlay appears, and the shot is fully accurate
- Hard-scoping is dangerous — every second you stay scoped, you’re immobile and visible. Opponents using Target can see you through walls
- Scope flicking — scope in slightly to one side of where you expect the enemy, then flick onto them and fire. This minimizes the window where they can react to your scope glint
Scope Glint
Your scope produces a visible glint visible to enemies within your field of view. This is the #1 thing that gets new players killed:
- Glint appears the instant you scope in
- It’s visible even through partial cover
- Smart players scope in behind cover, then peek out
- If you see a glint, you have approximately 0.5 seconds before the shot comes
The Combat Knife
The knife is more than a last resort. Master it and you’ll win close-quarter encounters against players who panic-scope.
| Attribute | Value |
|---|---|
| Damage | 50 per swing |
| Swings to kill | 2 (any body part) |
| Attack speed | 0.6 seconds between swings |
| Range | ~5 studs |
| Movement bonus | 15% faster than holding rifle |
Knife Techniques
The Dash-Knife Combo: Thunder Dash through an enemy (stunning them), immediately knife → knife. The stun prevents them from scoping or running, and two quick knife swings finish them before the stun wears off.
Knife While Wall Running: You can swing your knife while wall running. If an enemy is positioned near a wall you’re running on, a quick knife swipe as you pass can catch them off guard.
The Reload Cancel: If you fire, miss, and the enemy pushes you during your bolt cycle, swap to knife. One knife hit + bolt cycle finish + quickscope is faster than waiting for two bolt cycles.
All 7 Abilities: Detailed Breakdown
S-Tier
Target
- Cost: Moderate
- Cooldown: 20 seconds
- Effect: All enemies within a large radius are highlighted through walls for 2 seconds
- Best on: Large maps with many angles (Cargo), Free-for-All mode
- Counters: Forcefield (the shield blocks scoped shots even when you’re revealed)
- Advanced use: Pop Target, identify the nearest enemy, then DON’T immediately peek them. Wait 1 second — many players panic and reposition when they suspect they’ve been revealed, and you catch them mid-rotation.
Thunder Dash
- Cost: High
- Cooldown: 25 seconds
- Effect: Dash forward ~30 studs, leaving a stunning trail that lasts 2 seconds
- Best on: Tight maps with corridors, Team Deathmatch (chain stuns on grouped enemies)
- Counters: Dash (can dodge the trail), Forcefield (blocks stun if timed right)
- Advanced use: Dash NOT directly at the enemy, but slightly to their side. The stun trail cuts off their retreat path. Then quickscope them while they’re stunned.
A-Tier
Forcefield
- Cost: Moderate
- Cooldown: 30 seconds
- Effect: Deploy a 5-second protective barrier in front of you. Blocks all incoming fire.
- Best on: 1v1 Duels, maps with long sightlines
- Counters: Thunder Dash (dash through the forcefield and knife), flanking
- Advanced use: Don’t deploy it reactively when you’re already being shot at — deploy it before peeking a known sniper lane. It gives you one free peek without risk.
Dash
- Cost: Low
- Cooldown: 12 seconds
- Effect: Quick dash ~15 studs in your look direction. No stun trail.
- Best on: Any map, any mode — it’s the most versatile movement ability
- Counters: Target (you can see where they dashed to)
- Advanced use: Combine with slide for extended distance. Dash → immediate slide → the momentum stacks, carrying you ~25 studs total. Great for crossing sniper lanes.
B-Tier
Super Jump
- Cost: Low
- Cooldown: 18 seconds
- Effect: Launch vertically ~40 studs into the air
- Best on: Maps with vertical geometry, rooftops, containers
- Counters: Any scoped player with decent tracking aim — you’re exposed mid-air
- Advanced use: Super Jump at the edge of a rooftop, scope on the way up, fire at the apex, and land back on the roof. The brief aerial angle catches enemies who are only checking ground-level sightlines.
C-Tier
Platform
- Cost: Low
- Cooldown: 22 seconds
- Effect: Spawn a floating platform that moves slowly in the direction you’re facing
- Best on: Open maps, creative angles
- Counters: Literally everyone can see and shoot you
- Note: Platform is fun but impractical. You’re a slow-moving, exposed target. Use it for clip-worthy trickshots, not for serious matches.
D-Tier
Speed
- Cost: Very Low
- Cooldown: 15 seconds
- Effect: 30% movement speed boost for 3 seconds
- Best on: Nothing
- Counters: Normal aim — speed boost doesn’t change your hitbox or make you harder to track
- Note: Everything Speed does, Dash does better. The movement boost is negligible compared to the instant reposition of Dash. Skip this ability entirely.
Best Loadout Combinations
The Aggressor
- Ability: Thunder Dash
- Playstyle: Push, stun, eliminate, repeat
- Knife usage: High — dash-stun into double knife is your primary close-range combo
- Best maps: Tight maps with corridors and corners
- Weakness: Forcefield users who can block your dash entry
The Phantom
- Ability: Target
- Playstyle: Information warfare — always know where enemies are, pre-aim every peek
- Knife usage: Low — you should rarely be close enough to need it
- Best maps: Large maps with many angles (Cargo)
- Weakness: Thunder Dash users who close distance before your Target cooldown refreshes
The Survivor
- Ability: Forcefield
- Playstyle: Defensive sniper — hold angles, win peek battles, never die
- Knife usage: Medium — for when enemies push through your forcefield
- Best maps: Maps with long sightlines, 1v1 Duels
- Weakness: Flanking — Forcefield only protects one direction
The Ghost
- Ability: Dash
- Playstyle: Never stop moving, constant reposition, impossible to track
- Knife usage: Medium — dash into close range, knife, dash out
- Best maps: Any map (most versatile)
- Weakness: Target users who track your dash destination
Match your loadout to the map and mode, not just personal preference. Target dominates on Cargo where angles are everywhere. Thunder Dash rules on tight maps where enemies cluster. Forcefield is the 1v1 Duel king. And if you don’t know what to pick — pick Dash. It’s never the worst choice. Ready to put your loadout to the test? Our SNIPE Ranked Climbing Guide breaks down the RP system, optimal queue times, and the best loadouts for climbing through every rank tier.
Related Guides: