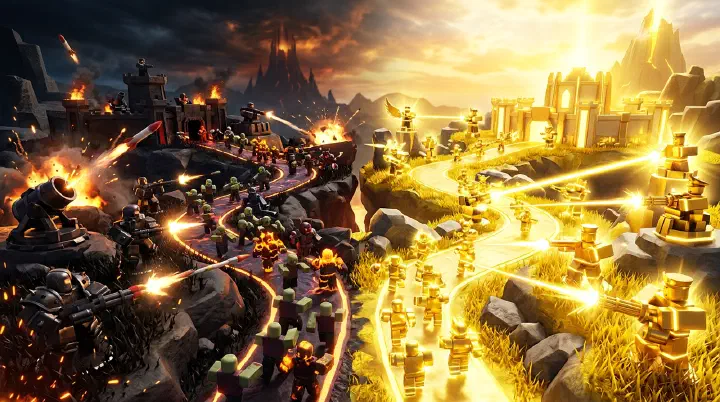
You Just Cleared Hardcore. Golden Mode Wiped You at Wave 28.
You spent three weeks refining your Hardcore strategy. You memorized the exact timing for Commander level 4, the perfect Accelerator spacing to dodge Void Reaver disables, the wave-35 Farm sell window. Finally — the victory screen. You roll into Golden Mode with the same loadout, same confidence. Wave 28 hits. A Necromancer swarm you barely noticed in Hardcore suddenly overwhelms your defenses. Your Accelerators fire at single targets while skeletons pile up. Your Farms generate coins you don’t have time to spend. You wipe, staring at the “Defeated” screen, wondering what went wrong.
Here is what happened: you treated both modes like the same game. They are not.
Hardcore is a marathon — 50 waves of escalating pressure where resource management and sustained DPS matter above everything else. Golden Mode is a sprint — 35 waves of mixed threats where adaptability and crowd control decide the outcome. The loadout that clears Hardcore is almost wrong for Golden Mode, and the reverse is also true. Most players who master one hit a wall on the other because they never adjust their mental model.
This guide breaks down the five hidden mechanics that determine whether you clear or wipe in each mode, and gives you the exact wave-by-wave strategy for both. If you can clear one but not the other, the fix is one or two loadout swaps. Here is which ones.
Three Most Common Deaths (and Why They Happen)
Death 1: The Hardcore Veteran in Golden Mode (Wave 28 Necromancer Swarm)
The setup: You bring 3 Farms, Commander, DJ, 2 Accelerators, and Freezer — your exact Hardcore loadout. Waves 1-20 feel easy. By wave 25, you have 4,000 coins banked. The Necromancer wave arrives. It spawns 15+ enemies that each split into 3 skeletons on death. Your Accelerators fire slowly at single targets. The skeletons pile up. You panic-buy a Militant, but it is too late. The swarm leaks through.
Root cause: Your loadout has zero AoE. Hardcore’s boss-heavy waves reward single-target DPS. Golden Mode’s mixed waves punish it. Three Farms occupy slots that should be Electroshockers or Rocketeers.
The fix: In Golden Mode, run 0-1 Farm max. Replace those two freed slots with Electroshocker and Rocketeer. The Electroshocker handles the Necromancer split, the Rocketeer cleans up the boss. You will clear wave 28 every time.
Death 2: The Golden Farmer in Hardcore (Wave 42 Void Reaver)
The setup: You optimized for Golden Mode — light on Farms, heavy on early DPS, 2 Electroshockers. You enter Hardcore, dominate waves 1-30. Then wave 35 hits and you are out of coins. Your Electroshockers tickle the Void Reaver. You cannot afford the Accelerator upgrade you need. The boss disables your two best towers and walks through.
Root cause: Golden Mode gives you enough starting cash to skip Farms. Hardcore does not. By wave 35 in Hardcore, you need 6,000+ coins invested in endgame towers. Without Farms generating passive income, you are 3,000 coins short.
The fix: Always bring at least 2 Farms in Hardcore. Upgrade them to level 3 by wave 15. Sell them at wave 35-40 to fund your Accelerator. The 2,000+ coins they generate are what buys your Void Reaver kill.
Death 3: Wrong Buffer Priority (Wave 30 Collapse)
The setup: You have Commander and DJ. You upgrade Commander to level 4 first because “more damage is better.” Your DJ sits at level 1. Wave 30 hits with a dense enemy group. Your towers fire faster, but their range is too short — the back of the pack walks past while the front gets shredded.
Root cause: Commander level 4 gives +50% fire rate. DJ level 2 gives +20% range and a 10% upgrade discount. In both modes, upgrading DJ to level 2 before Commander to level 3 yields more effective DPS because your towers cover more track. Most players reverse this order.
The fix: Upgrade priority: DJ level 2 → Commander level 3 → DJ level 3 → Commander level 4. The range buff from DJ level 2 alone gives your DPS towers 15-20% more track coverage, which translates to more hits per wave than the Commander fire rate buff at this stage.
The 5 Critical Differences Between Hardcore and Golden Mode
These five differences explain why the same loadout fails in the other mode. Each one is a decision point where choosing wrong loses the game.
Difference 1: Wave Count and Economy Timing
Hardcore runs 50 waves with 500 starting coins. Golden Mode runs 35 waves with 800 starting coins. That extra 300 coins in Golden Mode changes everything about your early-game strategy.
| Factor | Hardcore (50 waves) | Golden Mode (35 waves) |
|---|---|---|
| Starting coins | 500 | 800 |
| Peak income window | Waves 35-40 (Farms matured) | Waves 20-25 (mid-cycle) |
| Coins needed by final boss | 8,000+ | 5,000+ |
| Farm mandatory? | Yes | No |
The decision: Hardcore asks “how do I generate enough coins for 50 waves?” Golden Mode asks “how do I spend my starting coins most efficiently for 35 waves?” If you are under 2,000 coins by wave 15 in Hardcore, you are behind. If you have more than 1,000 coins unspent at wave 15 in Golden Mode, you are wasting early damage potential.
Difference 2: Wave Composition — Bosses vs. Swarms
Hardcore’s wave structure is boss-heavy: waves 18, 25, 30, 35, 40, 42, 45, and 50 all feature significant boss encounters. That is 8 boss waves out of 50 — 16% of your game time fighting single high-HP targets.
Golden Mode has only 3 boss waves (20, 30, 35), but features 6-7 “mixed threat” waves where Necromancers, Shielded enemies, and fast rushers appear simultaneously. The density of non-boss threats is higher across the entire match.
The decision: In Hardcore, optimize for single-target DPS (Accelerator, Minigunner). In Golden Mode, reserve 2 slots for AoE and crowd control (Electroshocker, Rocketeer). The player who brings 3 Accelerators to Golden Mode clears bosses but dies to swarms.
Difference 3: Farm Viability Curve
Farms are the most misunderstood tower in the endgame. Here is the hard truth about each mode:
Hardcore: 2 Farms at level 3 generate approximately 3,500 coins by wave 40. That pays for your Accelerator level 4 upgrade (3,200 coins). Without Farms, you cannot afford endgame upgrades. Period.
Golden Mode: 2 Farms at level 3 generate approximately 1,800 coins by wave 30 — the mode’s end. Meanwhile, a level-2 Militant (500 coins) kills roughly 60 enemies over the same period. At 8 coins per kill in Golden Mode, that Militant generates ~480 coins directly plus prevents leaks that would cost lives.
The decision: Bring 2 Farms to Hardcore. Bring 0-1 Farm to Golden Mode. The opportunity cost of a Farm slot in Golden Mode is higher than the coins it generates.
Difference 4: Boss Mechanics
Hardcore’s final boss (Void Reaver) has a tower-disable mechanic. It pulses every 30 seconds, shutting down all towers within 15 studs for 8 seconds. This forces spread placement — you cannot cluster your DPS.
Golden Mode’s final boss (Golden Knight) does not disable towers. Instead, it gains temporary damage immunity phases where it must be stunned to become vulnerable again.
The decision: In Hardcore, space your Accelerators 20+ studs apart and accept the suboptimal DJ buff coverage. In Golden Mode, cluster your DPS around the stun tower (Electroshocker) and time your stuns with the boss’s immunity phase. Two different placement philosophies for two different bosses.
Difference 5: Team vs. Solo Scaling
Hardcore’s enemy HP scales significantly with each additional player. A 4-player Hardcore match has enemies with roughly 2.5x the HP of a solo match. The mode is balanced around teams — the developers designed it for 4+ players.
Golden Mode’s HP scaling is gentler — roughly 1.5x at 4 players vs. solo. The mode was designed as a mid-point between casual and endgame, and can be comfortably soloed.
The decision: Solo players should prioritize Golden Mode first (easier solo clear) and only attempt Hardcore solo once they have Golden Minigunner plus 3 level-4 Accelerators. Team players can attempt Hardcore immediately with one Golden tower per person.
Counter-Intuitive Tips That Change Your Win Rate
These tips seem wrong at first glance. Test them. They work.
Tip 1: Sell Your Starter Tower Before You Think You Should
New players keep their starter Militant or Scout until wave 35+ because “it is still doing damage.” In Hardcore, a level-2 Militant deals roughly 5% HP per shot to wave-30 enemies. A wave-30 enemy has 2,000+ HP. Your Militant needs 40 shots per kill. At 0.5 shots per second, that is 80 seconds to kill one enemy. It is doing nothing.
Sell your starter tower at wave 22-25 in Hardcore and wave 18-20 in Golden Mode. The ~1,200 coins from the sell buy a meaningful upgrade on your main DPS tower. The freed slot holds a proper endgame tower. Keeping a starter tower past its expiration date is the sunk cost fallacy in action.
Tip 2: Golden Mode Rewards Aggressive Early Spending
When players see “only 35 waves,” they assume they should save more for late-game towers. Wrong. Golden Mode punishes slow starters. Enemies gain +12% HP per wave starting from wave 1, not wave 10 like in Hardcore. Those early waves hit harder than they feel.
Spend aggressively in Golden Mode waves 1-10. Place 2-3 damage towers by wave 5. Upgrade them to level 2 by wave 8. You should have less than 200 coins banked at wave 10. The coins you earn from waves 10-25 fund your late-game DPS. Spending early in Golden Mode is the difference between breezing through wave 28 and wiping to it.
Tip 3: Skip the Second Farm in Hardcore If You Have Golden Cowboy
Golden Cowboy generates 70% of a Farm’s income while dealing real damage. If you have Golden Cowboy, run 1 Farm plus 1 Golden Cowboy instead of 2 Farms. You save one loadout slot, get comparable economy, and gain DPS.
This is a common optimization that most Hardcore guides miss. Golden Cowboy at level 3 generates roughly 25 coins per kill in addition to its wave income. Over 35 waves of active killing, that adds up to 800-1,000 extra coins — the equivalent of a second Farm at level 2, but with DPS attached.
Tip 4: Upgrade DJ Before Commander
I mentioned this in the failure analysis, but it bears repeating because almost everyone gets it wrong. DJ level 2 costs 600 coins and gives +20% range. Commander level 3 costs 1,200 coins and gives +35% fire rate. The range buff from DJ level 2 gives your existing towers 15-20% more enemies in their targeting zone — which means they fire more often anyway.
Test this yourself: place a level-2 Minigunner, then add DJ level 2. Count the enemies it kills per wave. Then respec, add Commander level 3 instead. The DJ version kills 10-15% more enemies in wave 15-20 because the range extension catches more targets. The fire rate buff is wasted if the tower cannot see anything to shoot.
Hardcore Mode: Wave-by-Wave Strategy
Waves 1-15: Economy Foundation
Place 2 Farms immediately. Upgrade to level 3 by wave 10. Place 1 Militant or Scout at the first curve — level 2 is sufficient. Add Commander by wave 8 at level 2. Your goal by wave 15: 2 level-3 Farms, 1 Commander level 2, 1 starter DPS level 2, 1,000+ coins saved.
Waves 16-30: DPS Transition
Place your first Accelerator at wave 18. Place DJ at wave 20 at level 2. Second Accelerator at wave 22. Freezer at wave 24 at level 2. Upgrade Commander to level 3 by wave 25. Upgrade Accelerators to level 3 one at a time — do not split upgrades across both.
Decision point (wave 25): You have 2,000 coins. Do you upgrade Commander to level 4 or upgrade an Accelerator to level 4? Answer: Accelerator to level 4. A level-4 Accelerator with Commander level 3 buff does more DPS than a level-3 Accelerator with Commander level 4. The Commander gap is smaller than the Accelerator gap.
Waves 31-40: Power Peak
Third Accelerator at wave 32. Upgrade all Accelerators to level 4 by wave 38 — this is your most important investment. Sell both Farms at wave 35-37 during a lull in enemy spawns. The 1,800-2,500 coins fund your last upgrades. Upgrade Commander to level 4. Upgrade DJ to level 3.
Waves 41-50: Void Reaver
Space your Accelerators 20+ studs apart. Place the first at the front of the kill zone, the second mid-way, the third near the exit. This spacing prevents Void Reaver from disabling all three at once. Stun the boss with Electroshocker when it enters the kill zone. Focus all Commander + DJ buffs on whichever Accelerator the boss is closest to.
Golden Mode: Wave-by-Wave Strategy
Waves 1-12: Aggressive Start
Place 2 damage towers immediately (Militant, Scout, or any level-2 capable tower). Upgrade both to level 2 by wave 5. Place Electroshocker at wave 8 — the Necromancer swarm starts earlier in Golden Mode. Add DJ level 2 by wave 10. Spend aggressively — under 200 coins at wave 10 is ideal.
Waves 13-25: Mid-Game Building
Place your primary DPS tower (Minigunner or Accelerator) at wave 15. Upgrade to level 3 by wave 18. Add Rocketeer at wave 20 for AoE coverage. Upgrade Commander to level 3. Keep DJ within range of both your DPS and your Electroshocker — split coverage reduces effectiveness.
Decision point (wave 20): The Golden Knight mini-boss approaches. It gains temporary damage immunity. Do you burst it down or wait it out? Answer: Wait. Deploy Electroshocker stun right when immunity ends. A stunned Golden Knight takes 2x damage for 4 seconds. If you fire during the immunity phase, you waste 8-10 seconds of DPS.
Waves 26-35: Cleanup
Upgrade Electroshocker to level 4 for maximum stun uptime. Upgrade DPS tower to level 4. If you have surviving Farms, sell them at wave 28 — the coins fund your final upgrades. In the final boss wave (35), stun the Golden Knight immediately, stack all buffs on your DPS tower, and do not stop firing until it is dead. Golden Mode’s final boss has no phase transitions — it is a straight HP check.
Frequently Asked Questions
Should I bring Farms to Golden Mode?
No — and this is the #1 mistake Hardcore veterans make when switching to Golden Mode. Golden Mode has shorter waves (35 vs 50) and gives more starting coins. Every Farm you place is a DPS slot you are not filling. A single Golden Scout or level-2 Militant kills more enemies per wave than a Farm generates in coins. Use that slot for an early-game damage tower instead.
What is the best loadout if I want to farm both modes without swapping?
Run this universal loadout: Accelerator, Commander, DJ, Electroshocker, Farm, Golden Cowboy (or Militant if you don’t have it). The single Farm with Golden Cowboy generates enough income for Hardcore. The Electroshocker provides the AoE Golden Mode needs. Swap the Freezer in for the Militant if you are doing Hardcore specifically. This loadout clears both modes at roughly 70% efficiency of a specialized loadout — good enough for daily farming.
Why do I always wipe on wave 42 in Hardcore?
Wave 42 is when the Void Reaver starts its tower-disable mechanic every 30 seconds. If your Accelerators are clustered within 15 studs of each other, the boss can disable all three at once — instant wipe. Fix: space your Accelerators 20+ studs apart along the kill zone. One at the front, one mid-way, one near the exit. When the boss disables one, the other two keep firing. Also ensure your Commander covers at least two of your three Accelerators at all times.
How many Golden Mode wins do I need to unlock all golden towers?
You need exactly 3 Golden Mode wins to unlock one golden tower of your choice (3 golden crates = 1 tower unlock). With 8 golden towers in the game, that is 24 wins minimum. In practice, duplicates are common from crates, so budget for 30-35 wins to unlock all 8. At 25 minutes per win, that is roughly 12-15 hours of Golden Mode gameplay. Focus on unlocking Golden Minigunner first (3 wins), then Golden Crook Boss (3 more wins), then work down the priority list.
Is it worth buying the Golden Crate or should I save for the Daily Shop?
Never buy Golden Crates for coins (50,000 each). The RNG can give you Golden Pyromancer five times in a row — that is 250,000 coins wasted. Always save for the Daily Shop rotation. The shop sells specific golden skins for 30,000-45,000 coins depending on the tower. If you are desperate for a golden tower, farm Golden Mode wins instead — one win gives one free Golden Crate, no coin cost. Save your 50,000 coins for upgrades and new towers.
Can I solo Hardcore mode without Golden Towers?
Yes, but it is significantly harder. Without Golden Minigunner or Golden Scout, you need to be more aggressive with your Farm economy. Run 3 Farms instead of 2, sell them at wave 38 instead of 35, and accept that your first 5-10 Hardcore attempts will fail. The key difference is that you need 3 Accelerators instead of 2 to compensate for the missing Golden Tower DPS. Your win rate drops from roughly 60% (with Golden Minigunner) to 20% (without any Golden Towers).
Related Guides
- TDS Golden vs Fallen vs Hardcore — Which Mode to Farm First?
- TDS Hardcore Mode Guide — Tips, Loadouts, and Strategies
- TDS Strategy Guide — The 5 Decisions That Win or Lose Every Game
- TDS Loadout Guide — Best Tower Combinations
- TDS Towers Tier List — Every Tower Ranked
Disclaimer: Strategies are based on TDS Hardcore and Golden Modes as of July 2026. Game updates may change enemy stats, wave compositions, or tower effectiveness. Check the official TDS Wiki for the latest information.
Sources: