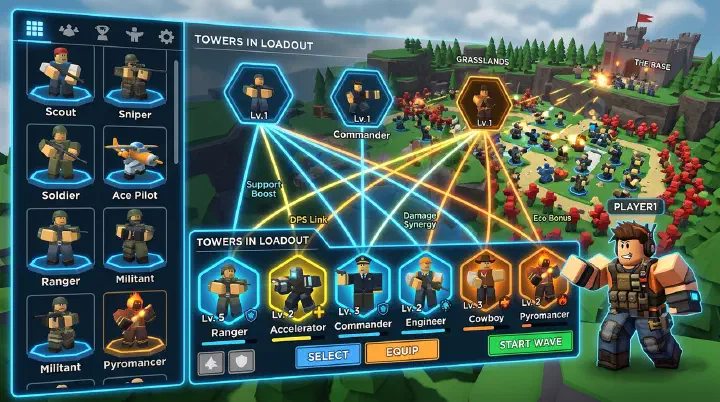
The Loadout That Looked Perfect on Paper
You spent two hours researching. You cross-referenced three tier lists. You watched four YouTube videos from top TDS players. Your loadout is all S-tier towers: Accelerator, Engineer, Pursuit, Turret, and Farm. Every tower is ranked in the top tier by at least two sources. You load into Fallen Mode confident.
Wave 28 hits. Hidden enemies appear. Your Accelerator fires at nothing — it can’t detect hidden. Your Engineer’s sentries target the visible enemies, but the hidden scouts slip through. Your Pursuit catches some, but a few reach the base. You leak. Wave 32: the Fallen Necromancer spawns shielded skeletons. Your Turret fires into the shields while the actual threat walks past. Wave 36: you’re overwhelmed. Game over.
You had five S-tier towers. You lost on wave 28. The guy next to you brought Militant, Commander, DJ Booth, Accelerator, and Crook Boss — two of them are ranked B-tier. He cleared wave 40 with coins to spare.
This isn’t bad luck. It’s a loadout building failure. You built a collection of powerful towers. He built a functional system.
This is the gap that tier lists don’t close. They rank towers by raw stats in a vacuum. But TDS loadouts aren’t about raw stats — they’re about coverage, synergy, and how five towers work as a single unit. A loadout of five A-tier towers that cover each other’s weaknesses beats five S-tier towers that all have the same blind spot every single time.
This guide covers the loadout building framework that tier lists don’t teach: how to analyze your loadout for gaps, how to identify synergies between towers that don’t appear on stat sheets, and the counter-intuitive principles that separate consistent clears from one-off wins.
Why Tier Lists Fail You on Wave 30
Tier lists are useful as a starting point. They tell you which towers have the best raw stats. What they don’t tell you — and what causes most loadout failures — is how those towers behave in combination with other towers, on specific maps, and against specific enemy compositions.
Failure Mode 1: Role Overlap — You Have 5 Slots but Only 3 Jobs Covered
The most common loadout mistake is redundancy disguised as strength. Players see Accelerator, Engineer, and Turret as three powerful DPS towers. But in practice, they’re all late-game, single-target DPS towers. None of them handle early waves efficiently. None of them detect hidden enemies. All three need the same support towers (DJ Booth, Commander) to reach their potential.
If your loadout has 5 towers but 3 of them need the same buffs, you’re not bringing 5 independent power sources. You’re bringing 3 towers that compete for the same two support slots and leave early game and hidden detection uncovered.
Check your loadout: does every tower fill a distinct role, or are you stacking multiple towers that need the same things?
Failure Mode 2: The Support Gap — Zero Multipliers
Some players skip DJ Booth or Commander because they “don’t deal damage.” Here’s what those towers actually do:
A solo Accelerator outputs approximately 1,200 DPS. Add DJ Booth (increased range + fire rate) and that jumps to roughly 2,000 effective DPS. Add Commander’s ability on top, and you’re looking at 3,400+ effective DPS during burst windows. That’s not a 20% buff. That’s almost 3x the output.
Skipping support towers means you need triple the DPS towers to match the same output. But you only have 5 slots. The math doesn’t work.
Failure Mode 3: Hidden Detection as an Afterthought
Hidden enemies appear on waves 24, 28, and in the late 30s across most modes. If your loadout doesn’t have a dedicated hidden detection tower, you will leak. Period.
The mistake isn’t skipping hidden detection entirely — it’s treating it as a secondary feature. “Oh, my Crook Boss also detects hidden, that’s nice.” No. Hidden detection is a primary requirement, not a bonus. Your loadout must include at least one tower that can see and hit hidden enemies, and that tower needs to be placed in a position where it actually covers the path.
Failure Mode 4: Ignoring Mode-Specific Constraints
A loadout that crushes Normal Mode can fail spectacularly in Hardcore Mode. The reasons aren’t obvious from tower stats:
- Hardcore starts you with 50 coins instead of 200. Expensive towers that work fine in Normal are literally unbuyable in Hardcore’s first 5 waves.
- Fallen Mode has hidden enemies starting at wave 24. No hidden detection = guaranteed leak.
- Golden Mode has a 5-minute timer on each wave. Economy towers that pay off over 10+ waves may not pay off at all.
- Polluted Wasteland has limited placement zones. Towers that need specific positioning (like Accelerator needing a straight line) are much harder to use.
Using the same loadout for every mode is like using the same key for every lock. Some doors stay closed.
Failure Mode 5: The Farm Trap
Farm generates excellent passive income. It also costs 400 coins upfront, takes up a slot that could be another tower, and requires protection during early waves. The question isn’t “is Farm good?” — it’s “does this specific loadout and mode have room for Farm to pay off?”
In Hardcore Mode, where enemies rush fast and early, Farm often dies before wave 10. You’ve lost 400 coins and a slot. In Fallen Mode, Farm is viable but not mandatory — many top players skip it entirely and rely on efficient tower choices. In Normal Mode and Golden Mode, Farm is almost always correct because early waves are easy enough to defend.
The Farm trap is taking it by default instead of asking whether your loadout can afford the slot.
The Loadout Optimization Framework
Building a loadout isn’t picking 5 towers. It’s solving a constraint satisfaction problem: 5 slots must cover 7 essential jobs. Here’s the framework that optimizes for coverage first, raw power second.
Step 1: Map the 7 Essential Jobs
Every TDS loadout needs to cover these capabilities:
| Job | Why It Matters | Failure If Missing |
|---|---|---|
| Early Wave Clear (1-15) | Establish economy, prevent early leaks | Dying on wave 10 with 2,000 unspent coins |
| Mid Game DPS (16-25) | Build toward late game without falling behind | Wave 20 boss overwhelms your early tower |
| Late Game Boss Killer | Kill the final boss | Wave 40 boss walks to the exit |
| Hidden Detection | Hit enemies invisible to most towers | Wave 24/28 hidden leak for 50+ HP |
| Support Buff (Range/Damage) | Multiply your DPS output | 3 towers doing the work of 1.5 |
| Economy Engine | Generate coins faster than waves | Cannot afford upgrades by wave 30 |
| Leak Catcher | Catch enemies that slip through | 1 fast enemy = game over on wave 38 |
You have 5 slots for 7 jobs. This means every tower must cover at least 2 jobs. A tower that only covers one job needs to be exceptional at that job to justify its slot.
Step 2: Identify Multi-Role Towers
The most valuable loadout slots are towers that cover 2+ jobs simultaneously:
- Golden Scout: Early wave clear + hidden detection + light economy
- Crook Boss: Hidden detection + income + light crowd control
- Golden Cowboy: Early game DPS + strong economy (kills generate cash)
- Militant: Early wave clear + cheap enough to sell late game without much loss
- Engineer: Mid game DPS + late game DPS + flexible placement
- Pursuit: Leak catcher + mobile DPS (follows enemies anywhere)
- DJ Booth: Support buff + range extension (indirectly covers more jobs by making other towers better)
When building your loadout, count how many jobs each tower covers. If you have a 5-tower loadout that covers only 6 of the 7 jobs, you have a gap. If you cover only 5, you will lose.
Step 3: Apply the Core + Support + Flex Formula
Every optimized loadout follows this structure:
Core (2 towers): Your main DPS engines. One early/mid tower and one late game boss killer. These are the towers you build your loadout around.
- Early Core: Militant, Golden Scout, Ace Pilot, Pyromancer
- Late Core: Accelerator, Engineer, Turret, Minigunner
Support (1-2 towers): Multipliers that make your core towers 2-3x more effective. Non-negotiable for endgame modes.
- Primary Support: DJ Booth, Commander
- Situational Support: Medic (stun-heavy modes), Electroshocker (speed modifier events)
Flex (1-2 towers): Fills the remaining gaps in your job coverage. This is where you customize for the specific mode and map.
- Hidden Detection: Crook Boss, Golden Scout, Sniper
- Economy: Farm, Golden Cowboy
- Leak Catcher: Pursuit, Ace Pilot
- Stun/Crowd Control: Freezer, Frost Blaster, Electroshocker
Step 4: Test Against the 5-Question Audit
Before finalizing any loadout, ask:
- Can this loadout survive wave 10 with no upgrades past level 2? If not, your early game is too weak.
- Can this loadout kill a boss (any boss) before it reaches the halfway point? If not, your DPS is insufficient.
- Does at least one tower have hidden detection, and is it placed to cover the path? If not, you’ll leak wave 24.
- Are your support towers buffing at least 2 DPS towers each? If DJ Booth only touches one tower, you’re wasting the slot.
- Can this loadout recover from one mistake? If a single leak ends the run, you need a leak catcher.
If the answer to any question is “no,” your loadout has a gap that needs filling.
Step 5: Mode-Specific Optimization
Every mode changes the priority order of the 7 jobs:
Normal Mode: Economy > Early Clear > Mid DPS > Support > Hidden > Leak Catcher > Boss Killer. Normal is easy enough that boss DPS is less critical. Farm and Golden Cowboy shine here.
Fallen Mode: Early Clear > Hidden Detection > Boss Killer > Support > Mid DPS > Leak Catcher > Economy. Fallen’s early waves hit harder than Normal’s late waves. Economy is optional. Hidden detection is mandatory by wave 24.
Hardcore Mode: Early Clear > Economy Efficiency > Support > Boss Killer > Mid DPS > Leak Catcher > Hidden. Hardcore’s 50-coin start makes every purchase critical. You cannot afford expensive towers early. Discounts from DJ Booth are more valuable here than in any other mode.
Golden Mode: Economy > Boss Killer > Early Clear > Support > Hidden > Mid DPS > Leak Catcher. Golden Mode’s timer-based waves reward burst damage and fast economy. Farm and Golden Cowboy excel. Late game is compressed, so your boss killer needs to come online fast.
Polluted Wasteland: Flexible Placement > Hidden > Support > Mid DPS > Boss Killer > Early Clear > Economy. Placement constraints dominate PW. Towers that work in tight or hazardous spaces (Military Base, Engineer, Pursuit) are more valuable than raw DPS.
Loadout Synergy Optimization
Individual tower choice is step one. How they work together is step two — and it matters more.
The Buff Stacking Principle
Support buffs stack multiplicatively, not additively. This is the single most important synergy principle in TDS.
A DJ Booth increases fire rate by roughly 35% at max level. Commander’s ability increases fire rate by roughly 50% during its duration. Together, they don’t give 85% more DPS. They give approximately 100% more DPS because the Commander buff multiplies the DJ-boosted fire rate, not the base rate.
This means each additional support buff you add is exponentially more valuable than the last. Two support towers triple your DPS output. A third support tower would theoretically push even higher — but you only have 5 slots, and the opportunity cost of a third support (losing an economy or coverage tower) usually outweighs the gain.
The Coverage Triangle
Placement distance between towers isn’t just about spacing — it’s about coverage synergy. The three zones of a functional loadout are:
Zone 1 — Entry (20% of lane): Your early-game tower and Farm (if used). This zone softens enemies and generates economy. It’s where you want AoE or splash towers that can hit dense groups.
Zone 2 — Midline (50% of lane): Your core DPS and support buffs. This is where the majority of enemy HP is removed. Your late-game DPS towers go here, within range of DJ Booth and Commander. This zone should have the highest concentration of DPS towers.
Zone 3 — Exit (30% of lane): Your leak catcher and secondary stun. This zone catches anything that survives Zones 1 and 2. Pursuit or a second hidden detection tower goes here. Never put your primary DPS here — by the time enemies reach Zone 3, they’re too close to the base to afford mistakes.
The most common loadout placement error is clustering all towers in Zone 1. This compresses your coverage into a small area, meaning any enemy that survives the cluster runs the entire remaining lane untouched. Spreading towers across all three zones ensures continuous damage application across the full lane length.
Synergy Pairs for Specific Outcomes
| Pair | Effect | Best In |
|---|---|---|
| Accelerator + Ranger | Accelerator kills bosses, Ranger clears crowds with long range | Fallen Mode, long straight maps |
| Engineer + Medic | Medic prevents Engineer stuns, sentry uptime stays high | Hardcore Mode |
| Golden Cowboy + Farm | Double income engine, Cowboy covers early defense | Golden Mode, Normal farming |
| Militant + Pyromancer | Militant handles early singles, Pyromancer burns dense groups | Fallen Mode (budget) |
| DJ Booth + Commander | Full support stack, DJ passive + Commander burst | Every endgame mode |
| Pursuit + Electroshocker | Pursuit catches leaks, Electroshocker slows for Pursuit to kill | Maps with multiple paths |
These pairs are proven by top players across thousands of games. They work because they cover complementary gaps rather than overlapping the same strength.
Counter-Intuitive Loadout Principles
These principles contradict what most players assume about loadout building. Following them gives you an edge against players who chase raw stats.
1. Your Best Tower Is Often the Wrong First Pick
Players naturally build their loadout around their strongest tower. If you own Accelerator, you start with Accelerator and fill the other four slots around it. This feels correct but often produces weaker loadouts.
The problem: your strongest tower has the most specific requirements. Accelerator needs hidden detection, a straight-line placement, DJ range, Commander buffs, and spin-up time. Building around Accelerator means the other four slots are determined by its needs, not by the mode’s needs. You end up with a loadout that’s optimized for Accelerator but suboptimal for the actual game.
Instead, pick the mode first, then your flex tower, then your support, then your DPS. Mode constraints should determine the loadout, not whichever tower has the highest DPS number. If Fallen Mode demands hidden detection and early wave clear, those constraints should dictate your first pick — not Accelerator.
2. A B-Tier Tower With a Clear Job Beats an S-Tier Tower That’s Confused
Crook Boss is ranked B-tier by most tier lists. Its raw DPS is mediocre. Its range is average. Against a single target, it loses to almost every other tower.
But Crook Boss covers three jobs simultaneously: hidden detection, passive income, and light crowd control through its spawned minions. In a loadout, Crook Boss checks three boxes while Accelerator checks one. If your loadout has room for a hidden detection tower and an economy tower, you could bring Crook Boss as both — freeing a slot for another DPS or support.
Tier lists rank towers by individual performance. Loadouts rank towers by job coverage. Job coverage wins games.
3. Skip Farm More Often Than You Think
Farm is one of the best towers in the game by coin generation. It’s also one of the most overused. Most players bring Farm to every mode because “more coins = better.” But Farm creates a survivability gap that many players don’t account for.
Every loadout with Farm is effectively operating with 4 combat towers for the first 15 waves. If those 4 towers can’t handle the early waves, Farm is a net negative — it generates coins you never get to spend because you’re dead.
The counter-intuitive decision: skip Farm in any mode where wave 1-10 is a threat. In Hardcore Mode, Farm-first players lose. In Fallen Mode, Farm is viable only if your early tower is strong enough to solo the first 15 waves. In Normal Mode and Golden Mode, Farm is safe because early waves are a joke.
Your loadout doesn’t need Farm if your early tower generates enough kills to fund your mid game. Golden Cowboy, Crook Boss, and even a well-placed Militant can generate sufficient income without the Farm slot.
4. Upgrade Support Before DPS
The instinct is to max your strongest DPS tower first. Bigger number = more damage. But the math doesn’t support this.
Compare two upgrade paths in Fallen Mode:
Path A: Max Accelerator to level 5 first (spending approximately 9,000 coins). Then upgrade DJ Booth to level 3. Then Commander to level 3.
Path B: Upgrade DJ Booth to level 3 first (approximately 2,500 coins). Then Commander to level 2. Then Accelerator to level 3. Then max Accelerator.
Path B produces higher effective DPS at every wave from wave 15 onward. Why? Because the DJ and Commander buffs apply to every Accelerator shot. A partially upgraded Accelerator with full support buffs out-damages a maxed Accelerator with no support.
The only exception: your early-game tower needs to reach a damage threshold to handle wave 10-15 enemies. Get that tower to level 2-3, then pivot to support upgrades. Don’t chase max DPS until your support infrastructure is in place.
5. Sell Earlier Than You Want To
Players hold onto early-game towers too long. Your level 3 Militant that carried waves 1-15 is dealing negligible damage by wave 25. You keep it because “it’s upgraded already.” But the 30% sell penalty is less expensive than the opportunity cost of the dead slot.
The threshold: if your early tower deals less than 15% of enemy HP per hit on wave 20+ enemies, sell it. The coins from selling fund upgrades on your late-game DPS. The empty slot can be replaced with a leak catcher or a second Commander.
Reinvesting early tower value into late game power is the highest-ROI decision in TDS. The sunk cost of upgrades is gone regardless. The question is whether the slot generates more value with its current occupant or its replacement.
Frequently Asked Questions
Q: How many DPS towers should a TDS loadout have?
A: Exactly two dedicated DPS towers — one for early/mid game and one for late game bosses. A third DPS tower is a wasted slot. The remaining three slots should be support (Commander or DJ Booth), economy or stun, and a flex tower. Two DPS towers with full support buffs deal 3x more effective damage than three unbuffed DPS towers.
Q: Should I use the same loadout for every TDS mode?
A: No. Loadouts must be mode-specific. Fallen Mode needs strong early DPS and hidden detection. Hardcore Mode demands economy efficiency because you start with only 50 coins. Golden Mode requires an economy engine that ramps fast. Polluted Wasteland needs flexible placement towers. Using a generalist loadout for every mode leaves you under-optimized in all of them.
Q: Is Farm mandatory in a competitive TDS loadout?
A: Not at all. Farm is strongest in Normal and Golden modes where the early waves are easy to defend. In Hardcore Mode, Farm delays your critical DPS too much and often dies to early rushes. In Fallen Mode, Farm is optional — many experienced players win without it. The rule: only take Farm if you can place two by wave 6 and protect them. Otherwise, skip it.
Q: How do I know which towers to swap when the meta changes?
A: Track three metrics in your games: wave clear speed (can you kill wave 15 enemies in under 3 seconds?), boss DPS (can you kill a boss in under 20 seconds?), and leak prevention (do enemies ever reach the exit?). If a tower fails any of these in its role, it needs replacement. The meta changes when new towers or balance patches break these benchmarks. Check the TDS Trello board and monthly patch notes.
Q: What’s the biggest mistake players make when building loadouts?
A: Reading only the headline stats of a tower. Players see a tower’s DPS number and stop reading. They miss critical constraints like hidden detection, placement requirements, and spin-up time. Every tower has a weakness. The best loadout builders read the full stat block, identify the weakness, and bring a tower that specifically covers it.
Q: How many loadout slots should I have?
A: Aim for at least 5 loadout slots: one for Fallen Mode, one for Hardcore, one for Golden Mode, one for events, and one for farming coins. You can purchase additional slots from the in-game shop for coins or Robux. Veteran players maintain 6-7 loadout slots to cover the full mode rotation without having to rebuild before every match.
Q: Can I build one loadout that works for both solo and team play?
A: No. Solo loadouts must be self-sufficient — they need their own economy, hidden detection, and boss DPS. Team loadouts can specialize because teammates cover your gaps. In a team loadout, you can skip economy entirely and rely on a teammate’s Farm, or bring pure single-target DPS while teammates handle crowd control. One loadout for both solo and team means it’s suboptimal for both. Maintain separate loadouts.
The Loadout You Build vs. The Loadout You Need
Tier lists show you which towers have the highest stats. This guide shows you how to build a functional system. The difference between them is the difference between having powerful pieces and having a working machine.
Before your next game, open your loadout and audit it against the 7-job framework. Count how many jobs each tower covers. Check for hidden detection. Check whether your support buffs are actually reaching your DPS towers. If you find a gap, swap one tower. Run the mode. Repeat.
The goal isn’t to have 5 S-tier towers. The goal is to have 5 towers that cover every job, exploit every synergy, and leave no gap for the enemy to exploit. That loadout clears wave 40. The tier list loadout might not.
For mode-specific loadout recommendations, check the TDS Loadout Guide. For detailed tower synergy breakdowns, see the Tower Synergy Combos Guide. For early-game tower choices and progression, start with the TDS Beginner Guide.