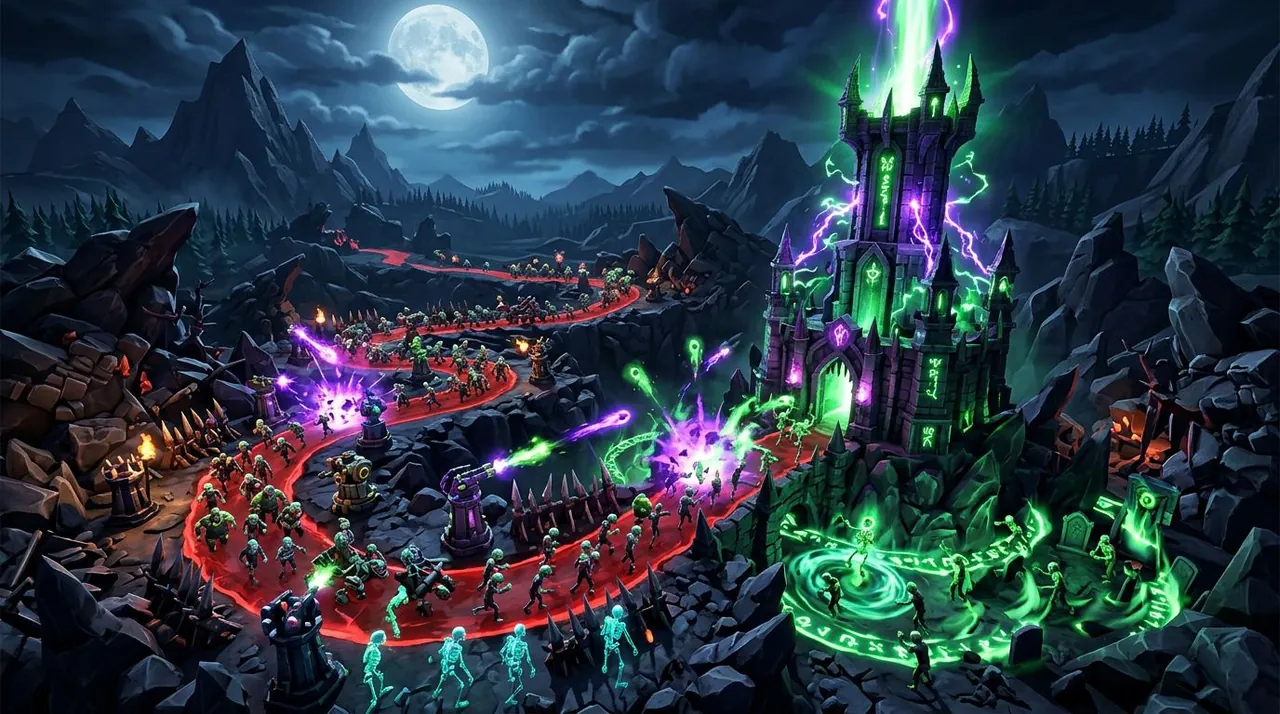
Two Players Buy the Same Tower. One Gets an Army. The Other Gets Nothing.
Two players, same map, same difficulty. Player one grabs the Necromancer on wave 3, drops it near the spawn, and waits. Five waves pass. The tower sits there, mostly idle, while the Scout and the Militant do all the actual work. By wave 12 the player is muttering that the tower is bugged.
Player two doesn’t touch it until wave 18. By then the map has narrowed into one choke, a Sledger is holding enemies in place, and a Minigunner is shredding them. The moment the Necromancer goes down, corpses start rising. Within two waves there’s a pack of zombies walking the lane, chewing through whatever leaks past the Minigunner. Same tower. Completely different result.
The difference isn’t luck. It’s feeding. The Necromancer only works if enemies die inside its radius, and that almost never happens by accident. It has to be engineered. This guide covers how — the summon mechanic, the placement, the loadout, and the one mistake that makes everyone swear the tower is broken.
What the Necromancer Actually Does
Here’s the core loop. Everything else hangs off it.
When an enemy dies within the Necromancer’s range, the tower raises a zombie minion from that corpse. The zombie fights for your side — walks the lane, blocks, attacks — for a short window before it decays. The tower doesn’t shoot. It converts enemy deaths into a self-sustaining army.
Three things follow from that, and they explain every strength and weakness the tower has.
It needs kills to exist. A Necromancer with no deaths in its radius produces zero zombies and contributes zero damage. No baseline attack to fall back on. That’s why it’s dead weight early, when enemies are sparse and die to your other towers first.
It snowballs. The more enemies die in range, the more zombies you have at once. Once a lane turns into a killing floor, the army grows until it’s doing a real chunk of the work itself.
It’s range-gated. Enemies that die outside the radius don’t count. This is a positioning tower first and a damage tower second — which is why the tower placement guide matters more here than the stat sheet.
The upgrades push one of two dials: how fast the tower raises zombies, and how hard each one hits. The pattern to name now: you’re buying production rate, not burst damage.
The Upgrade Curve, and Why Maxing It Late Is Fine
The Necromancer is priced like a late-game tower, and the cost curve confirms it. Treat these numbers as a rough snapshot — balance patches move them, and I’ll flag what I can’t verify in the final section.
The base placement sits in the low thousands — think the $3,000 ballpark. That’s real DPS money, and it returns none of it until the kills start flowing.
From there the curve looks roughly like this:
| Level | Approx. cost | What it roughly buys | When it’s worth it |
|---|---|---|---|
| 0 (place) | ~$3,000 | Basic summon on nearby deaths | Only after a kill lane exists |
| 1-2 | a few thousand | Faster summons, slightly tougher zombies | Fine to take early once you’re fed |
| 3-4 | mid-thousands | Stronger zombies, faster raise rate | The real power spike; take once your lane is hot |
| 5 (max) | tens of thousands | Max summon rate and minion strength | Only when your economy is already rolling |
The shape of the table is the point. Early levels are cheap-ish; the top end gets brutal, pushing past a late-game tower’s whole budget. You don’t max the Necromancer because it’s the plan — you max it because your Farm already made the money and the army is the best place to park it.
Compare that to the Minigunner, which pays back damage the moment it’s placed. The Necromancer’s value is back-loaded. The tier list puts it in context: S-tier late-game carry, D-tier early-game pick.
Where the Necromancer Fits: Modes and Maps
“Worth it” is a mode question, not a yes-or-no, so let’s be honest about each one.
Normal mode: Skip it. Enemies die too fast and too spread out to build an army, and the match ends before the snowball pays off. The tower idles the whole game.
Fallen mode: This is home. Fallen’s back half throws dense groups of high-HP enemies down predictable lanes — exactly the feed the Necromancer needs. If you farm Fallen, it earns its slot. Full walkthrough: the Fallen mode guide.
Hardcore mode: Situational but real. A fed Necromancer can hold a lane almost on its own. The catch: get your Hardcore fundamentals locked in first, because a mis-timed Necromancer leaves you with no cash and no army. See the Hardcore mode guide.
Golden mode: Niche. Golden punishes early leaks hard, and the Necromancer’s dead early game means you lean on the rest of the loadout until it ramps. It’s not carrying you.
Maps matter as much as modes. The Necromancer wants a single choke where everything funnels — one narrow corridor, a long straight kill lane, anywhere you can point every tower at one spot. On a wide, multi-lane map, the deaths scatter and the radius catches half of them. The best maps guide will point you at the funnel maps.
How to Feed It: The Slow-and-Funnel Combo
Here’s the single most important sentence: the Necromancer’s best friend is not another DPS tower. It’s a slow.
Here’s why, in concrete terms. Say a group of Fallen enemies walks toward your choke. If your Minigunner kills them the instant they enter range, the corpses drop at the edge of the Necromancer’s radius — or just outside it — and half the summons never trigger. Add a Sledger or Cryomancer holding them in the kill zone. They stay alive a second longer, they die inside the radius, and every corpse becomes a zombie. Same DPS, dramatically more army.
The full combo is a three-part machine:
- The slow — Sledger or Cryomancer — holds enemies in the kill zone.
- The killer — Minigunner, Engineer, or similar — turns them into corpses inside the radius.
- The Necromancer — converts those corpses into a standing army.
Then, if you’ve got a slot, add a Commander. Its fire-rate aura multiplies the army’s damage across every zombie at once — one of the few buffs that scales with your minion count. The synergy guide digs into this pairing, but the short version is: slow, killer, Necromancer, Commander, in that order.
Placement-wise, cover the center of the kill zone, not the entrance. You want deaths in the middle of the circle, where every corpse is safely inside range even as the slow drags enemies around the edge.
Failure Review — The Wave-Three Buy
Here’s the mistake I see in almost every lobby where someone calls the Necromancer useless, and it’s worth walking through the full loop.
The error. You place a Necromancer on wave 3, near the spawn, as your first real “big” purchase. You’ve got a Scout and maybe a Farm, and you’re expecting the tower to start paying out immediately.
The cause. The tower has nothing to feed on. Early enemies are weak, spread out, and die to your Scout before they reach the Necromancer’s range. Even when one dies nearby, a single weak zombie that decays in seconds does nothing to the wave. The tower’s whole mechanic — deaths into army — has zero inputs. You’ve parked a snowball machine at the top of a hill with no snow.
The recovery. Don’t sell it out of frustration — that locks in the loss. Build your early DPS first, hold the waves with Scout, Militant, and Minigunner, and only buy the Necromancer once you can drop it into a choke that’s already producing deaths. If you already spent the cash, treat it as dormant — it’ll wake up the moment a proper lane forms in front of it.
The takeaway isn’t “the tower is bad.” It’s “the tower is conditional.” A Minigunner earns its keep anywhere. The Necromancer earns its keep only where the kills are.
Decision Table: Necromancer, Accelerator, Minigunner, or Engineer?
New players ask which single DPS tower to commit to. Here’s the straight if-then table.
| If your situation is… | Then the right pick is… | Because… |
|---|---|---|
| Early game, no Farm online, waves 1-10 | Minigunner | Instant, reliable damage with no setup requirement |
| A single boss or high-HP enemy is the threat | Accelerator | Best single-target boss damage in the game |
| Mid-to-late Fallen, one hot choke, you already have a slow | Necromancer | The kill feed is live, so the army snowballs fast |
| Late game, money to burn, multiple lanes | Engineer | Strong, flexible late-game DPS that works anywhere |
| You’re still building fundamentals in Hardcore | Minigunner or Accelerator first | Necromancer needs a stable lane before it can shine |
The pattern: the Necromancer is a multiplier on an existing kill lane, not a lane-creator. No choke producing deaths? Accelerator or Minigunner serves you better. A hot choke? The Necromancer out-scales them, because every kill you’re already getting turns into bonus damage. It’s the difference between another gun and a factory that builds guns.
For what to fill the other four slots with, the loadout guide covers the full picture.
The Counterintuitive Part: Summon Rate Beats Zombie Damage
Everyone who reads the stat sheet wants to max zombie damage first. Bigger zombie, bigger number, feels obvious. It’s backwards.
The Necromancer’s real stat is summon rate — how fast it converts a death into a minion. A single zombie, even a strong one, gets body-blocked, tanks a few hits, and decays. Ten zombies is a wall. Ten zombies is what stops a leak, because the enemy has to chew through ten bodies instead of one, and each one is swinging while it does.
So the tower scales on volume, not per-hit damage. Summon rate first means every kill in the radius produces a zombie immediately. Damage first gives you a slightly bigger zombie that still decays before it matters. The rule: raise the dead faster before you make them stronger.
And the second counterintuitive bit: the best upgrade for your Necromancer is often a Sledger placed next to it. Money spent on a slow tower does more for your army than the same money on the Necromancer itself, because it multiplies the kill feed the whole machine runs on.
Advanced Techniques
Once you’ve got the basic slow-killer-summon combo working, there are higher-level tricks that squeeze more value out of the tower.
The Zombie Wall
This is the Necromancer’s most underrated trick. When you have 10+ zombies walking the lane at once, they don’t just deal damage — they physically block enemies. A dense zombie pack can hold a boss or a tanky enemy in place for several seconds, buying your DPS towers time to kill it.
The zombie wall is especially effective against:
- Bosses that move fast and would otherwise leak past your defenses
- Tanky swarms that push through your DPS
- Hidden enemies — zombies block them even when your towers can’t target them
To maximize the wall effect, place your Necromancer at the entrance of the kill zone, not the center. Zombies spawn at the death location and walk forward, so deaths near the front of the choke produce zombies that walk back through the entire lane. More walking time = more blocking = more damage dealt.
The Double-Necro Stack
On tight single-choke maps, two Necromancers covering the same kill zone is one of the strongest late-game setups in TDS. Each tower summons independently, so you roughly double your army size.
The key to making it work:
- Don’t buy both at once. Get the first one fed and upgraded first, then add the second.
- Stagger the placement. Put one slightly forward, one slightly back, so their ranges overlap but cover different parts of the choke.
- Make sure you have enough DPS feed. Two Necromancers need twice as many kills. If your DPS can’t keep up, you’ve wasted a tower slot.
On most Fallen maps, a double-Necro setup with Commander + DJ Booth + Sledger + Minigunner is strong enough to solo the back half of the game.
The Sell-Before-Wave Trick
Here’s a pro move for tight economy games: if you’re between waves and short on cash for an important upgrade (like a Farm or a key DPS tower), you can sell your Necromancer right before a wave starts, buy the upgrade, then rebuy the Necromancer during the wave when you have income again.
This works because:
- The Necromancer produces nothing between waves (no enemies = no deaths = no summons)
- Selling gives you 70-80% of its value back
- You lose only the placement cost difference, which is often cheaper than missing a critical Farm upgrade
It’s not necessary on easy modes. But in Hardcore or on hard Fallen maps where every dollar counts, it’s the difference between surviving wave 25 and leaking.
The Economy-Over-Damage Fallacy
Most players prioritize damage upgrades for their Necromancer. Smart players prioritize summon rate upgrades first, then use the extra zombies to earn more money, then upgrade damage.
Here’s why: more zombies = more kills = more cash from each enemy. The extra income pays for the damage upgrade faster than saving for it directly. It’s the same logic as Farm economy — spend money to make money, then spend the profits on power.
Failure Retrospective: The Fallen Mode Leak That Cost Me the Run
I was doing a Fallen solo run on a narrow chokepoint map. I had a solid loadout: Farm, Minigunner, Sledger, Commander, Necromancer. Everything was going fine. Waves 1-25 were clean. I was feeling cocky.
Then wave 28 hit — the one with the giant boss and the swarm of fast minions around it.
Here’s what I did wrong: I had placed my Necromancer at the back of the choke, near my base. I figured “more range coverage = better.” The Minigunner was at the front, melting enemies as they entered. The Sledger was in the middle, slowing everything down.
The problem: by the time enemies died, they were already 2/3 of the way through the choke. The Necromancer summoned zombies near the back of the lane. The zombies had almost no walk time before they reached the base and decayed. They were spawning, taking two steps, and disappearing.
Meanwhile, the boss was tanky. It pushed through the Minigunner’s fire, shrugged off the Sledger’s slow, and got within range of my base before the zombies could build up enough to stop it. I had 15+ zombies by the time it got there, but they were all spawning at the back — they never got in front of the boss to block it.
I leaked the boss. Run over.
Here’s what I should have done:
- Place the Necromancer at the front of the choke, not the back. Zombies spawn where enemies die. If enemies die at the front, zombies walk the full length of the lane. More walk time = more damage + more blocking.
- Position the slow tower before the Necromancer’s radius center. Hold enemies at the front of the kill zone so they die there, not at the back.
- Use the Minigunner to finish off enemies inside the summon circle, not before they enter it. Pull your DPS slightly back so the killing blow lands inside the Necromancer’s range.
The fix is counterintuitive: you want your DPS to be less efficient at the front so that the actual killing happens where it feeds your Necromancer. A slightly slower kill that produces a zombie is better than a fast kill that produces nothing.
I restarted the run with the Necromancer at the front of the choke. I beat wave 28 with 30+ zombies walking the lane and enough damage to kill the boss before it got past the halfway point. Same towers, same money, completely different result. Placement matters more than stats.
How to Practice With the Necromancer
You don’t learn the Necromancer by reading — you learn it by failing and figuring out why your army never built up. Here are three practice methods.
Drill 1: The Feed Test
Load into a single-choke Fallen map. Build your standard early game (Scout, Militant, Farm). At wave 18, place the Necromancer at three different positions in three separate runs:
- Run 1: At the very front of the choke
- Run 2: In the center
- Run 3: Near the back / base
Count how many zombies you have at wave 25 in each run. The difference will be dramatic — often 2-3x more zombies from a front placement versus a back placement. This drill teaches you exactly how much placement matters.
Drill 2: The No-DPS Challenge
Try a Fallen run where your only late-game damage towers are the Necromancer + 1 slow + 1 support (Commander / DJ Booth). No Minigunner, no Accelerator, no Engineer. You have to make the zombie army carry the DPS load.
You will fail. Probably multiple times. That’s the point. When your only damage comes from summons, you learn exactly what the tower needs to function. You’ll start noticing things you never paid attention to before: which waves produce enough feed, which choke points work best, how much slow you need to keep enemies in range.
After 3-4 failed runs, go back to your normal loadout. The Necromancer will feel overpowered because you’ll know exactly how to optimize it.
Drill 3: The Wave-Timing Drill
For one full game, only place or upgrade the Necromancer between waves, never during. This forces you to plan ahead — you have to predict which waves will produce enough feed to justify an upgrade, instead of reacting when you already have money sitting around.
This drill builds two skills: economic planning and wave knowledge. After a few games, you’ll know exactly which waves are kill waves (good for upgrading) and which waves are leak waves (good for saving money).
FAQ
What does the Necromancer do in Tower Defense Simulator?
When an enemy dies inside the Necromancer’s range, it raises a zombie minion from that corpse. Those zombies fight on your side — walking the lane, blocking enemies, dealing damage — for a short window before they decay. The tower doesn’t shoot. It converts enemy deaths into a self-sustaining army.
Is the Necromancer good for early game?
No. It needs kills to feed it, so early waves with weak, spread-out enemies give it almost nothing. Buy it from mid-game onward (waves 15-18 in Fallen) once strong enemies start dying in a choke point. A Necromancer placed on wave 3 is an expensive paperweight that produces zero zombies.
Which towers pair best with the Necromancer?
Slow towers first — Sledger or Cryomancer — because they hold enemies inside the Necromancer’s radius long enough for your DPS to kill them there. Commander multiplies the whole zombie army’s damage at once and is the strongest buffer. DJ Booth also helps by boosting range, which means more deaths inside the summon circle.
Is the Necromancer worth it in Fallen mode?
Yes, usually. Fallen’s mid-to-late waves funnel dense groups through choke points and drop high-HP enemies exactly where the Necromancer wants them. It’s the best late-game value tower on single-choke Fallen maps. It’s weaker in Normal mode, where enemies die too fast and too spread out to build a meaningful army.
Why does my Necromancer do nothing all game?
Almost always, it has no kills happening in its radius. Check its placement: if enemies die before they reach it, or the lane leaks somewhere else, the tower never triggers a summon. Move it to a choke point, add a slow tower to hold enemies there, and it will start producing zombies within one wave.
Can you stack multiple Necromancers?
Yes, and they stack well — each one summons from deaths in its own radius. On a tight choke, two Necromancers covering the same kill zone roughly doubles your army size. The catch: each one needs its own feed of kills, so you need enough DPS to keep both supplied. Two underfed Necromancers are worse than one well-fed one.
More TDS guides in the Related Guides section below, or visit the Tower Defense Simulator hub page for everything in one place.
Disclaimer: Stats and balance based on Tower Defense Simulator as of September 2026. Balance patches frequently adjust tower costs, summon rates, and zombie stats. Always check the official TDS Trello for the latest patch notes before making loadout decisions.
What does the Necromancer do in Tower Defense Simulator?
When an enemy dies inside the Necromancer’s range, it raises a zombie minion from that corpse. Those zombies keep fighting on your side for a short window before they decay. The tower scales up how fast it summons and how strong the zombies are through its upgrades.
Is the Necromancer good for early game?
No. It needs kills to feed it, so early waves with weak, spread-out enemies give it almost nothing. Buy it from the mid-game onward once strong enemies start dying in a choke point. A Necromancer placed on wave 3 is an expensive paperweight.
Which towers pair best with the Necromancer?
Slow towers first — Sledger or Cryomancer — because they hold enemies inside the Necromancer’s radius long enough for your other DPS to kill them there. Commander multiplies the whole zombie army’s damage and is the strongest buffer to add on top.
Is the Necromancer worth it in Fallen mode?
Yes, usually. Fallen’s mid-to-late waves funnel big groups through choke points and drop high-HP enemies exactly where the Necromancer wants them. It’s weaker in Normal, where enemies die too fast and too spread out to build an army.
Why does my Necromancer do nothing all game?
Almost always, it has no kills happening in its radius. Check its placement: if enemies die before they reach it, or the lane leaks somewhere else, the tower never triggers a summon. Move it to a choke point, add a slow, and it will start producing.